
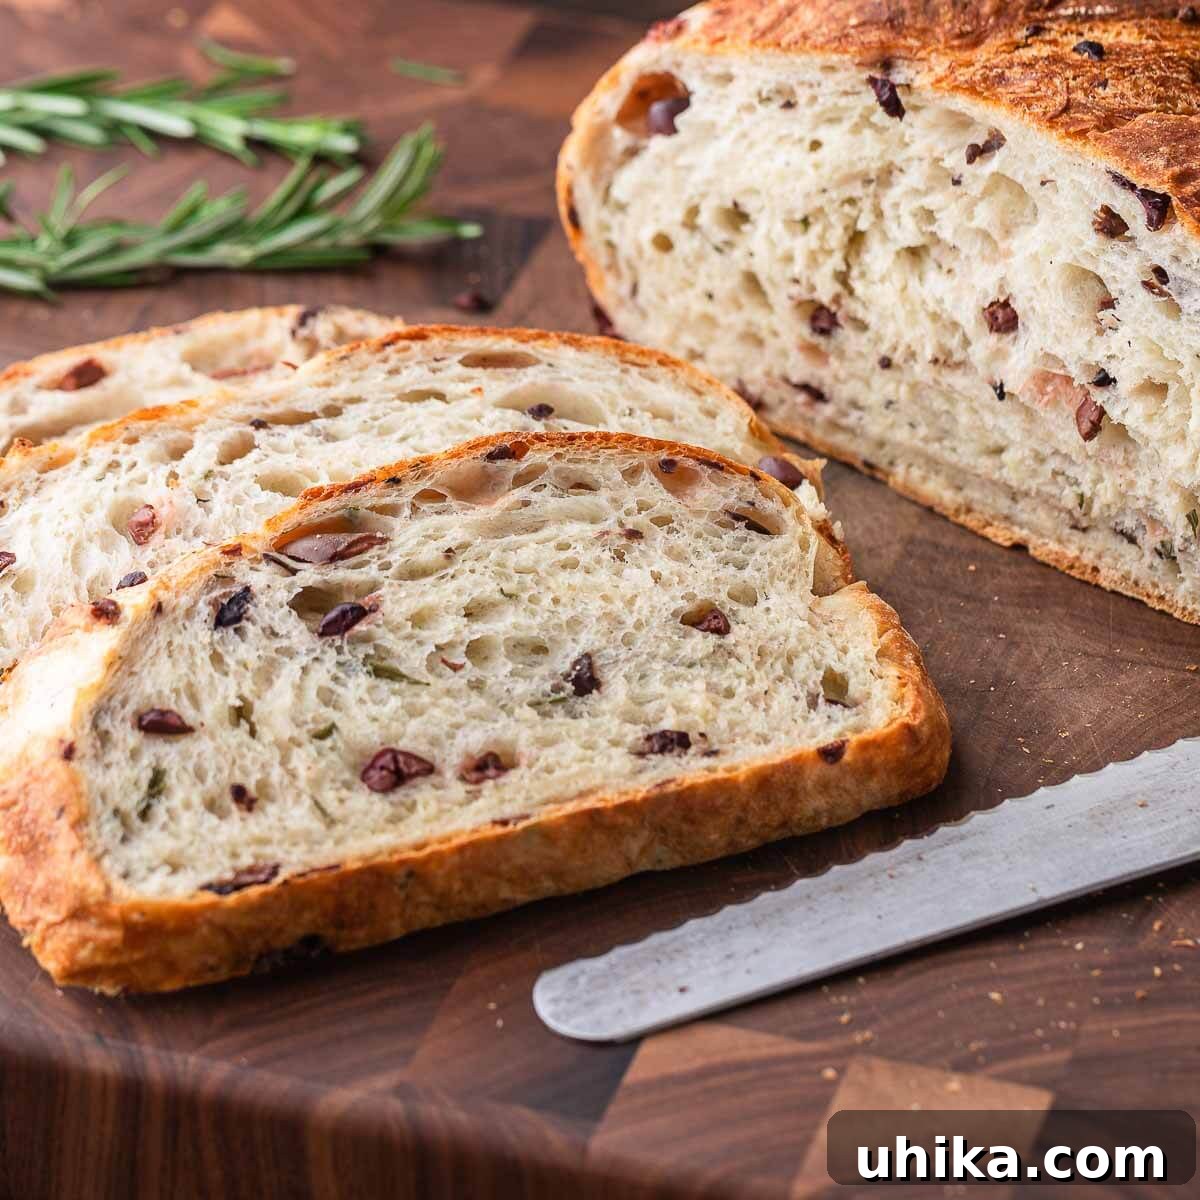
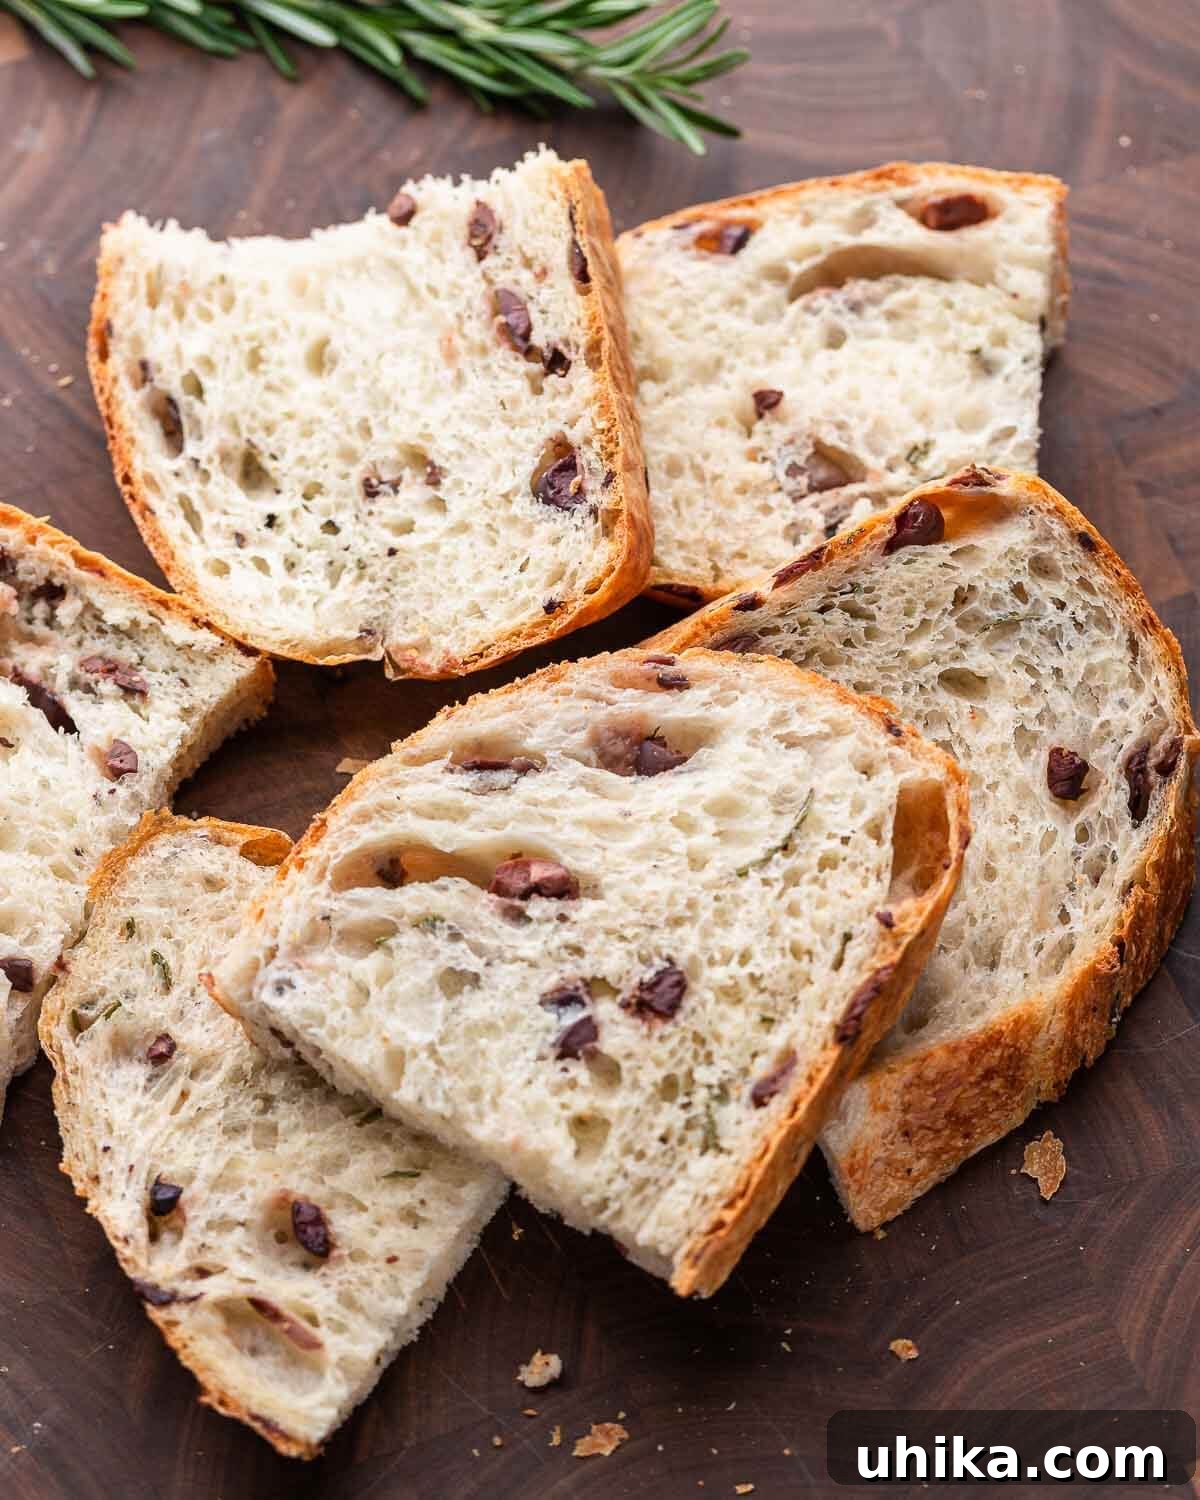
Welcome to the delightful world of homemade bread, where the aroma of freshly baked goodness fills your kitchen and the taste of artisan quality is within your reach. Today, we’re diving into a recipe that promises to elevate your baking skills and delight your palate: Olive Bread with Rosemary. This incredible loaf is packed with robust Mediterranean flavors, boasting a tender crumb and a perfectly crisp crust that makes it an exceptional choice for sandwiches, a fantastic accompaniment to soups, or simply enjoyed with a drizzle of extra virgin olive oil for dipping. Forget intimidating bakery visits; our comprehensive, step-by-step instructions are designed to demystify the bread-making process, empowering you to create this sensational loaf right in your own home.
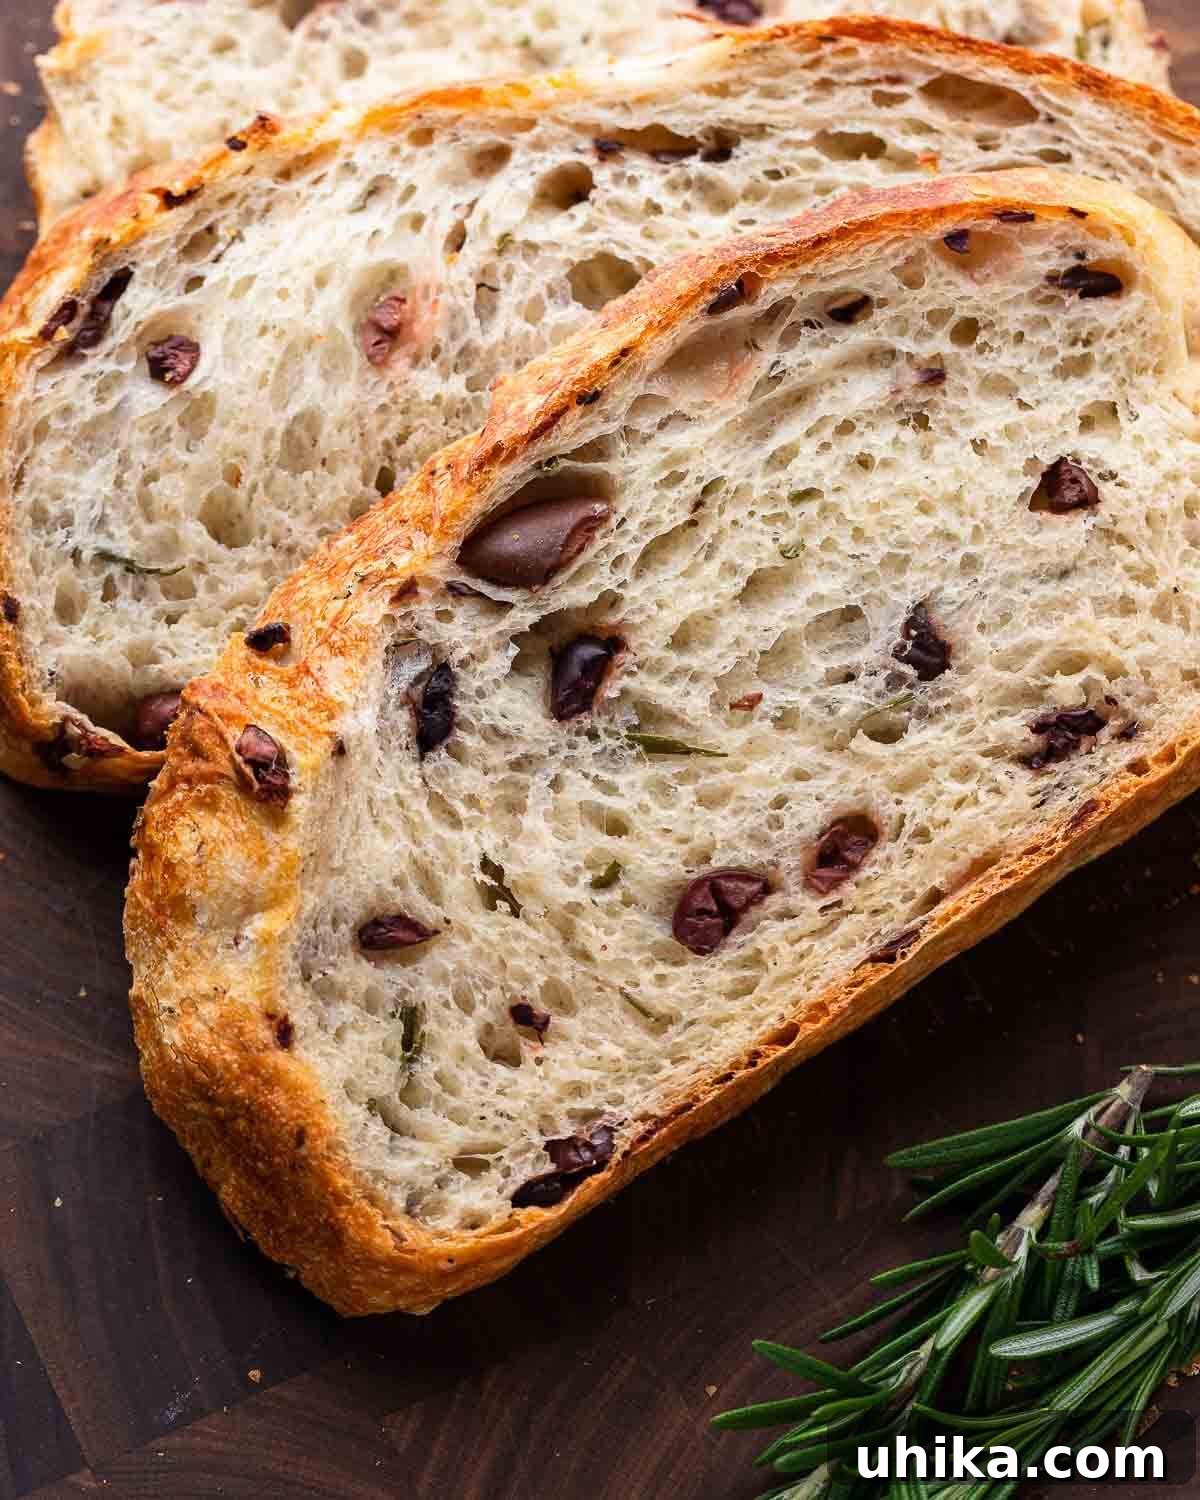
The Irresistible Allure of Homemade Olive Bread
There’s an undeniable magic to baking bread from scratch. The process, from mixing the initial ingredients to watching the dough transform and finally pulling a golden-brown loaf from the oven, is deeply satisfying. While the idea of baking your own bread might seem daunting to some, our goal is to simplify this culinary journey. This Olive Bread with Rosemary recipe is specifically crafted to remove any guesswork, making the experience enjoyable and successful for home bakers of all levels.
This particular loaf, infused with fragrant rosemary and briny olives, offers a unique flavor profile that sets it apart. It’s not just a staple; it’s a centerpiece. Perfect for crafting gourmet sandwiches, it also shines when served alongside a bowl of hearty soup, such as a rich Pasta Fagioli or a vibrant Minestrone. Imagine breaking off a warm, crusty piece and dipping it into a high-quality olive oil – a simple pleasure that speaks volumes. It’s also an impressive and thoughtful gift to bring when visiting friends or family, showcasing your culinary prowess and generosity.
Why a “Poolish” Makes All the Difference
Our recipe begins with a technique called ‘poolish,’ a pre-ferment that is crucial for developing the bread’s incredible depth of flavor and desirable texture. A poolish is a wet, loose starter made from flour, water, and a tiny amount of yeast, prepared a day in advance. Allowing it to ferment slowly overnight encourages the yeast to produce complex flavors that would otherwise be absent in a quick bread. This extended fermentation also contributes to a more open crumb structure, a better rise, and a longer shelf life for your finished loaf. It’s a simple step that requires patience but rewards you with a truly artisanal bread experience.
Key Ingredients for an Exceptional Loaf
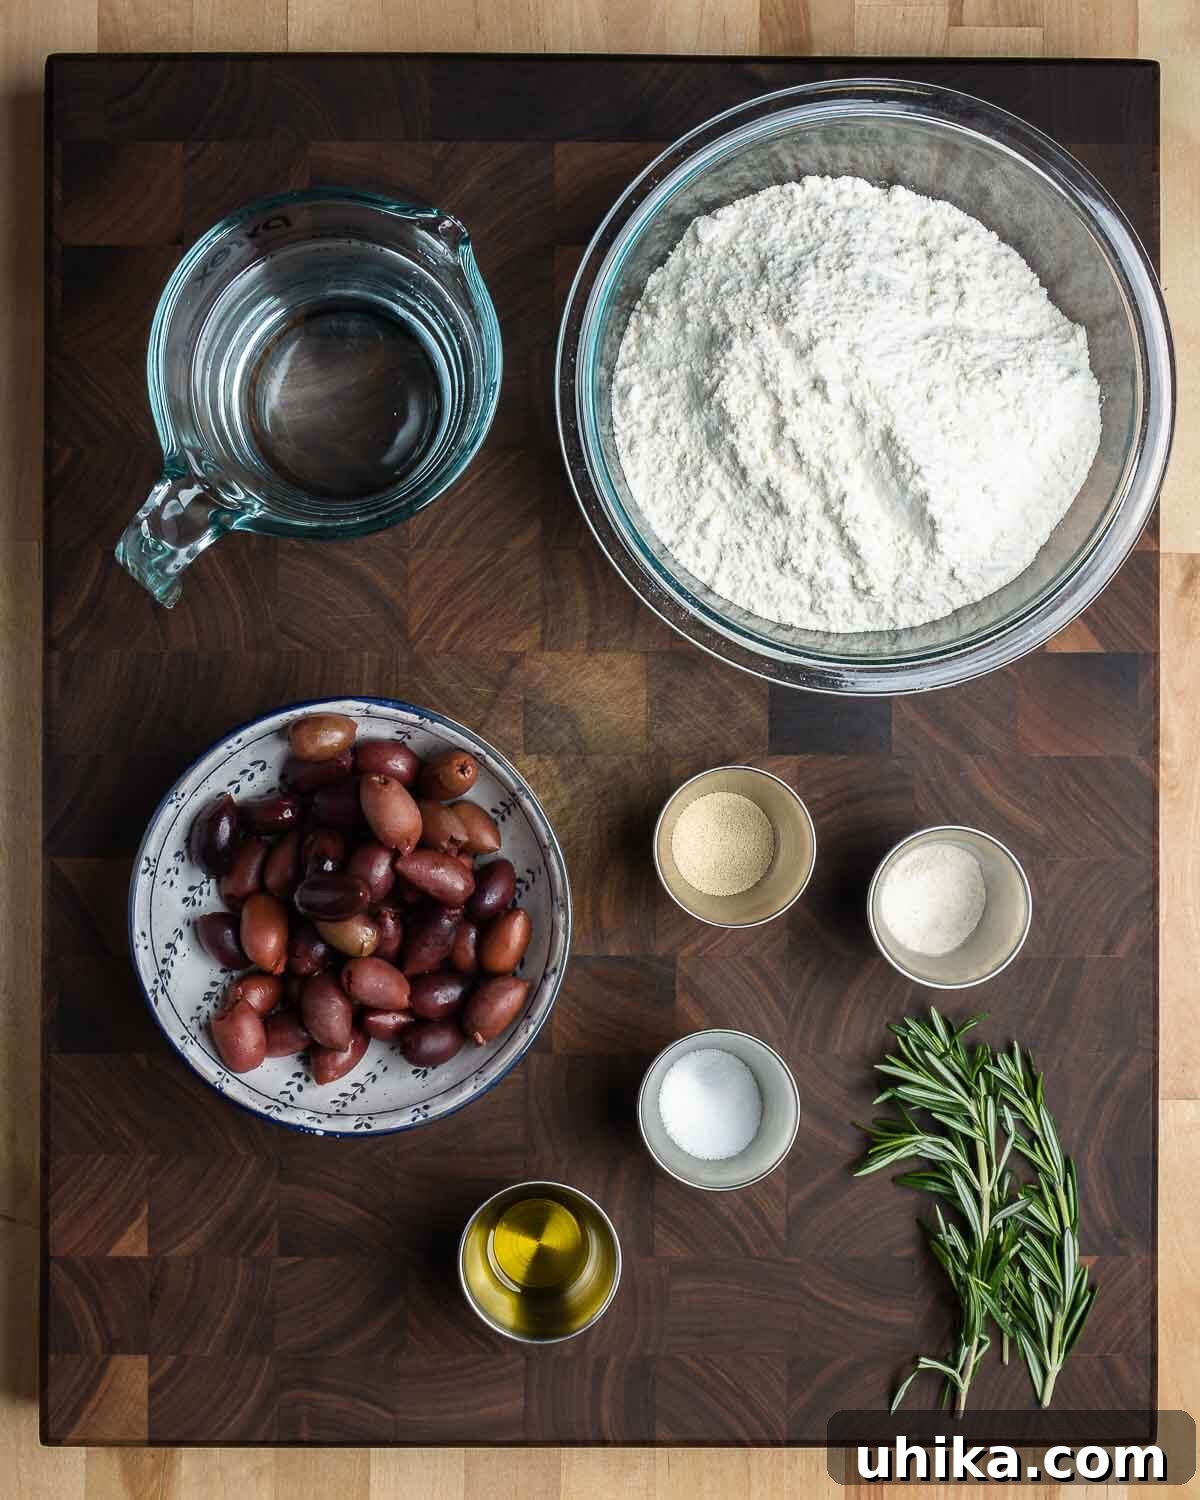
Crafting the perfect olive bread starts with understanding the role of each ingredient. Here’s a deeper look into what makes this recipe sing:
- Bread Flour: The higher protein content in bread flour is essential for developing strong gluten networks. This gluten is what gives the bread its structure, elasticity, and characteristic chewiness, allowing it to trap gases and achieve a beautiful rise.
- Instant Yeast: Chosen for its convenience, instant yeast can be mixed directly into your dry ingredients without prior activation. We recommend a reliable brand like SAF for consistent results.
- Water Temperature: Maintaining a water temperature of around 80°F (27°C) is crucial for optimal yeast activity. Too cold, and the yeast will be sluggish; too hot, and you risk killing it. An instant-read thermometer is your best friend here.
- Olives: While Kalamata olives are a classic choice for their distinct briny and slightly fruity flavor, feel free to experiment with others. Oil-cured black olives offer a rich, intense taste, while Castelvetrano olives provide a milder, buttery note. Ensure they are pitted, chopped, drained, and patted dry to prevent excess moisture from affecting your dough.
- Fresh Rosemary: The aromatic, pine-like notes of fresh rosemary perfectly complement the olives. Always opt for fresh over dried for superior flavor and fragrance.
- Diastatic Malt Powder (Optional but Recommended): This enzyme-rich powder helps in breaking down starches into sugars, which then feed the yeast, leading to better fermentation. More importantly, it contributes to a gorgeous golden-brown crust and a softer crumb. While optional, it truly enhances the bread’s appearance and texture.
- Extra Virgin Olive Oil: A touch of quality olive oil in the dough adds richness, moisture, and a subtle flavor that rounds out the overall taste.
Crafting Your Olive Bread: A Step-by-Step Guide
Making this olive bread is a journey that begins the day before baking. Follow these detailed instructions to ensure a perfect loaf every time.
Part 1: Preparing the Poolish (The Night Before)
- In a large mixing bowl, combine 1 1/4 cups (160g) of bread flour, 3/4 cup (160g) of water heated to approximately 80°F (27°C), and 1/8 teaspoon (.35g) of instant yeast. Stir until well combined and no dry streaks of flour remain.
- Cover the bowl loosely with plastic wrap or a clean kitchen towel and let it sit overnight (for about 10-12 hours) at a consistent room temperature of around 70°F (21°C). The exact time can vary based on your room’s temperature.
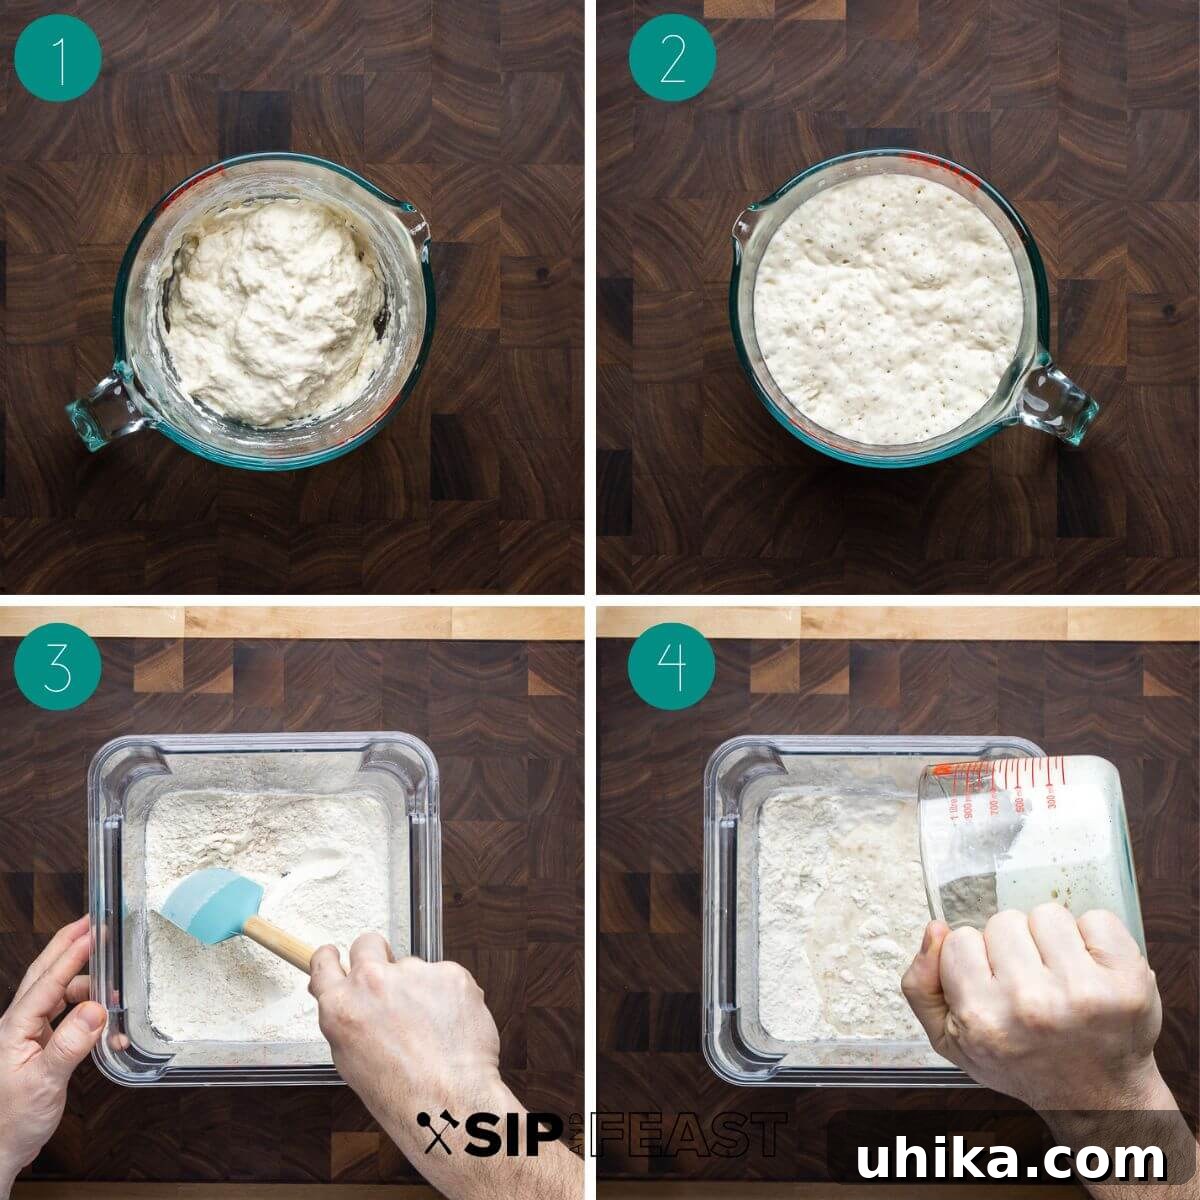
- Your poolish is ready when it has significantly risen, appears bubbly on the surface, and has a slightly tangy aroma. It should look alive and active. If you’re not ready to bake immediately, refrigerate the poolish to halt fermentation and prevent it from collapsing. It can be stored in the refrigerator for up to 3 days.
Part 2: Mixing and Developing the Dough (Baking Day)
- Prepare your olives and rosemary: Drain, dry thoroughly, and roughly chop 1 1/2 cups of pitted olives. Finely chop 1 tablespoon of fresh rosemary leaves. Set these aside.
- In a separate large bowl or a square container (ideal for stretch and folds), combine 3 1/4 cups (380g) of bread flour, 1 1/2 teaspoons (4.5g) of instant dry yeast, 2 teaspoons of diastatic malt powder (if using), and 2 teaspoons of fine sea salt. Whisk these dry ingredients together to ensure even distribution.
- Add the wet components: Pour in 1 cup (245g) of water warmed to 80°F (27°C), the entire poolish you prepared, the chopped olives, chopped rosemary, and 2 teaspoons of extra virgin olive oil to the dry ingredients.
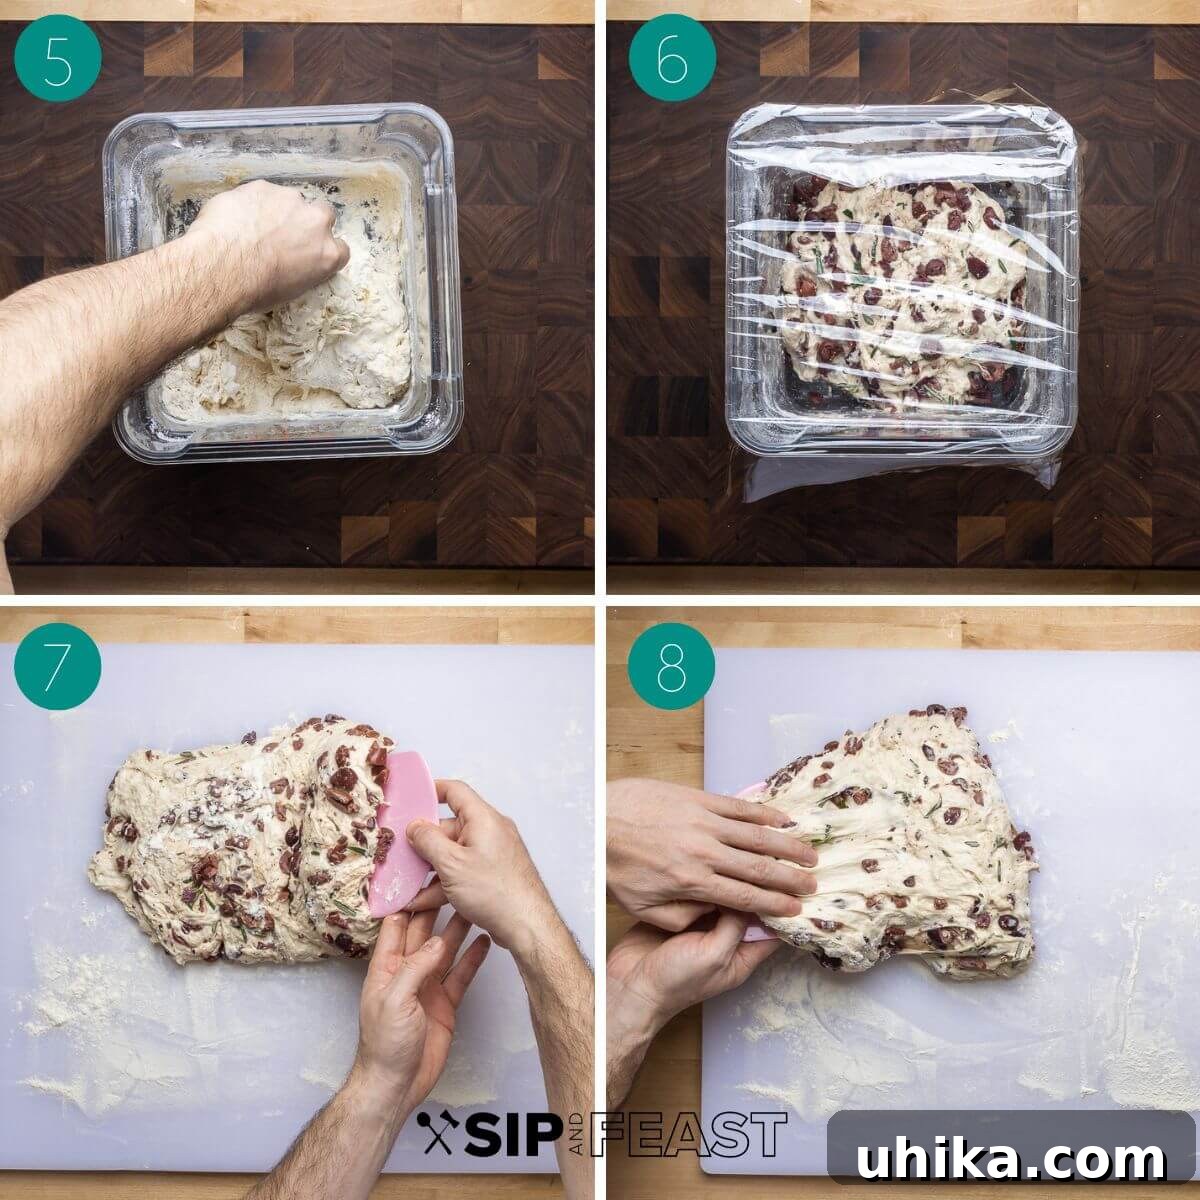
- Using your hands, gently mix all the ingredients until a shaggy dough forms and no dry flour remains. Then, begin to stretch and fold the dough within the bowl. This process of stretching and folding is crucial for developing the gluten structure without intensive kneading. Continue this for about 5 minutes, ensuring all ingredients are thoroughly combined and the dough starts to become more cohesive.
- Cover the bowl and let the dough rest at room temperature for 60 minutes. This is the first bulk fermentation, allowing the yeast to begin its work.
Part 3: The Art of Stretch and Fold
- After the 60-minute rest, lightly flour your work surface. Gently turn the dough out onto it.
- Dust a bench scraper with flour. Use it to lift one edge of the dough, gently stretching it upwards, then folding it over itself towards the center.
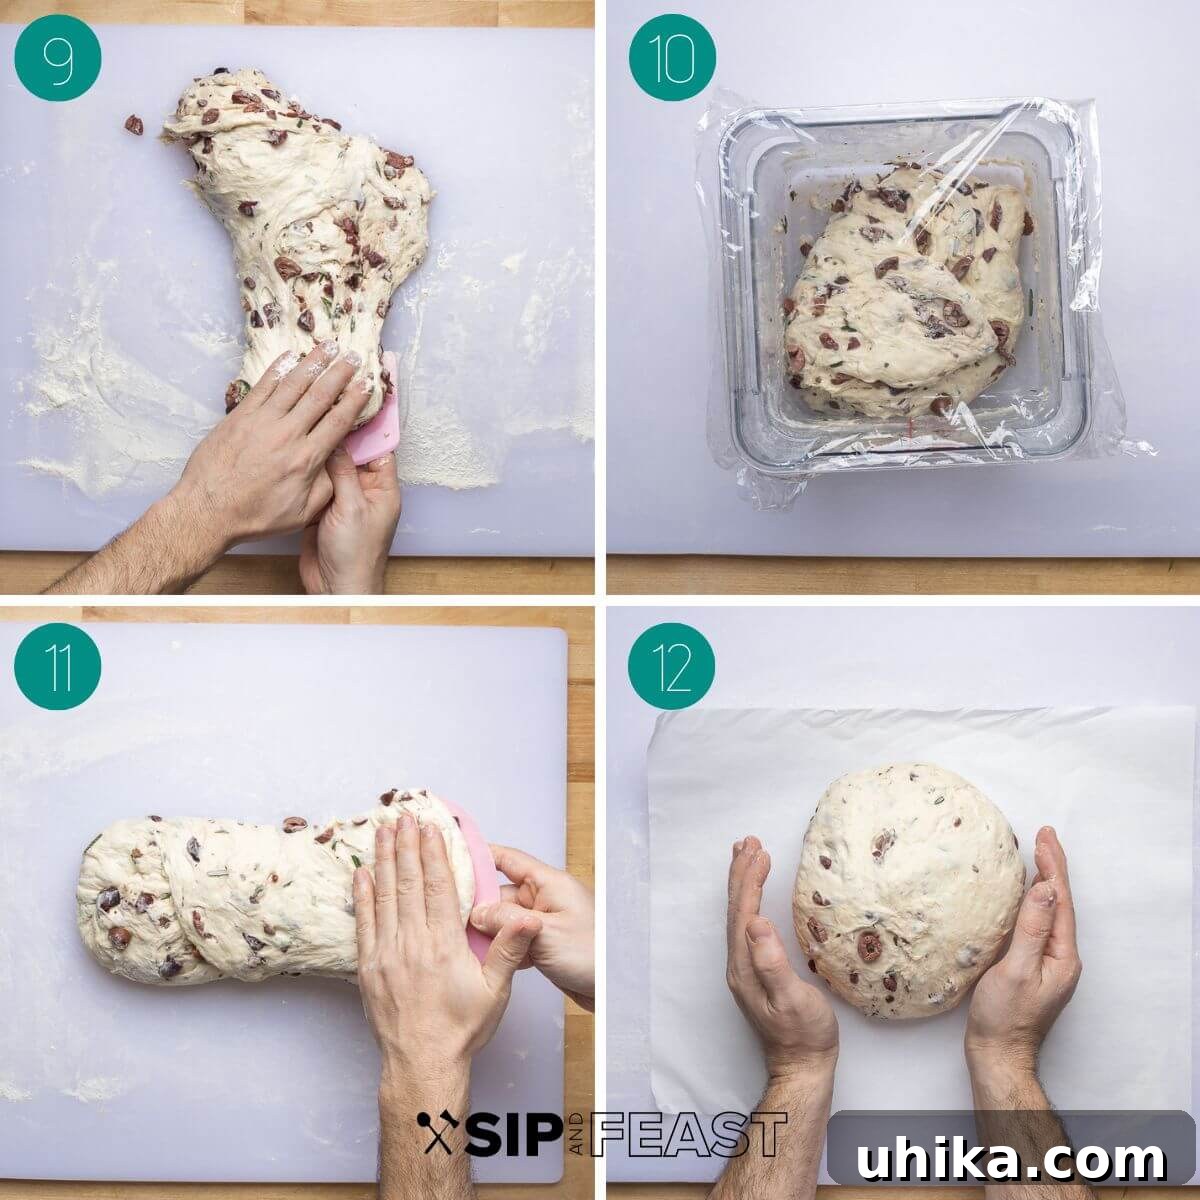
- Rotate the dough 90 degrees and repeat the stretch and fold motion. Continue this process for a total of 4 stretch and folds, rotating the dough after each fold. This technique helps build strength and elasticity in the dough while incorporating air.
- Carefully transfer the dough back into its container. Cover it again and let it rest for another 30 minutes.
- Note on Stretch and Folds: You can also perform the stretch and folds directly in the bowl. Simply moisten your hands with water before each stretch to prevent sticking. Both methods are effective in developing the dough’s gluten.
Part 4: Shaping, Proofing, and Baking
- After the 30-minute rest, perform another set of 4 stretch and folds as described in steps 8 and 9. This will be the final series of folds, further strengthening the dough.
- Gently transfer the dough to a lightly floured surface. Being careful not to “degas” or press out too much air from the dough, gently shape it into a round loaf (boule). Aim for a taut surface on top and a well-sealed seam at the bottom.
- Line a medium-sized bowl (or a banneton proofing basket if you have one) with a piece of parchment paper. Carefully place the shaped dough ball, seam side down, into the lined bowl. Cover it with a clean kitchen towel or plastic wrap and allow it to rise (proof) for about 90 minutes, or until it has roughly doubled in size. This secondary rise is critical for the final texture.
- Preheat your oven and Dutch oven: Approximately 45 minutes before the proofing time is complete, place a 5-6 quart covered Dutch oven into your oven. Preheat the oven to 450°F (232°C). Ensure the oven rack is positioned in the middle, leaving enough space for the Dutch oven with its lid. Preheating the Dutch oven is essential for creating a crispy crust and a good oven spring.
- Just before the 45 minutes of preheating are up, take your proofed dough. Using a sharp knife or a bread lame, score the top of the loaf with a shallow, 1/4-inch deep slit running lengthwise at a slight angle. This scoring helps control where the bread expands during baking, creating a beautiful ear.
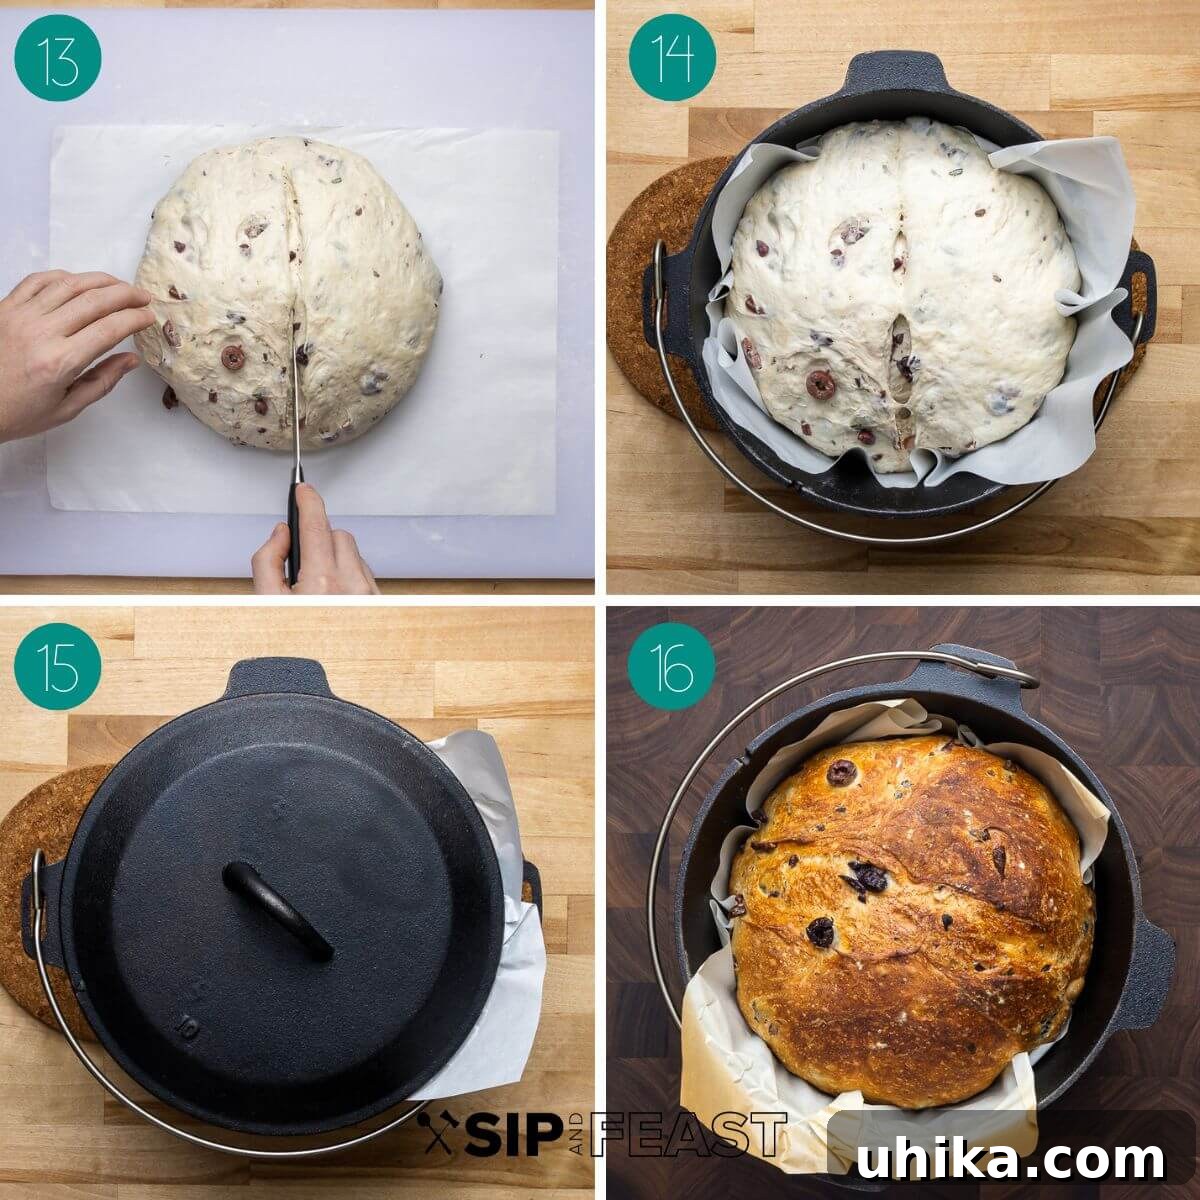
- Carefully remove the preheated Dutch oven from the oven (use oven mitts!). Remove the lid. Grasping the parchment paper on both sides, gently lower the dough into the hot Dutch oven. Quickly replace the lid.
- Place the covered Dutch oven back into the preheated oven and bake for 30 minutes. The lid traps steam, which helps the crust develop slowly and prevents it from setting too quickly, allowing for maximum oven spring and a soft, airy crumb.
- After 30 minutes, carefully remove the lid from the Dutch oven. Reduce the oven temperature if your bread is browning too quickly, though usually 450°F is fine. Continue baking uncovered for another 25-35 minutes, or until the loaf achieves a deep golden-brown color.
- To check for doneness, carefully remove the bread from the Dutch oven. Tap the bottom of the loaf; it should sound hollow. If it doesn’t, return the loaf (you can place it directly on the oven rack at this point) to the oven for another 5 minutes, then check again.
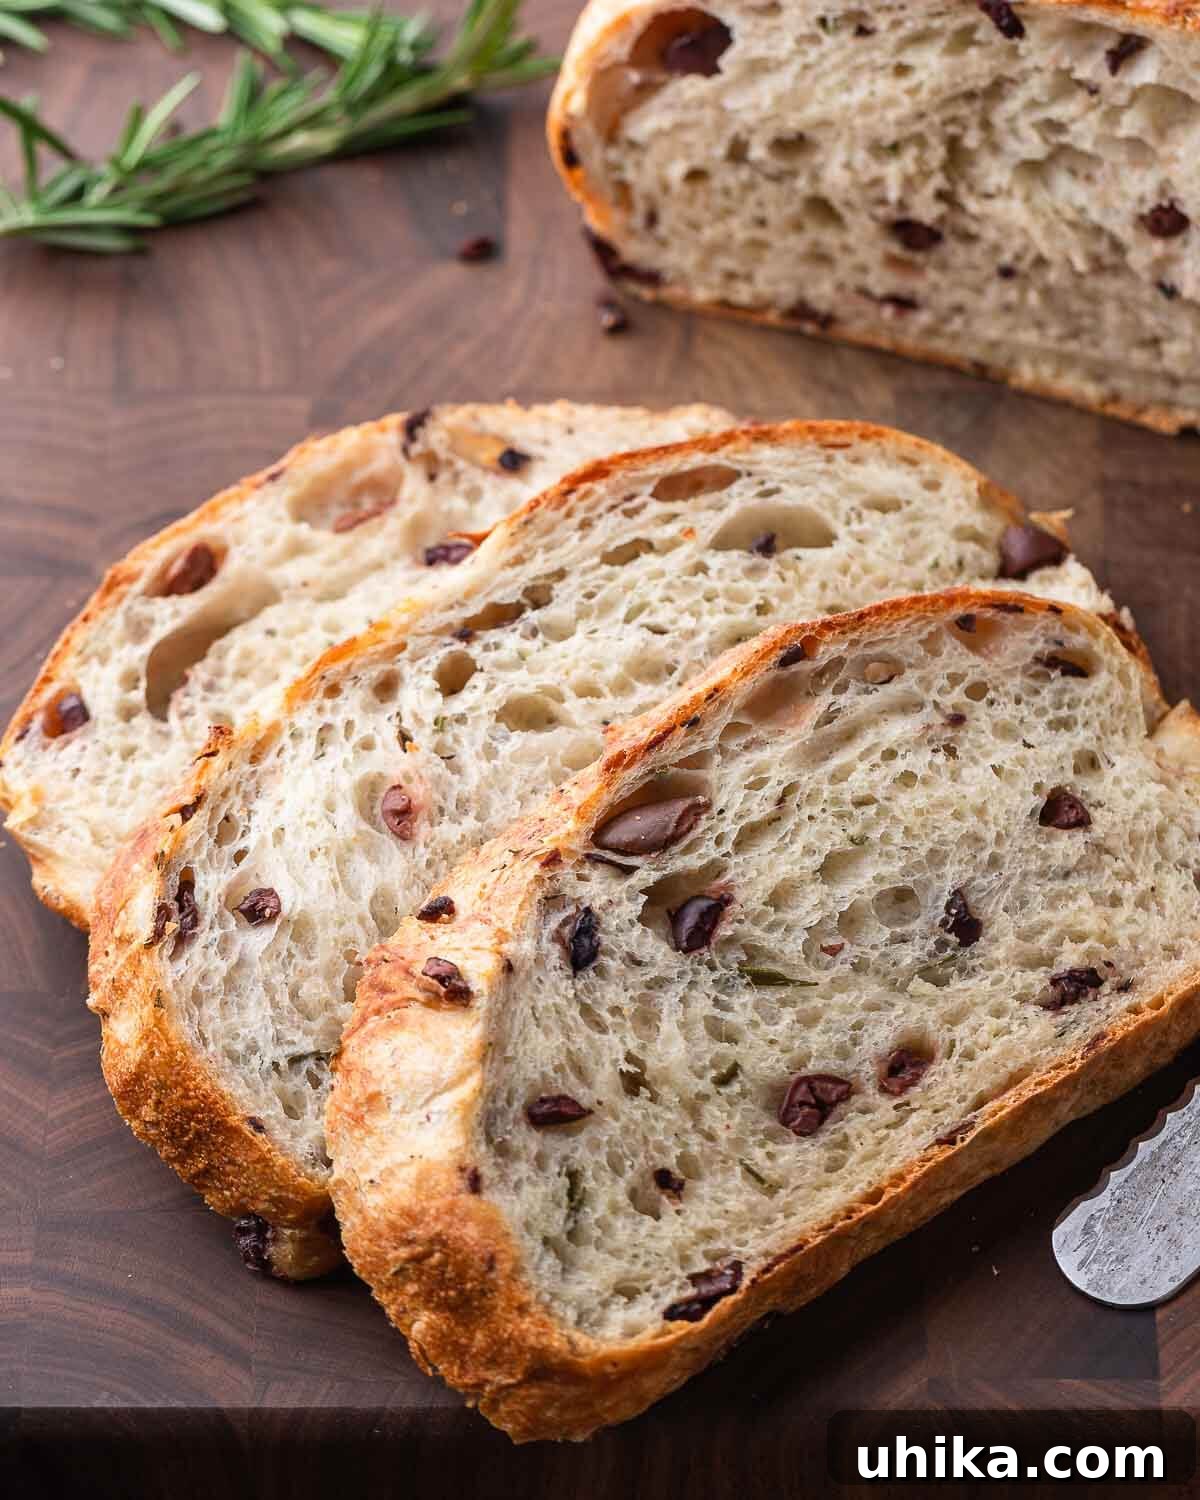
- Once baked to perfection, transfer the olive bread to a wire rack to cool completely. This is perhaps the hardest part, but it’s crucial! Wait at least 90 minutes before slicing. Slicing too early can release steam too quickly, resulting in a gummy texture. Patience will be rewarded with the ideal crumb. Enjoy your homemade masterpiece!
Top Tips for Your Best Olive Bread Loaf
Achieving a bakery-quality loaf at home is easier with these expert tips:
- Mastering the Poolish: The timing for your poolish depends heavily on your room’s ambient temperature. In warmer environments, it might be ready sooner than 10-12 hours. Look for visible bubbles and a slight doming before it starts to recede. If you need to delay baking, immediately refrigerate the poolish to prevent over-fermentation. It will keep well in the fridge for up to 3 days. When ready to use, allow it to come back to room temperature for about an hour before mixing with the main dough.
- The Power of Stretch and Fold: This gentle method is incredibly effective for developing gluten in high-hydration doughs like this one. It builds strength, creates a more open and airy crumb, and introduces oxygen, which is vital for yeast activity and gluten formation. Don’t skip these steps; they are key to the bread’s structure and rise.
- Choosing Your Olives Wisely: While Kalamata olives offer a classic, robust flavor, don’t hesitate to experiment! Oil-cured black olives provide a deep, intense brininess, while green olives like Castelvetrano are milder and buttery. For a unique twist, consider combining two types. Always ensure olives are pitted, thoroughly drained, and patted dry to avoid introducing excess moisture into the dough.
- Checking for Doneness: The “hollow sound” test is a time-honored method. A perfectly baked loaf will resonate with a hollow sound when tapped on the bottom. If it sounds dull or dense, it likely needs a few more minutes in the oven. You can place it directly on the oven rack for this final bake to ensure even crisping. An internal temperature of 200-210°F (93-99°C) is also a good indicator of doneness.
- Don’t Rush the Cooling: This is a critical step often overlooked. The bread continues to cook as it cools, and moisture distributes evenly throughout the crumb. Slicing too early can result in a gummy texture and a less satisfying crust. Embrace the anticipation!
- Hydration Adjustment: The amount of water absorbed by flour can vary based on humidity and flour type. If your dough feels too sticky or too stiff, don’t be afraid to add a tiny bit more flour or water, a teaspoon at a time, to achieve a workable consistency.
More Ways to Savor Your Olive Bread
This versatile bread is fantastic on its own, but its savory, aromatic notes make it a perfect companion for a variety of dishes. Here are a few of our favorite recipes that pair beautifully with Olive Bread with Rosemary:
- Tuscan White Bean Soup – The rich, earthy flavors of roasted garlic and cannellini beans in this hearty soup find their ideal match in the robust profile of olive bread. Dunking is highly encouraged!
- Peperonata – This vibrant Italian stew of bell peppers, onions, and tomatoes makes an incredible topping for slices of warm olive bread. The sweet and savory notes of the peperonata perfectly complement the salty olives and fragrant rosemary.
- Ciambotta – A fresh and flavorful summer vegetable stew, Ciambotta’s light yet rich character is beautifully enhanced by the complex flavors of this bread. It’s an ideal pairing for a rustic, satisfying meal.
- Cheese Boards: Serve slices of olive bread with an assortment of cheeses, cured meats, and fig jam for an elegant appetizer. The bread’s assertive flavor stands up well to strong cheeses.
- Bruschetta Base: Lightly toast slices and top with fresh diced tomatoes, basil, and a balsamic glaze for a sophisticated appetizer.
- With Eggs: Enjoy a slice alongside scrambled eggs or a frittata for a delightful breakfast or brunch.
Storage and Reheating Tips
To keep your homemade olive bread fresh for as long as possible:
- Room Temperature: Store the cooled loaf in a paper bag or a breathable bread bag at room temperature for 2-3 days. Avoid airtight plastic bags, as they can make the crust soft and the interior gummy.
- Freezing: For longer storage, slice the cooled bread and freeze in an airtight freezer bag for up to 2-3 months. You can toast individual slices directly from frozen.
- Reheating: To revive a day-old loaf, sprinkle it lightly with water and reheat in a 350°F (175°C) oven for 5-10 minutes, or until the crust is crisp again and the interior is warm.
Conclusion: Embrace the Joy of Baking
Baking this Olive Bread with Rosemary is more than just following a recipe; it’s an experience that enriches your senses and brings a touch of artisanal quality to your table. The blend of briny olives and fragrant rosemary creates a loaf that is both comforting and sophisticated, perfect for any occasion. We encourage you to embark on this rewarding baking adventure, knowing that each step brings you closer to a truly remarkable loaf of bread. Don’t be afraid to experiment, and most importantly, enjoy the process and the incredible results!
If you’ve enjoyed making this olive bread recipe, we’d love to hear from you! Please consider leaving a review or a 5-star rating. We strive to provide accessible learning experiences, so if you prefer visual guidance, many of our recipes are available on YouTube and our Facebook Page.
Olive Bread
James Delmage
⭐⭐⭐⭐⭐
15 minutes
50 minutes
14 hours
15 hours 5 minutes
1 loaf
Pin
Ingredients
For the poolish
- 1 1/4 cups (160g) bread flour
- 3/4 cup (160g) water 80f
- 1/8 teaspoon (.35g) instant yeast (SAF brand recommended)
For the olive bread
- 1 1/2 cups pitted olives (Kalamata, oil-cured, or Castelvetrano) chopped, drained, and patted dry
- 1 tablespoon rosemary leaves chopped
- 2 teaspoons fine sea salt
- 3 1/4 cups (380g) bread flour
- 2 teaspoons extra virgin olive oil
- 1 1/2 teaspoons (4.5g) instant dry yeast (SAF brand recommended)
- 2 teaspoons Diastatic malt powder (optional)
- 1 cup (245g) water 80f
Instructions
Make the poolish
-
The night before baking, mix together the bread flour, water, and instant yeast for the poolish in a large bowl. Cover and let sit overnight (10-12 hours) at 70°F. The poolish is ready when it has risen and is covered with small bubbles. If not using immediately, refrigerate to prevent collapsing.
For the olive bread
-
In a large bowl or container, whisk together the bread flour, instant dry yeast, diastatic malt powder (if using), and fine sea salt.
-
Add the 80°F water, the prepared poolish, chopped olives, chopped rosemary, and extra virgin olive oil to the dry ingredients. Mix by hand until thoroughly combined, stretching the dough to ensure even mixing for about 5 minutes. Cover and let the dough rest for 60 minutes.
-
After 60 minutes, transfer the dough to a lightly floured work surface. Perform 4 sets of stretch and folds: use a floured bench scraper to lift, stretch, and fold the dough over itself, rotating 90 degrees after each fold. Gently return the dough to the container, cover, and let it rest for another 30 minutes. After this rest, perform another 4 sets of stretch and folds. (Alternatively, you can perform stretch and folds directly in the container by wetting your hands to prevent sticking).
-
Gently shape the dough into a round loaf, being careful not to degas it. Place the dough ball seam side down into a bowl lined with parchment paper. Cover with a towel or plastic wrap and let it rise for 90 minutes, or until it has approximately doubled in size.
-
45 minutes before baking, preheat your oven to 450°F (232°C). Place a 5-6 quart covered Dutch oven on the middle oven rack to preheat along with the oven.
-
Just before the 45 minutes of preheating are complete, score the top of the proofed dough with a 1/4-inch deep slit running the length of the loaf at a shallow angle.
-
Carefully remove the hot Dutch oven from the oven. Remove the lid. Using the parchment paper, gently lower the dough into the Dutch oven. Quickly cover with the lid and return to the oven. Bake for 30 minutes.
-
After 30 minutes, remove the Dutch oven lid. Continue baking uncovered for another 25-35 minutes, or until the loaf is deeply golden brown and sounds hollow when tapped on the bottom. If it doesn’t sound hollow, you can place it directly on the oven rack for an additional 5 minutes.
-
Once baked, transfer the olive bread to a wire rack to cool completely for at least 90 minutes before slicing. Enjoy your homemade olive bread!
Notes
- I always use SAF instant yeast for all of my bread and pizza dough recipes.
- Diastatic malt powder helps aid in browning but is not required. It can be omitted.
- The calorie amount reflects 1 large loaf.
Bakers Percentages: 75% hydration, 1% instant dry yeast, 2% fine sea salt, 1% diastatic malt powder, 1.5% olive oil
Nutrition
Carbohydrates: 424.7g |
Protein: 57.5g |
Fat: 40.8g |
Saturated Fat: 5.7g |
Sodium: 6420mg |
Potassium: 595mg |
Fiber: 21g |
Sugar: 1.5g |
Calcium: 261mg |
Iron: 32mg
Nutrition information is automatically calculated, so should only be used as an approximation.
Like this? Leave a comment below!
Check us out on Instagram at @sipandfeast or tag #sipandfeast!