
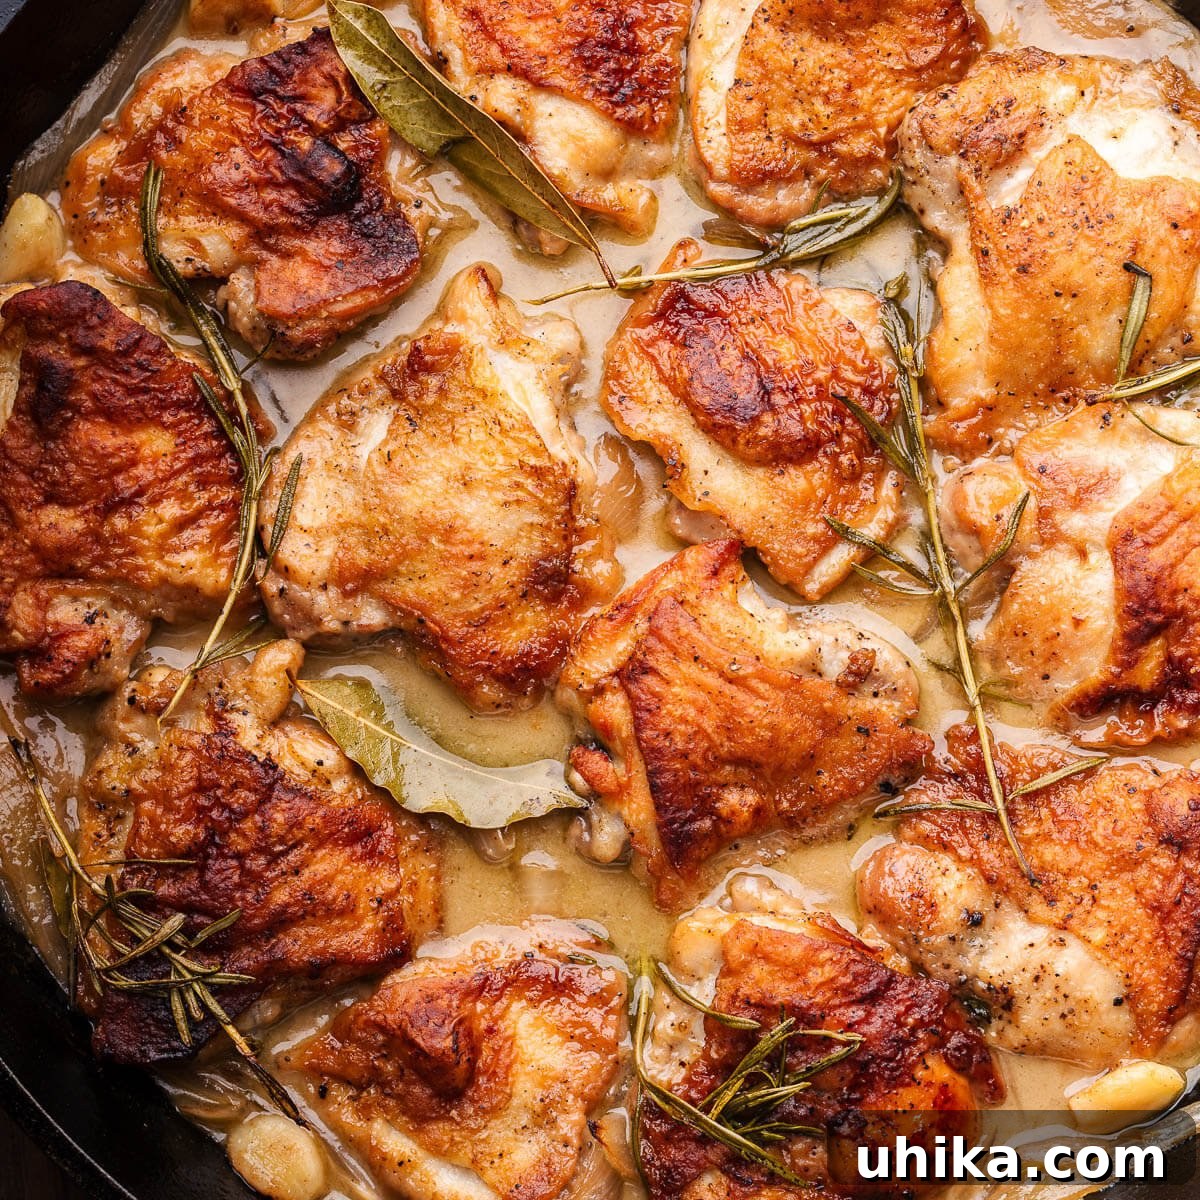
Italian-Style Vinegar Chicken: A Flavorful Braised Chicken Recipe
Discover the delightful taste of Italian-Style Vinegar Chicken, featuring succulent chicken thighs seared to perfection and then braised until incredibly tender in a rich, tangy vinegar sauce. Infused with aromatic onions, garlic, fresh parsley, and a blend of classic Italian herbs, this dish offers a sophisticated flavor profile that’s surprisingly easy to master. Perfect for a quick yet elegant weeknight dinner or impressive enough for special gatherings and traditional Sunday meals.
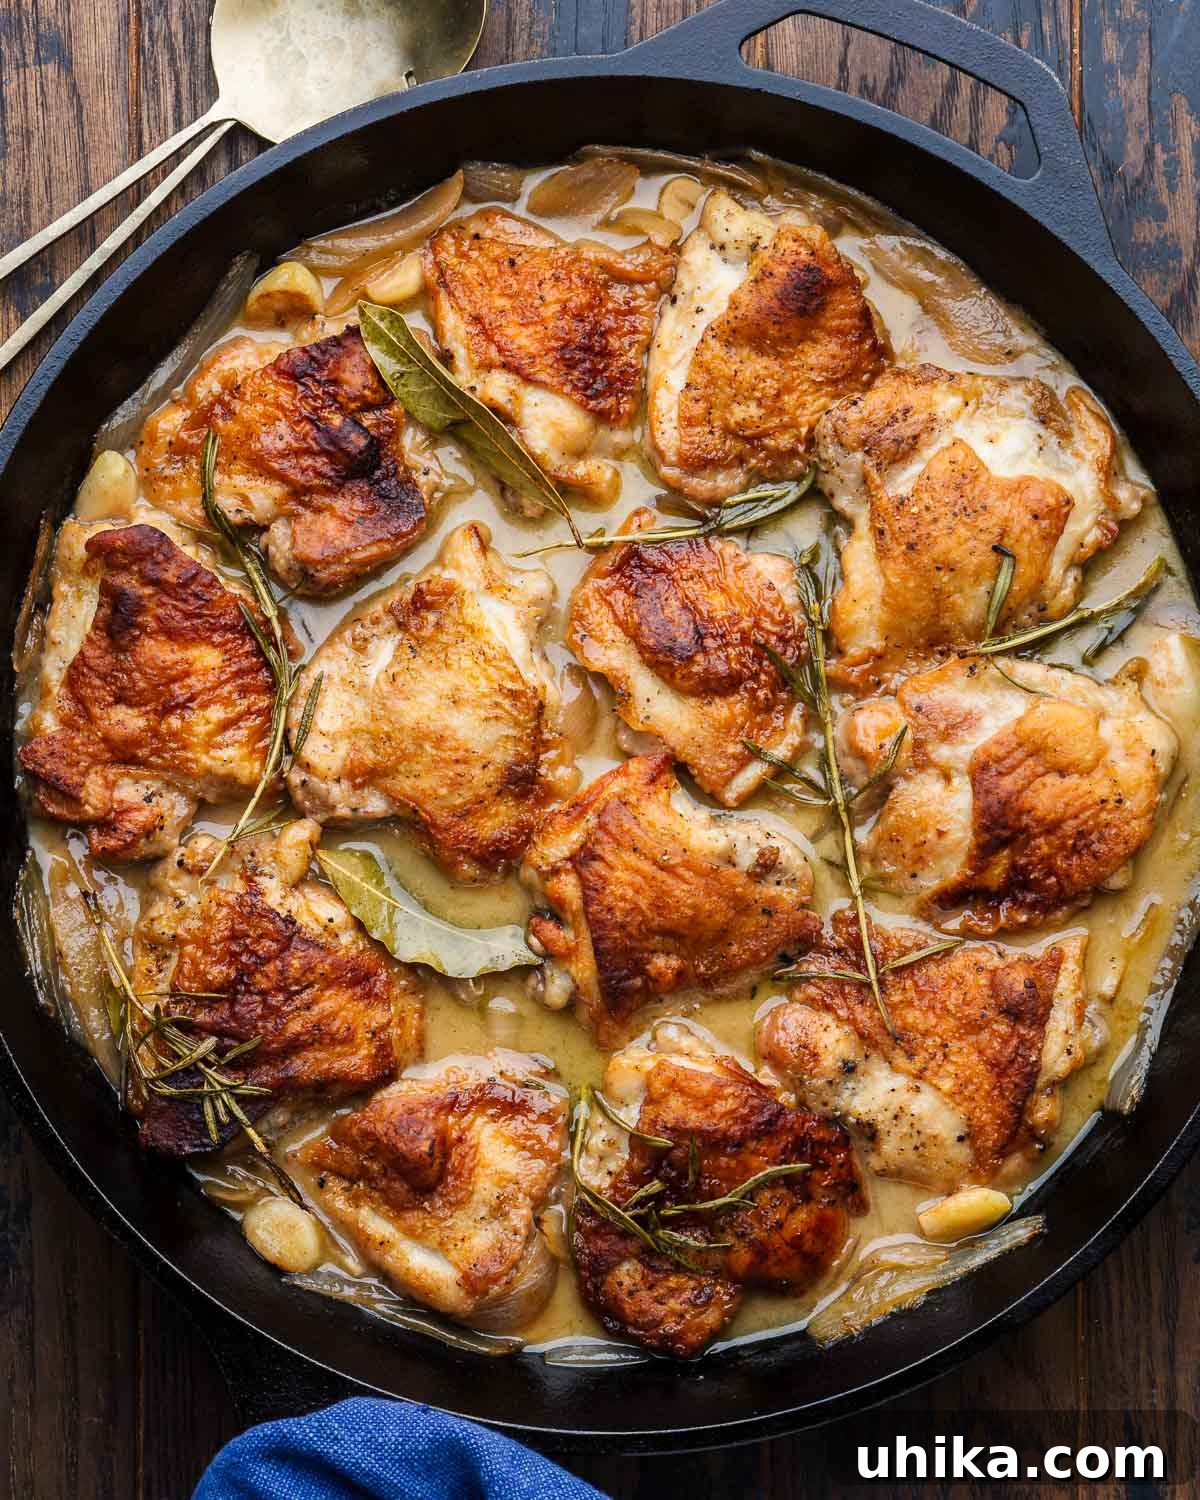
Why You’ll Love This Easy Italian Vinegar Chicken Recipe
While sharing a delectable flavor lineage with the beloved Chicken Scarpariello, our Italian Vinegar Chicken distinguishes itself with an even simpler preparation process, making it an ideal candidate for those busy evenings when you crave homemade comfort without the fuss. It’s a testament to the fact that extraordinary taste doesn’t require complex steps, much like our popular easy Greek lemon chicken and potatoes, which also champions the one-pan meal philosophy.
One of the many advantages of this recipe is its hands-off braising time. With approximately 35 minutes in the oven, you’ll have ample opportunity to prepare complementary side dishes. This allows you to orchestrate a complete, impressive meal with minimal last-minute stress. Imagine the aroma filling your kitchen as the chicken slowly tenderizes, developing its rich flavors, ensuring a truly rewarding cooking experience.
Perfect Pairings: What to Serve with Vinegar Chicken
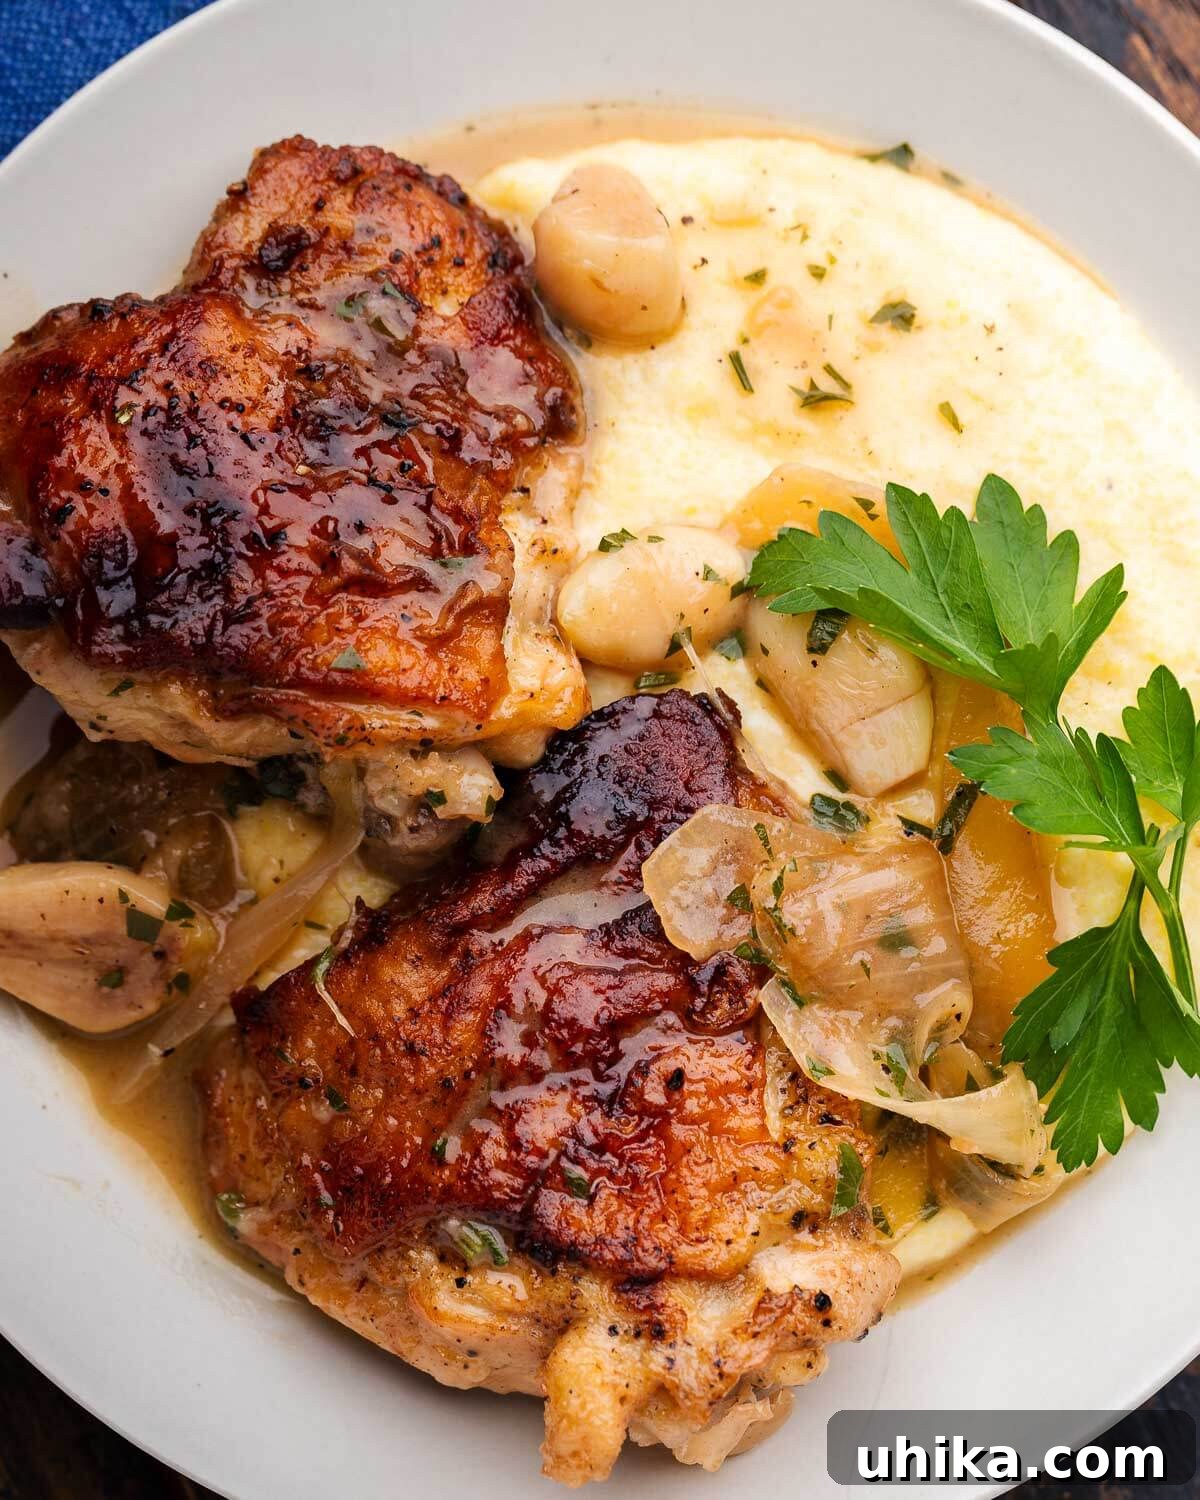
To truly elevate your Italian Vinegar Chicken experience, consider serving it over a bed of creamy, luscious polenta. The soft, comforting texture of the polenta acts as the perfect canvas for soaking up every drop of that savory, tangy sauce, creating a harmonious blend of textures and tastes. For a vibrant and healthy contrast, a side of perfectly roasted vegetables like crisp roasted broccoli adds a touch of freshness and color, balancing the richness of the chicken and sauce. The slight char on the broccoli complements the tangy notes of the vinegar chicken beautifully.
Other excellent side dish options include crusty Italian bread for dipping, which is ideal for sopping up all the delicious sauce. A simple green salad with a light vinaigrette offers a refreshing palate cleanser, while mashed potatoes or even a delicate orzo pasta can also serve as wonderful foundations for this flavorful chicken. The key is to choose accompaniments that can absorb the flavorful sauce and complement the chicken without overpowering its distinctive taste.
Essential Ingredients for Perfect Vinegar Chicken
Crafting this incredible dish begins with selecting high-quality ingredients. Below you’ll find a visual guide to all the components, followed by important notes to help you choose the best for your culinary adventure, ensuring a truly authentic and delicious outcome.
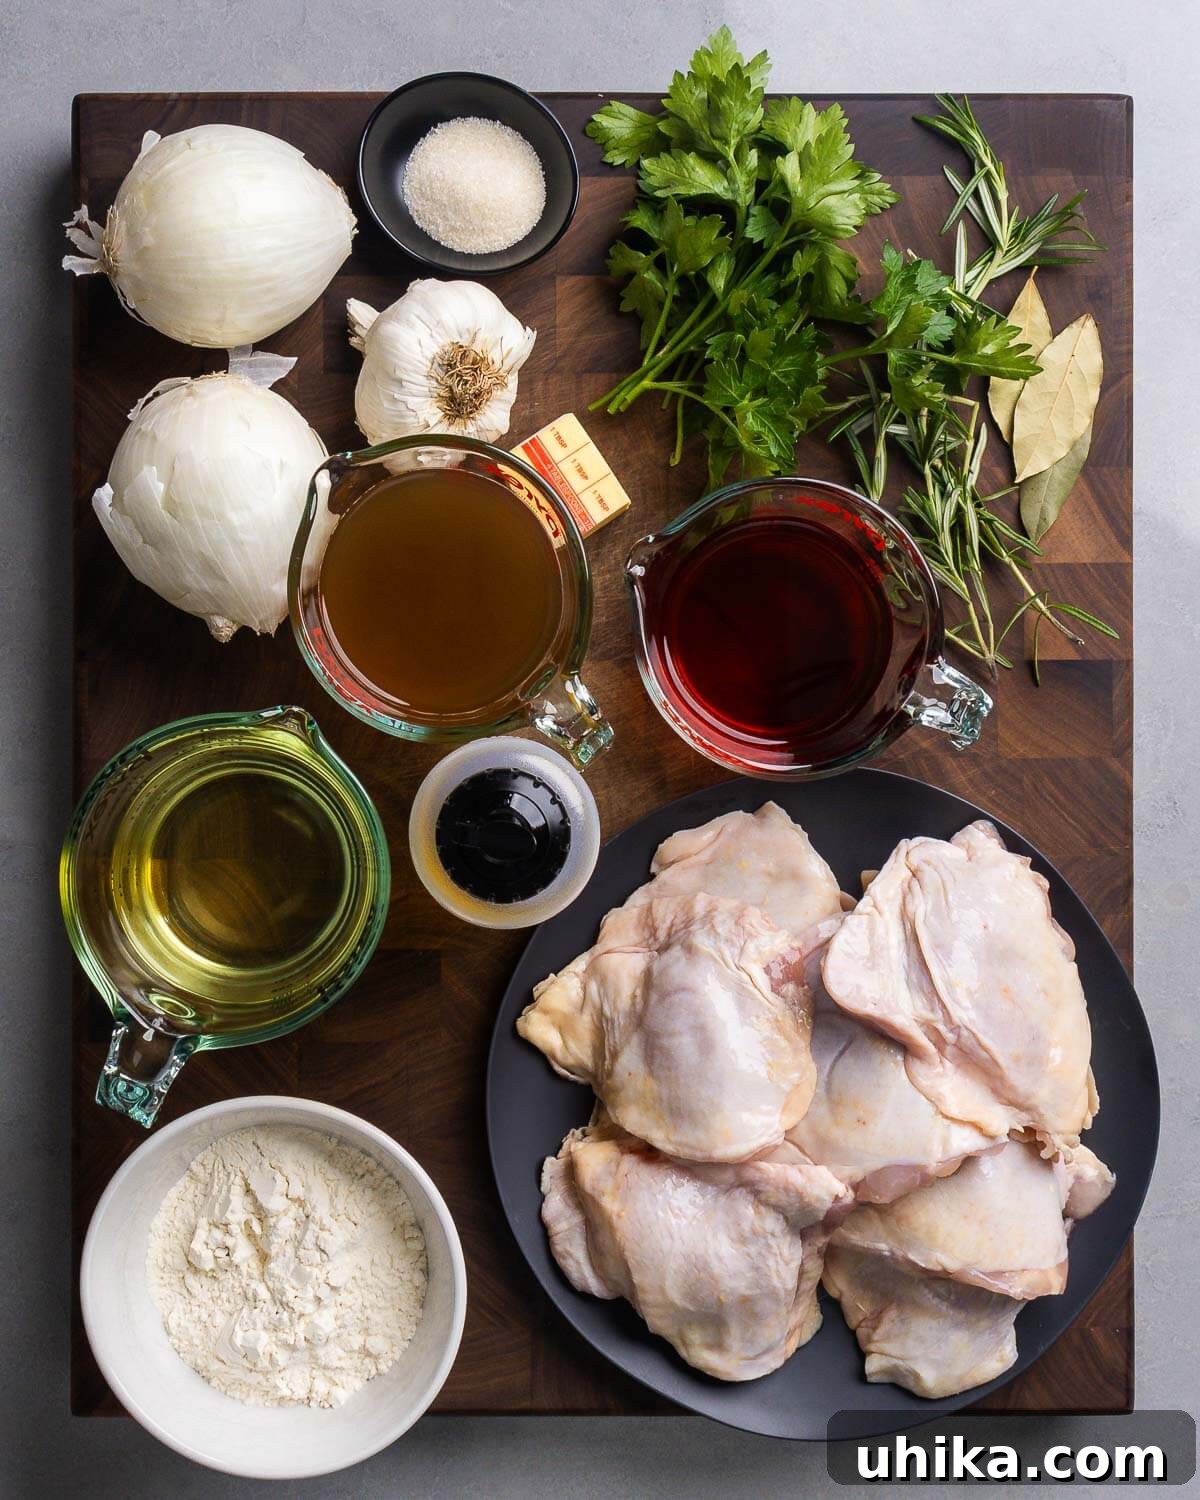
- Chicken: For the most robust flavor and tender texture, we highly recommend using bone-in, skin-on chicken thighs. The bone imparts deeper flavor during braising, and the skin, when properly seared, adds a delightful crispness that contrasts beautifully with the tender meat. The higher fat content of thighs also keeps them moist and forgiving during the braising process. However, if you prefer, boneless, skinless chicken thighs can certainly be used, yielding excellent results with a slightly reduced cooking time (approximately 2.5-3 pounds for this recipe).
- Vinegar: Red wine vinegar is the star of our tangy sauce. Its robust and fruity notes are crucial for developing the signature bright, acidic flavor of this dish. For convenience and economy, consider purchasing red wine vinegar in larger quantities from your local grocery store. Look for good quality vinegar that’s not overly harsh, as its flavor will be concentrated in the sauce.
- Wine: A dry white wine is essential to the sauce, adding depth, complexity, and a subtle fruitiness. Sauvignon Blanc or Pinot Grigio are ideal choices, offering crispness and subtle fruit notes that complement the vinegar without making the sauce overly sweet. Always cook with a wine you’d genuinely enjoy drinking, as its quality will directly impact the final flavor of your dish.
- Onions and Garlic: These aromatic foundations are vital for building a rich and savory flavor base. Large white onions caramelize beautifully as they sauté, adding a natural sweetness and depth. Generous amounts of fresh garlic infuse the sauce with its unmistakable pungent and comforting perfume. Don’t skimp on these essential aromatics, as they are key to the sauce’s character.
- Herbs: Fresh rosemary sprigs and bay leaves contribute an earthy, fragrant aroma that is characteristic of classic Italian cuisine. These herbs release their flavors slowly during the braising process, creating a deeply aromatic and comforting sauce. While rosemary and bay leaves are our go-to choices for their traditional Mediterranean notes, feel free to experiment with other complementary herbs like fresh thyme or oregano if you wish to personalize the dish.
- Chicken Stock: Low-sodium chicken stock or, even better, rich homemade chicken stock, provides the essential liquid base for braising. Using low-sodium stock allows you to control the overall saltiness of your dish, ensuring a perfectly seasoned outcome that isn’t overly salty. Homemade stock also offers a depth of flavor that’s hard to beat.
- Butter: Cold, unsalted butter is whisked into the sauce at the very end. This classic technique, known as “monter au beurre,” is a professional chef’s trick. It creates a luxurious, silky texture and a beautiful glossy sheen, enriching the sauce and emulsifying it to perfection, adding a final touch of decadence.
Refer to the comprehensive recipe card below for precise measurements and quantities for each ingredient, ensuring you have everything you need before you begin cooking.
Step-by-Step Guide: How to Make Italian Vinegar Chicken
Follow these detailed instructions to create a tender, flavorful Italian Vinegar Chicken that will impress every time. Each step is carefully outlined to ensure success, whether you’re a novice or an experienced cook, making the process straightforward and enjoyable.
- Prepare Your Ingredients and Oven: Begin by preheating your oven to 350°F (175°C) and positioning the oven rack in the middle. This ensures even cooking and readiness for the braising stage. Next, meticulously prepare your aromatics: thinly slice two large white onions from root to stem into 1/4-inch thick pieces, aiming for uniformity. Halve 12 cloves of fresh garlic – their robust flavor is crucial for the sauce. Mince 1/4 cup of fresh flat-leaf Italian parsley for a vibrant finish and garnish. Cube 3 tablespoons of unsalted butter and place it back in the fridge to keep it cold until it’s needed at the very end, which is crucial for emulsifying the sauce properly.
- Prepare and Flour the Chicken: Trim any excess or overhanging fat from 4 pounds of bone-in, skin-on chicken thighs. It’s essential to dry the chicken pieces thoroughly with paper towels; this step promotes a crispier skin when seared and prevents steaming. Season both sides generously with 2 teaspoons of Diamond Crystal kosher salt and 1 teaspoon of freshly ground black pepper, ensuring even coverage. In a shallow dish, tray, or a clean plastic bag, place 1 cup of all-purpose flour. Dredge each chicken thigh in the flour, ensuring it’s evenly coated, then gently shake off any excess flour. Arrange the floured chicken on a baking sheet lined with parchment paper, preparing them for searing.
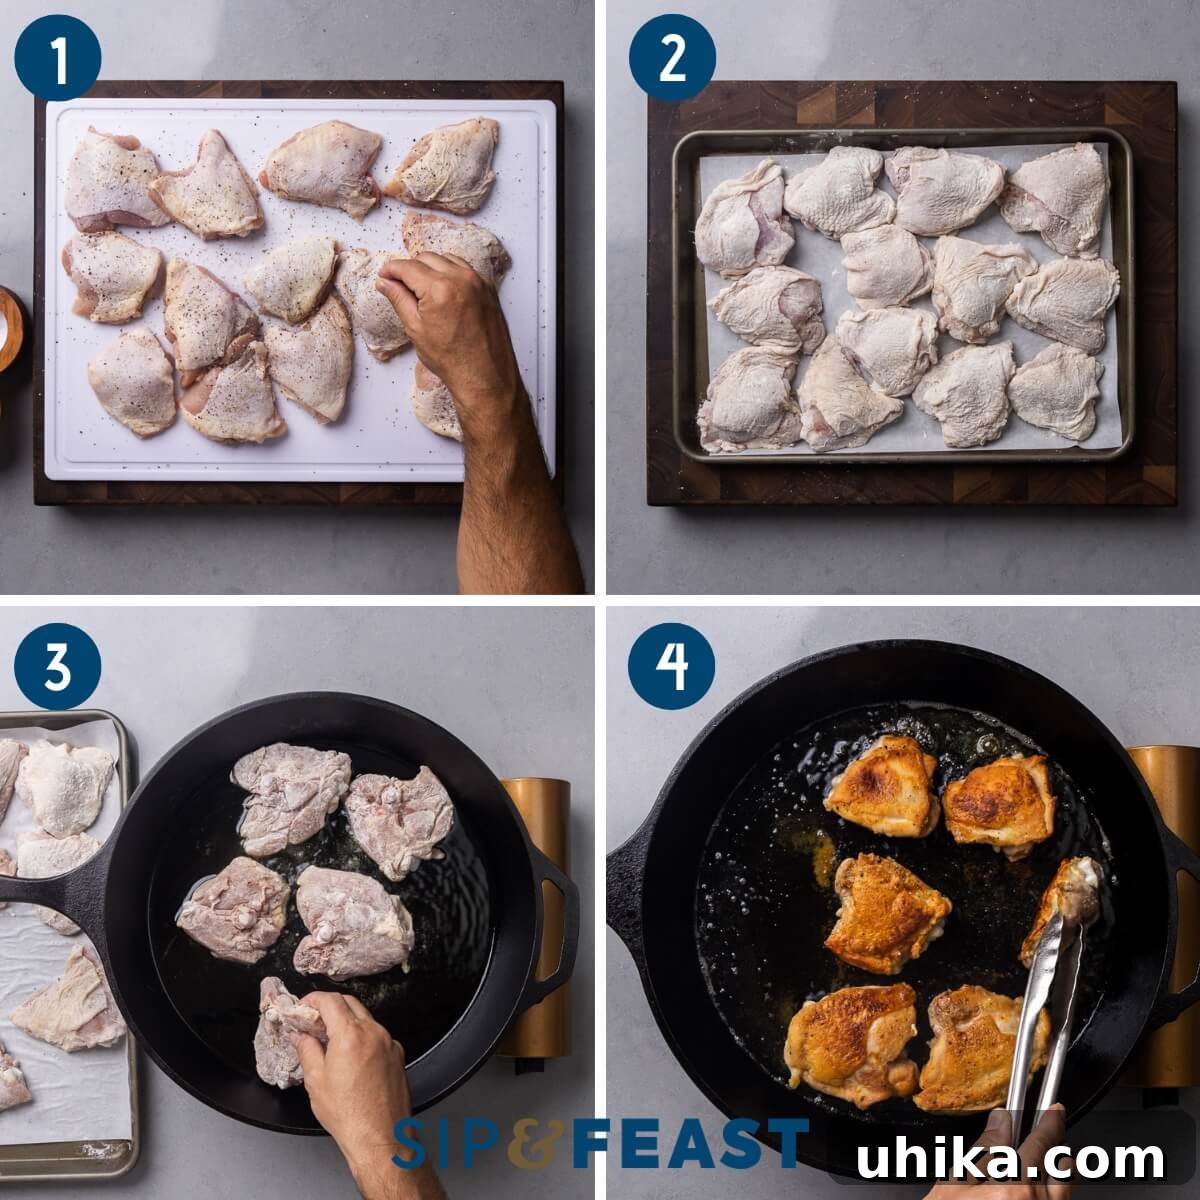
- Sear the Chicken Thighs: Heat a large, oven-safe pan (preferably a heavy-bottomed cast iron skillet or a durable stainless steel pan) over medium heat with approximately 1/4 inch of neutral cooking oil (like vegetable, canola, or avocado oil). Once the oil is shimmering and hot, carefully add the seasoned and floured chicken thighs, skin-side down. Sear for about 5 minutes, or until the skin achieves a beautiful deep golden-brown and crispy texture. Flip the thighs and sear the other side for about 3 minutes to develop a light crust and build more flavor.
- Batch Searing for Best Results: Transfer the seared chicken pieces to a plate lined with paper towels to drain any excess oil. It’s important not to overcrowd the pan during searing; if necessary, work in batches to ensure each piece gets proper color and crispness. Overcrowding can significantly lower the pan’s temperature, leading to steamed rather than properly seared chicken, which impacts both texture and flavor development.
- Prepare the Pan for Sauce: Carefully pour out any remaining frying oil from the pan. Using a paper towel, wipe down the pan to remove any browned bits that might burn later. While some fond (browned bits) are desirable for flavor, excess burnt particles can impart a bitter taste. Leave a clean surface for building your exquisite sauce.
- Sauté Aromatics: Add 1/4 cup of fresh olive oil to the cleaned pan, followed by the sliced onions and a pinch of salt. Sauté the onions over medium heat for 7-10 minutes, stirring occasionally, until they become soft, translucent, and slightly caramelized. If they start to brown too quickly or stick, add a splash of water to deglaze and prevent burning, scraping up any stuck bits. Once the onions are softened, add the halved garlic cloves and continue to cook for another 3-5 minutes, until the garlic is fragrant and lightly golden, being careful not to burn it, as burnt garlic can taste bitter.
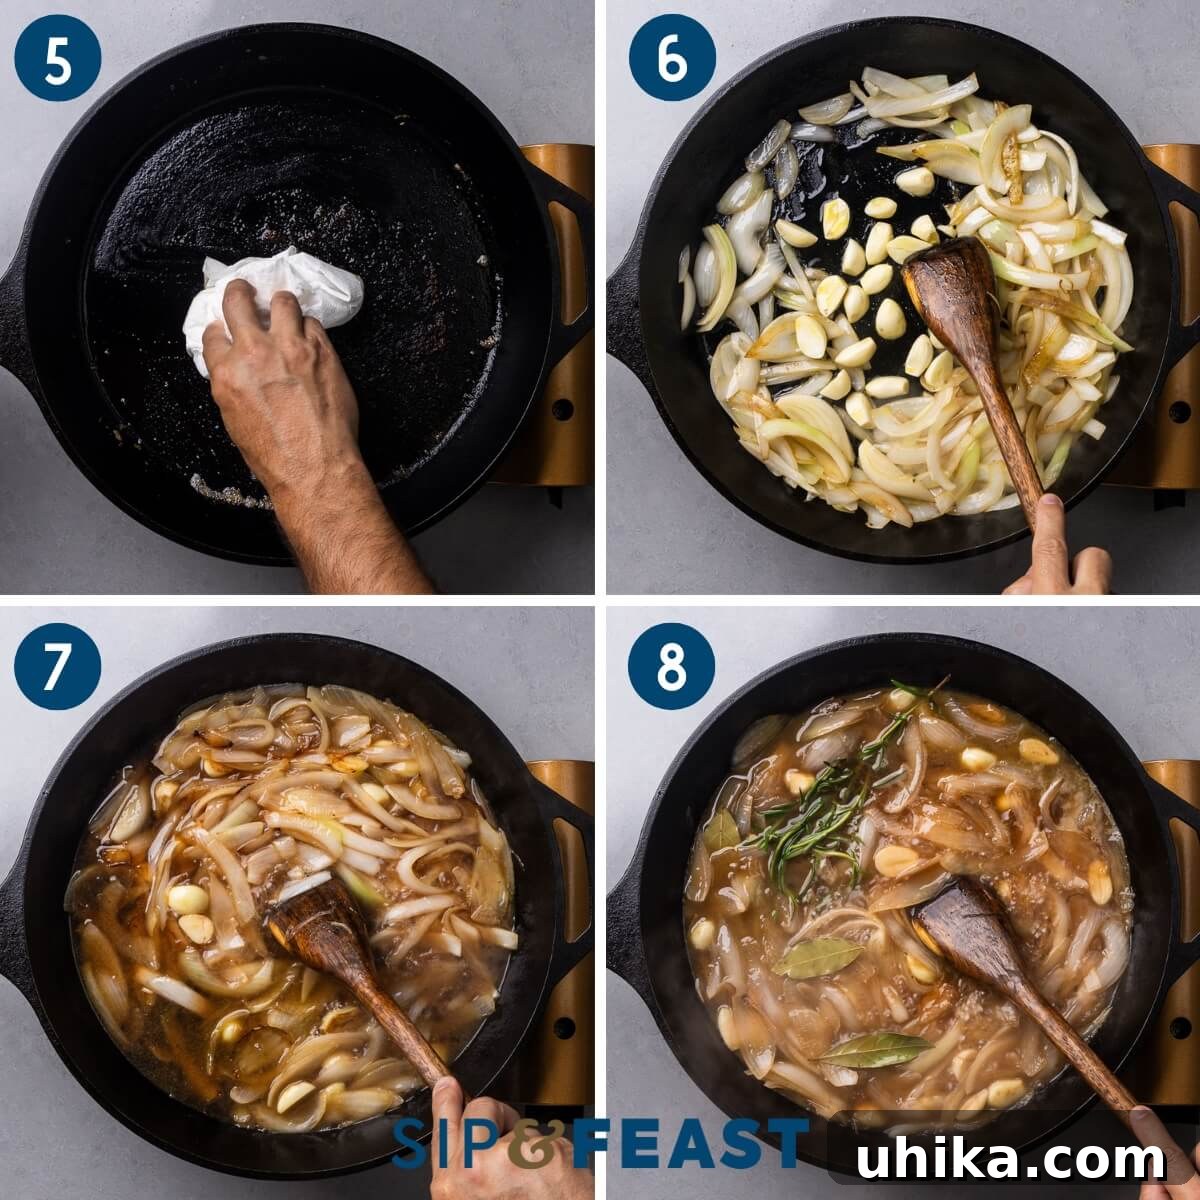
- Deglaze and Reduce the Sauce: Increase the heat to high. Pour in 1 cup of red wine vinegar, 1 1/2 cups of dry white wine, and 1 tablespoon of granulated sugar. Immediately use a wooden spoon to vigorously scrape the bottom of the pan, dislodging any flavorful browned bits (fond) that have accumulated during searing and sautéing. This crucial step, known as deglazing, adds immense depth of flavor to your sauce. Bring the liquid to a rolling boil and let it cook vigorously for about 5 minutes, allowing it to reduce by half. This reduction concentrates the flavors and cooks off some of the alcohol, creating a more intense and balanced sauce.
- Add Stock and Herbs: Carefully add 1 1/4 cups of low-sodium or rich homemade chicken stock to the reduced liquid. Incorporate the fresh 3 sprigs of rosemary and 3 large bay leaves, submerging them into the liquid to release their aromas. Bring the entire mixture back to a boil, ensuring all flavors are well combined.
- Braise the Chicken: Once the sauce is boiling, turn off the heat. Carefully arrange the seared chicken pieces back into the pan, ensuring they are skin-side-up. This helps prevent the skin from becoming soggy during braising and keeps it crispier. Cover the pan tightly with aluminum foil to trap the steam and moisture, then transfer it to your preheated oven. Bake for 20 minutes. After this initial braising, remove the foil and continue baking for an additional 10-15 minutes, or until the internal temperature of the thickest part of the chicken thighs reaches 185-195°F (85-90°C) when checked with an instant-read thermometer. This ensures the chicken is perfectly cooked, juicy, and fall-off-the-bone tender.
- Rest the Chicken: Carefully remove the pan from the oven. Using tongs, transfer the braised chicken pieces to a warm serving platter. Tent the platter loosely with foil to keep the chicken warm and allow it to rest for a few minutes. This resting period is essential as it helps the juices redistribute throughout the meat, ensuring maximum succulence and tenderness.
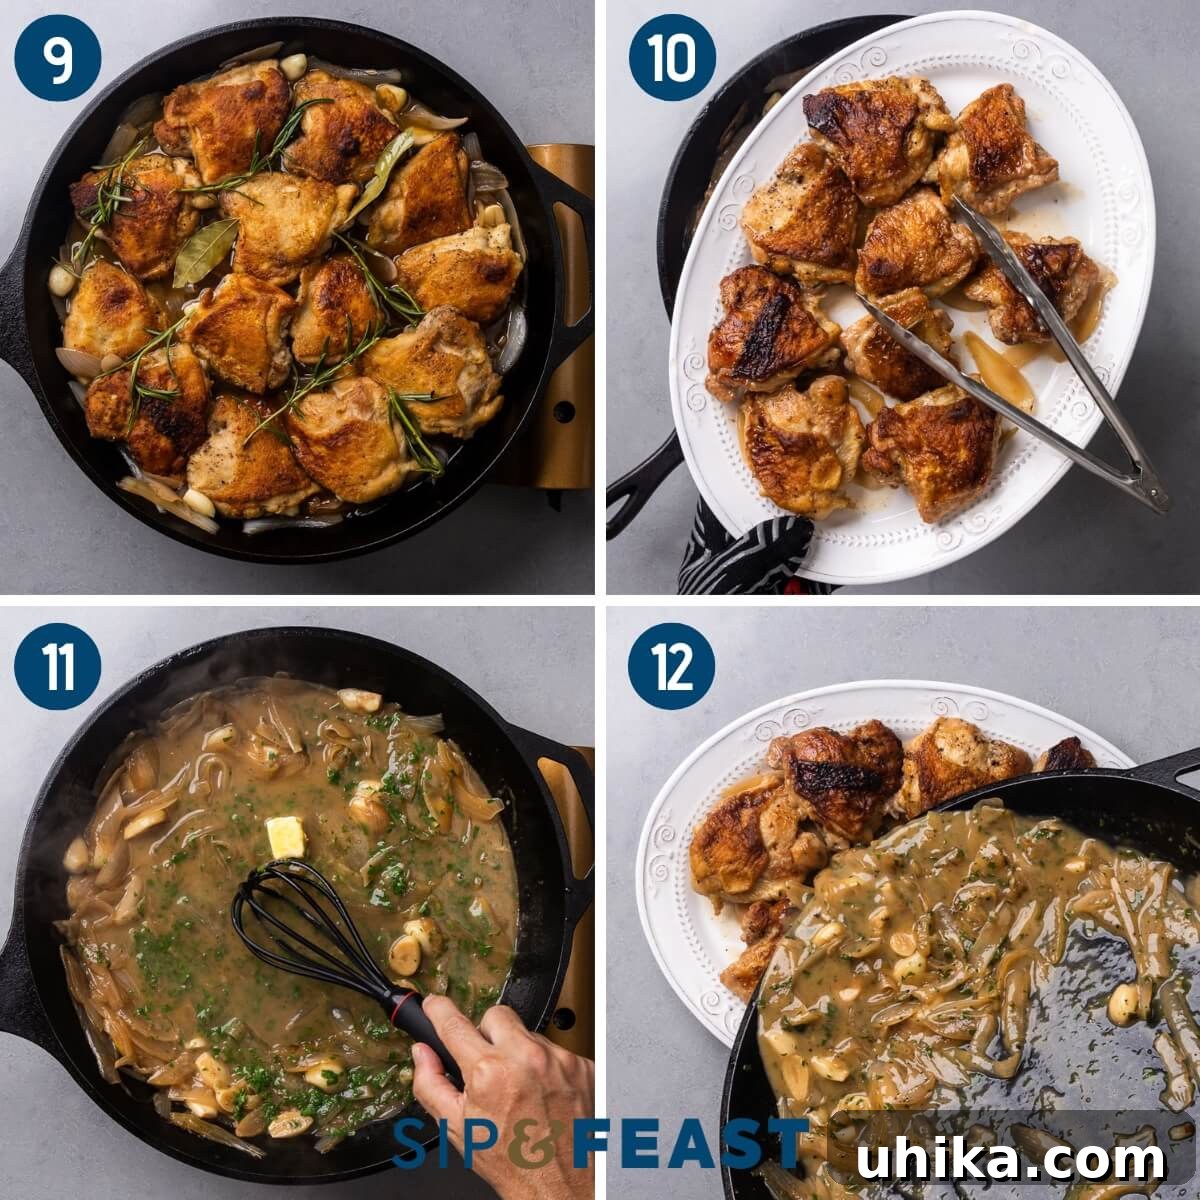
- Finish the Sauce: While the chicken rests, return your pan with the sauce to the stovetop over medium-high heat. Assess the consistency of the sauce. If it’s too thin for your preference, bring it to a gentle boil for a few minutes, stirring occasionally, to allow it to reduce and thicken slightly. Once satisfied with the thickness, turn off the heat. Carefully remove and discard the rosemary sprigs and bay leaves, as their work is done. Stir in the minced parsley for a burst of fresh flavor and color. Now, gradually whisk in the cold cubed butter, one cube at a time, until it is fully incorporated and the sauce becomes beautifully emulsified, glossy, and rich. Taste the finished sauce and adjust seasoning with additional salt and pepper as needed to achieve perfect balance.
- Serve and Enjoy: Pour the exquisite vinegar sauce generously over the rested chicken pieces on the platter. Garnish with a little extra fresh parsley if desired for a final touch of elegance. Serve immediately with your chosen side dishes and savor every delicious bite of this exceptional homemade Italian-Style Vinegar Chicken!
Expert Tips for the Best Italian Vinegar Chicken
- Embrace Homemade Chicken Stock: Whenever possible, elevate your dish by using homemade chicken stock. Not only does it offer superior flavor depth and richness compared to most store-bought varieties, but it also gives you complete control over the sodium levels in your dish. This allows you to season your dish precisely to your taste, avoiding an overly salty outcome. If homemade isn’t an option, a high-quality chicken base, such as Better Than Bouillon brand, diluted according to package directions, is an excellent second choice for a robust flavor foundation.
- Simplify Cleanup with One Pan: To make your Italian Vinegar Chicken even more convenient and minimize post-meal cleanup, opt for an oven-safe pan that can go from stovetop to oven for the entire cooking process. A sturdy 14-inch stainless steel pan works wonderfully, as does a substantial large cast iron pan. These types of pans distribute heat evenly and retain it well, contributing to a better sear and more consistent braising.
- Get Creative with Flavor: While rosemary and bay leaves provide a classic aromatic base for this vinegar chicken, don’t hesitate to personalize the flavors! The beauty of cooking lies in experimentation. For instance, I’ve had fantastic results substituting the rosemary with a kick of heat from cherry peppers, as demonstrated in a Patreon video. Consider adding other Mediterranean herbs like fresh thyme, a pinch of red pepper flakes for a subtle spice, or even a few Kalamata olives towards the end for an extra layer of briny flavor.
- Achieve the Perfect Sear: A crucial step for maximum flavor and texture is achieving a deep, golden-brown sear on your chicken thighs. Ensure your pan is sufficiently hot and, most importantly, avoid overcrowding it. Searing in batches, if necessary, guarantees that each piece develops a delicious, crispy crust. This process not only locks in moisture but also creates foundational browned bits (fond) in the pan, which are essential for building a rich and complex sauce through deglazing.
- Don’t Rush the Reduction: When you add the vinegar, wine, and sugar, it’s vital to allow the liquid to come to a rolling boil and reduce by about half. This step is indispensable for concentrating the flavors, mellowing the sharp acidity of the vinegar, and cooking off the raw alcohol notes from the wine. A properly reduced sauce will be much richer, more balanced, and intensely flavorful, forming the backbone of this delicious dish.
More Irresistible Chicken Thigh Recipes to Explore
If you’ve fallen in love with the versatility and rich flavor of chicken thighs in this recipe, you’re in for a treat! Explore these other fantastic recipes that celebrate this economical and delicious cut of chicken, perfect for any meal, from comforting classics to exciting new flavors:
- Chicken Vesuvio with Potatoes and Peas: A hearty Chicago classic featuring roasted chicken with wedges of potato, sweet peas, and a savory white wine and herb sauce.
- Chicken Fra Diavolo: For those who enjoy a bit of heat, this spicy tomato-based chicken dish, often served with pasta, is a robust and exciting option.
- 40 Clove Garlic Chicken: An intensely aromatic and deeply comforting dish, showcasing the incredible sweetness of slow-cooked whole garlic cloves alongside tender chicken.
- Rosemary Chicken with Sausage and Tomatoes: A rustic and flavorful one-pan meal, combining savory Italian sausage, tender chicken, and sweet burst tomatoes with fragrant rosemary.
- Chicken Fricassee: A timeless French classic, featuring chicken simmered in a creamy white sauce, offering elegance and comforting, delicate flavors.
Frequently Asked Questions About Italian Vinegar Chicken
- Can I use chicken breast instead of thighs?
- While chicken thighs are highly recommended for their juiciness, richer flavor, and forgiving nature during braising, you can use boneless, skinless chicken breasts. If you opt for breasts, be mindful that they cook faster and can dry out more easily. Reduce the braising time by about 10-15 minutes and ensure you check the internal temperature (165°F or 74°C) with an instant-read thermometer to prevent overcooking and keep them tender.
- What kind of red wine vinegar is best?
- A good quality red wine vinegar will truly make a difference in the final taste of your sauce. Avoid overly cheap options that can be too harsh or one-dimensional. Look for a brand with a balanced acidity and a pleasant, slightly fruity aroma. You don’t necessarily need the most expensive artisanal vinegar, but a mid-range, reputable brand will provide the best depth of flavor and smooth acidity.
- Can I make this dish ahead of time?
- Yes, Italian Vinegar Chicken is an excellent dish for meal prep as the flavors often deepen and meld beautifully overnight. Prepare the entire dish following the instructions, let it cool completely, then transfer it to an airtight container. It can be stored in the refrigerator for up to 3 days. To reheat, gently warm the chicken and sauce in an oven-safe dish, covered with foil, at 325°F (160°C) until thoroughly heated through.
- How can I thicken the sauce if it’s too thin?
- If your sauce is thinner than desired after the braising is complete, don’t worry. After removing the chicken to rest, place the pan containing the sauce back on the stovetop over medium-high heat. Bring the sauce to a vigorous simmer and let it reduce for a few minutes, stirring occasionally, until it reaches your preferred consistency. The final addition of cold butter (Step 11 in the recipe card) will also help to emulsify and slightly thicken the sauce, adding a luxurious finish.
- Can this recipe be made without alcohol?
- Yes, you can certainly adapt this recipe to be alcohol-free. Substitute the dry white wine with an equal amount of additional low-sodium chicken stock or a good quality non-alcoholic white wine alternative. While the flavor profile will be slightly different, it will still result in a delicious and comforting meal. You might want to add a touch more red wine vinegar or a squeeze of fresh lemon juice at the end to compensate for the wine’s acidity and complexity.
If you’ve savored this Italian-Style Vinegar Chicken Recipe or discovered any other culinary gems on our site, please consider showing your appreciation by leaving a 5-star rating and sharing your thoughts in the comments below. Your feedback truly helps us grow and inspires future recipes!
We understand that everyone learns differently. If you are someone who prefers to watch and learn, you’ll be delighted to find most of our recipes showcased with engaging video tutorials on our YouTube channel and Facebook Page. Don’t forget to subscribe!
For exclusive, never-before-seen FULL MEAL RECIPE VIDEOS, behind-the-scenes content, and to support our culinary journey, we invite you to become a Patreon member today! Join our community and unlock even more delicious inspiration.
Italian-Style Vinegar Chicken Recipe
by James Delmage
5 from 14 votes
Prep Time: 15 mins
Cook Time: 1 hr 15 mins
Total Time: 1 hr 30 mins
Servings: 6
Pin
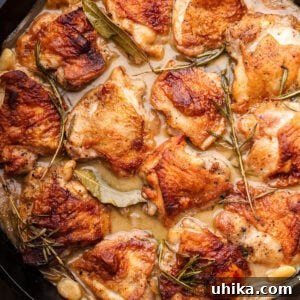
Italian Vinegar Chicken is a flavorful dish that combines chicken thighs that are seared and then braised until tender in a delicious white wine and vinegar sauce with onions, garlic, and herbs.
Ingredients
- 1/4 inch neutral oil (for frying the chicken)
- 4 pounds chicken thighs, trimmed of overhanging fat
- 2 teaspoons Diamond Crystal kosher salt
- 1 teaspoon black pepper
- 1 cup all-purpose flour (for dredging only)
- 1/4 cup olive oil
- 2 large white onions, sliced root to stem 1/4″ thick
- 12 cloves garlic, halved
- 1 cup red wine vinegar
- 1 1/2 cups dry white wine (e.g., Sauvignon Blanc or Pinot Grigio)
- 1 tablespoon granulated sugar
- 1 1/4 cups low-sodium chicken stock
- 3 sprigs rosemary
- 3 large bay leaves
- 3 tablespoons unsalted cold butter, cubed
- 1/4 cup minced flat-leaf Italian parsley
Want To Save This Recipe?
Enter your email and we’ll send it to you. Plus, get great new recipes from us every week!
Instructions
- Preheat oven to 350°F (175°C) and set the rack to the middle level.
- Dry off the chicken pieces thoroughly with paper towels and season generously with salt and pepper. Dredge the chicken in flour, shake off the excess, and place onto a parchment paper-lined baking sheet.
- Heat a large oven-safe pan (cast iron or heavy stainless steel) over medium heat with a 1/4 inch of neutral oil (vegetable, avocado, etc.). Once the oil is shimmering, add the chicken pieces skin-side down. Sear until golden (about 5 minutes), then flip and cook for another 3 minutes or so. Place the seared chicken onto a plate and repeat with any remaining pieces, working in batches to avoid overcrowding the pan.
- Pour out the frying oil and carefully wipe down the pan to remove any browned bits. Add the olive oil along with the sliced onions and a pinch of salt. Sauté the onions until soft (about 7-10 minutes), adding a splash of water if they start to burn or stick. Once soft, add the halved garlic and cook for another 3-5 minutes, or until fragrant and lightly golden.
- Next, add the red wine vinegar, dry white wine, and granulated sugar. Turn the heat to high. Use a wooden spoon to scrape the bottom of the pan, loosening any flavorful brown bits (fond). Bring to a boil and let it reduce by about half, cooking for 5 minutes.
- Add the chicken stock, rosemary sprigs, and bay leaves and bring the sauce back to a boil. Once boiling, turn off the heat and carefully arrange the seared chicken pieces back into the pan, skin-side up. Cover the pan tightly with foil and place in the preheated oven. Bake for 20 minutes. Then, remove the foil and continue to cook for an additional 10-15 minutes, or until the chicken thighs reach an internal temperature of 185-195°F (85-90°C) when checked with an instant-read thermometer.
- Remove the pan from the oven and transfer the chicken pieces to a serving platter, tenting them loosely with foil to keep warm. Check the consistency of the sauce. If it is too thin for your liking, place the pan back on a burner over medium-high heat and bring to a boil for a few minutes, allowing it to reduce and thicken.
- Once satisfied with the sauce consistency, turn off the heat. Remove and discard the rosemary sprigs and bay leaves. Stir in the minced parsley. Whisk in the cold cubed butter, one cube at a time, until the sauce is smooth, glossy, and emulsified. Taste the sauce and season with additional salt and pepper if required. Pour the delicious sauce generously over the chicken and serve immediately. Enjoy your homemade Italian-Style Vinegar Chicken!
Notes
- Chicken Thighs: For the best results, chicken thighs (bone-in, skin-on) are highly recommended due to their juiciness and forgiving nature during cooking. If using boneless, skinless thighs, aim for 2.5-3 pounds and be aware that cooking times may be slightly shorter.
- Sauce Thickness: While instructions include how to thin the sauce, it often thickens perfectly on its own during reduction. Only reduce further if you prefer a thicker consistency after the braising stage.
- Storage & Reheating: Leftovers can be stored in an airtight container in the refrigerator for up to 3 days. To reheat, place the chicken and sauce in an oven-safe dish, cover with foil, and warm at 325°F (160°C) until heated through, ensuring even heating.
Nutrition Information (Approximate per serving)
Calories: 525 kcal | Carbohydrates: 27g | Protein: 43.6g | Fat: 24.4g | Saturated Fat: 7.7g | Cholesterol: 145mg | Sodium: 557mg | Potassium: 451mg | Fiber: 0.9g | Sugar: 18.4g | Calcium: 36mg | Iron: 2mg
Nutrition information is automatically calculated and should be used as an approximation. Individual results may vary.
Enjoyed This Recipe? Leave a Comment!
Connect with us on Instagram at @sipandfeast or share your creations using #sipandfeast!