
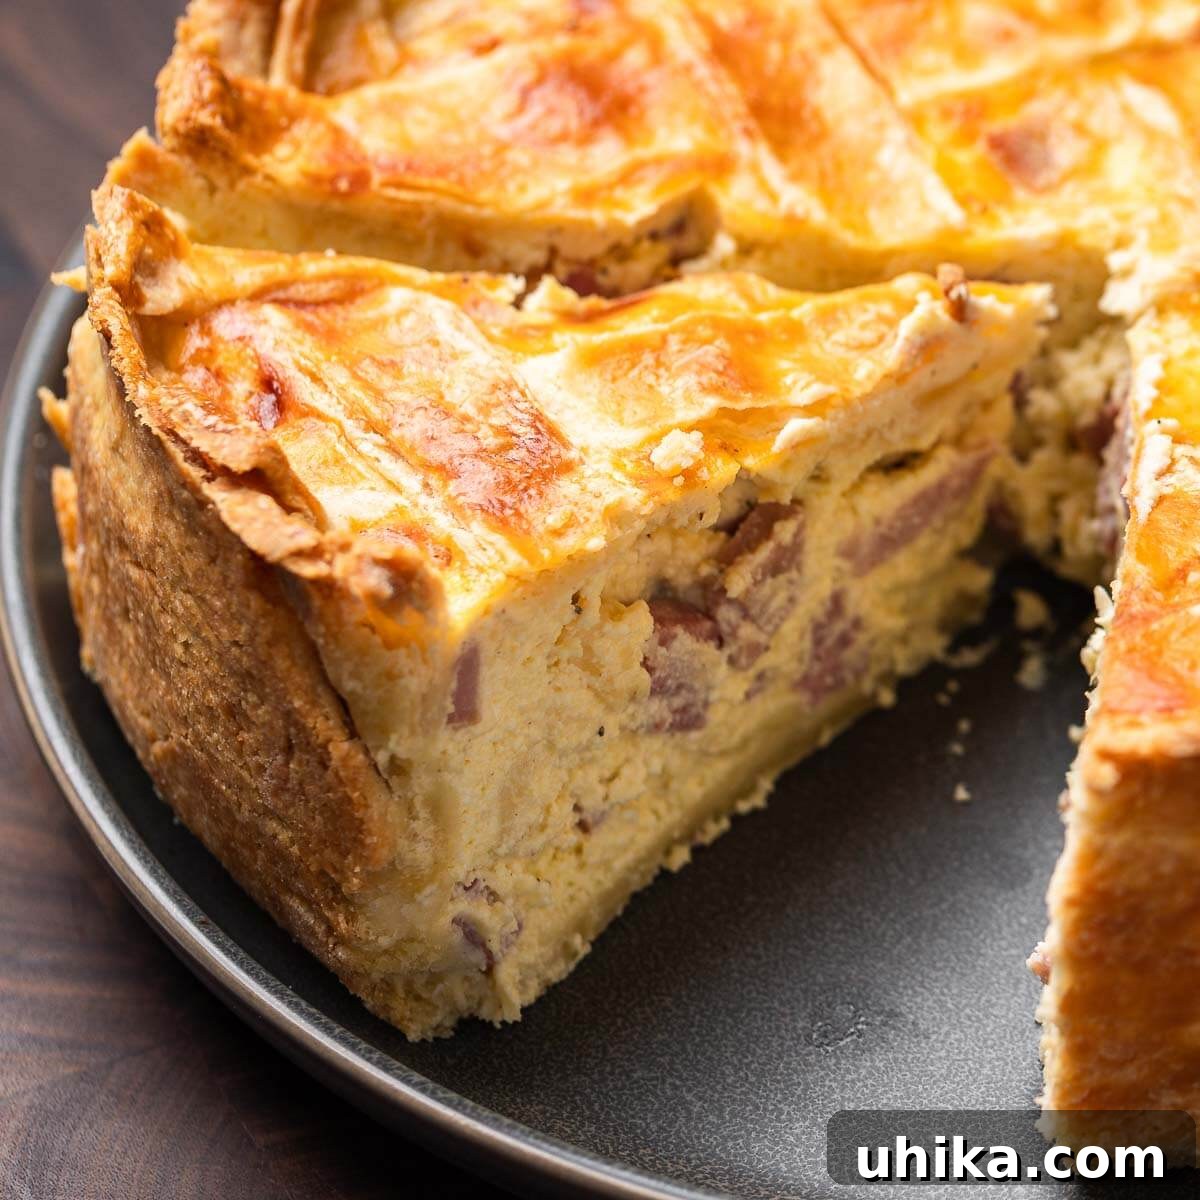
Pizzagaina, also known as Easter Pie, Pizza Rustica, Pizza Chiena, or Pizza Gain, is a magnificent savory meat pie that takes center stage at Italian and Italian-American Easter celebrations. This impressive dish features a rich, homemade flaky pie crust generously filled with a creamy blend of ricotta, mozzarella, Pecorino Romano, and provolone cheeses, alongside savory cured meats like mortadella and salami. A substantial slice of this traditional Easter pie is not just a meal; it's a cherished ritual, marking the joyous end of the Lenten fast and ushering in the festive spirit of Easter morning.
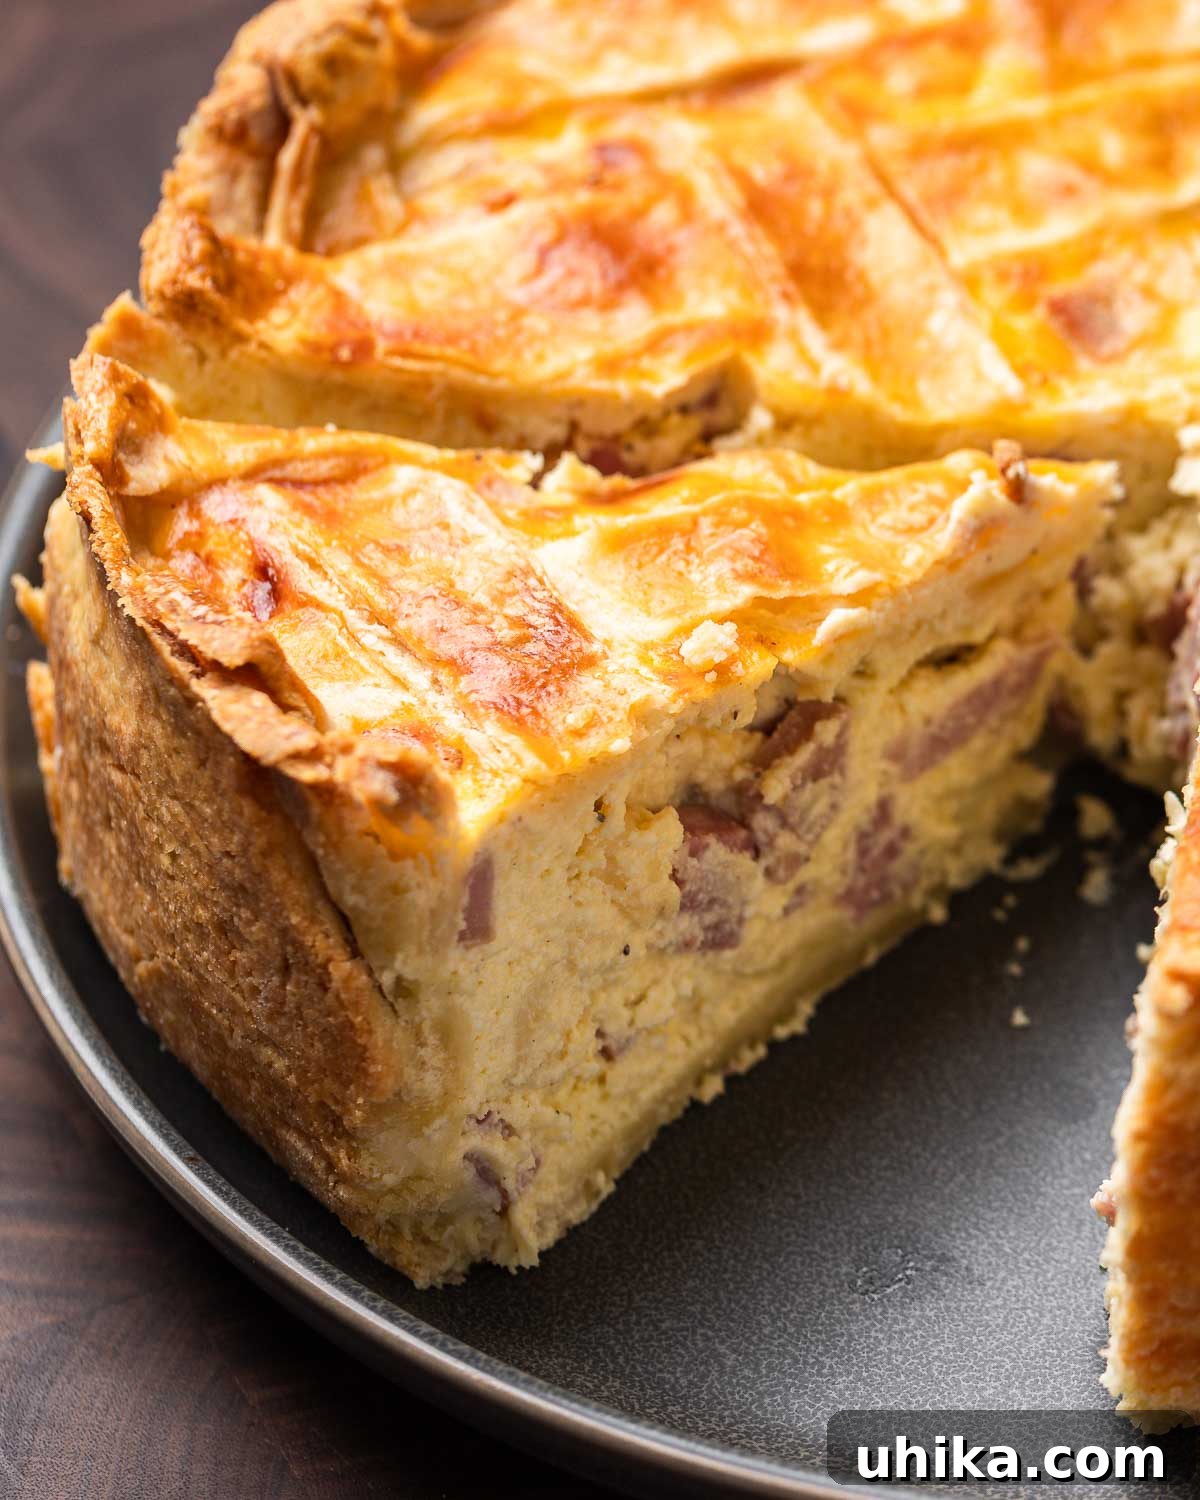
The Enduring Legacy of Pizzagaina: A Beloved Easter Tradition
For centuries, Pizzagaina has been more than just a recipe; it's a cornerstone of Easter tradition for countless Italian and Italian-American families. Rooted deeply in Catholic customs, the preparation and consumption of this savory pie are intrinsically linked to the observance of Lent and the joyous celebration of the Resurrection. Understanding its cultural context enriches every bite.
Origins and Cultural Significance
The majority of Italians and Italian-Americans adhere to Catholic traditions, which include observing certain customs during the Lenten season. This period, typically lasting 40 days, often involves fasting and abstinence, particularly from meat on Fridays, and for some, throughout the entire duration. Pizzagaina, or Pizza Rustica, is meticulously prepared to commemorate the culmination of this solemn period of reflection and sacrifice.
Traditionally, this elaborate pie is prepared on Good Friday, one of the holiest days in the Lenten calendar. However, it is not meant to be eaten immediately. The anticipation builds, as families patiently wait until Easter morning, after the Lenten fast has officially concluded, to partake in its rich and satisfying flavors. This act of waiting transforms the pie from a mere dish into a symbol of renewed life, abundance, and the breaking of the fast.
For many, there is no better way to break the Lenten fast and celebrate the resurrection of Christ than with a glorious, hearty slice of Easter pie, brimming with a delightful medley of meats and cheeses. It’s a dish that signifies coming together, sharing joy, and savoring the flavors of tradition.
Decoding the Names: Pizzagaina, Pizza Rustica, and More
The array of names for this beloved Easter pie—Pizzagaina, Pizza Rustica, Pizza Chiena (meaning "full pie"), and Pizza Gain—speaks to its widespread popularity and the regional variations across Italy and within Italian-American communities. While the name might change, the essence remains the same: a deeply satisfying, savory pie bursting with rich fillings, designed to be enjoyed during one of the most significant holidays of the year. Whether you call it Pizzagaina or Pizza Rustica, you're referring to the same cherished culinary masterpiece.
Crafting Your Homemade Flaky Pie Crust for Pizzagaina
The foundation of an exceptional Pizzagaina lies in its flaky, buttery crust. This homemade dough provides the perfect counterpoint to the rich, savory filling, creating a harmonious balance of textures and flavors. While it may seem daunting, the process is straightforward and incredibly rewarding.
Ingredients for the Perfect Dough
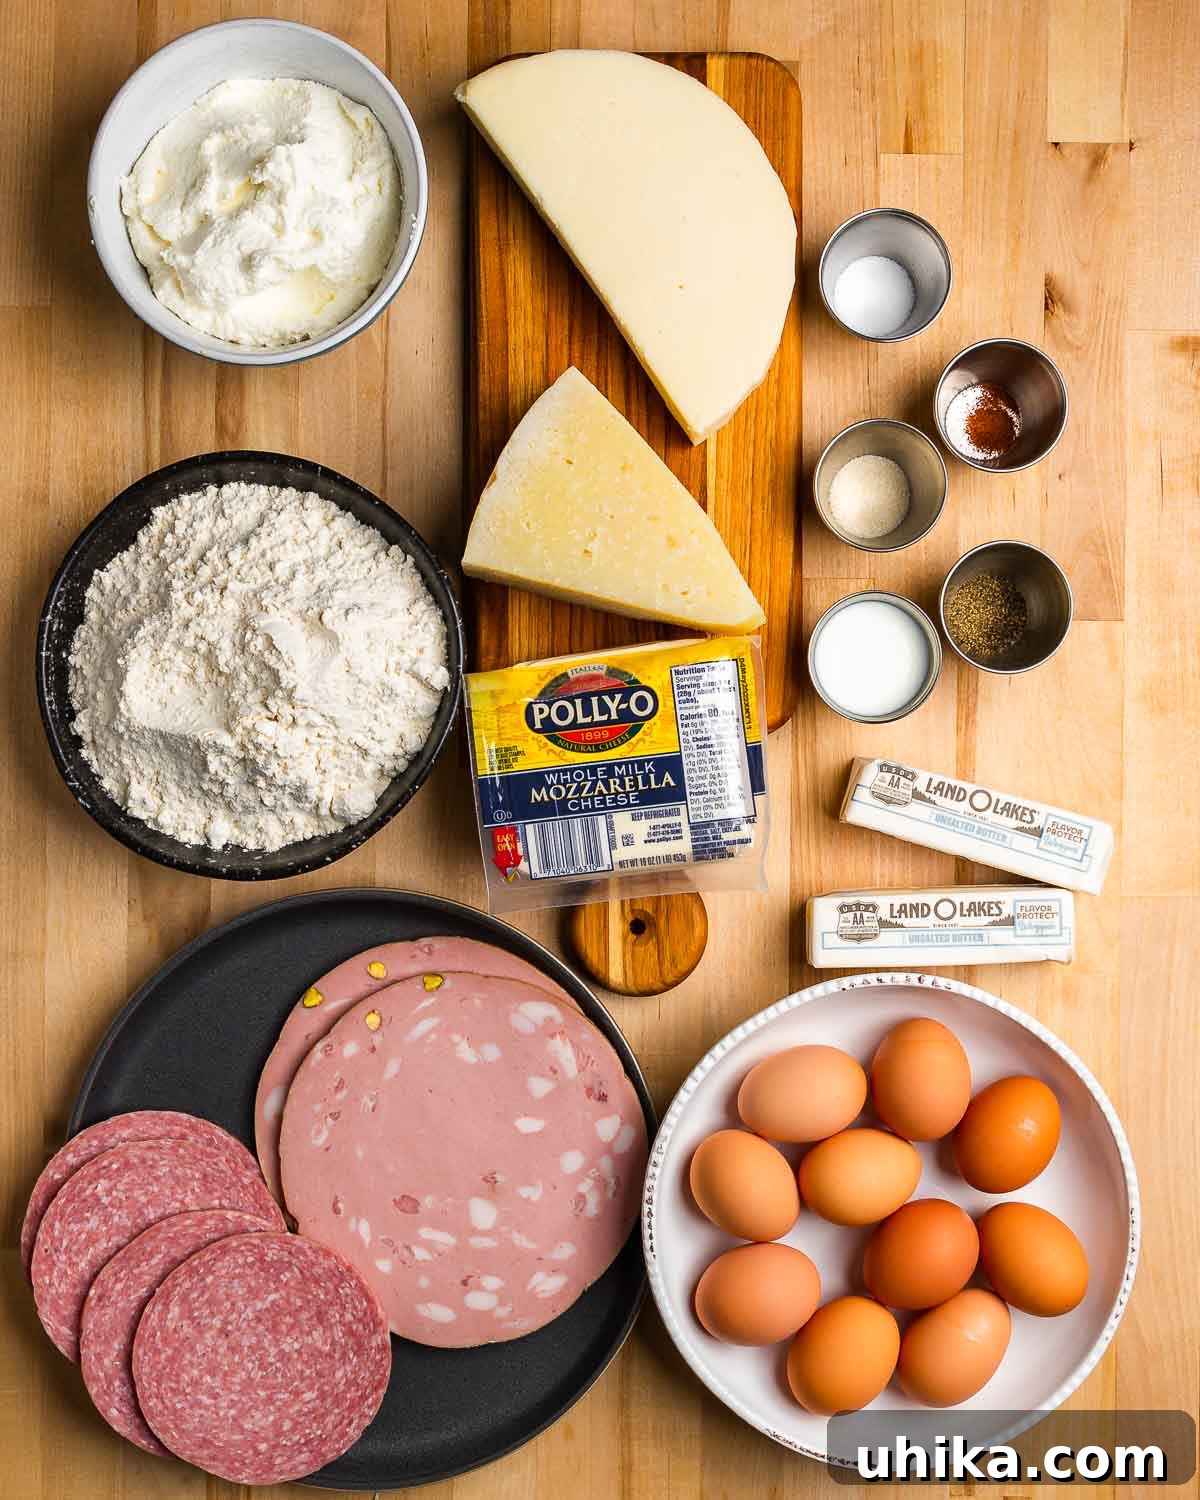
- 3 1/2 cups (450 grams) all-purpose flour
- 2 sticks cold unsalted butter, cubed
- 1/3 cup milk
- 2 large eggs
- 1 teaspoon fine sea salt
- 1 teaspoon sugar
Step-by-Step Dough Preparation
- **Combine Dry Ingredients:** Begin by adding 450 grams (approximately 3 1/2 cups) of all-purpose flour to the bowl of a food processor. Add 1 teaspoon of fine sea salt and 1 teaspoon of sugar. Pulse briefly to ensure these dry ingredients are thoroughly mixed. This initial step ensures even distribution of flavor throughout the dough.
- **Incorporate Cold Butter:** Next, add 2 sticks of cold butter, cut into small cubes, to the flour mixture. Pulse for about 20-30 seconds. The goal here is to cut the butter into the flour until the mixture is well incorporated but still crumbly. You should observe small, coarse pieces of butter mixed with a grainy, floury texture. This is crucial for achieving a truly flaky crust. If you don't have a food processor, you can use a pastry cutter or even your fingertips to work the cold butter into the flour, taking care not to overwork it.
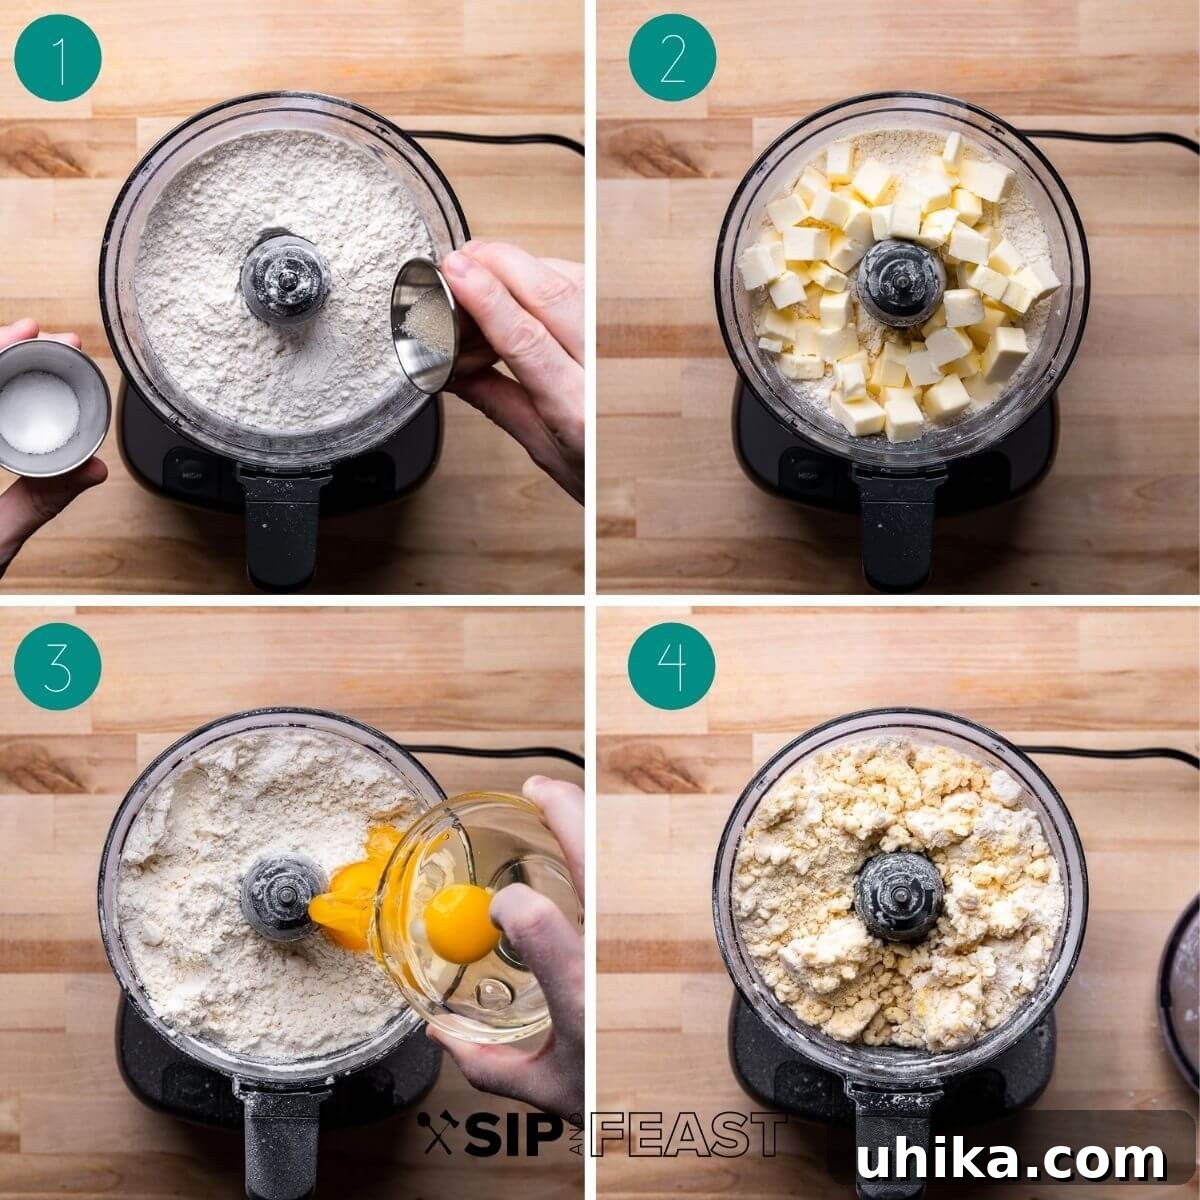
- **Add Wet Ingredients:** Introduce 2 large eggs and 1/3 cup of milk to the food processor.
- **Form the Dough:** Pulse again until a loose, shaggy mass of dough begins to form. At this stage, it will appear somewhat messy, but that's perfectly normal and desired.
- **Light Kneading:** Transfer the dough onto a lightly floured work surface. Knead the dough for only a few seconds – just enough to bring it together into a cohesive, stuck-together mass. Avoid over-kneading, as this can develop the gluten too much, resulting in a tough rather than flaky crust.
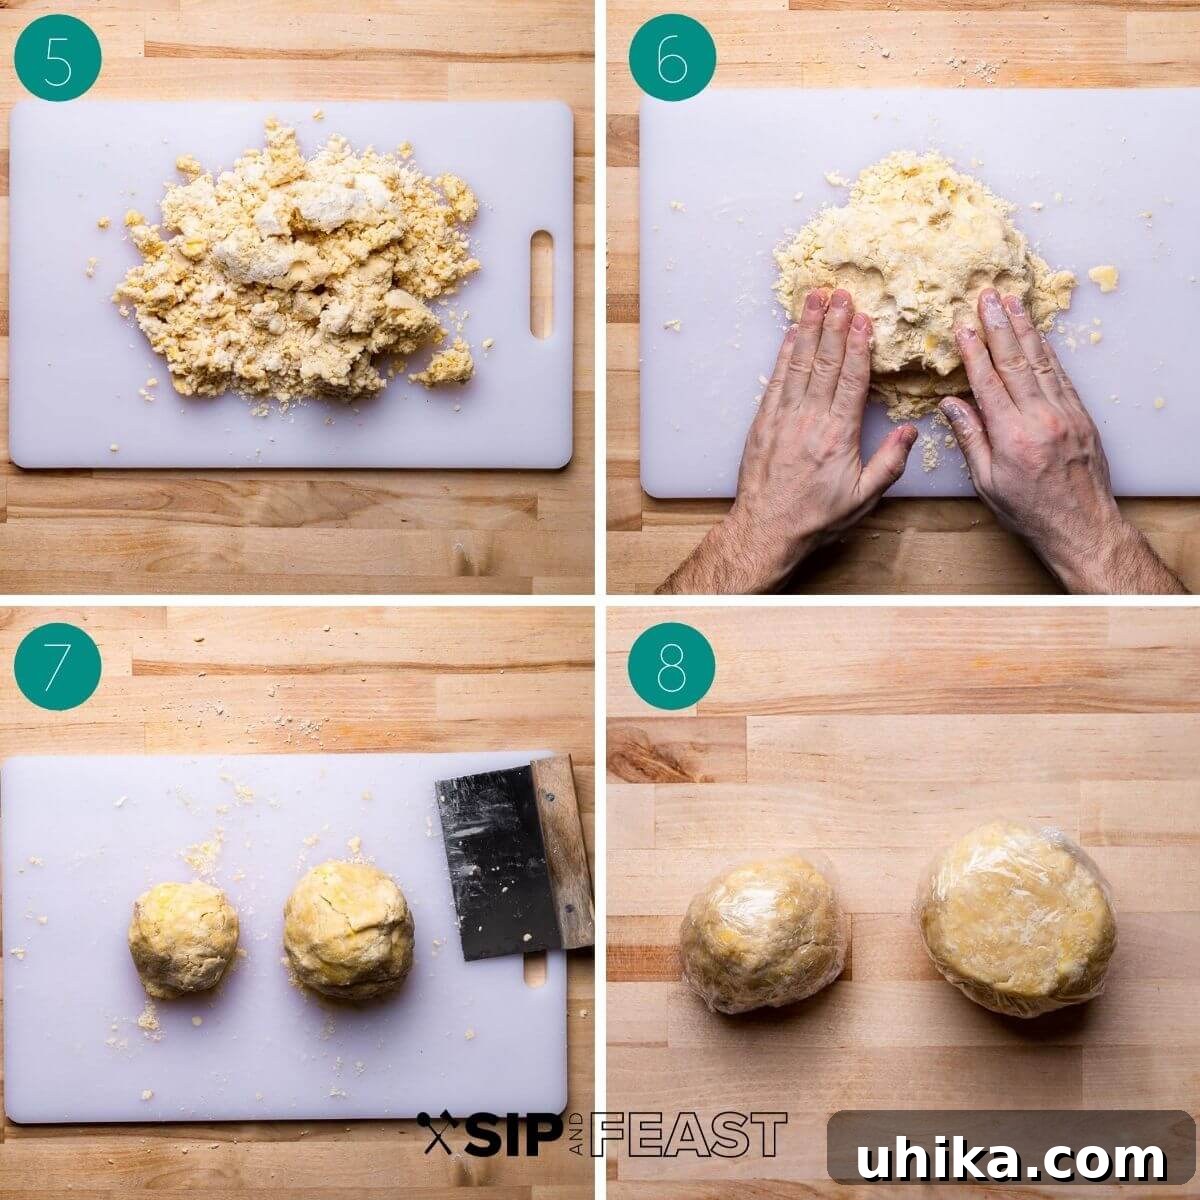
- **Divide and Chill:** Divide the dough into two distinct pieces. Form one larger ball using approximately two-thirds of the dough, which will serve as the base for your pie. The remaining one-third should be shaped into a smaller ball, destined for the top crust.
- **Refrigerate:** Wrap both dough balls tightly in plastic wrap to prevent them from drying out. Refrigerate for at least 1 hour before you plan to use them. Chilling the dough allows the butter to firm up and the gluten to relax, which is essential for a tender, flaky crust. For convenience, this dough can be prepared up to 1 day in advance.
The Heart of the Pie: A Rich and Savory Filling
The filling is where Pizzagaina truly shines, offering a delightful combination of creamy cheeses and robust cured meats. This savory blend provides a satisfying contrast to the delicate crust.
Essential Ingredients for the Filling
- 2 pounds ricotta, drained overnight (or well-drained)
- 7 large eggs
- 1/4 teaspoon nutmeg
- 1/2 teaspoon fresh black pepper
- 1 cup prosciutto, cut into 1/4-inch cubes
- 1 cup mortadella, cut into 1/4-inch cubes
- 1 cup Genoa salami, cut into 1/4-inch cubes
- 3/4 cup mozzarella, cut into 1/4-inch cubes
- 3/4 cup provolone, cut into 1/4-inch cubes
- 3/4 cup Pecorino Romano, grated
Mixing the Flavors
- **Prepare the Meats and Cheeses:** Begin by preparing your chosen meats and cheeses. Cut 1 cup each of prosciutto, mortadella, and salami into 1/4-inch cubes. Similarly, cube 3/4 cup each of mozzarella and provolone to the same size. Grate 3/4 cup of Pecorino Romano cheese.
**Note on Customization:** Feel free to personalize your pie! Soppressata, capocollo, ham, or even cubed turkey can be excellent additions or substitutions for the meats. For cheeses, consider smoked mozzarella, caciocavallo, fontina, or scamorza. Traditionally, basket cheese is sometimes used, but it can be difficult to find; use what's readily available to you for delicious results. - **Combine Creamy Base:** In a very large mixing bowl, combine 2 pounds of ricotta cheese (ensure it has been well-drained, ideally overnight, to prevent a watery filling), 7 large eggs, 1/4 teaspoon of nutmeg, and 1/2 teaspoon of fresh black pepper. Whisk these ingredients thoroughly until they are fully incorporated and the mixture is smooth and consistent. Nutmeg adds a subtle warmth that beautifully complements the savory elements.
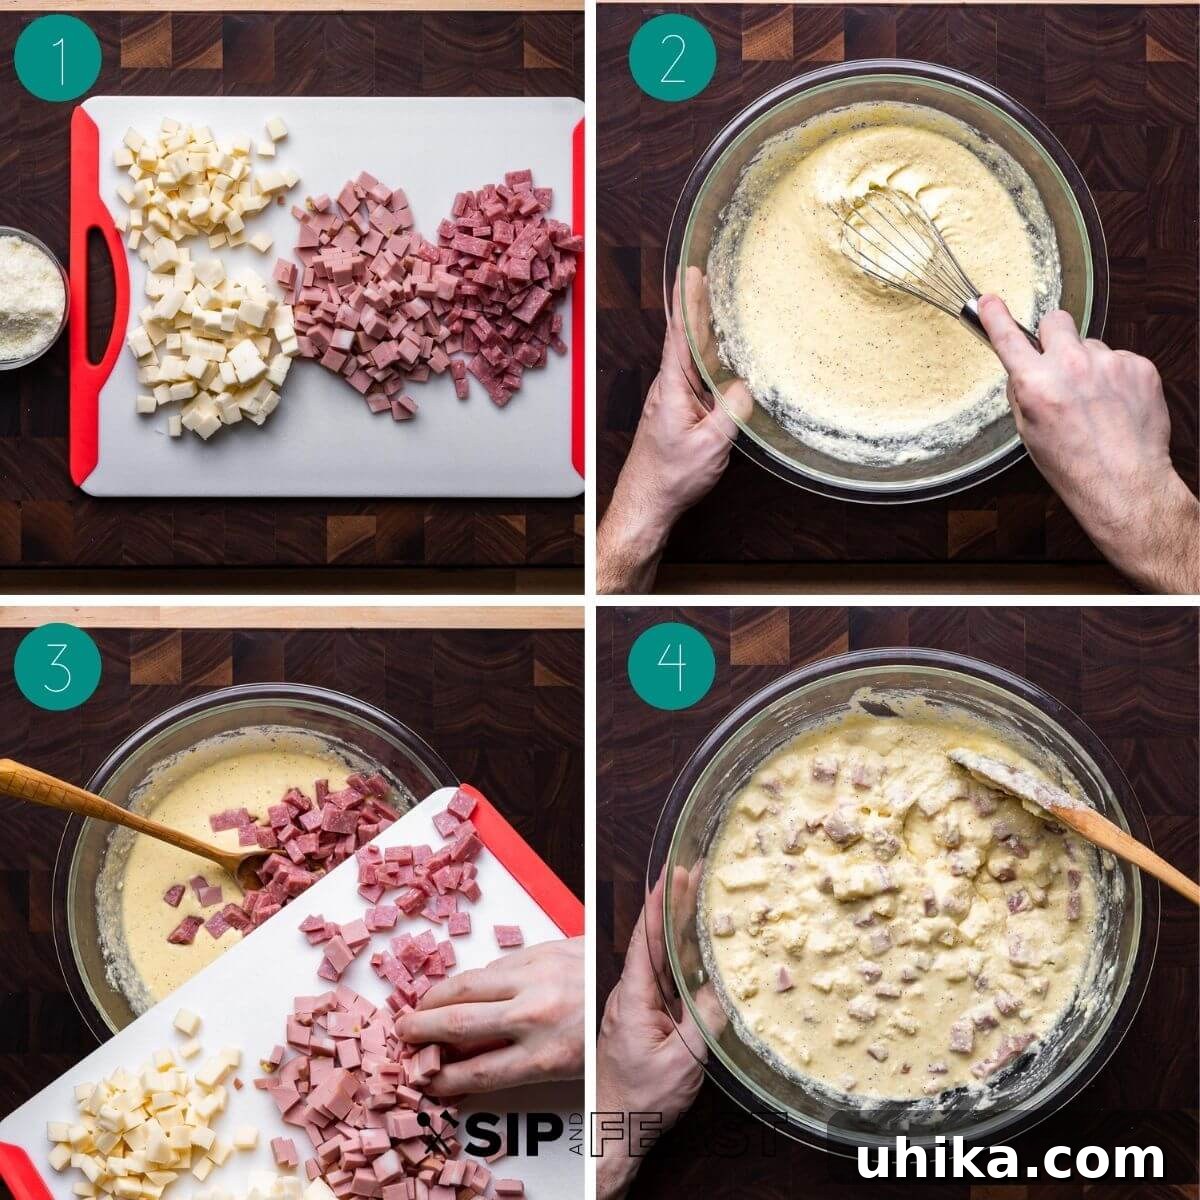
- **Integrate Meats and Cheeses:** Add all of your prepared cubed meats (prosciutto, mortadella, salami) and cheeses (mozzarella, provolone, Pecorino Romano) to the ricotta mixture in the large bowl.
- **Final Mix:** Mix all the ingredients well until everything is evenly distributed. Once thoroughly combined, set the Easter pie filling aside while you prepare the crust.
Assembling Your Easter Masterpiece
Assembling the Pizzagaina is where all your preparations come together. Careful handling of the dough and a thoughtful approach to layering will ensure a beautiful and delicious pie.
Preparing the Springform Pan
Before you begin rolling the dough, prepare your baking vessel. Preheat your oven to 375°F (190°C). Position one oven rack to the lowest level and a second rack to the middle level. Generously grease a 9x3-inch springform pan with butter or lard. A helpful tip for easier removal of the pie after baking is to place the bottom of the springform pan with the cup side facing down. This creates a slightly raised edge that makes lifting the finished pie much simpler.
Rolling and Lining the Bottom Crust
- **Soften Dough Slightly:** Remove the larger dough ball from the refrigerator about 10-15 minutes before you intend to roll it out. This brief resting period allows the dough to soften slightly, making it more pliable and preventing it from cracking during rolling.
- **Roll the Base:** On a lightly floured work surface, use a floured rolling pin to roll out the larger dough ball.
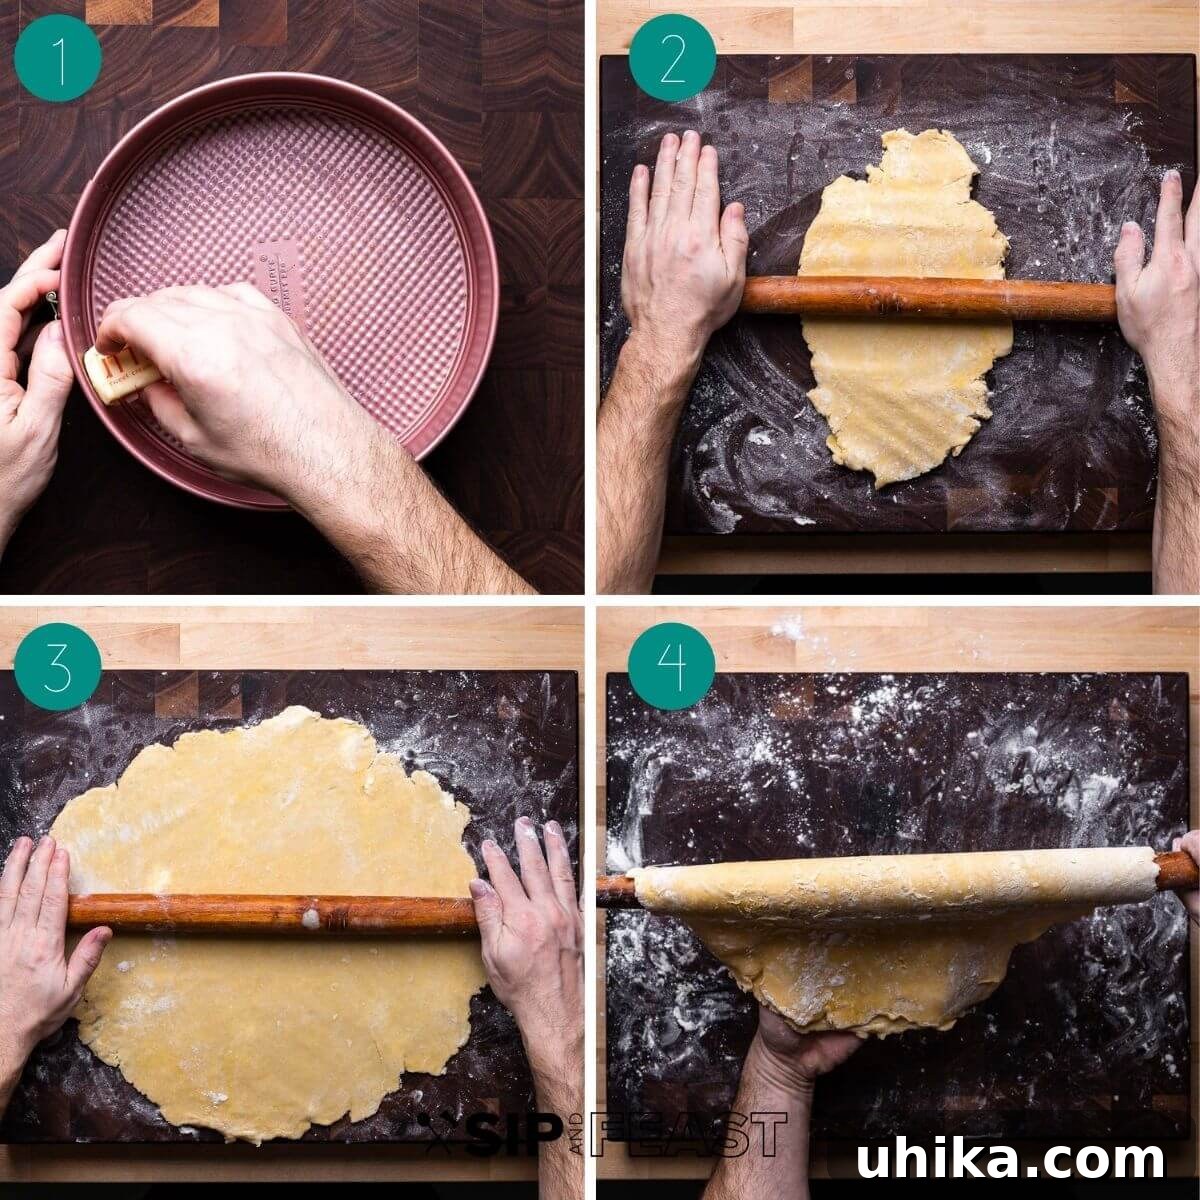
- **Achieve Desired Thickness and Size:** Roll the dough into a circular shape, aiming for approximately 1/4-inch thickness and about 15 inches in diameter. This size should provide enough overhang for the springform pan.
- **Transferring the Dough:** To make transferring the dough easier, gently drape it over your rolling pin.
- **Center and Place:** Carefully bring the dough to your prepared springform pan and center it, ensuring it will fall evenly into the pan.
- **Gently Settle the Dough:** Gently ease the dough into the pan, allowing it to conform to the contours of the bottom and sides.
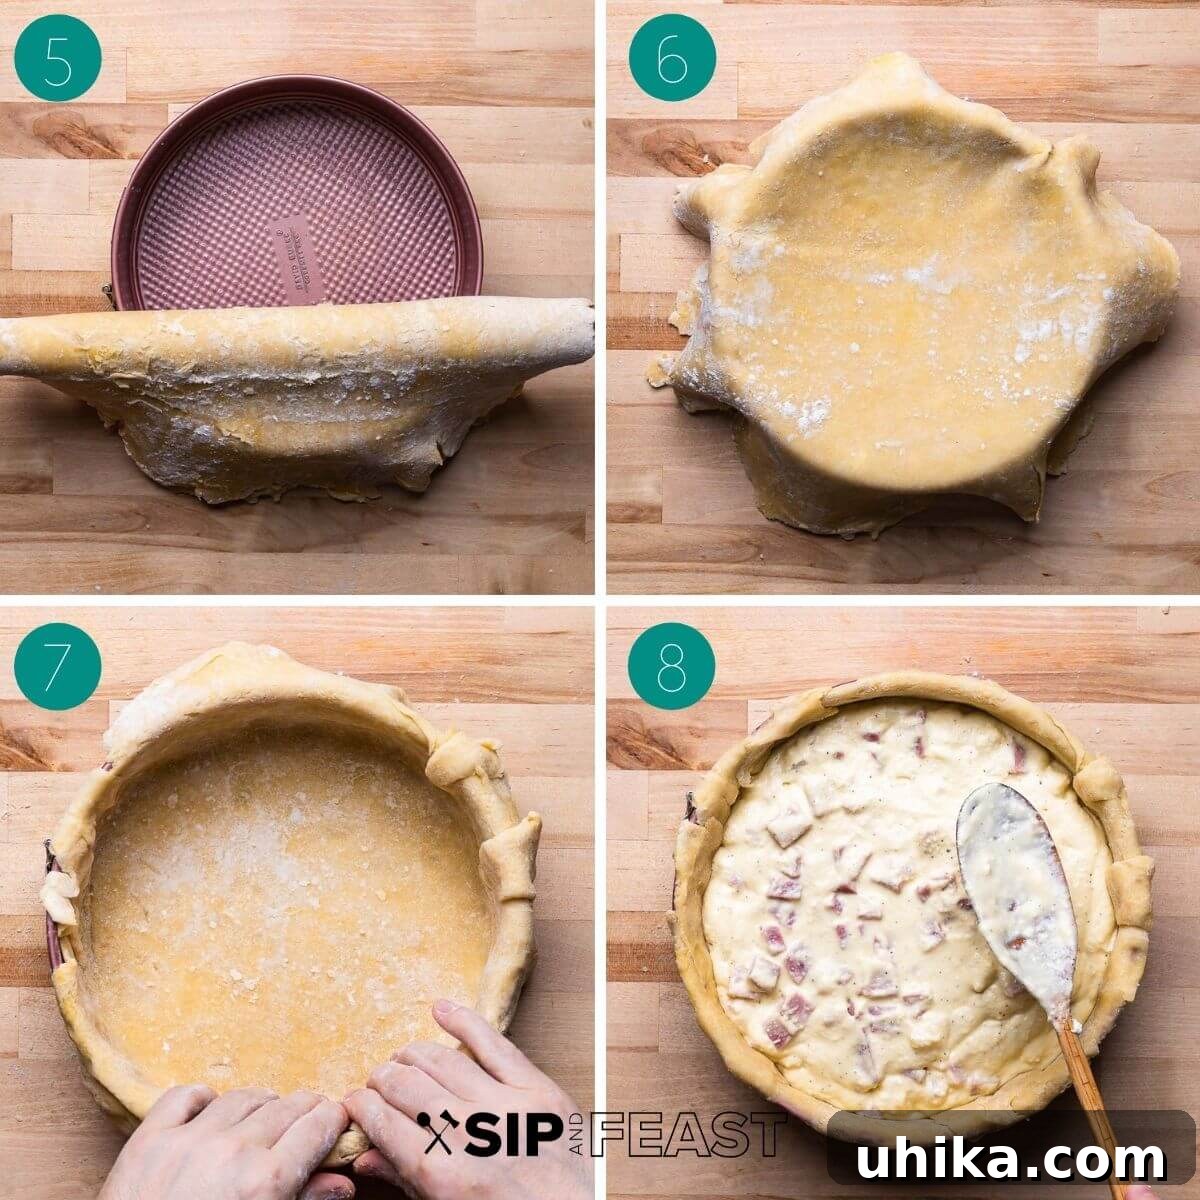
- **Trim and Patch:** Neatly tuck in the edges of the dough so that it completely fits the interior of the pan, forming a solid base and sides. Trim off any excess overhanging dough. If you notice any small holes or thin spots in your dough, simply use some of the trimmed excess dough to create patches, gently pressing them into place to seal.
Filling the Pie
- **Pour the Filling:** Carefully pour the prepared savory filling into the dough-lined pie pan. Be sure to leave at least 1/4 inch of space from the top rim unfilled; this allows for some expansion during baking without overflowing. If necessary, use a spatula to gently level out the filling for an even bake.
Topping and Baking Your Pizzagaina to Golden Perfection
The final steps involve creating the top crust and baking your Pizzagaina to a beautiful golden brown, ensuring a perfectly cooked and settled interior.
The Decorative Top Crust: Lattice or Solid
- **Prepare the Top Dough:** Roll out the second, smaller dough ball into a circle that is slightly larger than the top of your pie pan. Now, you have a choice for the top crust: you can either cut this dough into 1-inch wide strips to create an elegant lattice design, or you can opt for a simpler, solid top crust.
- **Forming the Lattice (or Solid Top):** If creating a lattice, carefully arrange the 1-inch wide dough strips in an interwoven pattern, about 1 inch apart, across the top of the pie. Ensure you slightly overlap the dough strips where they meet the edges of the pie to help them stay securely in place during baking. Use your fingers or a fork to gently press the edges of the strips down into the bottom crust, sealing them together. If needed, a tiny bit of water can act as a natural "glue" to help the strips adhere to the sides. Trim off any excess dough hanging over the pan's edge. If you chose a solid top crust, simply lay the rolled-out dough over the filling and trim the edges, making sure to cut a small slit or two in the center to allow steam to escape during baking.
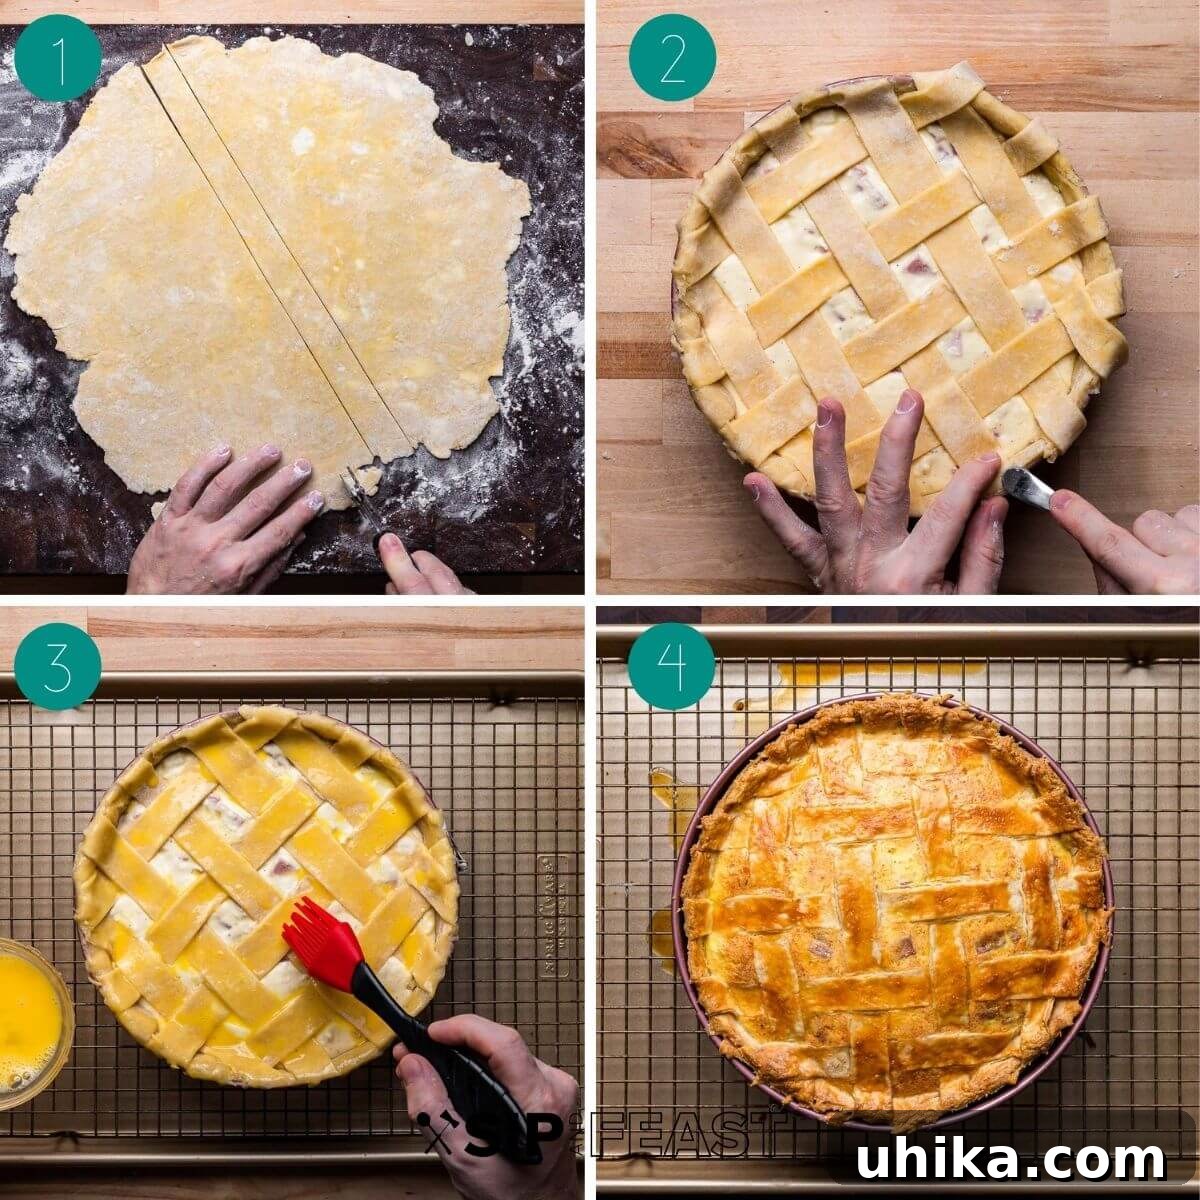
- **Egg Wash:** In a small bowl, beat 1 large egg yolk with 1-2 teaspoons of water. Gently brush this egg wash over the entire top crust of the pie. This will give your Pizzagaina a beautiful golden sheen and help seal the crust.
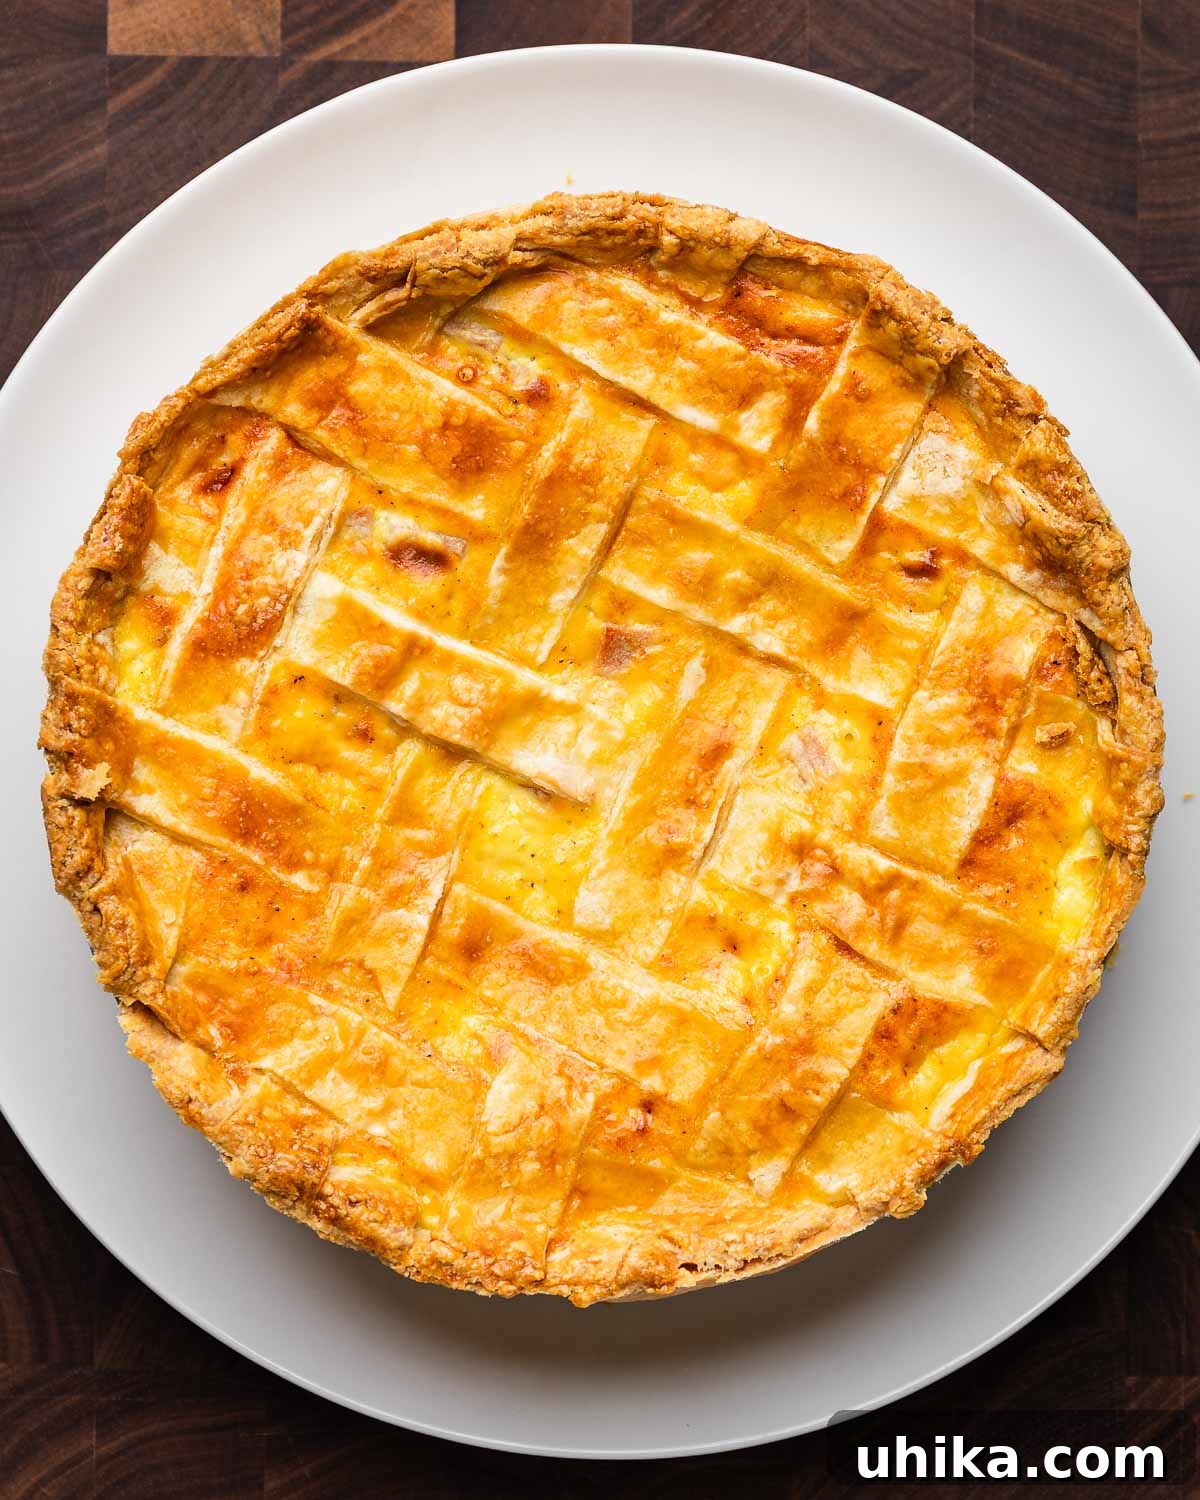
- **Baking Process:** Place the pie on the lowest rack in your preheated 375°F (190°C) oven and bake for 20 minutes. After this initial bake, carefully move the pan up to the middle rack. Continue baking for an additional 40-50 minutes, bringing the total bake time to approximately 60-70 minutes. Keep an eye on the pie at the halfway point; if the crust appears to be browning too quickly, loosely cover the top with aluminum foil to prevent over-browning. The pie is done when the top crust is a rich golden brown and the filling is set.
- **Cooling and Setting:** Once baked to perfection, remove the Pizzagaina from the oven and transfer it to a wire rack to cool completely. It is crucial to let the pie cool for at least 2 hours before attempting to remove the sides of the springform pan. This cooling period allows the cheese filling to set properly, preventing it from collapsing or becoming runny when sliced.
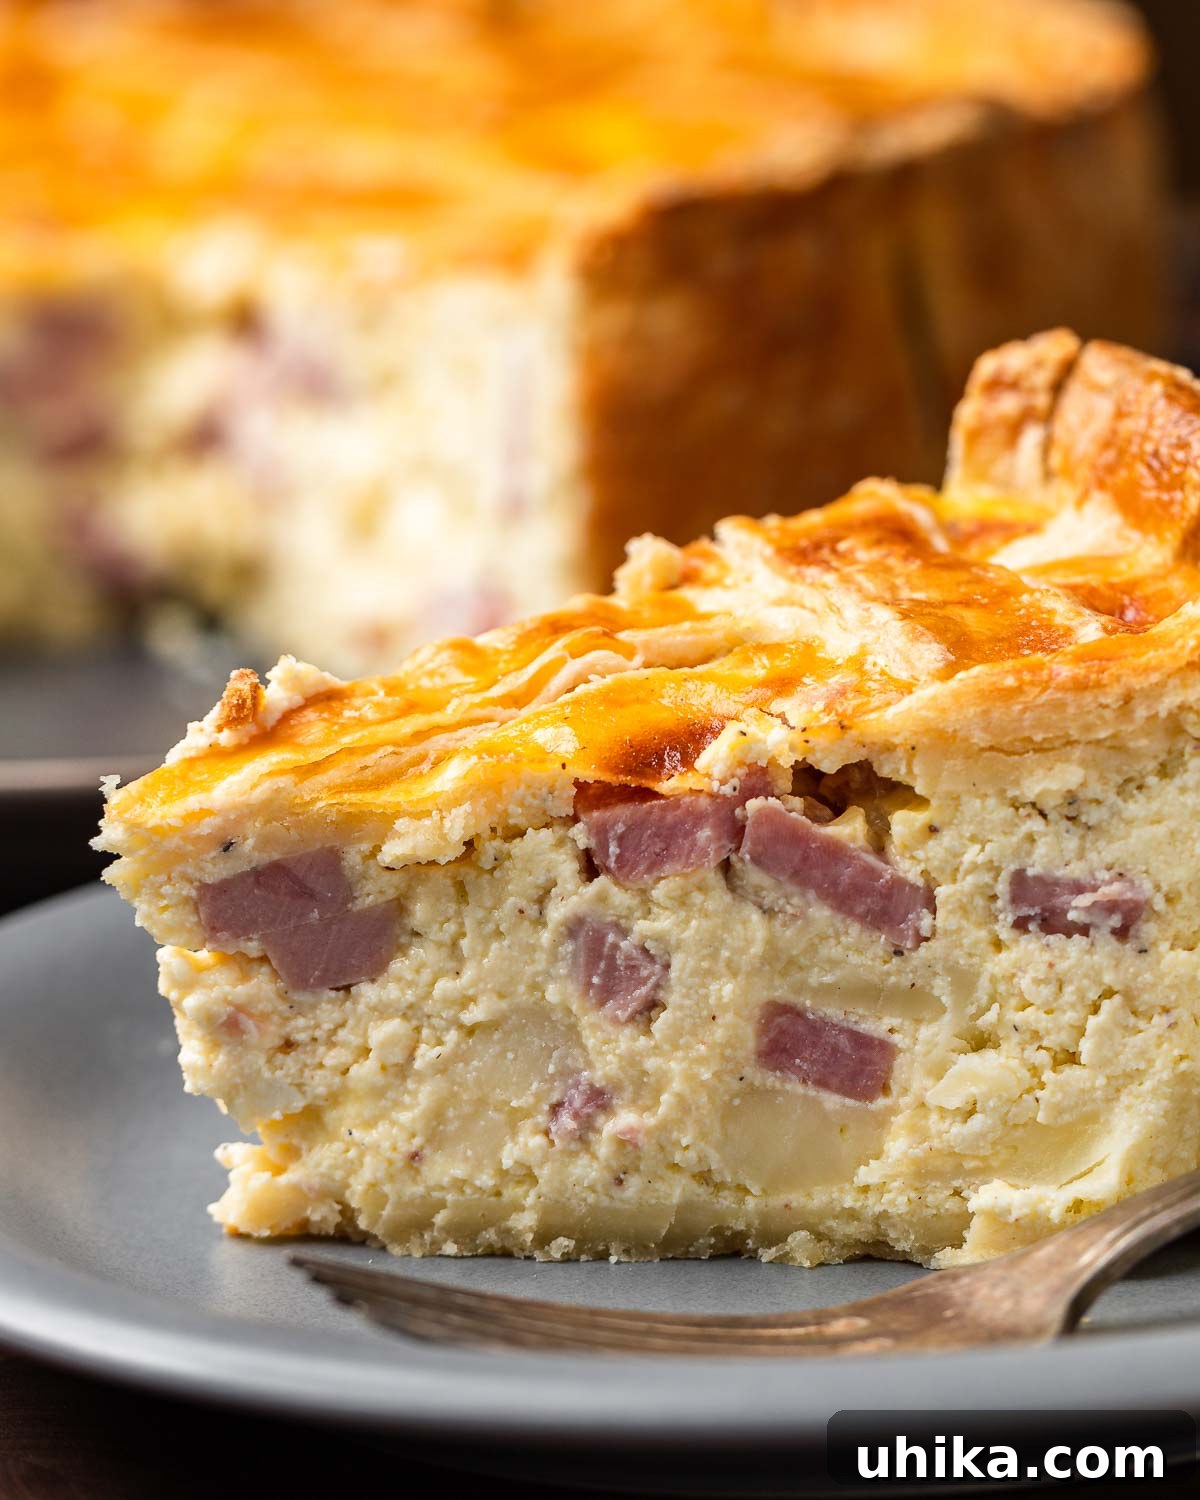
- **Overnight Chill for Best Results:** While the pie can be eaten the same day, Pizzagaina is traditionally considered even better after it has had a chance to sit overnight, wrapped and refrigerated. The flavors meld and deepen, and the pie achieves an ideal texture for slicing. The next day, if you wish to remove the pie from the bottom plate of the springform pan, you can gently warm it in the oven at 350°F (175°C) for a few minutes. The subtle heat will slightly melt the butter in the crust, making it much easier to slide the pie off the base.
Expert Tips for Your Best Pizzagaina
Achieving a perfect Pizzagaina involves a few key techniques. Here are some expert tips to ensure your Easter pie is a resounding success:
- **Pan Preparation is Key:** A well-greased springform pan is non-negotiable. Use plenty of butter or lard to prevent sticking. A clever trick is to invert the bottom of the springform pan (cup side down); this slight elevation makes removing the finished pie much easier. Alternatively, you can line the bottom with parchment paper.
- **Patience with Cooling:** Resist the urge to open the springform pan too soon! Allowing the pie to cool completely for at least 2 hours while still in the pan is vital. This enables the cheese filling to settle and firm up, ensuring clean slices. For even better results, refrigerate the pie on its base overnight. A quick warm-up in the oven for 5-10 minutes the next day can help loosen it for easy removal from the base.
- **The Versatile Filling:** While ricotta is a must for its creamy texture, the meats and other cheeses offer fantastic flexibility. Experiment with different cured meats like soppressata, capocollo, or even ham or turkey. For cheeses, consider the robust flavors of smoked mozzarella, caciocavallo, fontina, or scamorza. The traditional "basket cheese" can be hard to find, so feel free to use a blend of your favorites.
- **Dough Handling Techniques:** A food processor makes quick work of the dough, but if you don't have one, grating cold butter or using a pastry cutter works just as well. When transferring the dough, the "rolling pin method" (draping it over the pin) is efficient, but rolling it on parchment or wax paper and then inverting it into the pan is another reliable approach. Don't stress about a perfect lattice top; a simple solid top with a vent slit is equally delicious.
- **Serving Temperature:** Pizzagaina is traditionally served on Easter morning and is perfectly delightful enjoyed either cold or slightly warmed. The flavors are excellent at room temperature as well.
Beyond Pizzagaina: More Italian Easter Delights
While Pizzagaina holds a special place, Easter Sunday is a time for a feast! Here are a few more traditional Italian Easter recipes to complete your celebratory spread:
- Pastiera Napoletana – A sweet grain pie with fragrant orange and creamy ricotta, a true Neapolitan classic.
- Italian Easter Bread – A sweet brioche-like bread, often braided and adorned with brightly colored Easter eggs.
- Roasted Boneless Leg of Lamb – Succulent lamb infused with aromatic rosemary and garlic, a perfect centerpiece.
- Baked Cauliflower – Tender cauliflower baked with oregano, crispy breadcrumbs, and rich Pecorino Romano cheese.
- Baked Artichoke Hearts – Canned artichoke hearts transformed with white wine, lemon, garlic, and seasoned breadcrumbs.
- Stuffed Artichokes – The quintessential stuffed artichoke, bursting with garlicky breadcrumbs and baked in a buttery white wine and lemon sauce.
We hope you enjoy preparing and sharing this incredible Pizzagaina or Italian Easter pie recipe with your loved ones. If you found this recipe helpful, consider leaving a rating and review!
For those who prefer visual learning, you can often find our recipe demonstrations on popular video platforms and social media pages.
Pizzagaina (Pizza Rustica)
James Delmage
30
1
1
2
50
8
Pin
Ingredients
For the dough
- 3 1/2 cups all-purpose flour or 450 grams
- 2 sticks cold unsalted butter cubed
- 1/3 cup milk
- 2 large eggs
- 1 teaspoon fine sea salt
- 1 teaspoon sugar
For the filling
- 7 large eggs
- 32 ounces ricotta drained overnight
- 1 cup Genoa salami cut into 1/4-inch cubes
- 1 cup mortadella cut into 1/4-inch cubes
- 1 cup prosciutto cut into 1/4-inch cubes
- 3/4 cup provolone cut into 1/4-inch cubes
- 3/4 cup mozzarella cut into 1/4-inch cubes
- 3/4 cup Pecorino Romano grated
- 1/4 teaspoon nutmeg
- 1/2 teaspoon black pepper
Remaining ingredients
- 1 large egg yolk beaten
- 2 teaspoons water
- 1 tablespoon unsalted butter for greasing the pie dish
Instructions
Prep the dough
-
Add the flour, salt, and sugar to a bowl of a food processor and pulse to mix the ingredients. Add the cold butter cubes and pulse for about 20-30 seconds or until the mix is well incorporated but still crumbly. You should have small coarse pieces and a grainy mix.
-
Next, add the eggs and milk and pulse again until the dough is formed. It will be kind of a mess at this point which is fine.
-
Place the dough onto a work surface and knead for a few seconds only. You just want to bring the dough together so that it forms a stuck-together mass. Cut into two balls. Make one large ball with 2/3's of the dough and the other smaller one with the remaining dough.
-
Wrap the balls tightly in plastic wrap and refrigerate for 1 hour before using. The dough can be made 1 day ahead of time.
Make the filling
-
In a very large bowl mix the ricotta, eggs, pepper, and nutmeg until smooth.
-
To the bowl, add the cubed prosciutto, salami, mortadella, mozzarella, provolone, and grated Pecorino. Mix together.
Assemble and bake
-
Remove the dough from the fridge about 10-15 minutes before rolling to prevent it from cracking.
-
Preheat the oven to 375f and set one rack to the lowest level and the second to the middle level. Grease a (9 by 3") springform pan with butter or lard.
-
Roll out the larger ball to a circle approximately 1/4-inch thick and about 15-inches round. Place the dough into the pan and tuck in the edges letting the excess overhang. Trim off the excess overhanging dough. Any open spots should be patched with the excess dough.
-
Pour the filling into the pie pan, leaving at least a 1/4-inch unfilled. If needed, use a spatula to level out the filling.
-
Roll out the second smaller ball to a circle a bit larger than the pie pan. Cut into 1-inch wide strips for a lattice.
-
Place the strips in a lattice formation about a 1-inch apart. Make sure to overlap the dough so that the strips stay down while baking. Alternatively, you can forgo the lattice and just cover the pie with the second circle and cut a slit for venting. The choice is yours.
-
Use your fingers or a fork to press the strips down into the corners so that they stick. If needed a touch of water can be used to "glue" the strips to the sides. Cut off any excess dough.
-
Beat the egg yolk with 2 teaspoons of water and brush the top of the pie crust.
-
Bake for 20 minutes on the lowest rack, then move the pan up to the middle rack and continue baking. Full bake time will be approximately 60-70 minutes. Check the pie at the halfway point and if it looks like it's getting too brown cover loosely with foil. Once golden brown, remove from the oven and place on a wire rack to cool.
-
After baking, let the pie cool for 2 hours before removing the sides of the springform. The pie can be eaten the same day though it's better to let it sit overnight in the refrigerator. Place the pizzagaina in the oven at 350f for a few minutes the next day. The heat will slightly melt the butter and allow easy removal of the bottom pan plate.
-
Pizzagaina is best made the day before and eaten the next day after it has settled and cooled. It can be served either cold or warm. Enjoy!
Notes
- Makes 8 large servings.
- After baking, let the pie cool for 2 hours before removing the springform. The pie should be refrigerated on the bottom plate overnight. Use heat from a gas torch or place it in the oven at 350f for 10 minutes. The heat will allow easy removal of the bottom plate. A final option is to try to dislodge the pie with a spatula.
- Pizzagaina (Pizza Rustica) is best served cold or at room temperature. Traditionally the dish is served for Easter breakfast or brunch.
- All different meats can be used. Soppressata, capocollo, ham, pepperoni, or even cubed turkey all work great.
- Cheeses like fontina, scamorza, caciocavallo, and smoked mozzarella all work well.
- Leftovers can be saved for up to 4 days in the refrigerator.
Nutrition
Nutrition information is automatically calculated, so should only be used as an approximation.
Like this? Leave a comment below!
Check us out on Instagram at @sipandfeast or tag #sipandfeast!