
Table of Contents
- The Secret to Perfect BBQ Chicken: Why Indirect Grilling is a Game Changer
- Essential Ingredients for Grilled BBQ Chicken: Building Layers of Flavor
- Mastering the Indirect Grilling Method for BBQ Chicken
- Delicious Side Dishes to Complement Your BBQ Chicken Feast
- Juicy Grilled BBQ Chicken Recipe
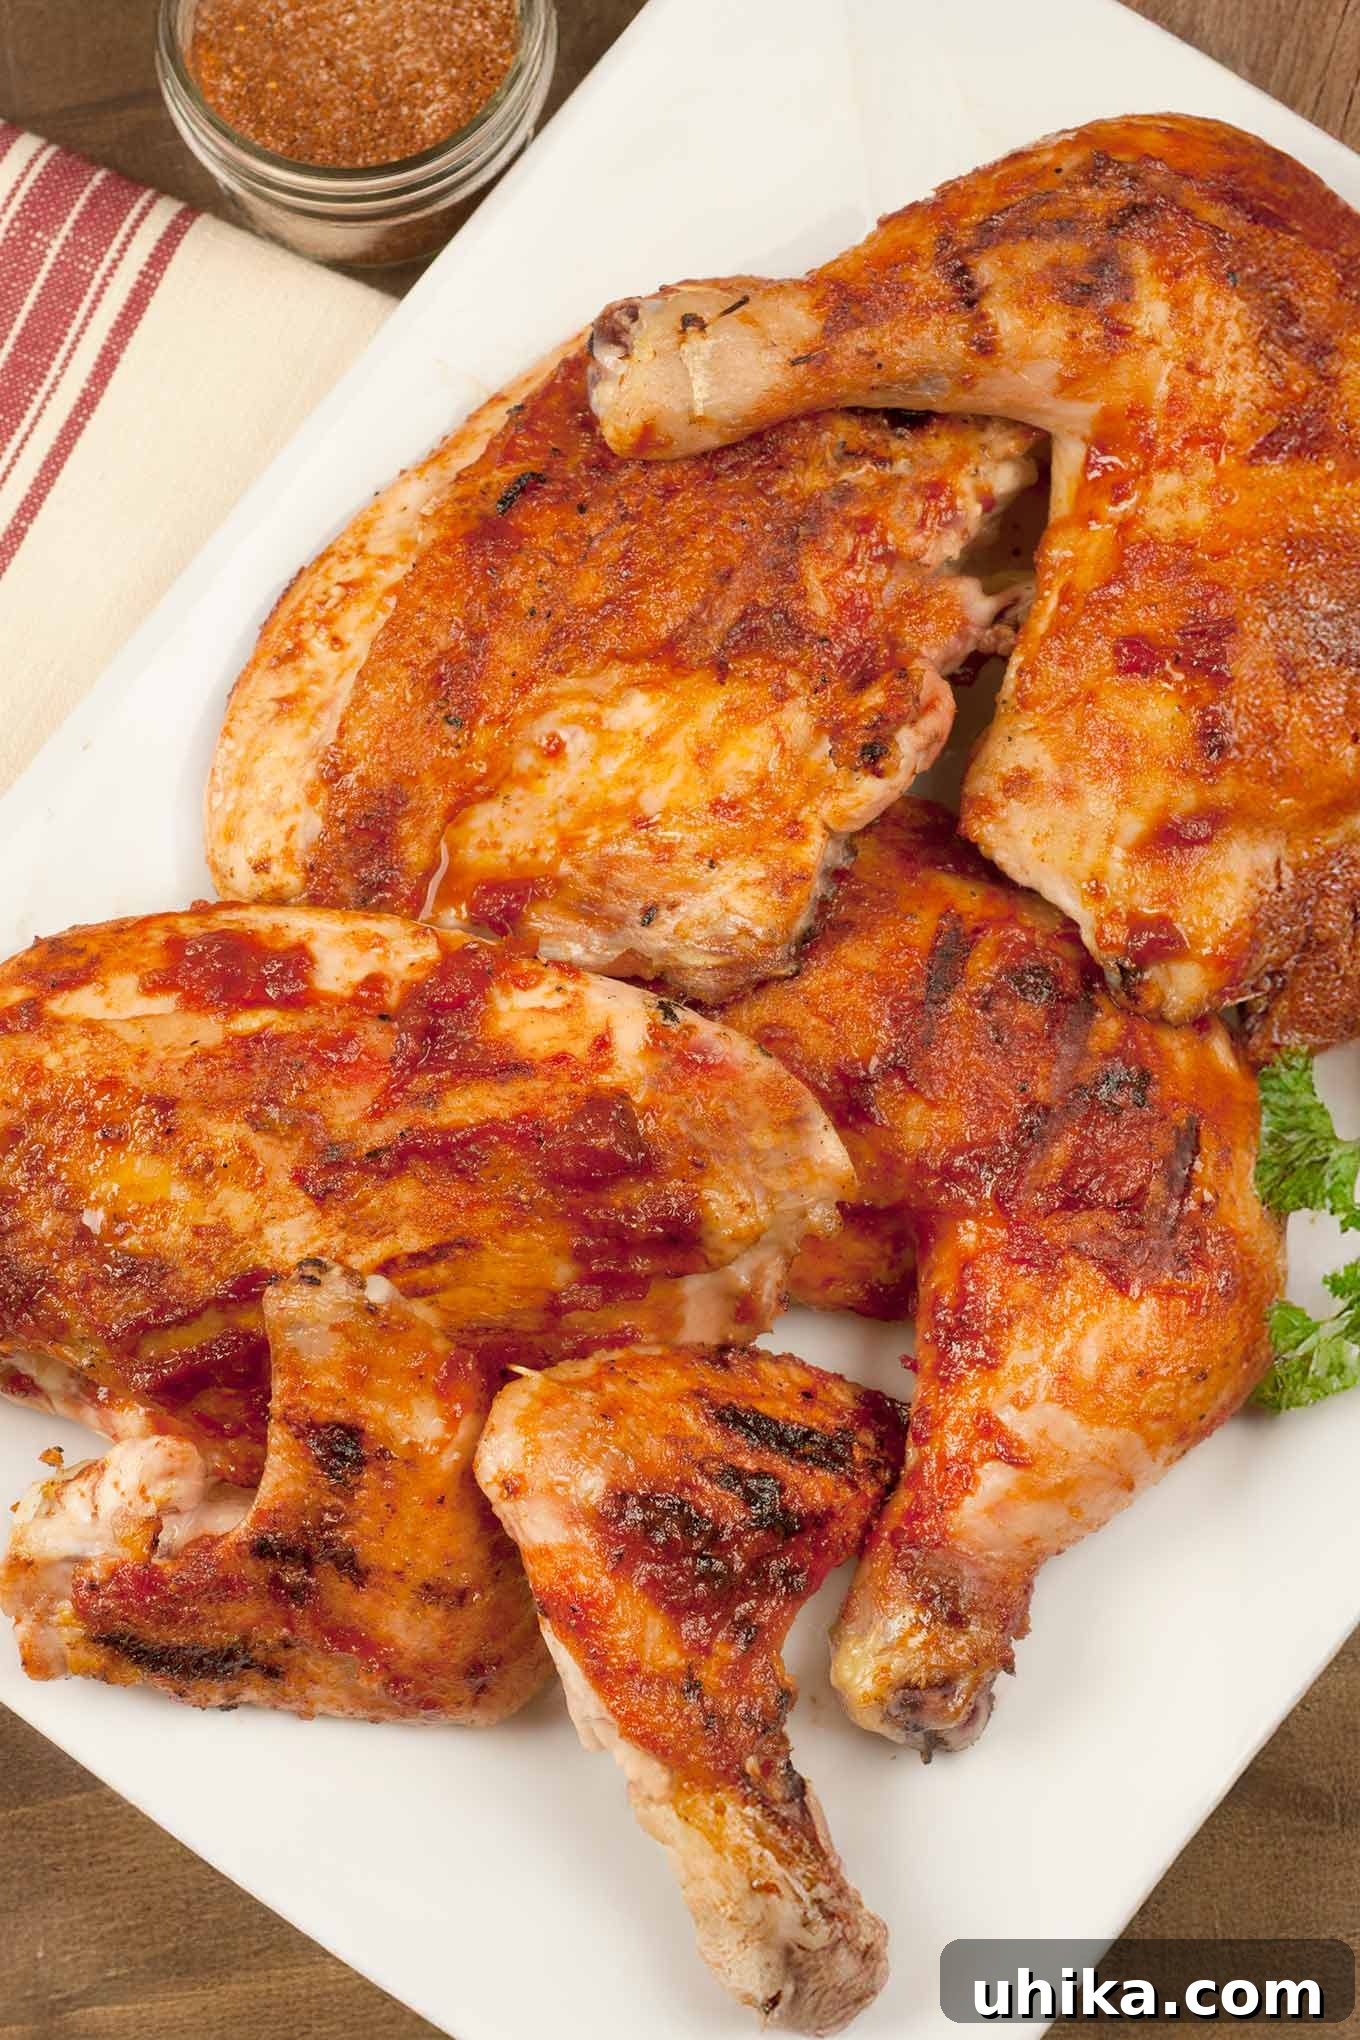
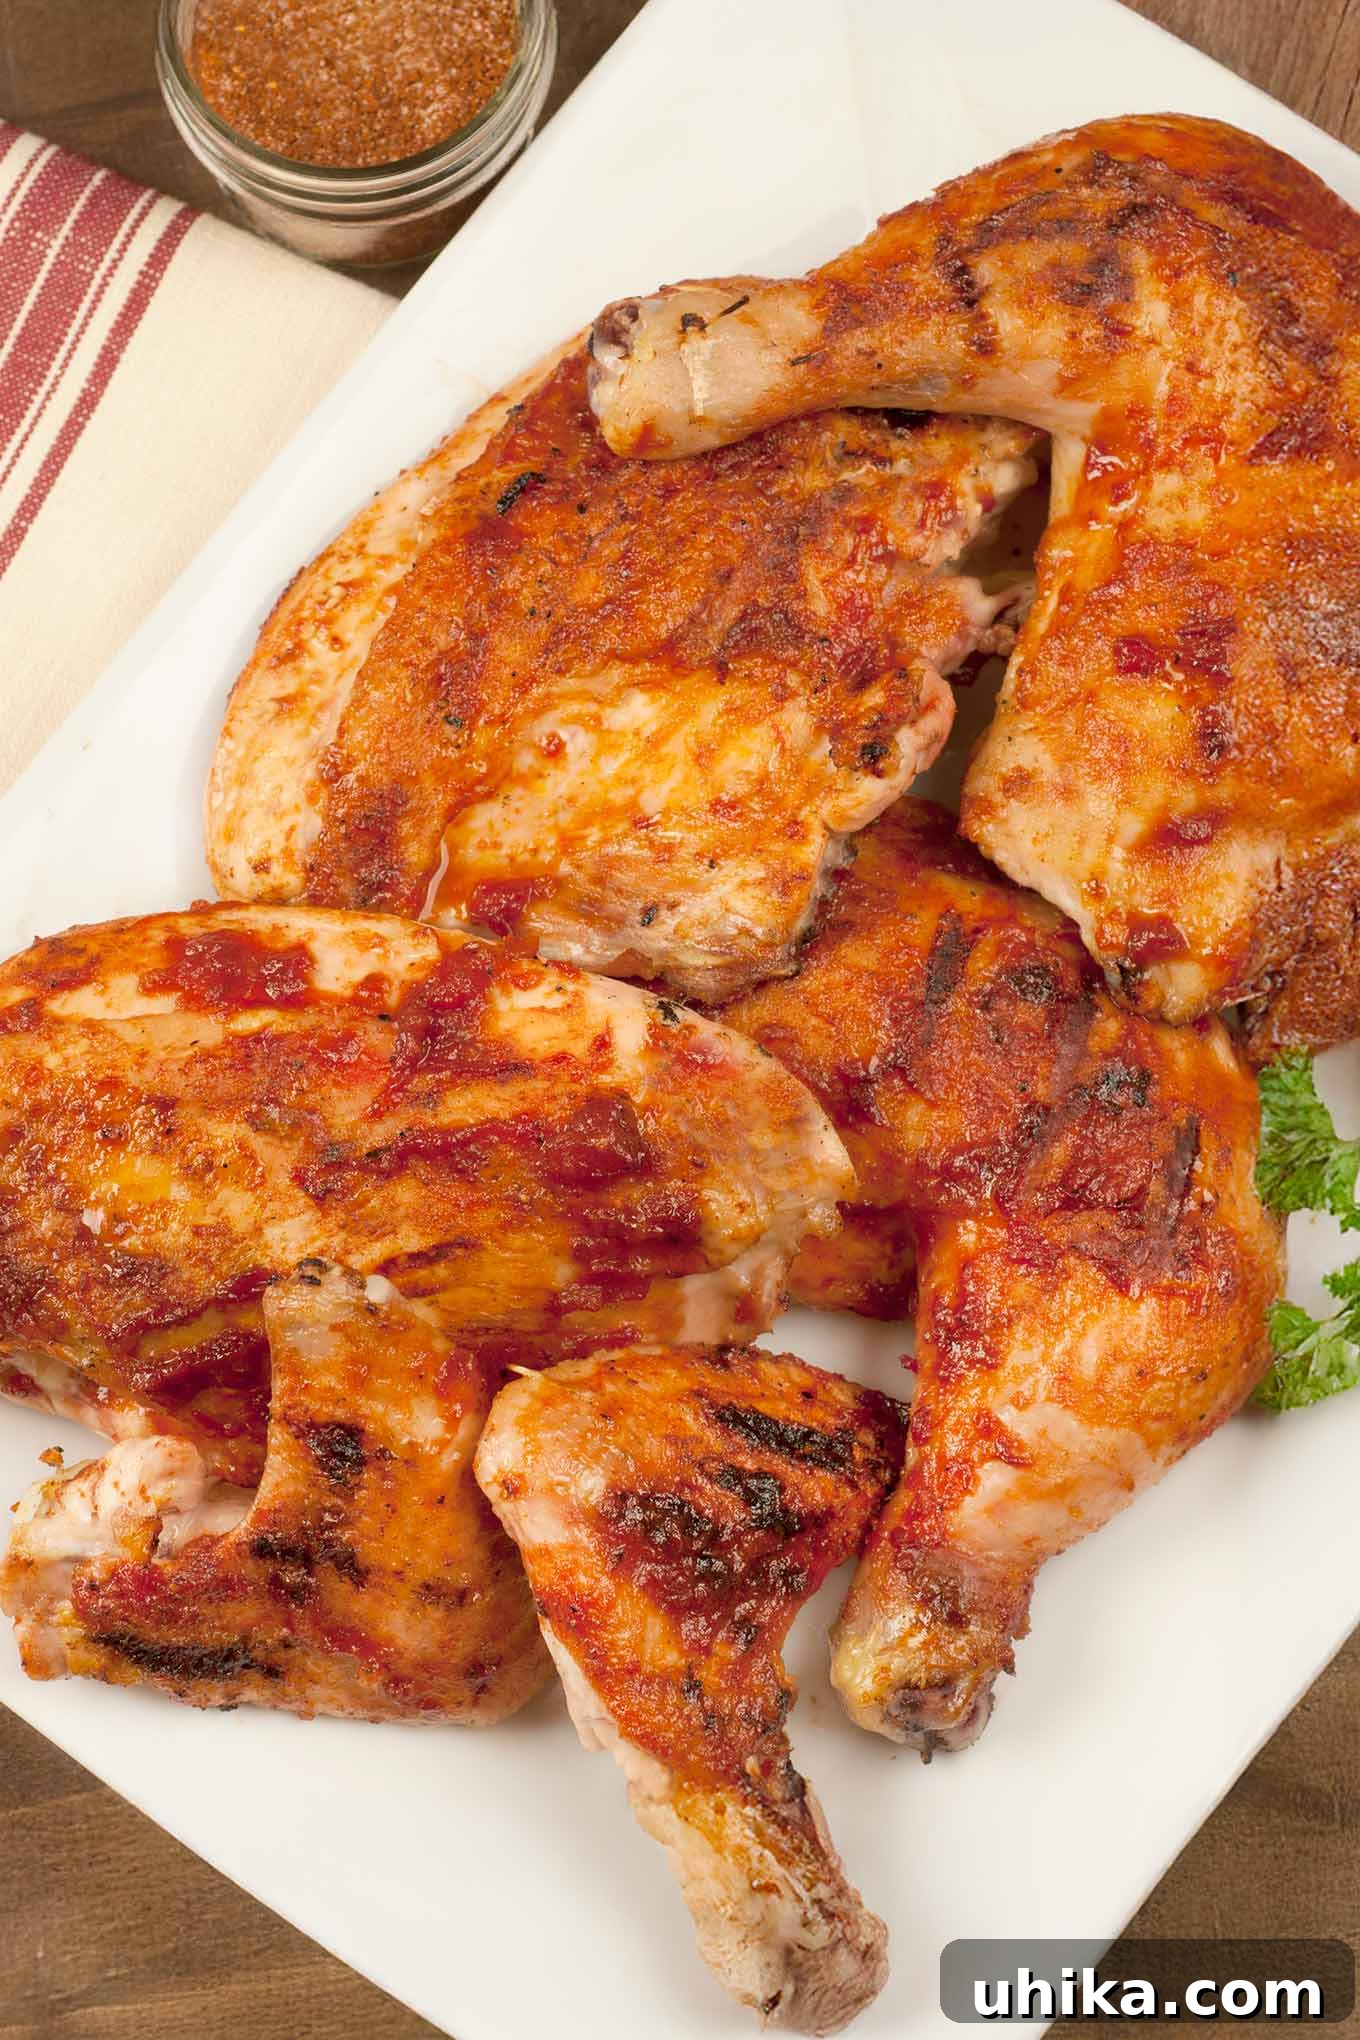
Welcome to your ultimate guide for creating barbecue chicken that will forever change your grilling experience. This isn’t just another grilled chicken recipe; it’s a meticulously crafted method designed to banish dry, burnt chicken from your plate for good. By harnessing the power of indirect grilling, combined with a deeply flavorful homemade spice rub and a luscious, smoky-sweet barbecue sauce, you’ll achieve unparalleled results. Imagine chicken with a perfectly crisp, caramelized skin and incredibly moist, succulent meat on the inside – bursting with that irresistible grilled flavor. This technique starts with a quick sear over direct heat to lock in juices and create a beautiful crust, then finishes gently over indirect heat, allowing the chicken to cook through without drying out. Get ready to impress your family and friends with the best BBQ chicken they’ve ever tasted, becoming a true grill master in the process!
The Secret to Perfect BBQ Chicken: Why Indirect Grilling is a Game Changer
For many grill enthusiasts, barbecue chicken has often been a source of frustration. The common dilemma: how do you achieve that coveted crispy skin and deep smoky flavor without rendering the meat dry and stringy, or worse, leaving it charred on the outside and undercooked within? We’ve certainly faced this challenge countless times, resulting in less-than-stellar outcomes. However, a profound shift in technique – embracing the indirect grilling method – completely transformed our approach to grilled chicken, making it a consistently triumphant dish.
The magic of indirect grilling lies in its ability to cook food gently and evenly, mimicking the environment of an oven while still imparting all the wonderful flavors of the grill. Instead of placing the chicken directly over the flame, where intense heat can quickly burn the exterior, indirect grilling involves cooking it adjacent to the heat source. This controlled environment allows the chicken’s internal temperature to rise gradually, ensuring the meat cooks through thoroughly without its natural moisture evaporating.
Our method utilizes a two-stage process: an initial searing phase over direct heat, followed by an extended period over indirect heat. The initial sear is crucial for two reasons: it creates a beautiful, golden-brown crust on the chicken skin through the Maillard reaction, developing complex savory flavors, and it helps to lock in those precious juices. After this quick sear, moving the chicken to the cooler, indirect zone is where the real transformation happens. Here, the chicken continues to cook slowly, absorbing the smoky essence of the grill, while the homemade spice rub and barbecue sauce have ample time to caramelize into a sticky, flavorful glaze without burning. This gentle cooking preserves the chicken’s tenderness and juiciness, resulting in meat that’s fork-tender and moist from bone to skin.
By understanding and applying this indirect grilling technique, you’ll overcome the common pitfalls of dry or burnt BBQ chicken. It’s a reliable strategy that ensures every bite is infused with flavor, boasting a delightful texture that makes it worthy of being a grilling season favorite. Say goodbye to guesswork and hello to consistently perfect, juicy grilled BBQ chicken!
Essential Ingredients for Grilled BBQ Chicken: Building Layers of Flavor
The foundation of truly exceptional grilled BBQ chicken is built upon carefully selected ingredients. Below, we’ll explore the key components that define this recipe’s success. For exact measurements and a complete list, please refer to the detailed printable recipe card at the end of this article.
-
CHICKEN: The choice of chicken cuts can significantly influence your grilling experience and the final taste. For this recipe, we typically utilize a whole broiler/fryer chicken, weighing approximately 4 to 4.5 pounds, which we then expertly cut into individual pieces. This approach allows for greater consistency in seasoning and cooking across various cuts. However, convenience often calls, and purchasing pre-cut chicken parts is an excellent alternative. Popular options include meaty leg quarters, flavorful thighs, classic drumsticks, or leaner chicken breasts.
- Cutting Your Own: Opting for a whole chicken and cutting it yourself provides control over piece size and often proves more economical. It also ensures a balanced mix of dark and white meat, catering to diverse preferences.
- Pre-Cut Options: If time is a constraint, pre-cut chicken parts are perfectly suitable. The key is to select pieces of relatively similar size to promote even cooking. For instance, if using thick chicken breasts, consider butterflying or halving them horizontally to reduce cooking time and prevent drying.
- Meat Type Considerations: Dark meat cuts (thighs, drumsticks, leg quarters) inherently contain more fat, making them more forgiving on the grill and prone to staying juicier. White meat (breasts, wings) is leaner and cooks more rapidly, demanding closer attention to prevent overcooking and dryness. A combination offers the best of both worlds.
-
BBQ SPICE RUB: Before any heat touches the chicken, a phenomenal BBQ spice rub lays the groundwork for profound flavor. Our homemade Smoky BBQ Spice Blend is designed to infuse the meat with a complex profile of smoky, savory, and subtly sweet notes. We highly encourage preparing a batch to keep stocked in your pantry; it requires minimal effort and remains potent for up to six months, ready to elevate numerous dishes beyond just chicken.
- The Homemade Advantage: While many excellent store-bought rubs exist, crafting your own grants you absolute command over ingredients, allowing you to adjust sodium content and fine-tune the flavor to your personal preference. Our blend typically features a harmonious mix of paprika (smoked paprika for extra depth), brown sugar, garlic powder, onion powder, chili powder, cumin, salt, and freshly ground black pepper.
- Personalization: Don’t hesitate to experiment! Add a pinch of cayenne for a spicy kick, or incorporate dried herbs like oregano or thyme for an aromatic twist that complements the robust flavors.
- Application Technique: Generosity is key here. Apply the rub liberally to every surface of the chicken pieces, ensuring they are thoroughly coated. Gently massage the rub into the meat; this helps the spices adhere and penetrate deeply, maximizing flavor infusion.
-
BBQ SAUCE: The grand finale to our barbecued masterpiece is the sauce, and our homemade Bourbon BBQ Sauce is our absolute favorite. It strikes an exquisite balance of sweet, tangy, and savory, enriched by a hint of smokiness that perfectly complements the grilled chicken. Its versatility extends to a wide range of grilled meats, making it an indispensable part of your BBQ repertoire.
- Flavor Dynamics: Our bourbon BBQ sauce, inspired by the Jack Daniel’s Tennessee Honey often highlighted in similar recipes, introduces a sophisticated depth. The bourbon imparts mellow, caramel-like undertones, while the honey (or a similar sweet component) provides a rich sweetness that caramelizes beautifully when exposed to indirect heat on the grill, creating that desirable sticky glaze.
- Alternative Sauces: Should you have a cherished brand of BBQ sauce, feel free to substitute it. The most important factor is selecting a sauce whose flavor profile you adore, as it plays a significant role in the chicken’s ultimate taste. Consider how its sweetness, tang, and spice level will interact with the rub and the smoky grill flavors.
- Strategic Basting: Timing is crucial when applying BBQ sauce. Due to its sugar content, sauce can burn easily over high direct heat. We apply the sauce towards the end of the cooking process, during the indirect grilling phase, allowing it to caramelize and adhere to the chicken without scorching, resulting in a beautiful, flavorful crust.
Preparation Overview: Step-by-Step for Succulent Chicken
Mastering the Indirect Grilling Method for BBQ Chicken
Embark on your grilling journey with confidence! This section provides a concise yet comprehensive overview of each step for creating sensational BBQ chicken. For an even more in-depth experience, including troubleshooting advice and specific instructions for charcoal grills, please refer to the complete printable recipe card located further down the page.
1. Prepare and Season the Chicken: The Foundation of Flavor
The journey to perfectly grilled BBQ chicken begins with meticulous preparation. First, ensure your chicken pieces are thoroughly patted dry with paper towels. This seemingly small step is vital; excess moisture on the skin can hinder browning and crisping. Next, liberally brush every surface of each chicken piece with olive oil. The oil serves multiple purposes: it acts as a binder for the spice rub, helps the skin achieve that coveted crispy texture, and contributes to even heat distribution. Following the oil, generously sprinkle your chosen BBQ spice rub over all sides of the chicken. Don’t be timid; use your fingers or the back of a spoon to vigorously massage the seasoning into the meat, ensuring every nook and cranny is coated. This critical step builds the foundational layer of flavor. Allow the seasoned chicken to rest at room temperature for approximately 15 minutes while you proceed with grill preparation. This brief rest allows the flavors to meld and brings the chicken closer to room temperature, which promotes more even cooking.
2. Preheat Your Grill for Optimal Cooking Zones
A successful indirect grilling setup hinges on creating distinct hot and cool zones on your grill. For gas grills, begin by preheating all burners to medium heat, aiming for an internal grill temperature between 350°F and 375°F (175°C to 190°C). Once the grill reaches this temperature, turn off the burners on one side completely. This effectively establishes your “cooler zone” for indirect cooking. The remaining active burners will maintain the “hot zone,” which you’ll use for the initial searing. If you are operating a single-burner gas grill, you will adjust the heat down significantly after the initial searing phase. For those planning to use a charcoal grill, detailed instructions for creating an effective two-zone setup are provided within the printable recipe card below, as charcoal requires a slightly different approach to heat management.
3. Initial Sear Over Direct Heat: Building Flavor and Texture
With your grill preheated and zones established, ensure your grill grates are clean and lightly oiled to prevent the chicken from sticking. Carefully place the seasoned chicken pieces, skin side down, directly over the hot side of the grill (the side with active burners). Grill uncovered for approximately 5 to 7 minutes. This initial burst of intense direct heat is paramount for two reasons: it initiates the Maillard reaction, which is responsible for developing those rich, savory browned flavors and creates a beautiful, deeply colored, and crispy sear on the chicken skin. It also helps to quickly render some of the fat under the skin. Throughout this stage, maintain a watchful eye to prevent excessive charring or unexpected flare-ups, which can occur from dripping fat. Once the skin is beautifully seared, flip the chicken pieces to cook skin side up for an additional 3 to 4 minutes over direct heat. Continue monitoring closely for any flare-ups.
4. Finish with Indirect Heat: The Key to Juiciness and Flavor Infusion
After achieving that perfect sear, it’s time to transition the chicken to the cooler, indirect side of the grill. Arrange the chicken pieces strategically: place thicker cuts, such as leg quarters or large thighs, closer to the active heat source (but not directly over it), and position smaller, faster-cooking pieces like wings or breast halves further away. This ensures all parts cook evenly. Now, generously baste the chicken with your chosen barbecue sauce. This is where the sauce begins its magic, caramelizing into a delicious glaze. Close the grill lid to trap the heat and smoke, and let the chicken cook undisturbed for 15 minutes. This indirect cooking allows the chicken to finish cooking gently, retaining its moisture while absorbing the smoky flavors. After 15 minutes, open the lid, turn the chicken skin side up, rearrange the pieces if needed to ensure even cooking, and baste liberally with more BBQ sauce. Re-cover the grill and continue cooking for an additional 20 minutes. The sugars in the sauce will beautifully caramelize, creating a sticky, irresistible exterior.
5. Check for Doneness and Rest: The Final Touches for Perfection
Ensuring your chicken is perfectly cooked and safe to eat is the final, crucial step. Using a reliable instant-read meat thermometer, check the internal temperature of each chicken piece. Insert the thermometer into the thickest part of the meat, being careful to avoid touching any bones, as bones can give a false high reading. You are aiming for an internal temperature of 165°F (74°C). As each piece reaches this target temperature, carefully remove it from the grill and transfer it to a clean serving platter. This staggered removal prevents smaller pieces from overcooking while larger ones finish. If some pieces require more cooking time, simply return them to the indirect heat zone, checking their temperature every 3 to 5 minutes until they are done. Once all the chicken is off the grill, resist the urge to cut into it immediately. Instead, tent the platter loosely with aluminum foil and allow the chicken to rest for at least 5 to 10 minutes before carving or serving. This resting period is paramount; it allows the muscle fibers to relax and the juices to redistribute throughout the meat, resulting in exceptionally tender, moist, and flavorful chicken. Skipping this step is a common mistake that can lead to disappointingly dry meat, even if perfectly cooked.
Delicious Side Dishes to Complement Your BBQ Chicken Feast
A show-stopping grilled BBQ chicken deserves an equally impressive supporting cast of side dishes. These selections are chosen to perfectly balance and enhance the smoky, sweet, and tangy flavors of your main course, ensuring a complete and satisfying meal.
- Homemade Light & Creamy Coleslaw – This classic barbecue companion offers a refreshing textural and flavor contrast. Its crisp, cool cabbage and carrots, coated in a tangy-sweet dressing, provide a fantastic palate cleanser that cuts through the richness of the BBQ chicken. It’s a must-have for any summer feast.
- Sweet Corn and Tomato Salad with Fresh Chive Vinaigrette – Celebrate the vibrant flavors of the season with this bright and juicy salad. Sweet, tender corn kernels combined with ripe, juicy tomatoes and a delicate chive vinaigrette create a herbaceous and refreshing side that beautifully complements the chicken’s smoky profile. It’s light, fresh, and bursting with summer goodness.
- Classic Southern Fried Green Tomatoes – A timeless and beloved Southern classic, fried green tomatoes bring a unique tangy zest and an utterly satisfying crunch to the table. Their distinct flavor and texture make them an exceptional, traditional pairing for any barbecue spread, offering a comforting yet exciting twist.
- Roasted Okra with Crispy Bacon and Juicy Tomatoes – Another delightful Southern favorite, this side dish marries the earthy, slightly sweet notes of roasted okra with the irresistible savory crunch of bacon and the burst of sweetness from roasted tomatoes. It introduces additional layers of smoky depth and texture that perfectly harmonize with your BBQ chicken.
- Cheesy Stuffed Zucchini Boats – These crowd-pleasing zucchini boats, generously filled with a savory and creamy cheese mixture, are a versatile and satisfying side. They offer a rich, hearty component that pairs wonderfully with virtually any grilled dish, including our succulent BBQ chicken.
- Classic Creamy Potato Salad – A staple at any barbecue, a well-made creamy potato salad provides a comforting, savory, and slightly tangy contrast. Its cool temperature and hearty texture make it an ideal partner for the warm, robustly flavored chicken.
- Grilled Asparagus with Lemon Zest – For a lighter, fresher complement, simply grill fresh asparagus spears until they are tender-crisp. A squeeze of fresh lemon juice and a sprinkle of zest before serving adds a bright, zesty note that cleanses the palate and beautifully highlights the grilled flavors.
- Homemade Macaroni and Cheese – Indulge in the ultimate comfort food with a creamy, rich macaroni and cheese. Its cheesy goodness provides a decadent counterpoint to the smoky chicken, making for a truly satisfying meal.
Juicy Grilled BBQ Chicken Recipe
By Lynne Webb
Flavored with a simple rub and a finish of homemade barbecue sauce, this recipe for grilled BBQ chicken uses an easy indirect grilling technique to ensure tender, juicy results every time. Perfect for your next summer gathering and guaranteed to be a hit!
Cook Time: 50 mins
Total Time: 1 hr 10 mins
Yields: 4 servings
Ingredients
- 1 whole chicken (about 4-1/2 lbs), cut into 8-10 pieces (or 4-4.5 lbs of preferred chicken parts like leg quarters, thighs, drumsticks, or breasts)
- Olive oil (for brushing chicken)
- BBQ Spice Rub (approximately 2-3 tablespoons, homemade or your favorite store-bought blend)
- 1-1/4 cups Bourbon BBQ Sauce (homemade or your preferred brand)
Instructions
- Prepare the Chicken: Thoroughly pat chicken pieces dry with paper towels to ensure crispy skin. Brush all sides generously with olive oil. Sprinkle the BBQ Spice Rub liberally over all surfaces, using your fingers or the back of a spoon to rub it in well. Set the seasoned chicken aside at room temperature for 15 minutes while you prepare your grill.
- Preheat the Grill: For a gas grill, preheat all burners to medium temperature (350°F to 375°F / 175°C to 190°C). Once preheated, turn off the burners on one side to create a cooler, indirect cooking zone.
- Sear Over Direct Heat: Clean and lightly oil your grill grates. Place the chicken pieces, skin side down, directly over the hot side of the grill (active burners). Grill uncovered for 5 to 7 minutes until the skin is beautifully seared, golden-brown, and crispy. Carefully flip the chicken and cook skin side up for an additional 3 to 4 minutes over direct heat. Monitor closely to prevent excessive charring or flare-ups.
- Move to Indirect Heat: Transfer the seared chicken pieces, skin side down, to the cooler, indirect side of the grill. Arrange thicker pieces (e.g., leg quarters) closer to the active heat zone and smaller pieces (e.g., wings, breast halves) further away to promote even cooking.
- First Basting & Indirect Cook: Generously baste the chicken with your chosen barbecue sauce. Close the grill lid and cook undisturbed for 15 minutes. This allows the chicken to cook gently and begin absorbing the sauce flavors.
- Second Basting & Indirect Cook: Open the lid, turn the chicken skin side up, and rearrange the pieces if necessary for more even cooking. Baste liberally again with more barbecue sauce. Re-cover the grill and continue cooking for an additional 20 minutes.
- Check for Doneness: After the second indirect cooking phase, check the internal temperature of each chicken piece using an instant-read thermometer. Insert the thermometer into the thickest part of the meat, avoiding bones. Chicken is fully cooked when it registers 165°F (74°C). Remove cooked pieces to a clean serving platter as they finish to prevent overcooking. Return any undercooked pieces to the indirect heat, checking every 3 to 5 minutes until they reach the target temperature.
- Rest and Serve: Once all chicken is cooked, transfer it to a clean serving platter. Tent loosely with aluminum foil and let the chicken rest for at least 5 to 10 minutes before carving and serving. This crucial resting period allows the juices to redistribute, ensuring every bite is tender, moist, and delicious.
Notes
Indirect Grilling With a Charcoal Grill: A Detailed Guide
While gas grills offer straightforward temperature control, mastering indirect grilling on a charcoal grill brings an unparalleled smoky depth that’s truly worth the extra effort. The key is to effectively create distinct hot and cool zones within your charcoal setup.
- Creating the Zones: The method for arranging your charcoal will depend on the size and configuration of your grill:
- One-Sided Pile Method: For most standard or rectangular charcoal grills, pile all your lit charcoal on one side of the fire grate. This clearly defines a hot zone directly over the coals and a cooler, indirect zone on the empty side. This is ideal for smaller cuts or when you need a very distinct separation of heat.
- Ring or Perimeter Method: For larger, round kettle-style grills, you can arrange the lit charcoal in a circular ring around the edges of the lower grate, leaving the very center empty. This creates a central indirect cooking space, providing more even radiant heat from all sides. This method works exceptionally well for larger items or when cooking more chicken pieces.
- Achieving Medium Heat: Begin by lighting your charcoal until it’s fully ignited and covered with a light, uniform layer of ash, indicating it’s ready. To gauge “medium heat” (approximately 350°F to 375°F / 175°C to 190°C), carefully hold your hand about 4 inches above the cooking grate directly over the hot coals. If you can comfortably keep it there for 6 to 8 seconds before needing to pull it away, your coals are at the right temperature. Control your grill’s temperature by adjusting the top and bottom vents: more open vents mean more airflow and hotter coals, while closing them reduces heat.
- Charcoal Grilling Technique: Follow the primary recipe instructions for seasoning and searing. You will still begin by placing the chicken directly over the hot coals (direct heat zone) for 5-7 minutes per side to achieve that desirable sear and crust. After searing, gracefully transfer the chicken pieces to your indirect heat zone (the side without coals, or the center of your charcoal ring). Close the grill lid, ensuring your vents are adjusted to maintain a consistent medium-low temperature (around 250°F to 325°F / 120°C to 160°C) inside the grill. The lid is crucial for trapping the smoke and converting your grill into a convection oven, gently cooking the chicken. Baste the chicken as instructed in the main recipe, and continue cooking until the internal temperature reaches 165°F (74°C). Remember that charcoal grills can have varying hot spots, so it’s a good practice to rotate your chicken occasionally if you notice any uneven cooking.
Nutrition Information (Approximate Per Serving)
- Calories: 453
- Total Fat: 32g
- Cholesterol: 144mg
- Sodium: 178mg
- Carbohydrates: 2g
- Sugar: 2g
- Protein: 35g
Nutrition information provided is an approximation, automatically calculated, and should be used as a general guide only. Individual values may vary significantly based on exact ingredient choices, brands, and preparation methods.