
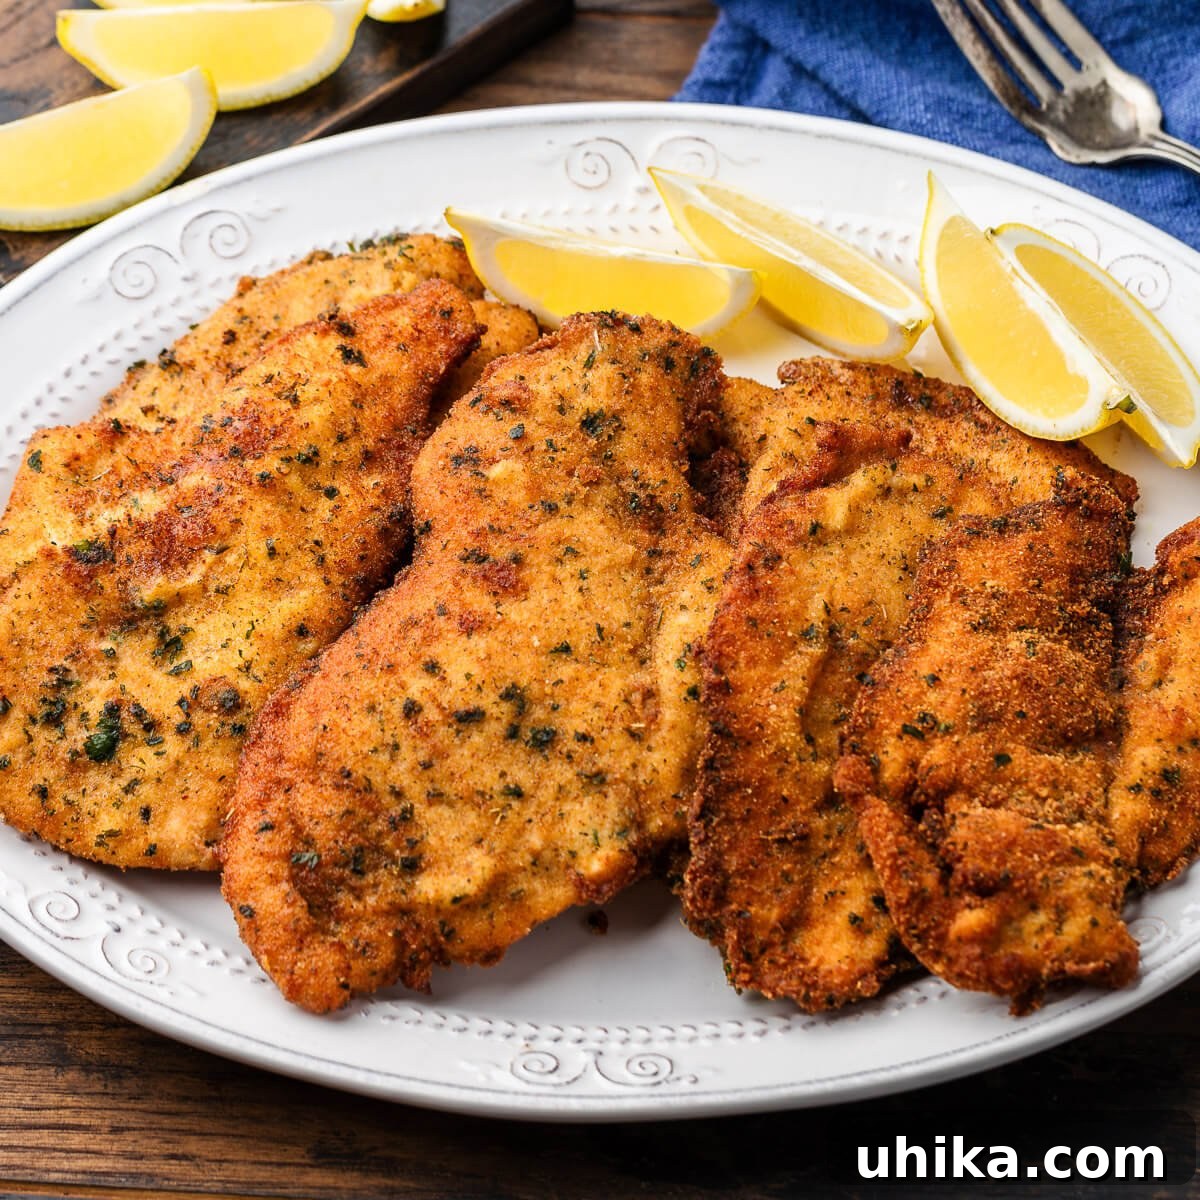
Irresistibly Crispy Italian Chicken Cutlets: Your New Favorite Weeknight Hero
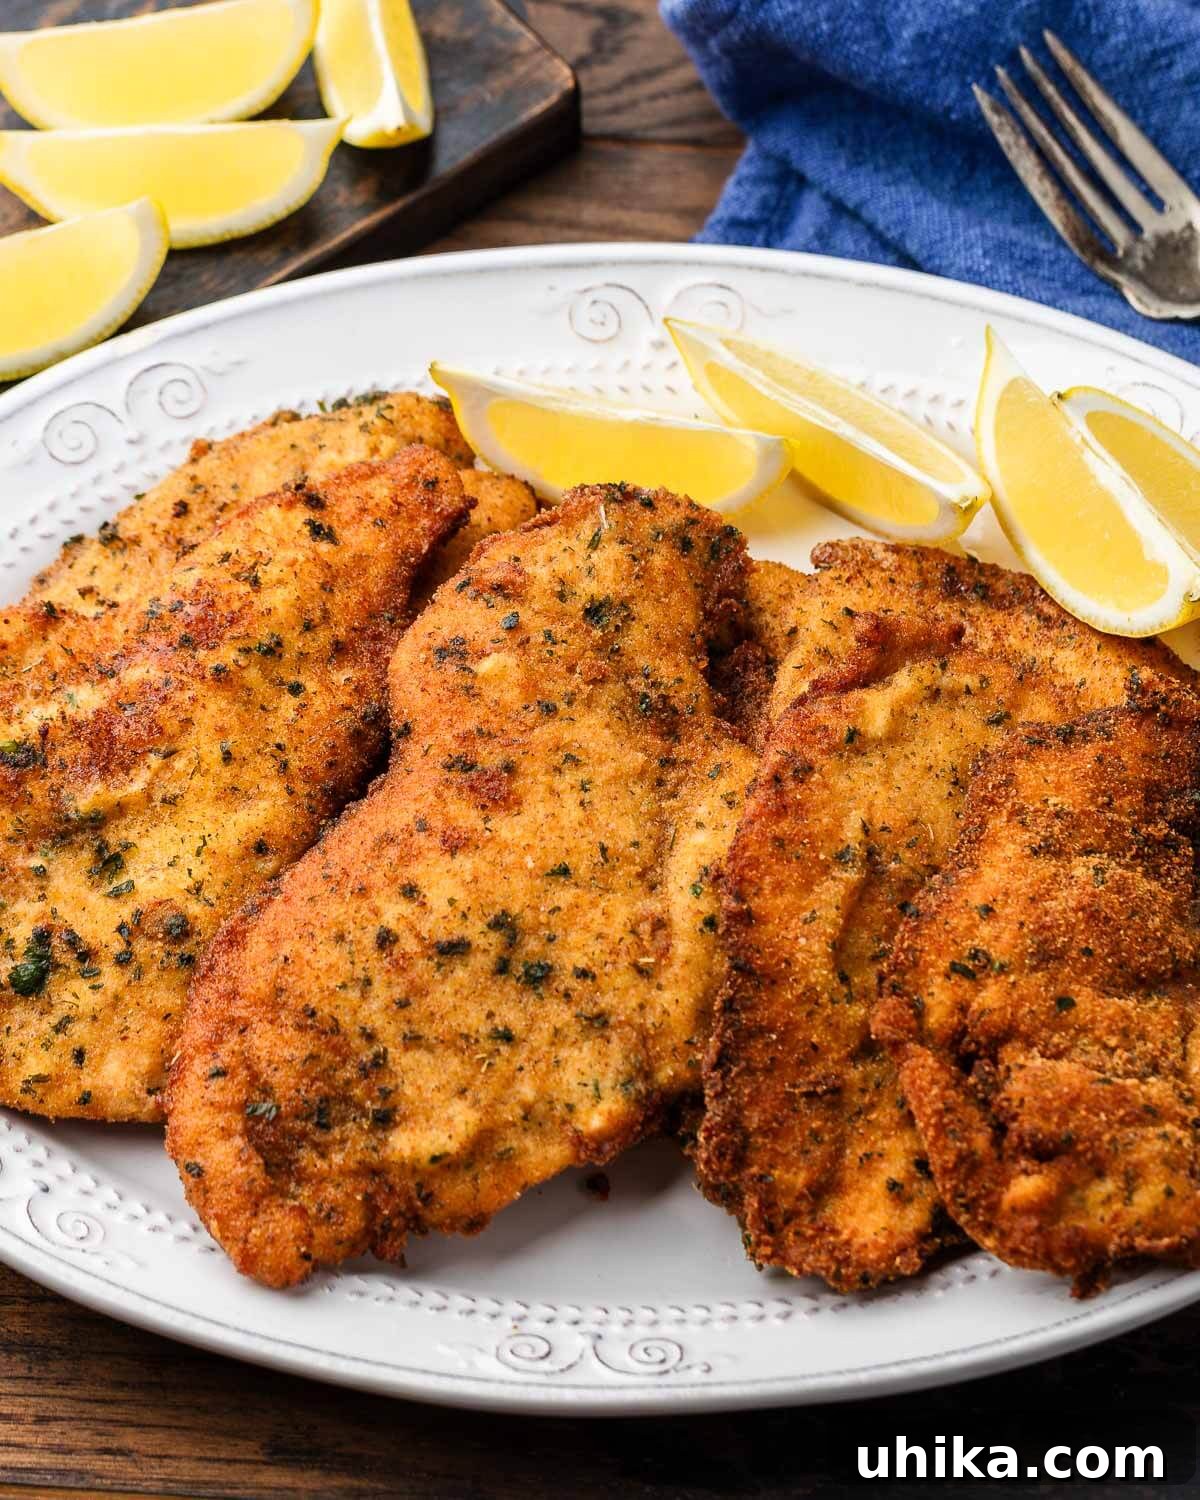
There’s nothing quite like a perfectly cooked plate of Italian Chicken Cutlets. These golden-fried beauties are more than just a meal; they’re a culinary cornerstone, a staple in Italian-American kitchens, and an absolute joy to eat. Whether nestled in a hearty sandwich, tossed into a vibrant salad, or serving as the base for a classic chicken parmigiana, their versatility knows no bounds. Simply enjoyed on their own with a generous squeeze of fresh lemon, they are truly perfection.
This timeless recipe, originally shared on February 11, 2020, has been lovingly updated on July 27, 2024, with brand-new pictures, expanded information, and an improved recipe to ensure your cutlets are always as delicious as Nonna used to make.
For anyone navigating a busy schedule, these Italian chicken cutlets are a true lifesaver. I often find myself preparing large batches—sometimes even doubling or tripling this recipe—especially when the kids head back to school. They’re incredibly versatile, making fantastic additions to lunchbox sandwiches, and they effortlessly transform into a satisfying weeknight dinner. Pair them with a simple fluffy rice pilaf, tender rosemary lemon smashed potatoes, or a side of vibrant sauteed greens like garlic broccoli rabe, sautéed spinach with garlic, or a refreshing arugula salad finished with a bright lemon vinaigrette and shavings of Parmigiano Reggiano. These cutlets truly adapt to any meal scenario, making them an indispensable part of your culinary repertoire.
Why You’ll Adore These Italian Chicken Cutlets
What makes these chicken cutlets so universally loved? It’s a combination of their crispy texture, tender interior, and the delightful blend of traditional Italian flavors. Here’s why this recipe will quickly become a family favorite:
- Unmatched Versatility: As mentioned, these cutlets are a chameleon in the kitchen. From quick lunches to elegant dinners, they fit every occasion.
- Simple Ingredients, Incredible Flavor: You don’t need exotic ingredients to create something truly delicious. Our recipe relies on pantry staples and fresh chicken for maximum impact.
- Perfect for Meal Prep: Make a big batch at the beginning of the week, and you’ll have a convenient protein ready for multiple meals, saving you precious time.
- Kid-Friendly: The crispy coating and tender chicken breast are a hit with even the pickiest eaters.
- Authentic Italian Taste: Infused with Pecorino Romano and fresh parsley, these cutlets bring the authentic flavors of an Italian kitchen right to your table.
Essential Recipe Ingredients
Crafting the perfect Italian chicken cutlet begins with selecting the right ingredients. Below you’ll find a visual guide to everything you need, followed by important notes to help you choose wisely.
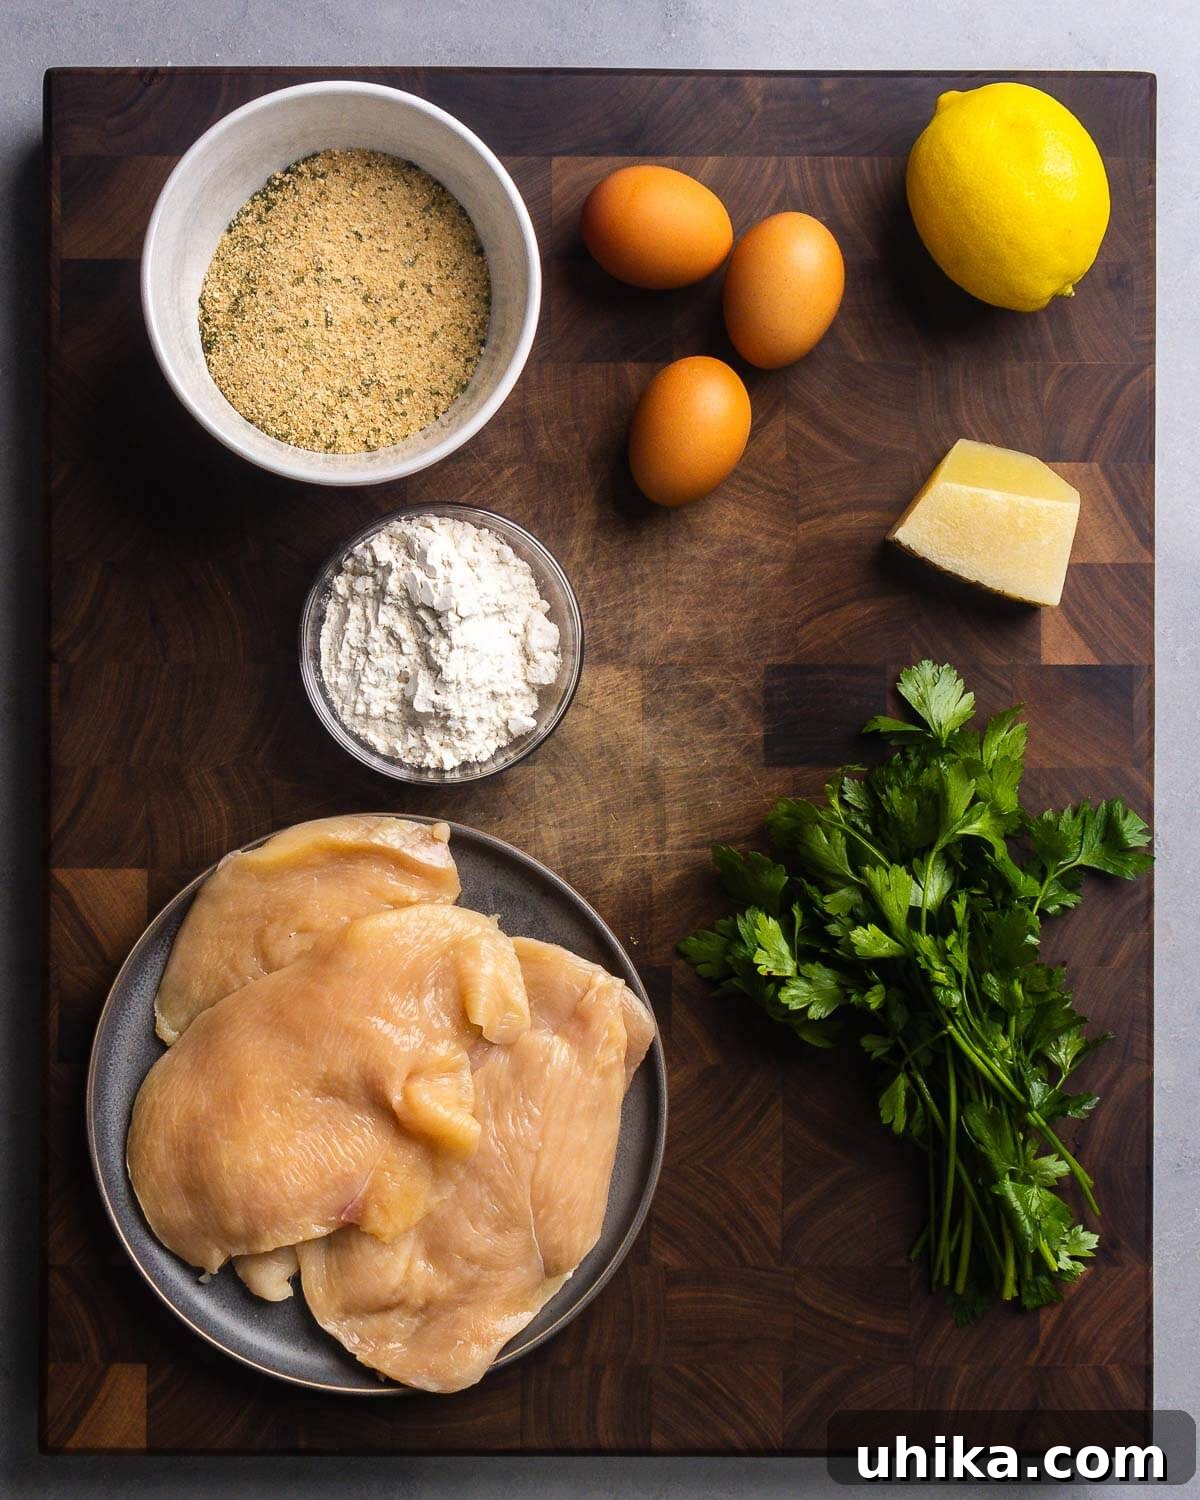
- Chicken: For the best results, seek out thinly sliced chicken breasts. If you’re working with full breasts, you’ll need to butterfly and pound them to a uniform thickness, ideally no more than 1/2 inch. Many grocery stores now conveniently offer ultra-thin cutlets, which can be a real time-saver. Uniform thickness is crucial for even cooking and a consistently crispy exterior.
- Oil: While high-quality olive oil can be used for frying, it can be pricier and has a lower smoke point. For a more economical and stable frying option, consider neutral oils like canola, vegetable, or peanut oil. These oils can withstand higher temperatures, ensuring a beautiful golden crust without burning.
- Breadcrumbs: Italian seasoned breadcrumbs are my go-to for their built-in blend of herbs and spices, which imparts a classic flavor. However, plain breadcrumbs work just as well, allowing you to customize the seasoning with your favorite herbs and spices. For an extra crispy texture, you might even consider using panko breadcrumbs.
- Pecorino Romano: This hard, salty Italian cheese adds a wonderful depth of flavor to the breading. Its sharp, tangy profile complements the chicken beautifully. While Parmigiano Reggiano can be used as a substitute, Pecorino Romano offers a more robust, traditional taste that truly elevates these cutlets.
- Fresh Italian Flat-Leaf Parsley: Minced fresh parsley isn’t just for garnish; it brightens the flavor of the breading, adding a fresh, herbaceous note that cuts through the richness of the fried chicken.
- Eggs: Large eggs are essential for creating the binder that adheres the flour and breadcrumbs to the chicken, ensuring a beautifully coated and crispy cutlet.
- All-Purpose Flour: The initial dredge in flour helps create a dry surface for the egg wash to cling to, forming a crucial first layer for the breading.
- Diamond Crystal Kosher Salt & Black Pepper: Proper seasoning at each stage is key. We divide the salt and pepper to season both the flour and the breadcrumb mixture, ensuring flavor permeates every bite.
For precise measurements and detailed instructions, please refer to the comprehensive recipe card below.
Mastering the Art of Italian Chicken Cutlets
Creating perfect Italian chicken cutlets is a straightforward process, but paying attention to each step ensures a tender, juicy interior and an incredibly crispy, golden exterior. Follow these detailed steps to achieve culinary perfection.
- Prepare the Chicken: Begin by preparing your chicken. If you are using full chicken breasts, carefully fillet them horizontally to create thinner pieces. Then, using a meat mallet, gently pound 1 pound of chicken cutlets until they are uniformly thin, ideally about 1/2 inch or even thinner. This crucial step ensures even cooking and maximum crispiness. Pat the pounded chicken dry with paper towels to remove any excess moisture, which helps the breading adhere better. While the chicken rests, finely mince 3 tablespoons of fresh flat-leaf Italian parsley and grate 1/4 cup of Pecorino Romano cheese.
- Set Up Your Dredging Station: Establish an organized “assembly line” for breading. You’ll need three separate bowls or shallow baking trays. In the first bowl, combine 1/2 cup of all-purpose flour with 3/4 teaspoon of Diamond Crystal kosher salt and 1/4 teaspoon of freshly ground black pepper, mixing well to distribute the seasonings evenly. In the second bowl, vigorously beat 3 large eggs until thoroughly combined. In the third bowl, combine 1 cup of Italian-seasoned breadcrumbs, the remaining 3/4 teaspoon of Diamond Crystal kosher salt, 1/4 teaspoon of black pepper, the minced parsley, and the grated Pecorino Romano. Mix all these dry ingredients together until well incorporated.
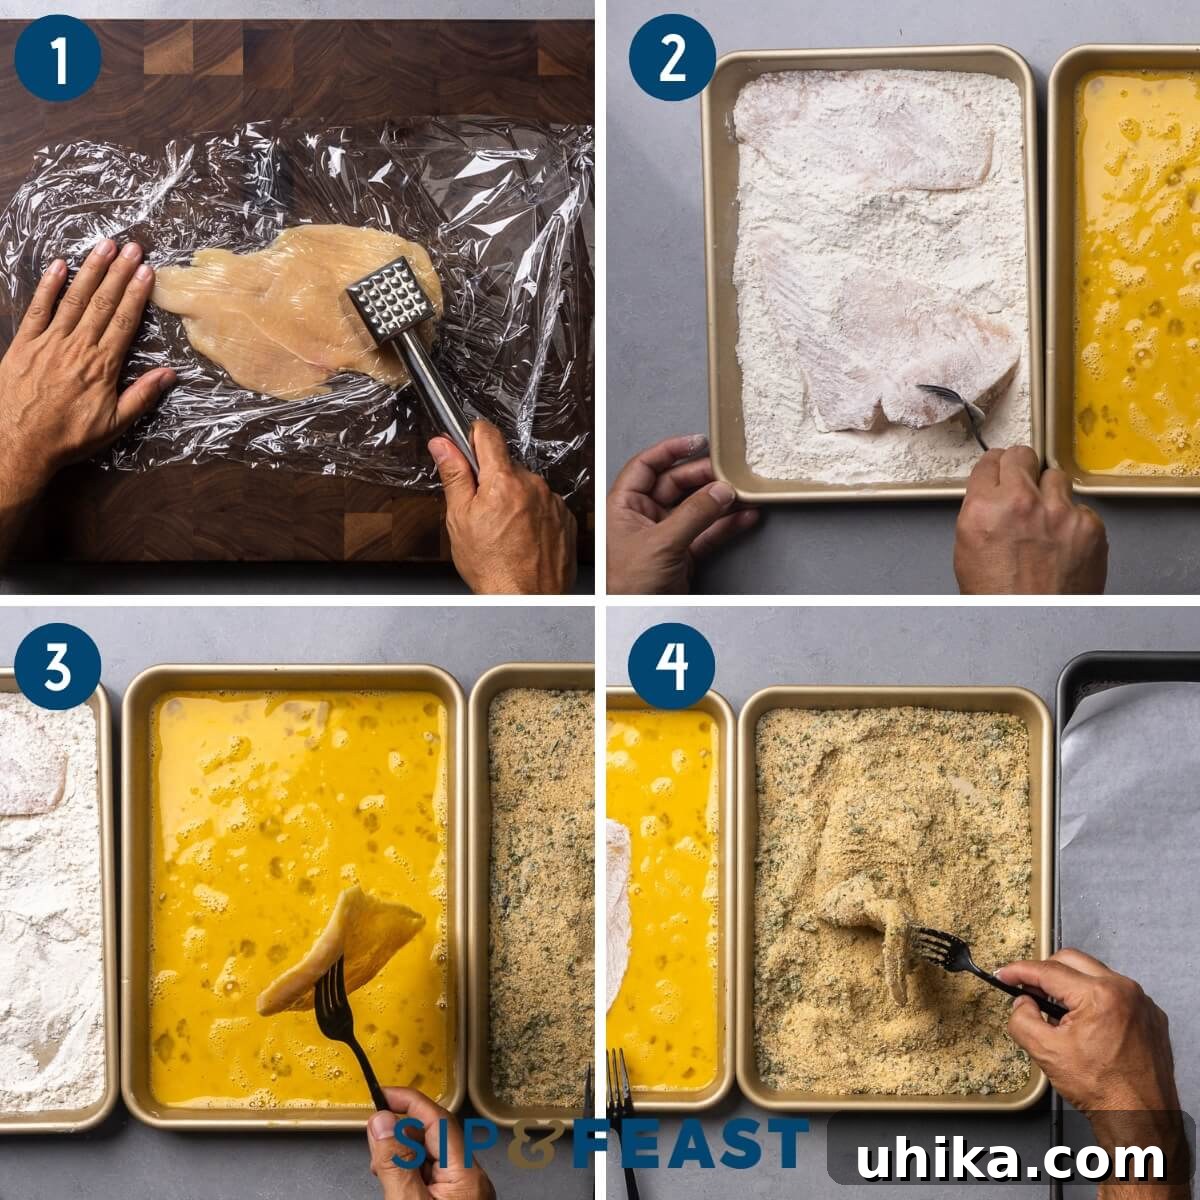
- Flour the Cutlets: Take one pounded chicken cutlet and dredge it thoroughly in the first bowl of seasoned flour, ensuring both sides are coated. Gently shake off any excess flour. A thin, even layer is what you’re aiming for.
- Dip in Egg Wash: Immediately transfer the floured cutlet into the second bowl containing the beaten eggs. Ensure the entire surface of the cutlet is completely coated with the egg wash. Lift the cutlet, allowing any excess egg to drip back into the bowl. This egg layer acts as a crucial adhesive for the breadcrumbs.
- Bread the Cutlets: Next, place the egg-dipped cutlet into the third bowl with the seasoned breadcrumb mixture. Press the breadcrumbs firmly onto both sides of the chicken, ensuring a thick, even coating. The more breadcrumbs adhere, the crispier your cutlet will be.
- Prepare for Frying: Once breaded, carefully place the chicken cutlets onto a baking sheet lined with parchment paper. This prevents sticking and makes cleanup easier. If you’re preparing multiple batches, it’s a good idea to refrigerate the breaded cutlets while you finish the others. This helps the breading set and prevents it from falling off during frying.
- Heat the Oil: In a large, heavy-bottomed pan, such as a cast iron skillet, pour approximately 2 cups of olive oil or neutral oil, aiming for about 1 inch in height. Heat the oil over medium-high heat until it reaches a temperature of 360°F (182°C). Using an oil thermometer is highly recommended for accuracy, ensuring your cutlets cook perfectly without becoming greasy or burning. If you don’t have a thermometer, a small piece of breadcrumb should sizzle immediately and turn golden in about 30 seconds when the oil is ready.
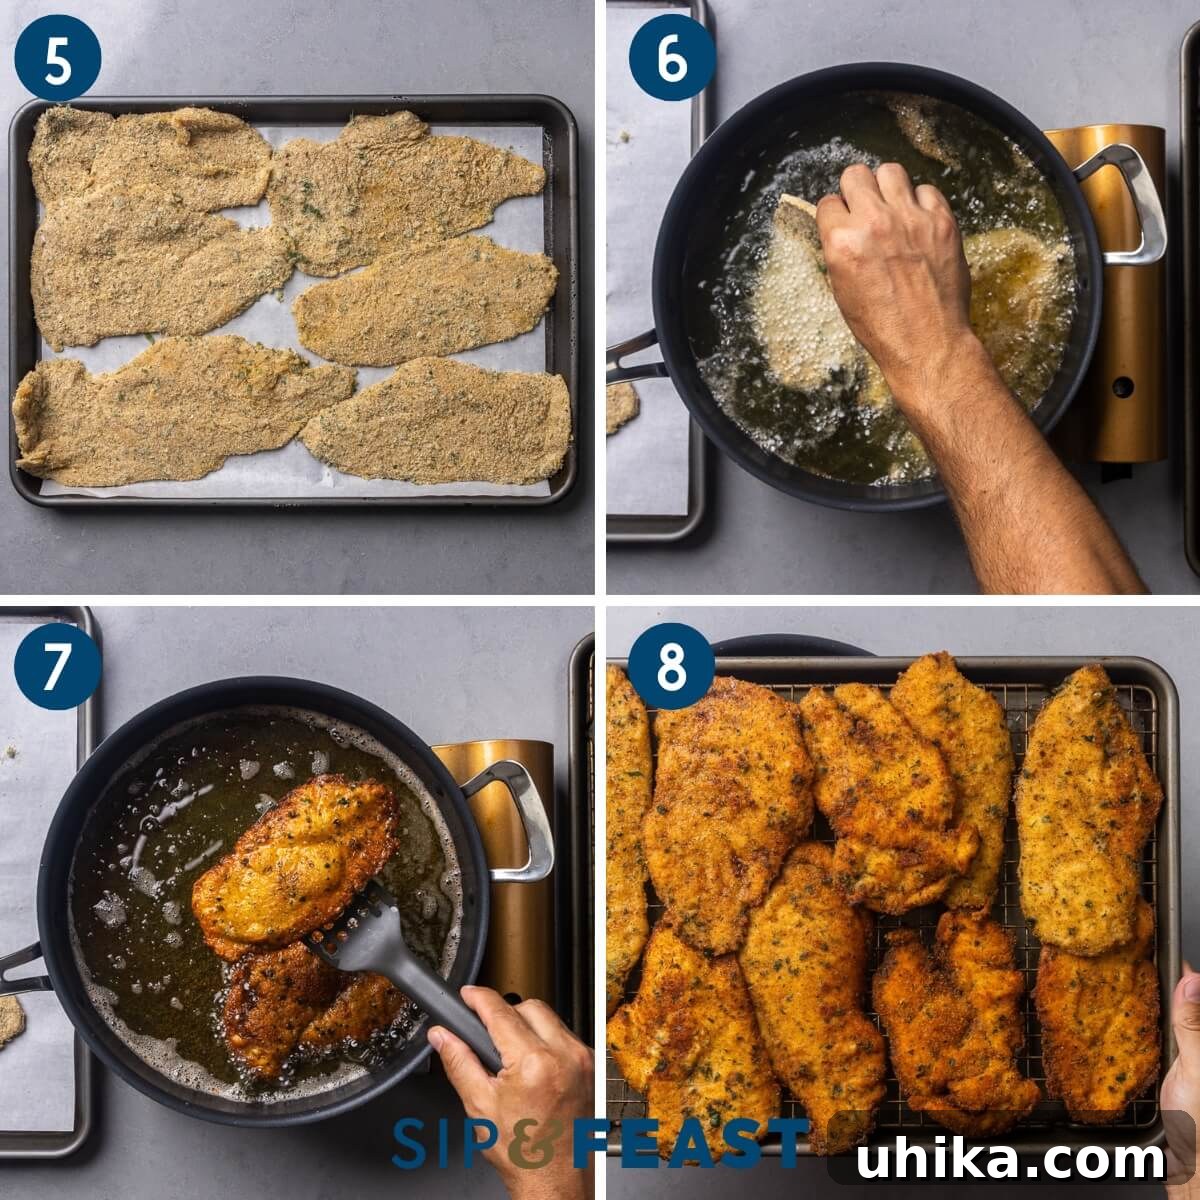
- Fry the Cutlets: Carefully place the breaded cutlets into the hot oil. Fry them for approximately 3 minutes per side, or until they achieve a beautiful golden-brown color and are cooked through. Work in batches to avoid overcrowding the pan, which can lower the oil temperature and lead to soggy cutlets. The 1-inch depth of oil facilitates a quicker and more even fry compared to shallow frying. If you opt for shallow frying with about 1/4-inch of oil, you may need to add more oil between batches to maintain consistency.
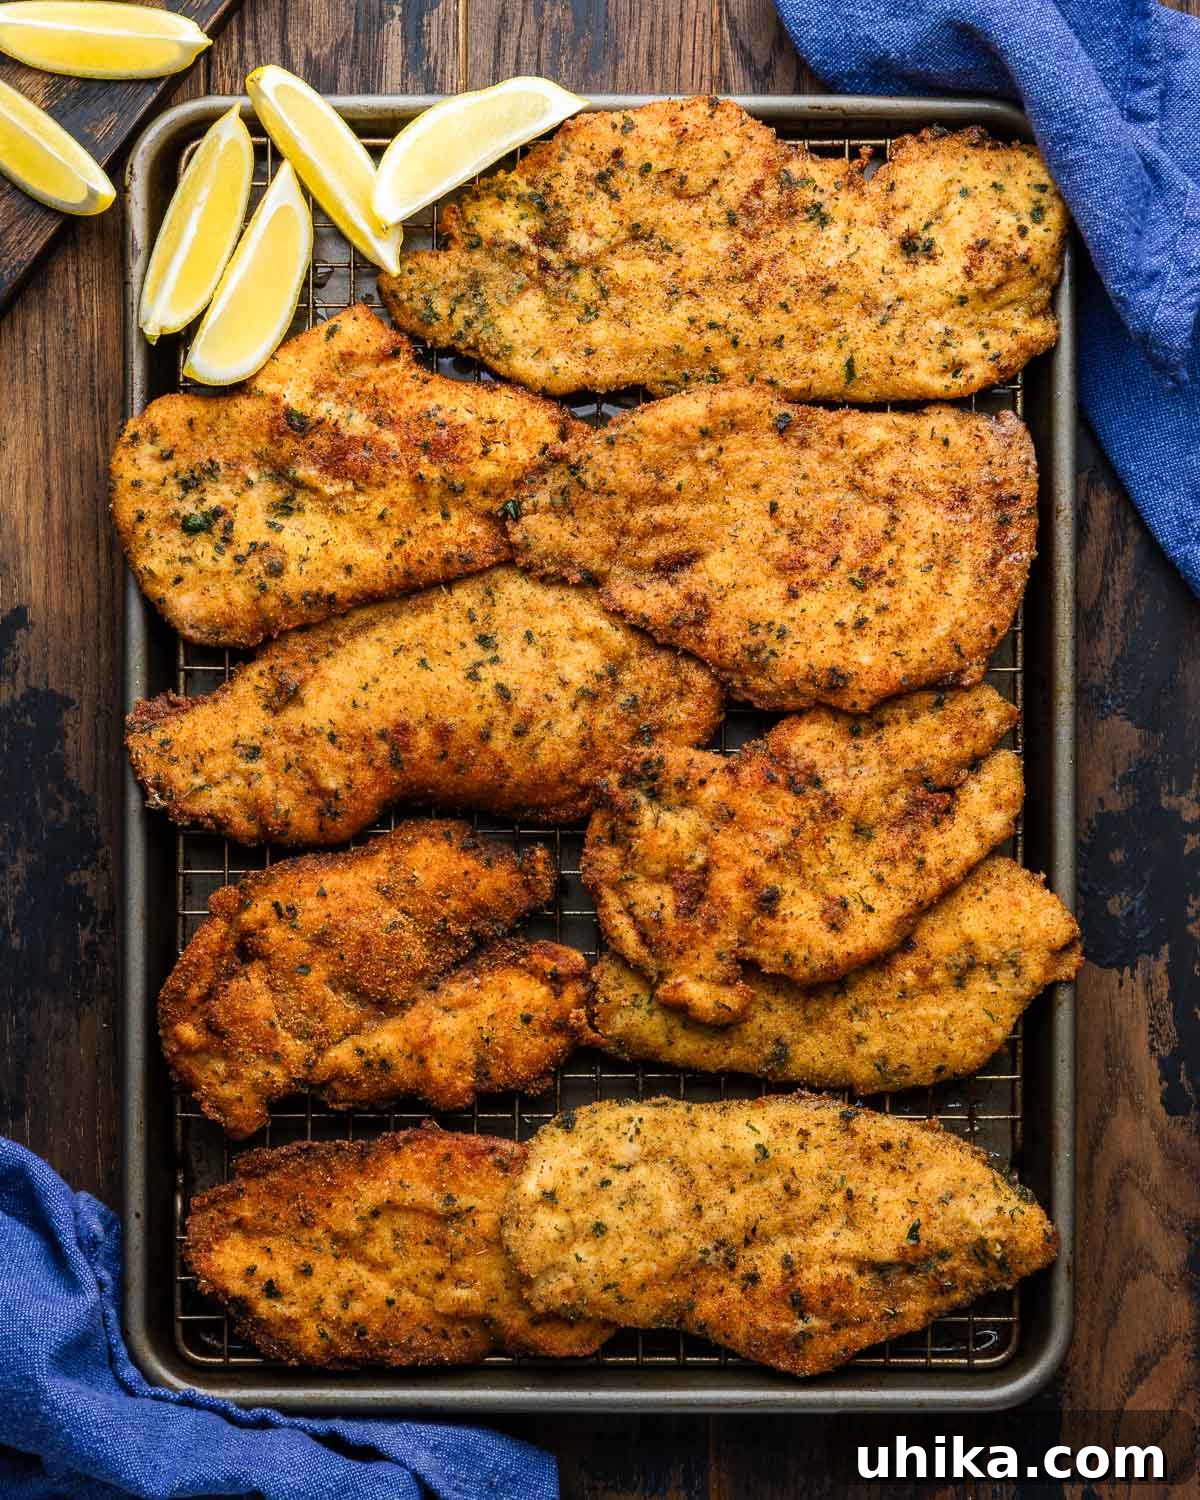
- Drain and Serve: Once fried to perfection, remove the cutlets from the oil and immediately transfer them to a wire rack set over a baking sheet, or a plate lined with paper towels, to drain any excess oil. This step is crucial for maintaining their crispiness. Serve the cutlets warm, perhaps with a simple side of fresh arugula, delicate shavings of Parmigiano Reggiano, and a bright squeeze of lemon. Alternatively, allow them to cool completely before storing them in the refrigerator. They are fantastic for preparing sandwiches, classic chicken parmigiana, or adding to vibrant salads for a healthy protein boost.
Top Tips for Perfect Italian Chicken Cutlets
Achieving consistently perfect Italian chicken cutlets is easy with a few expert tips:
- Don’t Be Shy, Make a Lot! If you’ve ever walked into an Italian-American grandma’s kitchen, you’d likely find a towering pile of Italian Chicken Cutlets ready for anything. Nonnas were, arguably, the original meal preppers! While this recipe serves 4, you can effortlessly scale it up to prepare a much larger batch. This way, you’ll have delicious cutlets on hand for various dishes throughout your week, from folding into Spicy Rigatoni Vodka with Chicken to crafting elegant Chicken Milanese. I always make a significant quantity – in fact, a couple of years ago for our chicken parmigiana YouTube video, I fried about 8 pounds of cutlets!
- Invest in an Oil Thermometer: The ideal temperature for frying Italian chicken cutlets is between 350-360°F (175-182°C). Using an oil thermometer is the most foolproof method to ensure you maintain the proper temperature. This prevents the cutlets from becoming greasy (if the oil is too cool) or burning before cooking through (if the oil is too hot).
- Save Your Frying Oil: If your frying oil remains relatively clean after use, don’t discard it immediately! Allow it to cool completely, then strain it through a fine-mesh strainer or a coffee filter to remove any food particles. Store the strained oil in a marked, airtight bottle or container in a cool, dark place. You can typically reuse frying oil 1-2 more times for similar purposes, making it more economical and environmentally friendly.
- Pound for Perfection: Don’t underestimate the importance of pounding the chicken cutlets thin and evenly. This ensures they cook quickly and uniformly, resulting in a consistently crispy texture without dry spots.
- The Power of the Wire Rack: After frying, always transfer your cooked cutlets to a wire rack set over a baking sheet, rather than directly onto paper towels. This allows air to circulate around all sides, preventing the bottom from steaming and becoming soggy, thus preserving that delightful crispiness.
- Pre-breading Prep: You can bread your chicken cutlets ahead of time and store them in the refrigerator for up to 24 hours before frying. This is a fantastic strategy for meal prepping and making weeknight dinners even faster. Just ensure they are covered to prevent drying out.
Common Questions About Italian Chicken Cutlets
Can I bake or air fry these chicken cutlets instead of frying?
Yes, you absolutely can! For a lighter version, you can bake them at 400°F (200°C) for 20-25 minutes, flipping halfway through, until golden and cooked through. Alternatively, air fry them at 375°F (190°C) for 12-15 minutes, flipping once, until crispy and cooked. While frying yields the crispiest result, these methods are great healthier alternatives.
How do I keep chicken cutlets crispy after frying?
The key to keeping them crispy is to drain them on a wire rack immediately after frying. Avoid stacking them on top of each other, as this traps steam and makes them soggy. If you need to keep them warm for a short period, you can place them on the wire rack in a preheated oven at 200°F (90°C).
Can I make these gluten-free?
Certainly! Simply substitute the all-purpose flour with a gluten-free all-purpose flour blend and use gluten-free breadcrumbs. The rest of the recipe remains the same, ensuring a delicious gluten-free option.
How should I store and reheat leftover chicken cutlets?
Cooked cutlets can be stored in an airtight container in the refrigerator for up to 3 days. To reheat, place them on a baking sheet and warm them in a preheated oven at 325°F (160°C) for 12-15 minutes, or until heated through and crispy. You can also reheat them in an air fryer for a few minutes until crisp.
What are some other serving suggestions for Italian chicken cutlets?
Beyond sandwiches and salads, Italian chicken cutlets are excellent with a side of pasta tossed in marinara sauce, alongside roasted vegetables, or even chopped and added to a frittata or omelet for a hearty breakfast or brunch. They’re also phenomenal sliced thin and served with fresh mozzarella, tomatoes, and basil for a Caprese-inspired meal.
More Italian Chicken Recipes You’ll Adore
If you’ve fallen in love with these chicken cutlets, you’ll be thrilled to explore more of our favorite chicken breast recipes, each bursting with authentic Italian flavors. We hope you enjoy them as much as we do!
- Classic Chicken Saltimbocca
- Hearty Chicken Valdostana
- Elegant Chicken Francese
If you’ve thoroughly enjoyed this Italian Chicken Cutlets Recipe or any other delightful recipe on our site, we would be incredibly grateful if you could give it a 5-star rating and share your culinary experience with us in the comments section below. Your feedback helps us grow and inspires other home cooks!
We believe in catering to various learning preferences. If you are someone who prefers to learn by watching, you’ll be pleased to find most of our recipes beautifully demonstrated on our official YouTube channel and our vibrant Facebook Page. Join our community there for step-by-step video guides and culinary inspiration.
For exclusive, never-before-seen FULL MEAL RECIPE VIDEOS and a deeper dive into authentic Italian cooking, consider becoming a valued Patreon member today! Your support helps us continue creating and sharing our passion for delicious food.
Italian Chicken Cutlets

Pin
SaveSaved
Ingredients
- olive oil for frying, enough to fill pan at least 1-inch high (or neutral oil like canola/vegetable)
- 1 pound (454g) chicken cutlets thinly sliced or pounded to 1/2 inch thickness
- 1/2 cup (65g) all-purpose flour for dredging
- 1 1/2 teaspoons Diamond Crystal Kosher salt divided
- 1/2 teaspoon black pepper divided
- 3 large eggs beaten
- 1 cup (100g) Italian seasoned breadcrumbs
- 3 tablespoons minced Italian flat-leaf parsley
- 1/4 cup (23g) grated Pecorino Romano
- 1 large lemon cut into wedges, for serving
Want To Save This Recipe?
Enter your email and we’ll send it to you. Plus, get great new recipes from us every week!
Instructions
-
First, prepare your chicken cutlets by pounding them thin (if not already) and patting them completely dry. Then, set up your breading station with three shallow bowls or baking dishes. In the first bowl, combine the flour with half of the kosher salt and black pepper. In the second bowl, beat the eggs. In the third bowl, combine the breadcrumbs, Pecorino Romano, minced parsley, and the remaining salt and pepper.
-
Dredge each dry chicken cutlet thoroughly in the seasoned flour, shaking off any excess. Next, dip the floured cutlet into the beaten egg wash, ensuring it’s completely coated, and allow any excess egg to drip off. Finally, place the egg-dipped chicken into the breadcrumb mixture, pressing firmly on both sides to ensure a thick, even coating. Set the fully breaded chicken cutlets onto a parchment paper-lined baking sheet.
-
Pour olive oil (or neutral oil) into a large cast iron or heavy pan, filling it to approximately 1-inch high. Heat the oil over medium-high heat until it reaches 360°F (182°C). An oil thermometer is recommended for accuracy.
-
Carefully place the breaded chicken cutlets into the hot oil, working in batches to avoid overcrowding the pan. Fry for 3-4 minutes per side, or until they are golden brown and cooked through. Once cooked, transfer the cutlets to a wire rack or a plate lined with paper towels to drain excess oil.
-
Serve the crispy chicken cutlets warm, either by themselves with a squeeze of fresh lemon, alongside a simple arugula salad, or as part of a larger meal. Enjoy your delicious homemade Italian Chicken Cutlets!
Notes
- The quantities for breadcrumbs, flour, and eggs are approximate. Depending on the thickness and size of your chicken cutlets, you may need to add a touch more of any of these ingredients as required to ensure full coverage.
- Always fillet and pound chicken cutlets to no more than 1/2 inch thick; thinner is generally better for maximum crispiness and even cooking. Many grocery stores now offer pre-sliced ultra-thin cutlets, which saves prep time.
- Maintaining an oil temperature of 360°F (182°C) is key for perfectly fried cutlets that are golden and not greasy. An oil thermometer is a valuable kitchen tool for this.
- For meal prep convenience, chicken cutlets can be breaded up to 24 hours in advance and stored covered in the refrigerator before frying.
- Storing & Leftovers: Cooked chicken cutlets can be stored in an airtight container in the fridge for up to 3 days. To reheat, place them on a baking sheet in a preheated oven at 325°F (160°C) for 12-15 minutes, or in an air fryer, until warmed through and crispy.
Nutrition
Nutrition information is automatically calculated, so should only be used as an approximation.
Like this? Leave a comment below!Check us out on Instagram at @sipandfeast or tag #sipandfeast!
This recipe was originally published on February 11, 2020, and underwent a complete update on July 27, 2024, to bring you enhanced details and a more refined experience.