
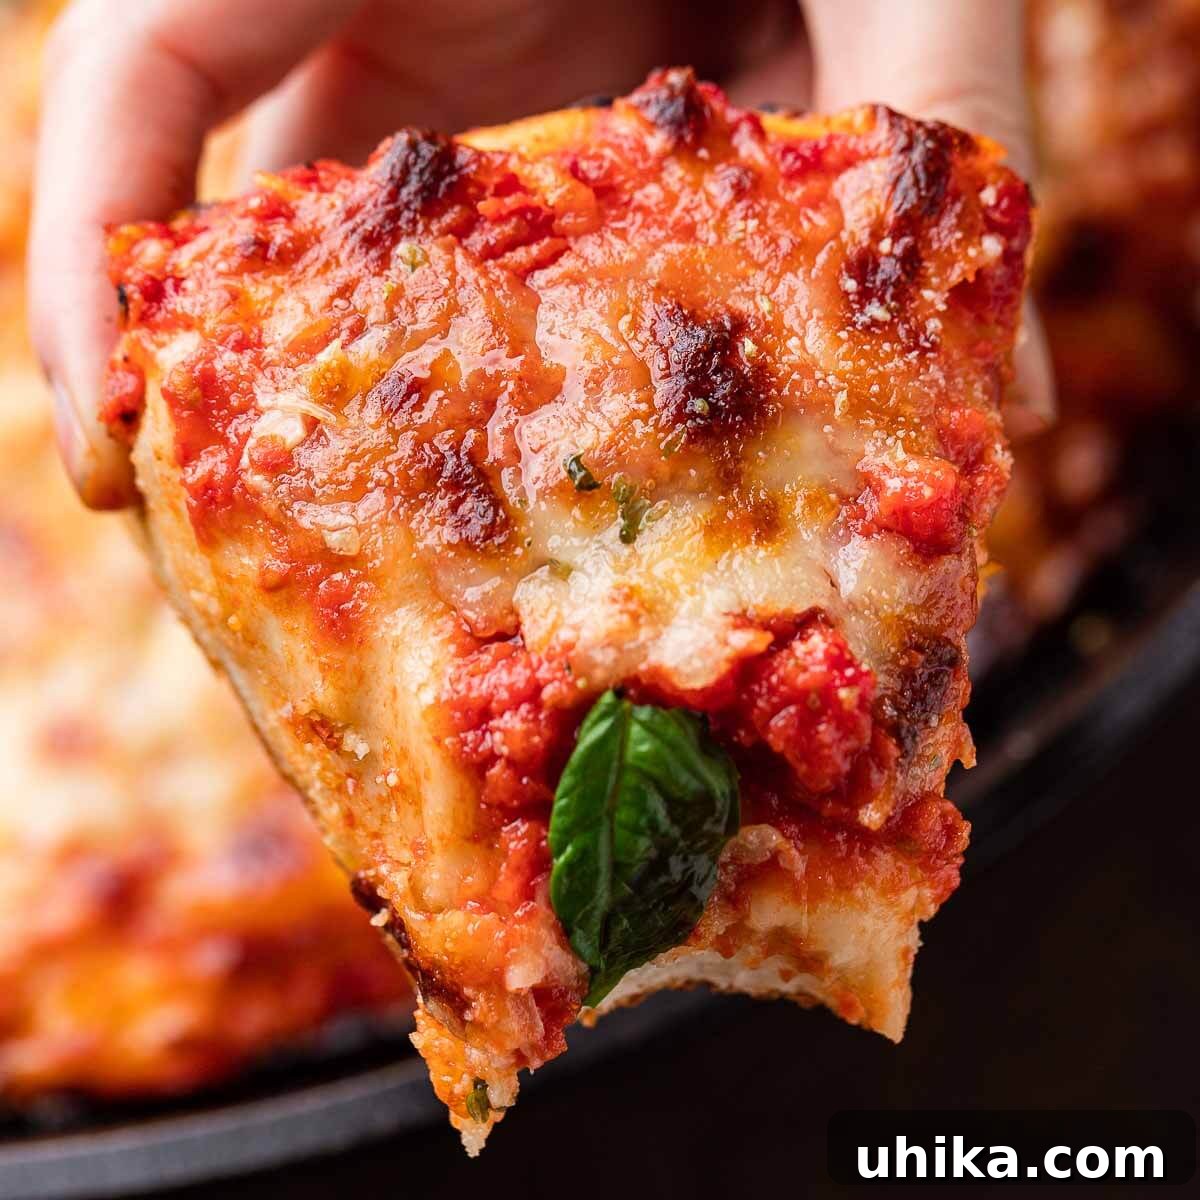
Discover the ultimate guide to crafting a delicious and effortlessly achievable **cast iron pan pizza**. Forget the complexities of pizza steels or dedicated pizza ovens; this method brings gourmet pizza night right to your kitchen with minimal fuss. Our recipe leverages a classic New York-style cold-fermented dough, vibrant plum tomatoes, rich block mozzarella, and savory Pecorino Romano cheese. The inherent qualities of a cast iron pan create a uniquely crispy bottom crust and a fluffy interior, making it the perfect foundation for any toppings you desire.
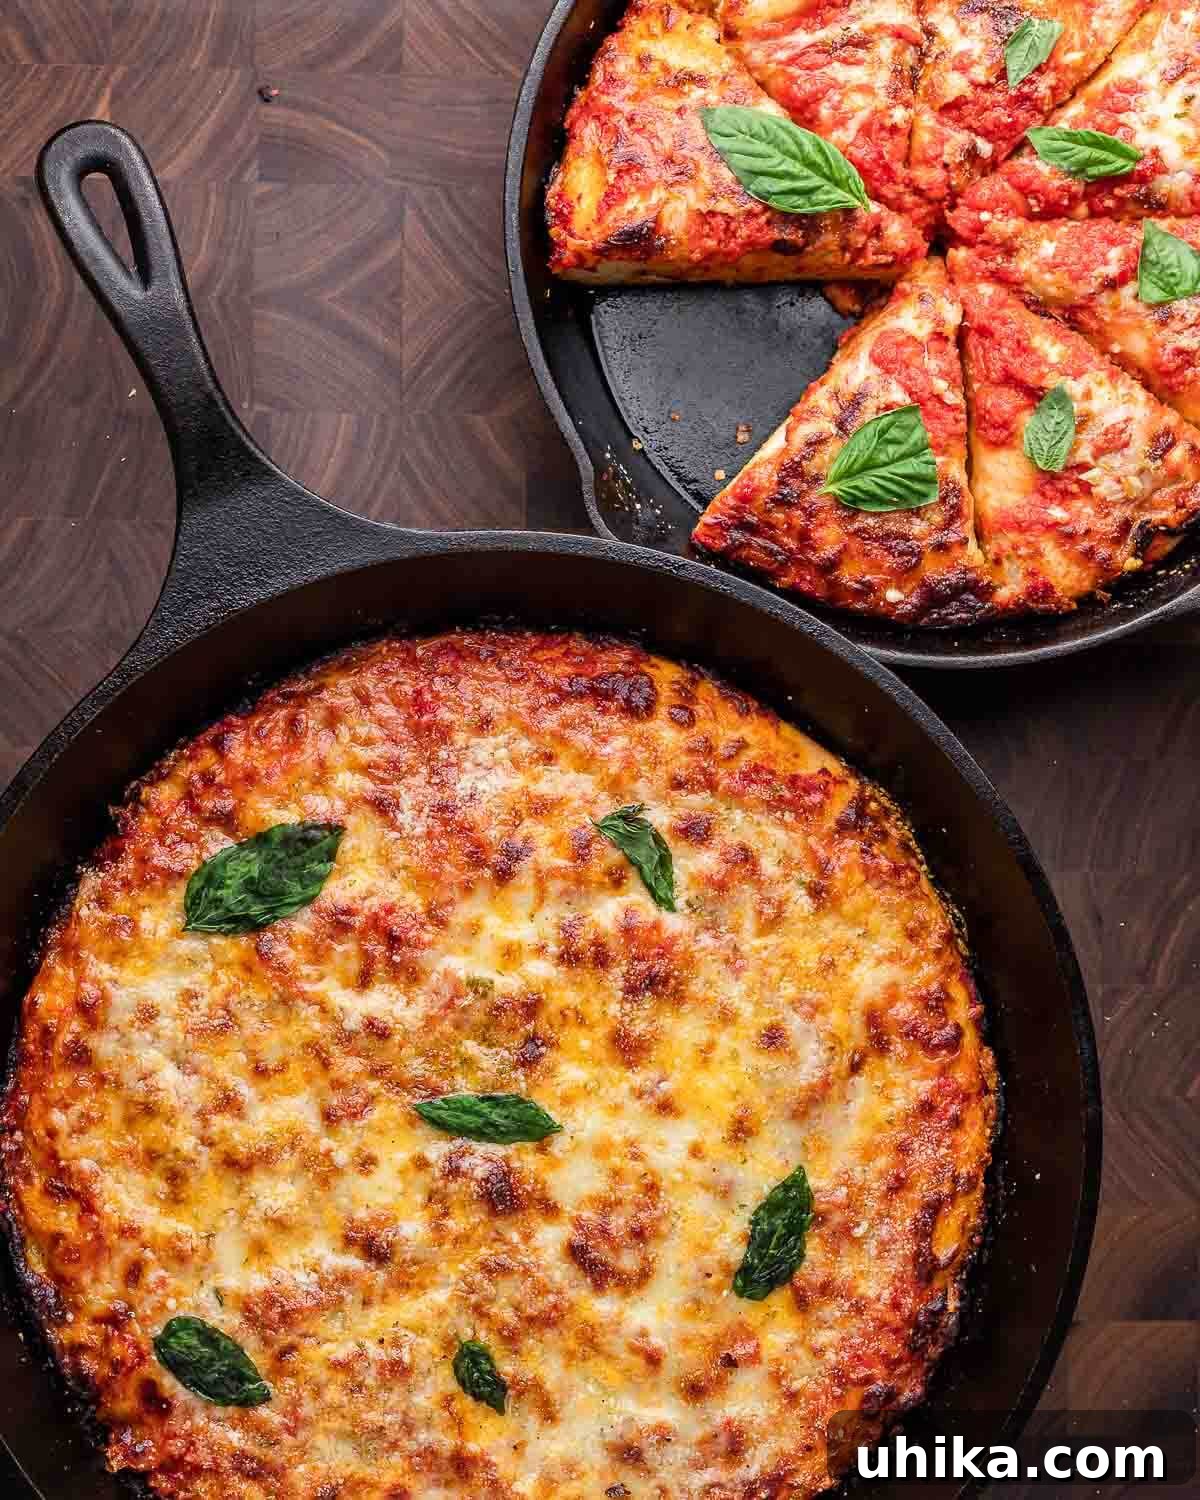
Why Choose Cast Iron for Your Next Pizza?
Cast iron pizza stands out as a superior and incredibly convenient alternative to traditional New York round pizzas, which often require specialized equipment like a pizza steel. This method simplifies the entire pizza-making process, eliminating the challenging stretching and launching techniques typically associated with classic New York pies. Despite its ease, our recipe ensures an exceptional flavor profile thanks to the same tried-and-true cold-fermented dough. The unique thermal properties of cast iron allow for incredible heat retention and even cooking, resulting in a perfectly golden, crunchy crust that’s difficult to achieve with other methods.
While a simple cheese cast iron pizza, adorned with fresh basil, is undoubtedly a treat, the deep sides of a cast iron pan transform it into an ideal vessel for an abundance of toppings. This design prevents spillover, inviting you to experiment with your favorite combinations such as spicy pepperoni, briny anchovies, earthy mushrooms, tangy olives, hearty sausage, or any other creative additions your palate desires. The robust crust handles heavy toppings effortlessly, making every bite a delightful explosion of flavor and texture.
Just like all our popular pizza recipes, this cast iron pan pizza pairs wonderfully with a side of savory garlic knots and a crisp salad, creating a complete and satisfying meal for any occasion.
Essential Ingredients for a Perfect Cast Iron Pan Pizza
Crafting an outstanding cast iron pan pizza begins with high-quality ingredients. Here’s a closer look at what you’ll need and why each component is crucial for achieving that perfect taste and texture. All ingredients are visibly presented in the image below, with important notes provided to guide you.
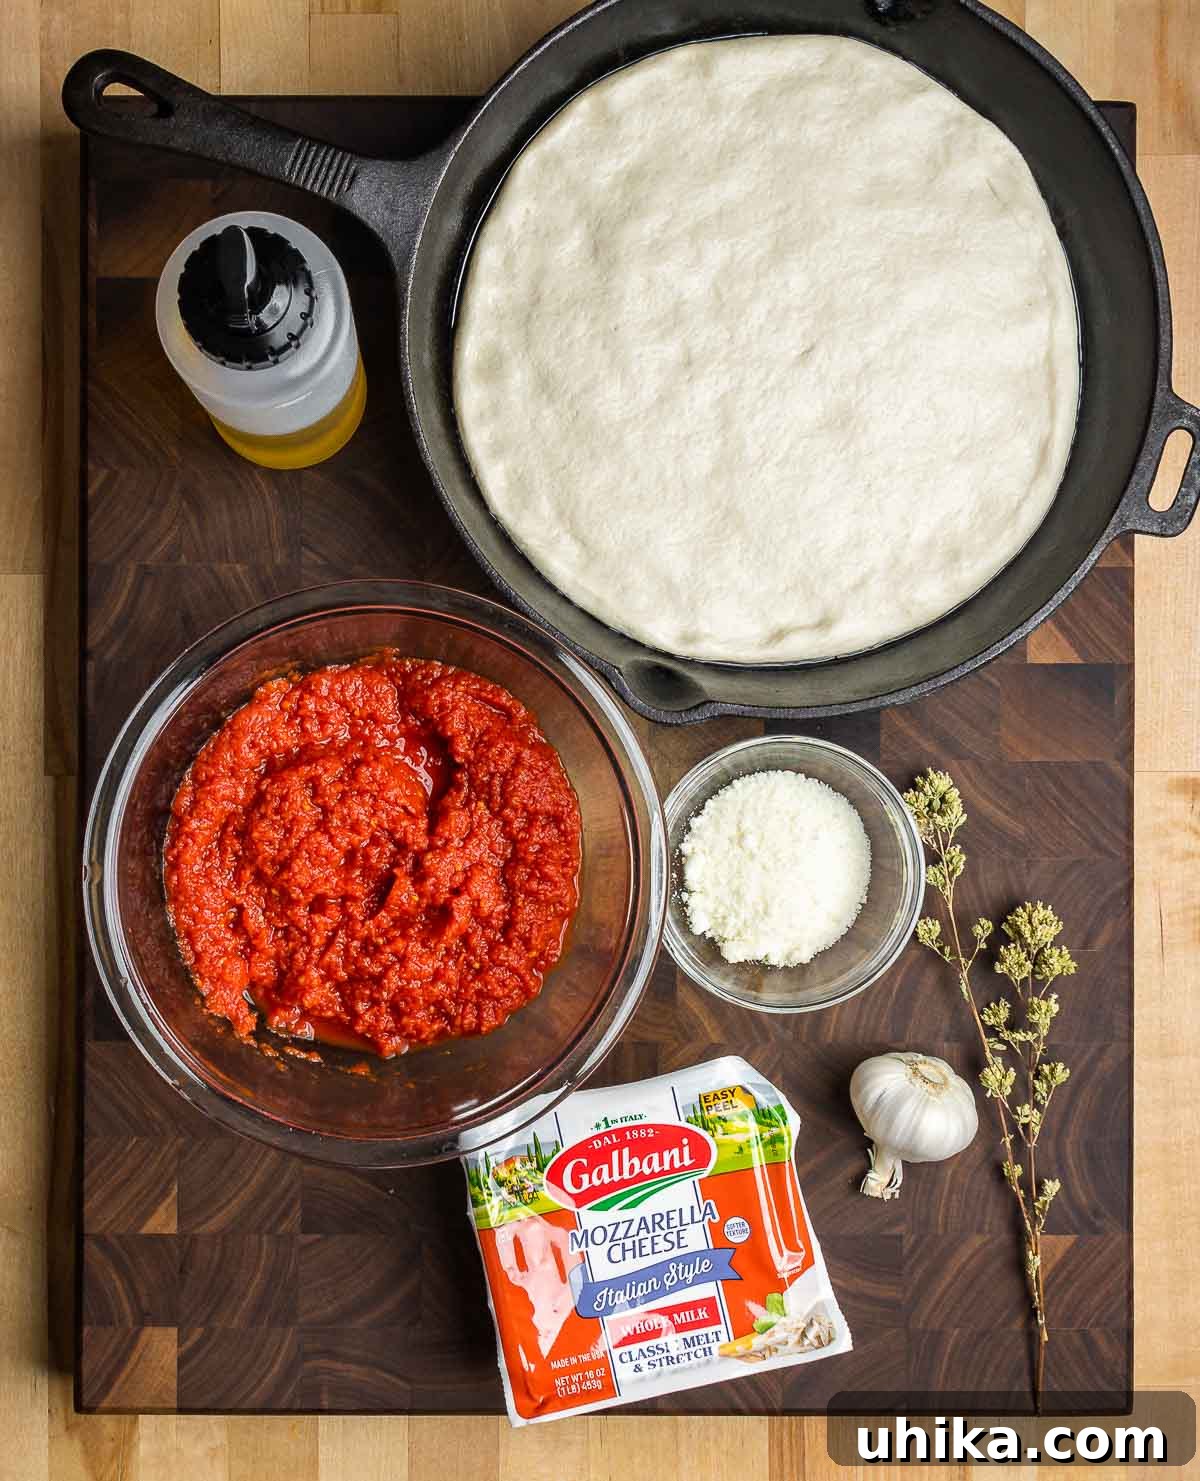
- Pizza Dough: The foundation of any great pizza. While we’ll guide you through making our classic homemade New York-style dough, feel free to use high-quality store-bought dough for convenience. You’ll need approximately 24 ounces (about 680 grams) of dough for this recipe, perfectly sized for a 12-inch cast iron pan. Our cold-fermented dough is key to the exceptional flavor and airy, chewy texture.
- Mozzarella Cheese: Opt for low-moisture, full-fat block mozzarella. This type of mozzarella melts beautifully without releasing excessive water, which can lead to a soggy crust. Shredding it yourself from a block ensures a superior melt and flavor compared to pre-shredded varieties.
- Tomatoes: High-quality plum tomatoes are essential for a rich, flavorful sauce. Whether you choose crushed tomatoes or whole plum tomatoes that you pulse in a blender, the most critical step is to drain them thoroughly. Excess liquid will make your pizza watery and prevent a crispy crust. A good brand of San Marzano style tomatoes will elevate your pizza sauce.
- Oregano: While any good dried oregano will work, we highly recommend Sicilian oregano. Its robust, earthy, and slightly peppery notes add an authentic Italian touch that truly enhances the flavor profile of your pizza.
- Olive Oil: A generous amount of good quality extra virgin olive oil is used to coat the pan, ensuring a golden, crisp bottom crust and easy release. It’s also infused with garlic for a delightful flavor boost drizzled over the top.
- Pecorino Romano Cheese: This hard, salty sheep’s milk cheese adds a sharp, tangy counterpoint to the creamy mozzarella, offering an additional layer of complex flavor. A final sprinkle after baking is highly recommended.
- Garlic and Kosher Salt: Simple but powerful flavor enhancers. Minced fresh garlic, infused in olive oil, adds aromatic depth, and kosher salt brings out the natural sweetness of the tomatoes and balances the overall taste.
Refer to the complete recipe card for precise measurements and quantities, ensuring you have everything ready to create your perfect cast iron pan pizza.
Crafting Your Cast Iron Pan Pizza: A Detailed Guide
Making a delicious cast iron pan pizza is a rewarding experience, combining the satisfaction of homemade dough with the ease of pan cooking. Follow these detailed steps to achieve a perfectly crispy, flavorful pizza every time.
Step 1: Preparing Your Perfect Pizza Dough
Our cast iron pizza begins with a cold-fermented New York-style dough, which develops incredible flavor and a beautiful texture. This dough requires some advance preparation, ideally a day before you plan to bake your pizza. Each numbered step corresponds to the process illustrated below.
- Combine Dry Ingredients: In a medium-sized bowl, thoroughly whisk together 3 1/4 cups (406 grams) of bread flour, 1/2 teaspoon (2 grams) of instant yeast, 1 1/2 teaspoons (8 grams) of fine sea salt, and 1 teaspoon (4 grams) of sugar. Mixing these dry ingredients ensures even distribution throughout the dough.
- Hydrate the Dough: Pour 9 ounces (260 grams) of cool water into a large mixing bowl. Gradually add the dry ingredient mixture to the water, a little at a time, mixing continuously with a sturdy spoon or your hands. Continue mixing until all the dry ingredients are incorporated and a dry, shaggy, rough mass of dough forms. It won’t look smooth yet, but all flour should be hydrated.
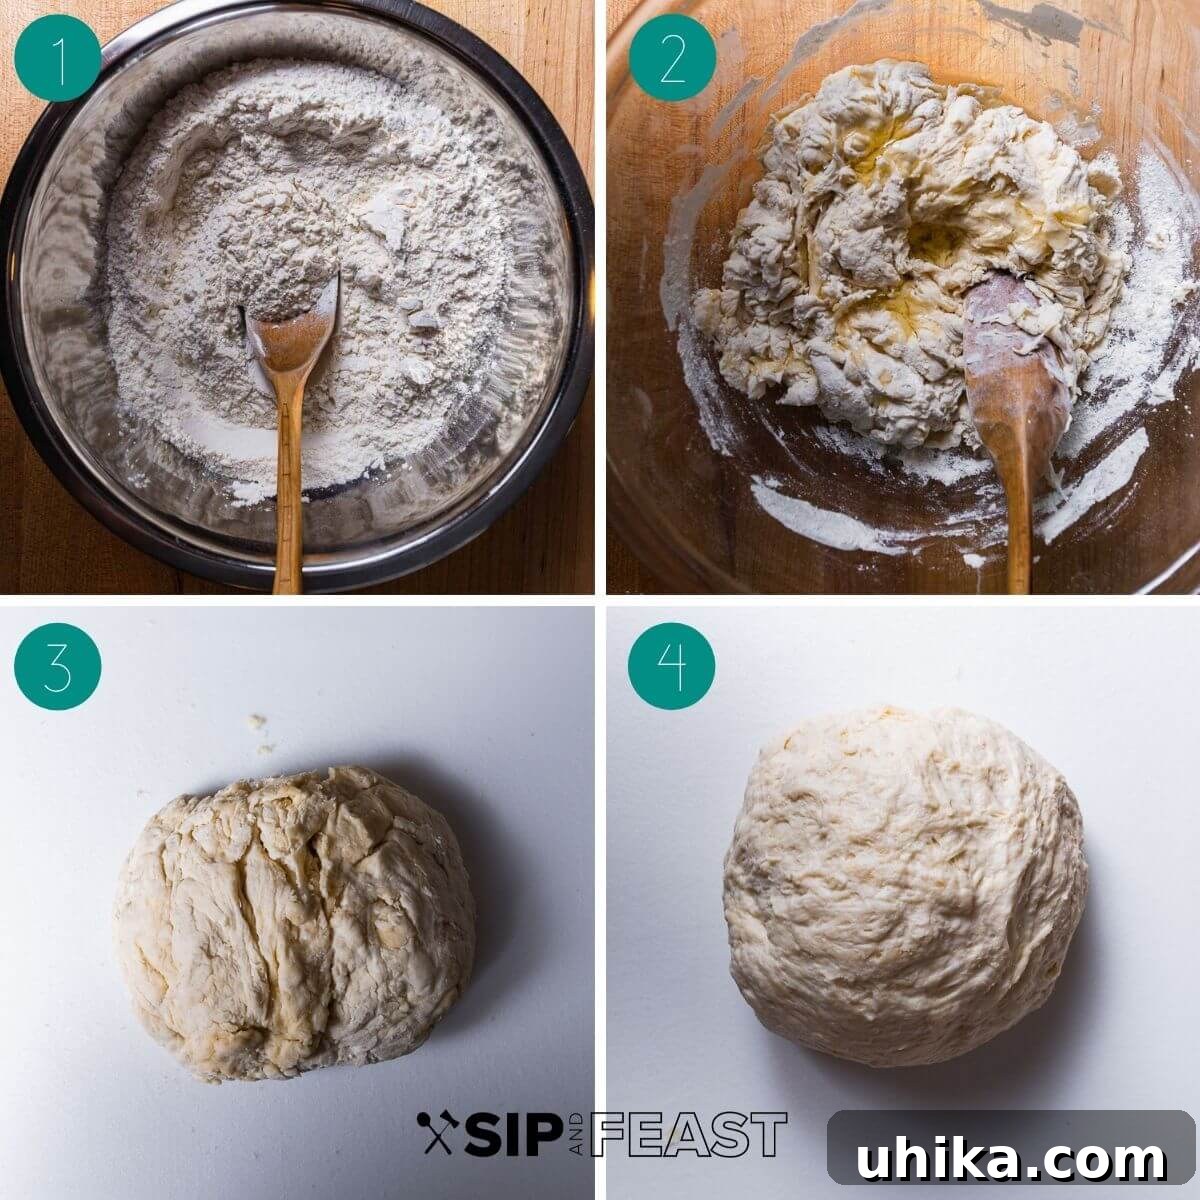
- Add Olive Oil and Initial Kneading: Pour 1 tablespoon (14 grams) of olive oil over the shaggy dough. Mix it in thoroughly, using the oil to help scrape any dough residue stuck to the sides of the bowl. Transfer the dough onto a clean, lightly floured work surface. Knead the dough vigorously for 5-7 minutes. This develops the gluten, creating a strong and elastic structure for your pizza crust. If the dough becomes too sticky to handle during kneading, simply cover it with an inverted clean bowl and let it rest for 30 minutes. This rest allows the flour to fully hydrate, making the dough less sticky and easier to work with.
- Final Kneading and Cold Fermentation: After the 30-minute rest (if needed), resume kneading, ensuring you’ve kneaded for a total of at least 5 minutes. Once sufficiently kneaded, place the bowl back over the dough and allow it to sit for another 30-40 minutes at room temperature. This brief rest helps relax the gluten, making the dough easier to shape. After this period, gently pull and stretch the dough towards its center repeatedly to form a smooth, tight ball. Pinch the seam closed on one side and place the dough ball seam-side-down into a lightly oiled bowl. Cover the bowl tightly with plastic wrap to prevent it from drying out. Refrigerate the dough for at least 12 hours, but preferably for 1 full day (24 hours). This crucial cold fermentation process significantly enhances the flavor and texture of the dough, making it more digestible and aromatic. You can even ferment it for up to 72 hours for an even deeper flavor!
Step 2: Assembling and Baking Your Cast Iron Pizza
Once your dough has completed its cold fermentation, it’s time to transform it into a magnificent cast iron pan pizza. This process is designed for ease and maximum flavor.
- Prepare the Dough for Stretching: After at least one day of cold fermentation, your dough is ready. You can remove it from the refrigerator about 30 minutes before use to allow it to come closer to room temperature, which will make it more pliable and easier to stretch. Alternatively, you can place it directly into the pan, but it might require a bit more effort to stretch.
- Oil the Pan: Generously coat the bottom of a 12-inch cast iron pan with 1/4 cup of olive oil. This not only prevents sticking but is also key to achieving that irresistibly crispy, golden-brown crust. Ensure the entire bottom surface is covered.
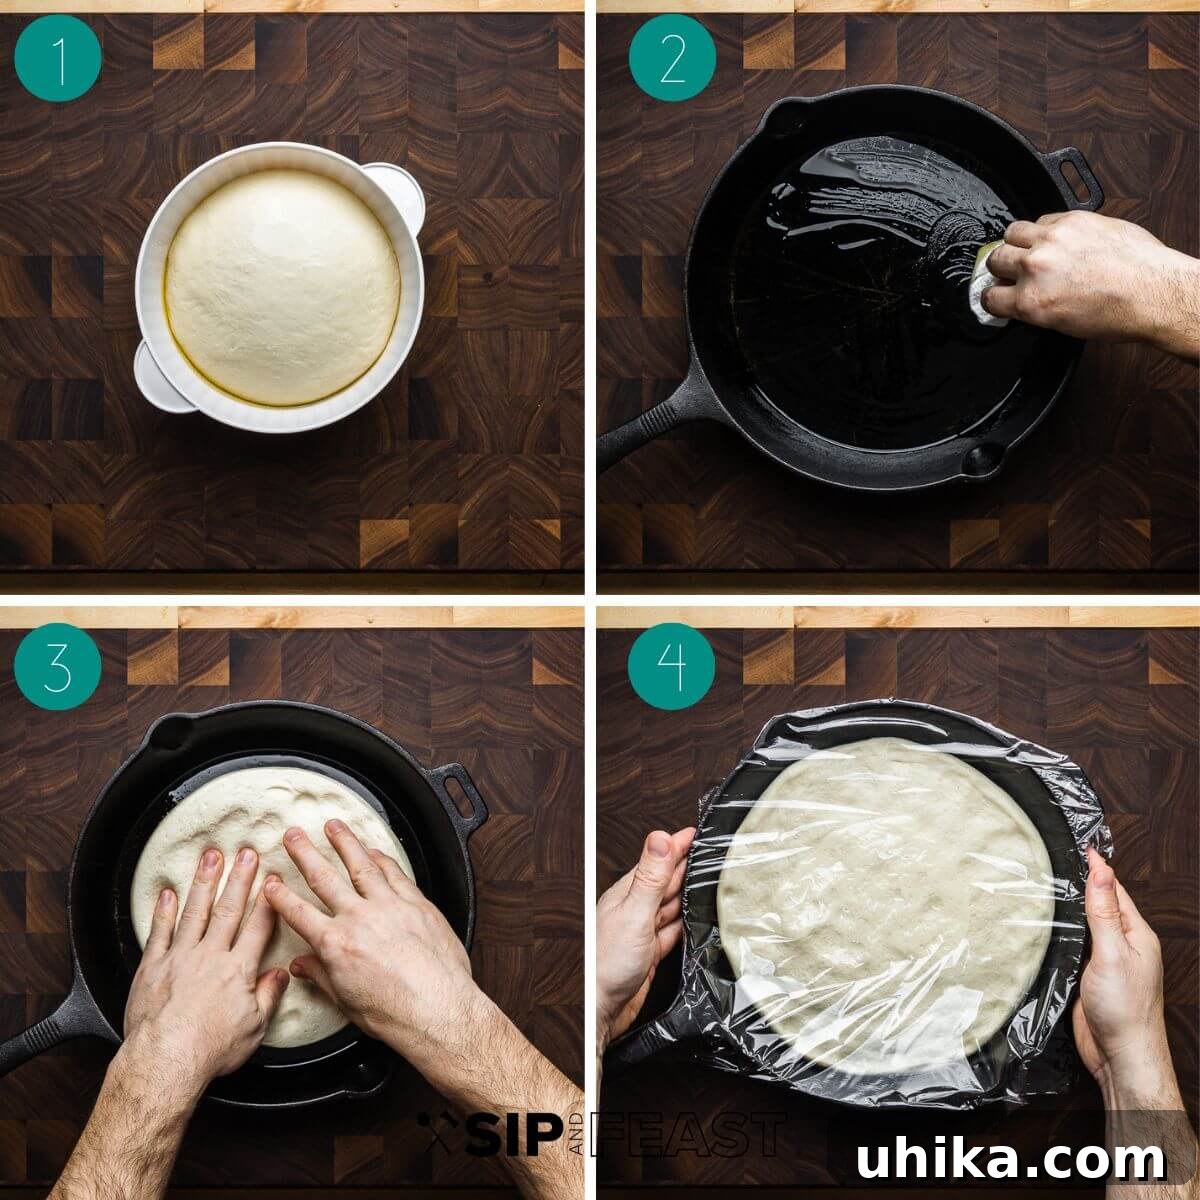
- Stretch the Dough in the Pan: Place your dough ball directly into the center of the oiled cast iron pan. Using your fingertips, gently but firmly press the dough outwards towards the edges of the pan. Don’t worry if you can’t get it to completely fill the pan in one go; the dough will resist.
- Allow Dough to Relax and Rise: Cover the pan loosely with plastic wrap and let the dough warm up at room temperature for about two hours. During this time, the dough will relax and naturally expand to fill the pan. If after two hours it still hasn’t reached the edges, simply press it gently into place with your fingertips once more. Recover the pan with plastic wrap. While the dough rests, preheat your oven to a blazing 550°F (288°C), placing an oven rack in the middle position. A high oven temperature is crucial for a fast cook and a crispy crust.
- Prepare Sauce and Toppings: While the dough rests, prepare your sauce and toppings. Mince 2 cloves of garlic and combine them with 2 tablespoons of olive oil to create a flavorful garlic oil; set this aside. Drain 12 ounces of crushed plum tomatoes thoroughly of any excess water. Measure out 1 1/2 cups of these drained tomatoes and stir in 1/2 teaspoon of kosher salt; set aside for your sauce. Finally, shred 10 ounces of low-moisture block mozzarella cheese and grate 2 tablespoons of Pecorino Romano cheese.
- Assemble the Pizza: Once the dough has fully expanded in the pan, remove the plastic wrap. If needed, give the dough one last gentle press to ensure it reaches the pan’s edges. Evenly spread the seasoned tomato sauce over the dough. You can spread it all the way to the edge for a saucy bite or leave a small border for a more defined crust. The beauty of pan pizza is that the edges are protected by the pan, so there’s no right or wrong way.
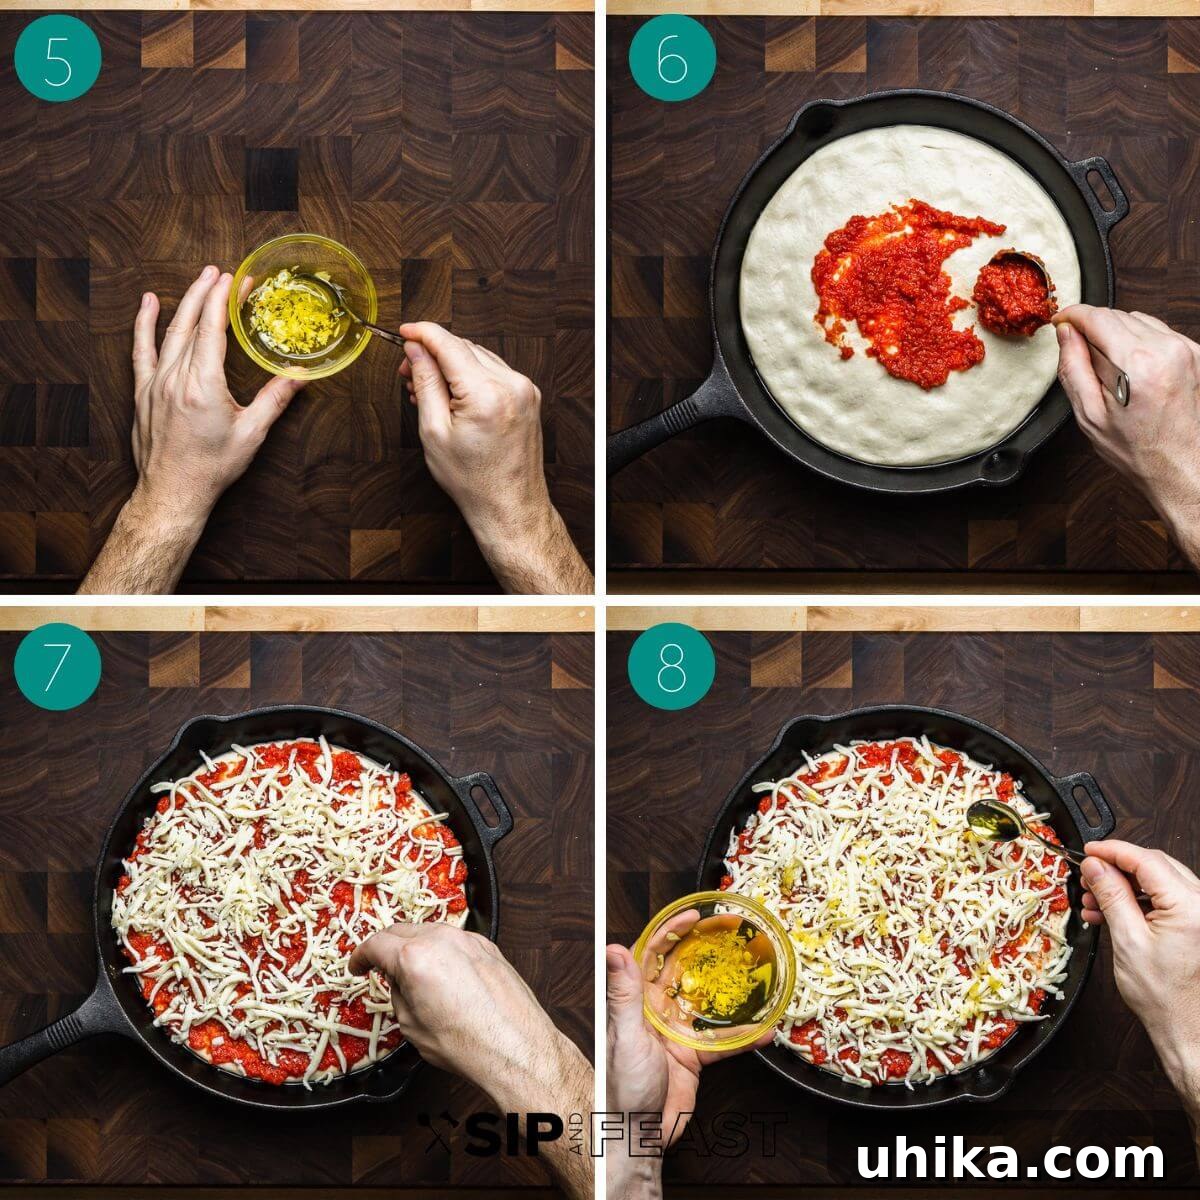
- Add Mozzarella and Garlic Oil: Generously top the sauce with the shredded low-moisture mozzarella, ensuring an even layer for perfect melt. Then, take your prepared garlic oil and drizzle it evenly all over the top of the pizza. This adds an incredible depth of flavor and helps achieve a beautiful golden crust.
- Initial Bake: Carefully transfer the cast iron pan to your preheated 550°F (288°C) oven. Bake for approximately 14 minutes. The exact time may vary slightly depending on your oven. During this bake, the crust will begin to brown, and the cheese will melt and bubble.
- Final Touches and Bake: After 14 minutes, remove the pizza from the oven. Sprinkle the grated Pecorino Romano cheese and 1 teaspoon of Sicilian oregano evenly over the hot pizza. Return the pan to the oven and continue baking for another 1-2 minutes. This brief final bake allows the Pecorino to melt slightly and the oregano to bloom in the heat, intensifying its aroma.
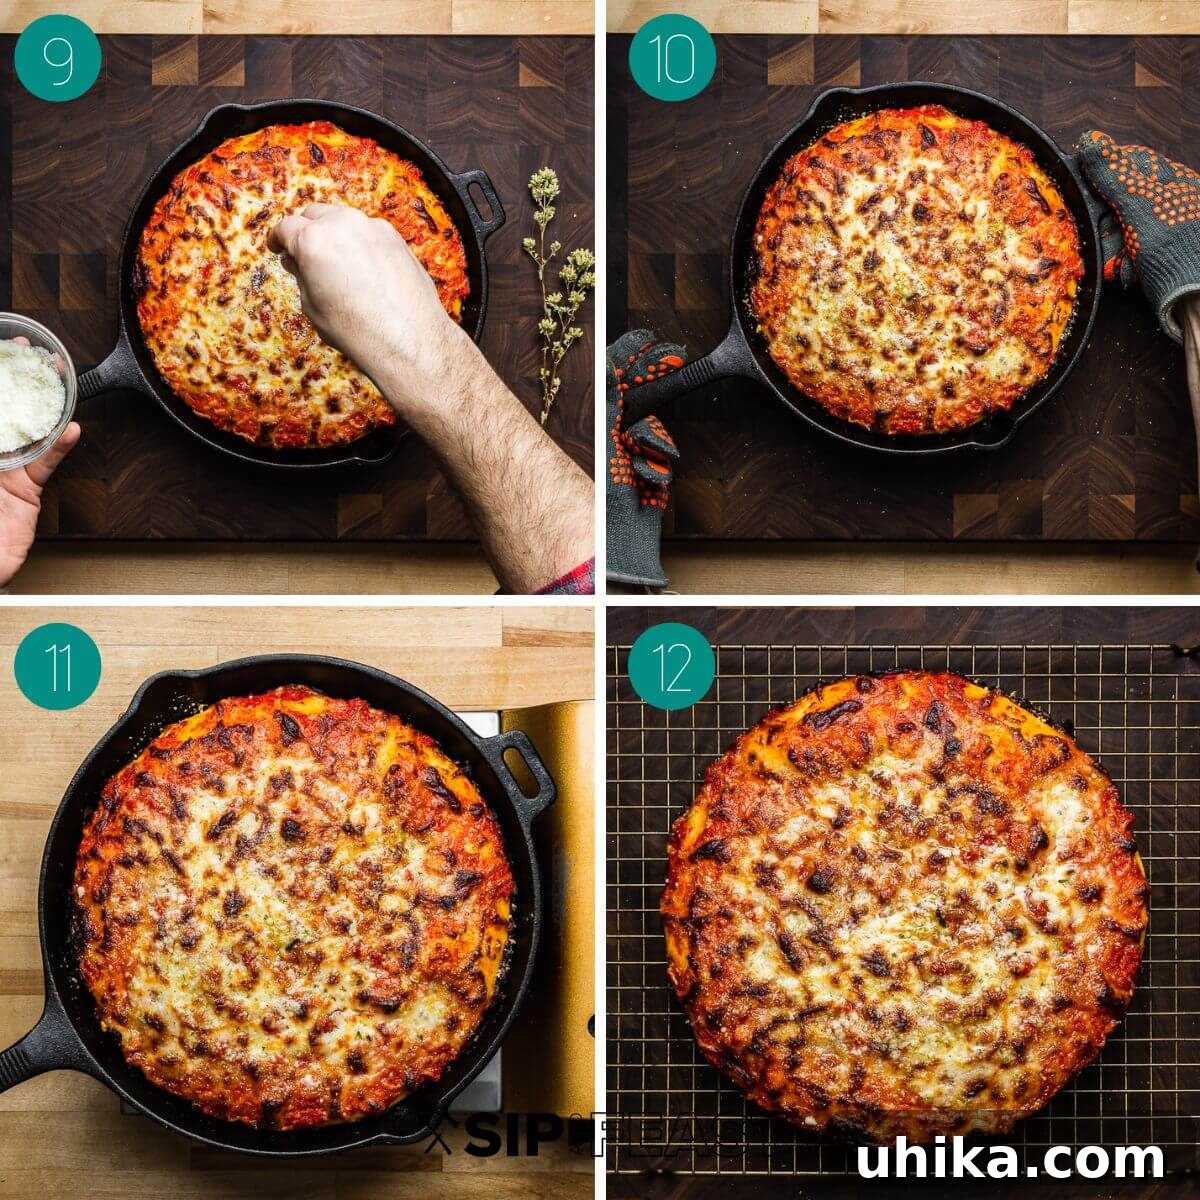
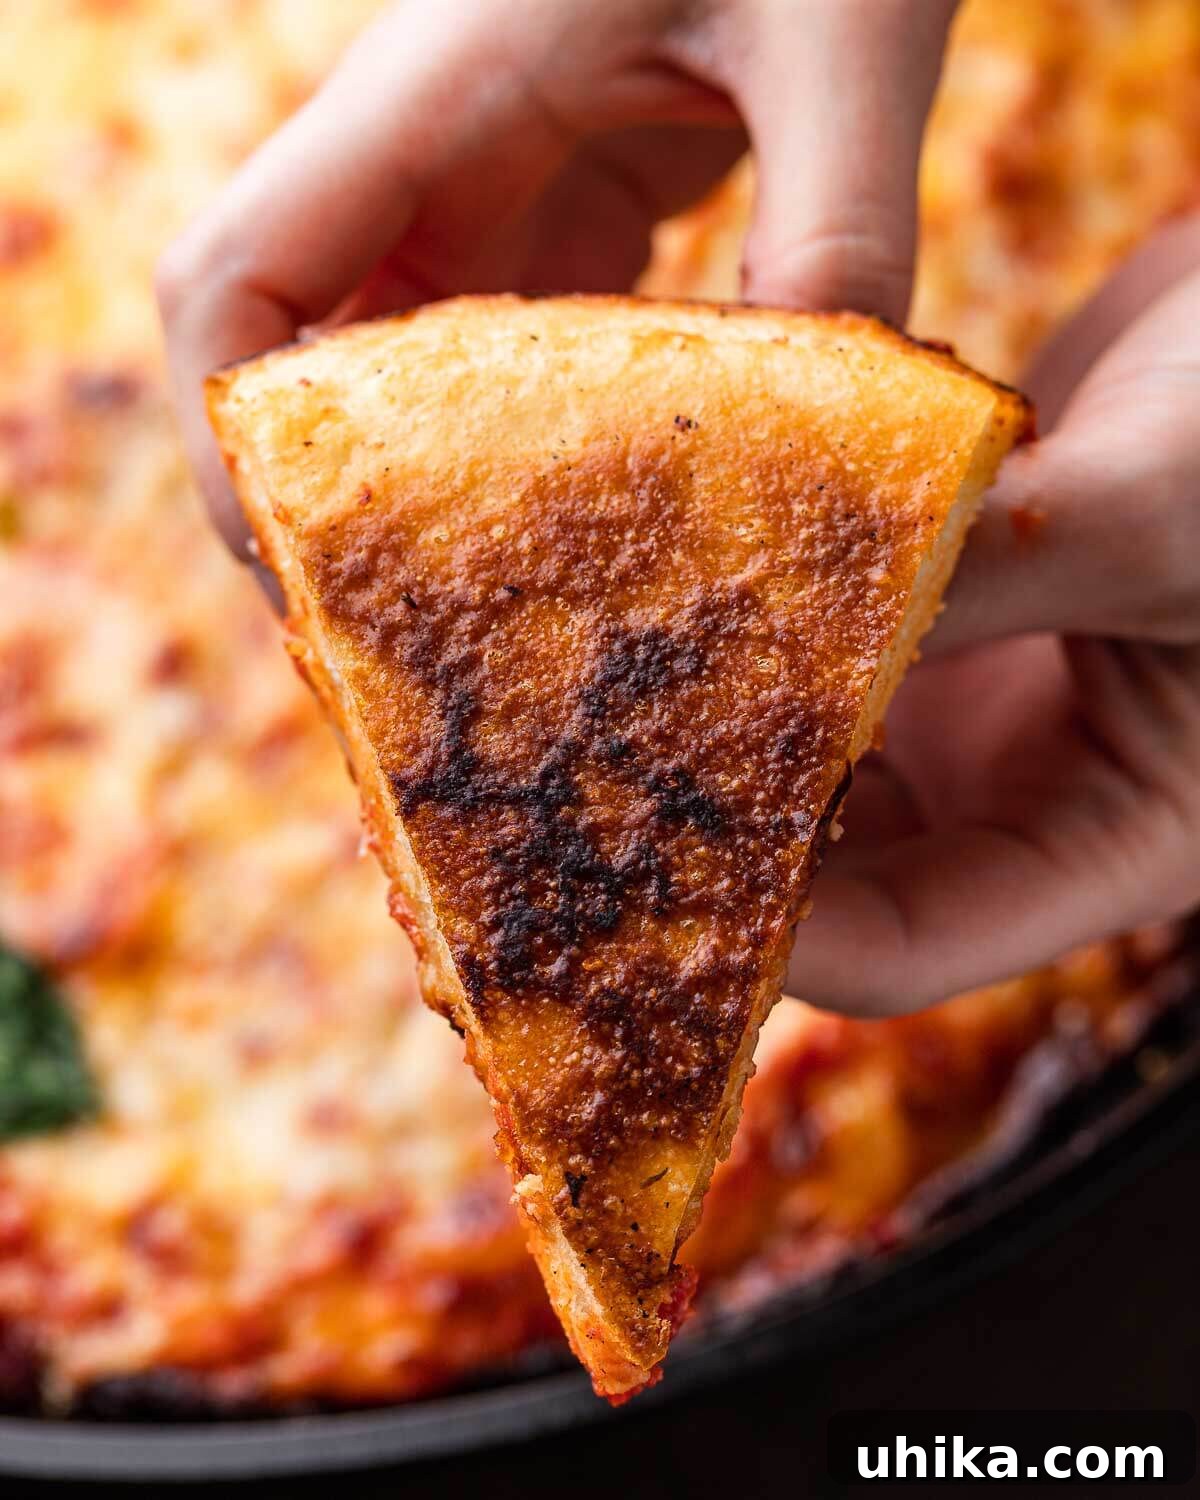
- Achieve the Perfect Bottom Crust: This is a secret weapon for cast iron pizza! After removing the pizza from the oven, use a spatula to gently lift a small section of the pizza to check the color of the bottom crust. If it’s not as golden brown and crispy as you’d like, carefully place the cast iron pan directly onto your stovetop over medium heat. Cook for a few minutes, checking frequently (every 30-60 seconds) with the spatula, until the bottom is perfectly browned and crispy to your preference. Be extremely cautious as the pan will be very hot. This stovetop finish provides unparalleled control over your crust’s crispness.
- Rest, Slice, and Serve: Once the pizza is cooked to perfection (total cooking time will be approximately 15-18 minutes), remove it from the heat. Allow the pizza to rest in the pan for at least 5 minutes before slicing and serving. This resting period is crucial as it allows the cheese to set slightly and the internal juices to redistribute, preventing a messy slice and enhancing the overall texture. Enjoy your magnificent homemade cast iron pan pizza!
Expert Tips for Your Best Cast Iron Pan Pizza
Elevate your cast iron pizza game with these invaluable tips and tricks:
- Adjusting Pan Size: This recipe is designed for a thick, satisfying 12-inch pizza. However, don’t hesitate to use a different-sized cast iron pan if you prefer. For a thinner, crispier crust, you can use a 14-inch pan with the same amount of dough. You might need to stretch the dough a bit more to fill the larger pan, and the cooking time will be reduced to approximately 12-14 minutes. Remember that a larger, thinner pizza will also require slightly more cheese and sauce to ensure full coverage and flavor.
- Mastering Cold Fermentation: The cold fermentation process is a cornerstone of this recipe’s exceptional flavor and texture. While a minimum of 12 hours in the refrigerator is essential, allowing the dough to cold ferment for up to 72 hours will yield an even more complex, nuanced flavor profile and a wonderfully airy crumb. Plan ahead for maximum deliciousness!
- Stand Mixer Convenience: If you prefer to use a stand mixer instead of hand-kneading, simply combine the ingredients in the mixer bowl and knead on low speed with the dough hook attachment for about 5-7 minutes. Once properly kneaded, form the dough into a ball, place it in an oiled, tightly covered container, and refrigerate overnight for cold fermentation.
- Topping Creativity: One of the greatest advantages of cooking pizza in a deep cast iron pan is its ability to handle a generous amount of toppings without spillage. The higher edges of the pan act as a natural barrier, allowing you to load up on your favorite ingredients. Beyond the classic cheese, sauce, oil, and oregano, consider adding thinly sliced pepperoni, sautéed mushrooms, caramelized onions, roasted bell peppers, crumbled sausage, or fresh basil. Don’t be shy – the sturdy crust can support it all!
- Perfecting the Bottom Crust: The ability to finish the pizza on the stovetop is a distinct benefit of using a cast iron pan. If, after baking, you find the bottom crust isn’t as crispy and golden as you desire, simply transfer the hot pan to your stovetop over medium heat. This direct heat contact will quickly crisp up the crust to your liking. Always use extreme caution and oven mitts when handling the pan, as it will be very hot after coming out of a 550°F oven. Check the bottom frequently to prevent burning.
- Storing and Reheating Leftovers: Any leftover cast iron pan pizza can be stored in an airtight container in the refrigerator for up to 3 days. To reheat, place slices on a parchment paper-lined baking sheet and bake at 350°F (175°C) for approximately 10 minutes, or until heated through and crispy. This method helps restore much of its original texture.
Explore More Irresistible Pizza Creations
If you’ve enjoyed the simplicity and deliciousness of our cast iron pan pizza, we’re sure you’ll love exploring other fantastic pizza recipes from our collection. Expand your homemade pizza repertoire with these incredible options:
- New York Sicilian Pizza: A thick, airy crust with a classic square shape, this pizza is a staple for many.
- Grandma Pizza: Thin, crispy, and baked in an olive oil-coated pan, offering a rustic, home-style experience.
- French Bread Pizza: A quick and easy option for when you crave pizza but are short on time, using French bread as a convenient base.
We truly hope you’ve found this Cast Iron Pan Pizza Recipe inspiring and delicious. If you’ve tried this recipe or any others on our site, we’d be thrilled if you could give it a 5-star rating and share your experience in the comments below!
We understand that different people learn in different ways. If you prefer to learn by watching, many of our recipes, including detailed demonstrations, are available on our YouTube channel and our Facebook Page.
Cast Iron Pan Pizza
James Delmage
15 mins
15 mins
1 d
1 d 3 hrs 30 mins
8 slices

Pin
Ingredients
For the dough
- 3 1/4 cups (406 grams) bread flour
- 1/2 teaspoon (2 grams) instant yeast
- 1 1/2 teaspoons (8 grams) fine sea salt
- 1 teaspoon (4 grams) sugar
- 9 ounces (260 grams) cool water
- 1 tablespoon (14 grams) olive oil
For the cast iron pizza
- 1 ~24 ounce dough ball from above
- 12 ounces crushed plum tomatoes drained of excess liquid
- 10 ounces low moisture block mozzarella cheese shredded, weight will vary, but use enough to cover the pizza completely
- 2 tablespoons Pecorino Romano grated
- 6 tablespoons olive oil divided
- 2 cloves garlic minced
- 1/2 teaspoon kosher salt
- 1 teaspoon Sicilian oregano
Instructions
For the dough
-
Place 9 ounces (260g) of water into a large bowl. In a separate bowl, combine 3 1/4 cups (406g) of bread flour, 1/2 teaspoon (2g) of instant yeast, 1 1/2 teaspoons (8g) of fine sea salt, and 1 teaspoon (4g) of sugar. Mix until well combined.
-
Gradually add the dry ingredients to the water, mixing thoroughly to form a dry, rough mass. Ensure all flour is hydrated.
-
Pour 1 tablespoon (14g) of olive oil over the dough. Mix again, using the oil to help scrape any dough residue from the bowl sides. Transfer the shaggy dough to a work surface.
-
Knead the dough for 5-7 minutes. If the dough becomes too sticky, cover it with an inverted clean bowl and let it rest for 30 minutes before resuming kneading. Ensure a total of at least 5 minutes of active kneading.
-
After kneading, cover the dough with the bowl once more and let it sit for 30-40 minutes to relax before forming the dough ball.
-
After 40 minutes, pull the dough repeatedly towards its end to form a smooth ball. Pinch the seam closed and place the dough ball seam-side-down into a lightly oiled bowl. Cover tightly with plastic wrap and refrigerate for at least 12 hours, preferably 1 day, before using.
For the cast iron pizza
-
Coat the bottom of a 12-inch cast iron pan with 1/4 cup of olive oil. Remove the dough from its bowl and place it into the pan. Use your fingertips to begin pressing the dough into the edges of the pan. This may take a few attempts. Cover the pan loosely with plastic wrap to allow the dough to warm and relax.
-
After 2 hours, the dough should have expanded to fill the pan. If not, gently press it into the sides with your fingers once more. Recover with plastic wrap. At this point, preheat your oven to 550°F (288°C), placing the oven rack in the middle level.
-
Drain 12 ounces of crushed plum tomatoes thoroughly. You’ll need about 1 1/2 cups of drained tomatoes. Mix 1/2 teaspoon of kosher salt into the tomatoes and set aside. In a separate small bowl, combine 2 minced garlic cloves with 2 tablespoons of olive oil and set aside (this is your garlic oil).
-
Remove the plastic wrap from the pan. If necessary, press the dough firmly into the edges. Spread the seasoned tomato sauce evenly over the dough, extending to the edges or leaving a small border for the crust. Top generously with the shredded mozzarella.
-
Drizzle the prepared garlic oil all over the top of the mozzarella-covered pizza.
-
Bake the pizza for 14 minutes. Remove from the oven, then evenly sprinkle with the 2 tablespoons of grated Pecorino Romano and 1 teaspoon of Sicilian oregano. Return to the oven and cook for an additional 1-2 minutes.
-
Check the pizza’s underside with a spatula. If the bottom crust isn’t golden brown and crispy enough, carefully place the hot cast iron pan directly onto your stovetop over medium heat. Cook, checking frequently, until the bottom is browned to your desired crispness. Be very careful not to burn it!
-
The total cooking time will be approximately 15-18 minutes. Let the pizza rest in the pan for 5 minutes before carefully slicing and serving. Enjoy your homemade cast iron pan pizza!
Notes
- This recipe is designed for a thick 12-inch cast iron pizza. If using a 14-inch pan, you may need to stretch the dough a bit more, resulting in a thinner crust. Cooking time for a 14-inch pizza will be shorter, around 12-14 minutes, and you may need slightly more cheese and sauce to cover the larger surface area.
- Dough can be cold fermented for a minimum of 12 hours up to 72 hours for enhanced flavor.
- For those preferring a stand mixer, knead the dough on low speed for 5-7 minutes. Then, form a ball, place in an oiled, tightly covered container, and refrigerate overnight.
- Actual oven temperatures can vary, so baking times are approximate (15-18 minutes total). Always monitor your pizza closely.
- The stovetop browning method is a fantastic way to ensure a perfectly crispy bottom crust. Use caution as the pan will be extremely hot.
- Leftover pizza can be stored in the fridge for up to 3 days. Reheat on a parchment-lined baking sheet at 350°F (175°C) for about 10 minutes until hot and re-crisped.
Bakers Percentages: 64% hydration, .4% yeast, 2% salt, 3.4% oil, 1.2% sugar
Nutrition
Nutrition information is automatically calculated, so should only be used as an approximation.
Like this? Leave a comment below!
Check us out on Instagram at @sipandfeast or tag #sipandfeast!