
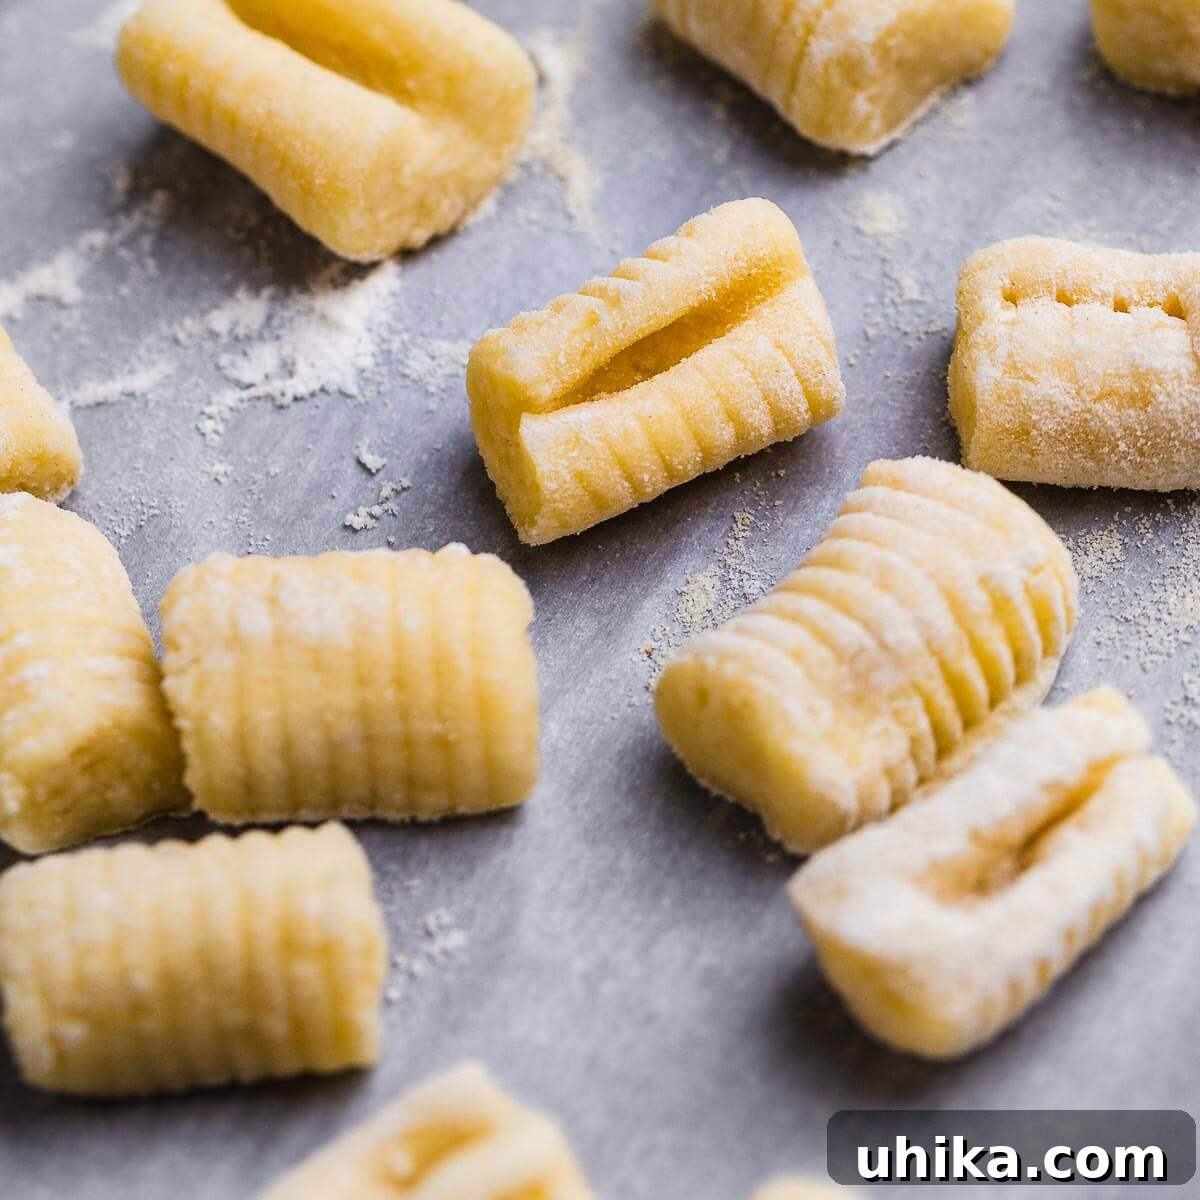
The Ultimate Guide to Mastering Homemade Potato Gnocchi
Embarking on the journey to make homemade potato gnocchi might seem daunting at first glance. A quick online search often bombards you with countless recipes, many of which can leave you feeling intimidated, suggesting that crafting perfect gnocchi from scratch is an insurmountable culinary challenge. They might even imply that deviating from their exact instructions will result in an unmitigated disaster of tough, gummy dough. But let’s set the record straight: this simply isn’t true!
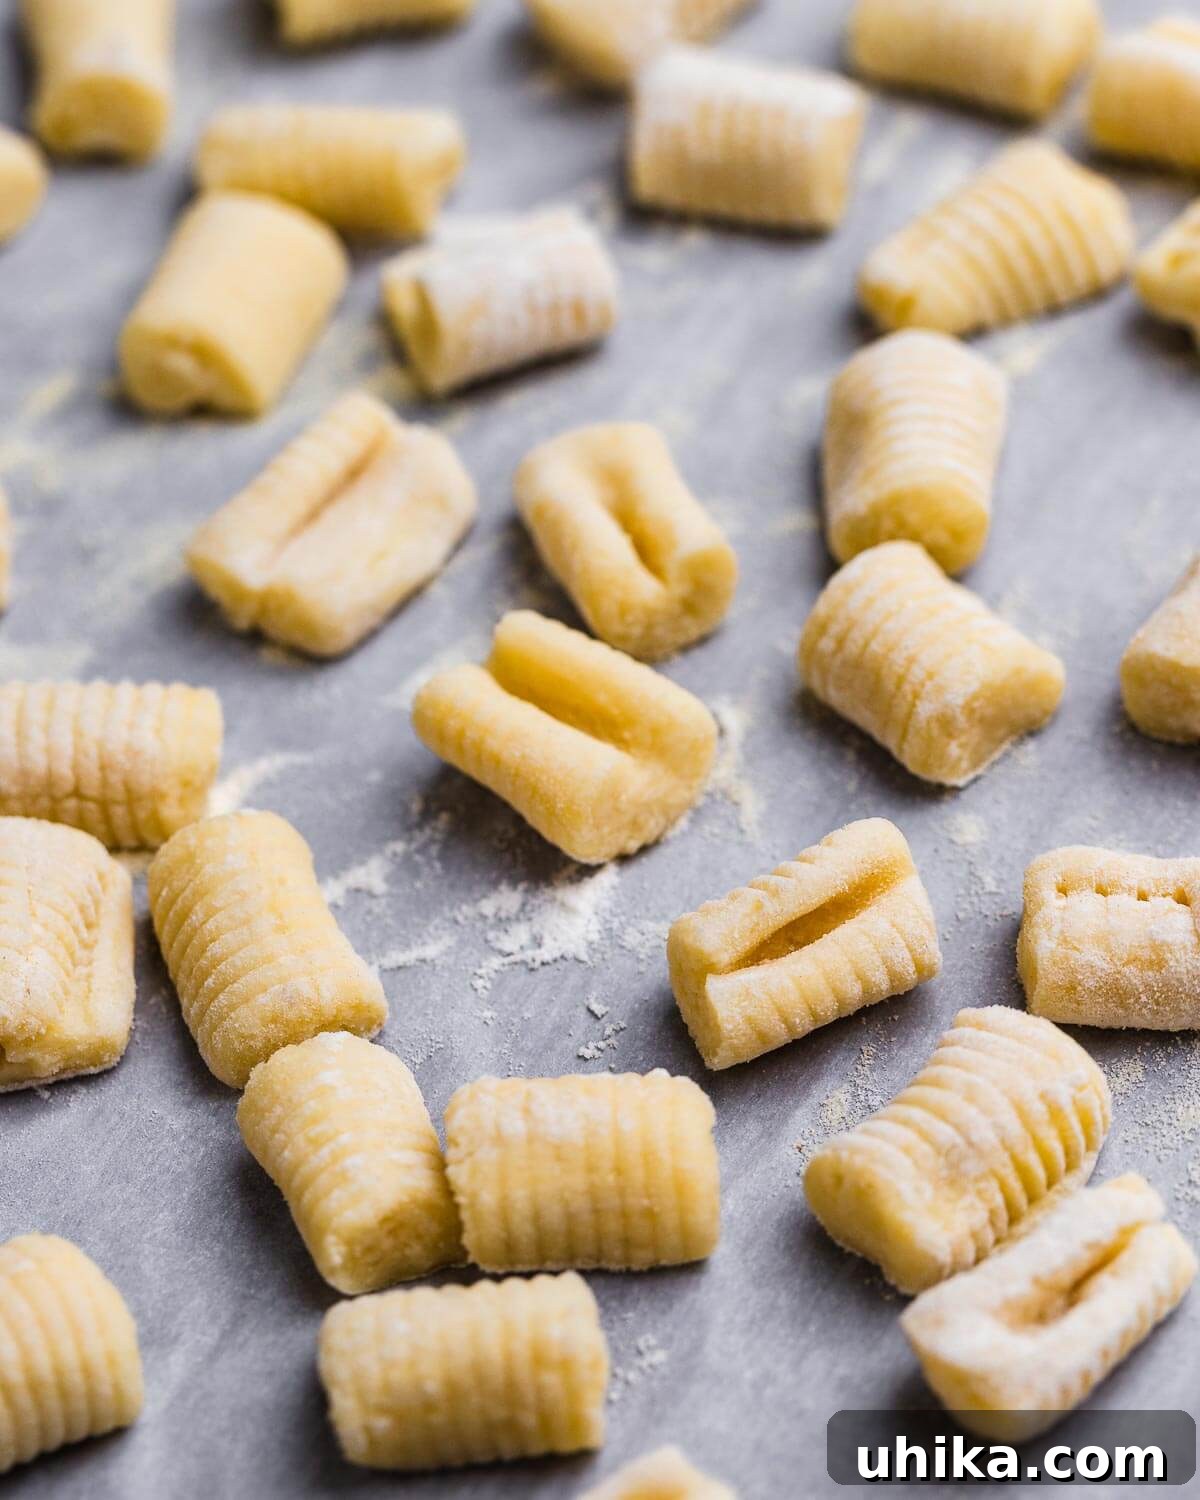
I’m here to demystify the process and assure you that creating delectable, tender gnocchi at home is far simpler than you might imagine. With just a few basic kitchen tools, most of which you probably already own – perhaps with the exception of a potato ricer – you’ll be well on your way to culinary success.
Your initial attempts might not yield absolutely flawless results, and that’s perfectly okay. Cooking is an art that requires practice. But very soon, you’ll be effortlessly producing batches of delicate, pillowy potato gnocchi that easily rival those served in the finest Italian restaurants. More importantly, every single piece will be incomparably better and more satisfying than any store-bought alternative you’ve ever tasted!
Why Choose Homemade Gnocchi? The Unbeatable Difference
Beyond the immense satisfaction of creating something truly special from scratch, there are compelling reasons to opt for homemade gnocchi over their supermarket counterparts. Store-bought gnocchi often lack the delicate texture and fresh flavor that define authentic Italian gnocchi. They tend to be denser, sometimes rubbery, and can possess a rather uniform, bland taste due to preservatives and processing. Homemade gnocchi, on the other hand, boast a light, airy consistency and a rich, earthy potato flavor that shines through any sauce. The effort you put in translates directly into a superior dining experience – a difference you can genuinely taste and feel.
The Essential Role of Potato Selection
The foundation of great gnocchi lies in the right potatoes. For the best results, always choose dry, starchy varieties like Russet (Idaho) potatoes. Their low moisture content and high starch profile create a light, fluffy texture when cooked and riced, which is crucial for preventing gummy gnocchi. Avoid waxy potatoes, as they hold too much water and can lead to a dense, sticky dough. When purchasing, look for potatoes with their skins fully intact, as this acts as a natural barrier, preventing excessive water absorption during cooking.
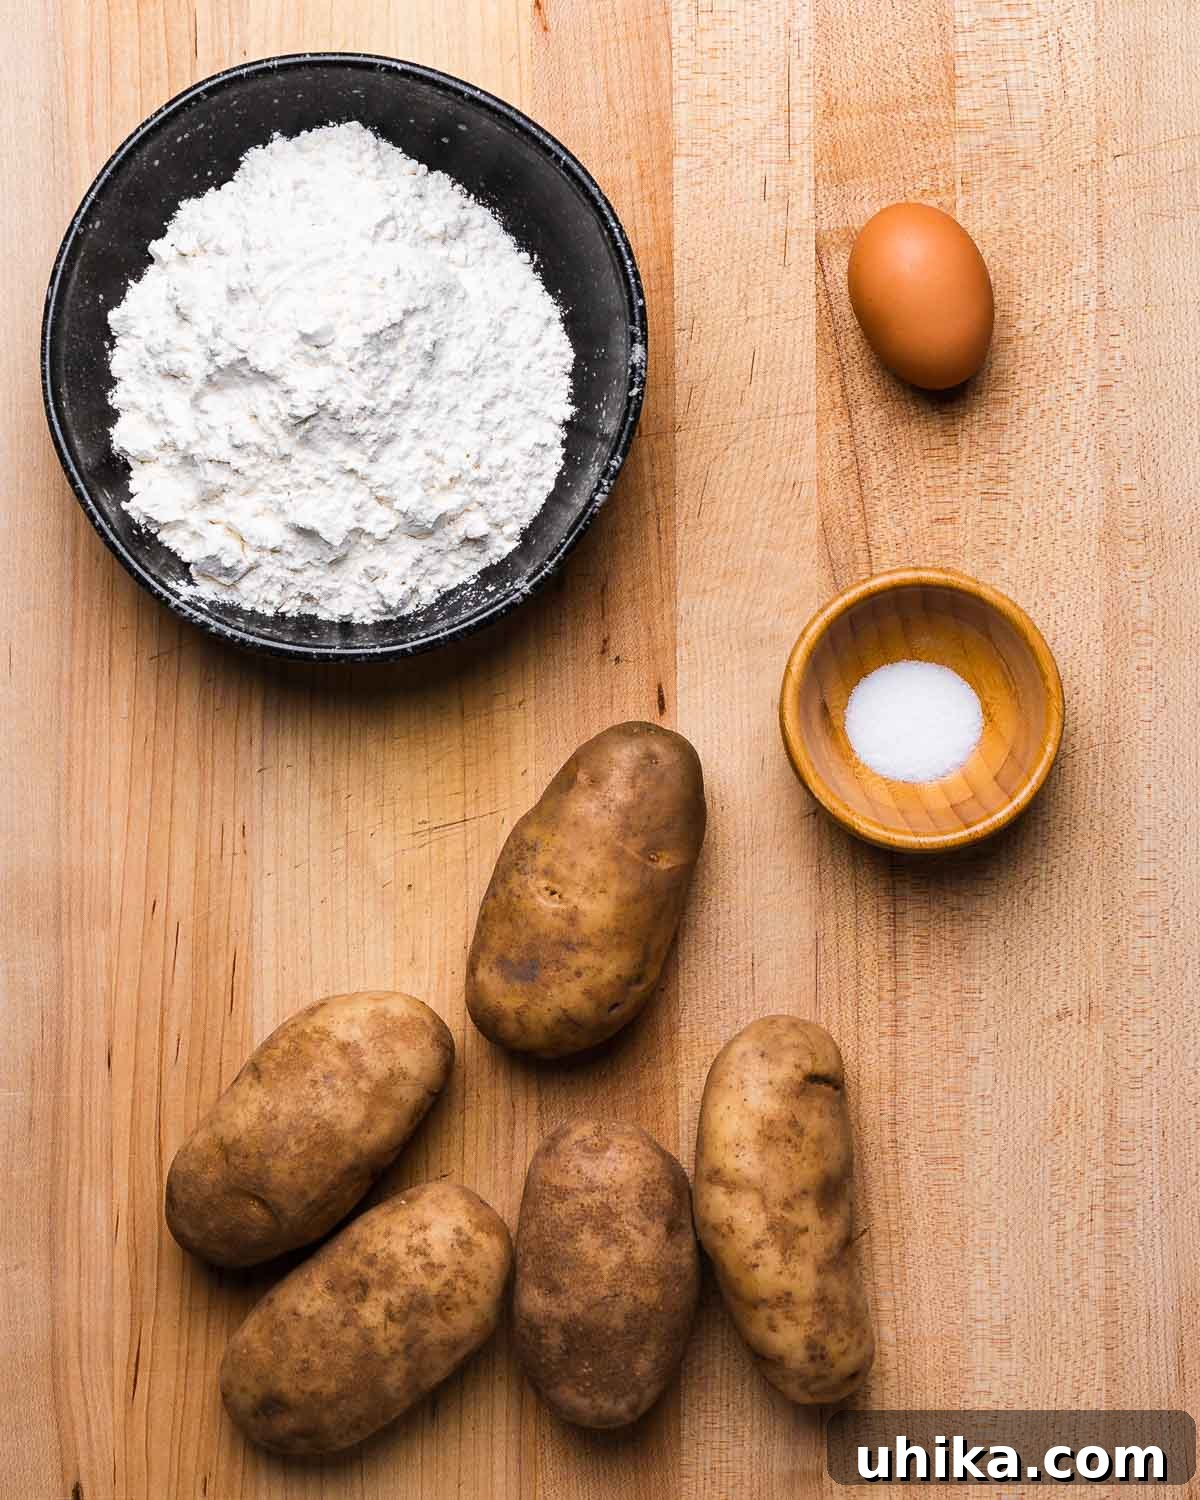
Step-by-Step Guide to Crafting Perfect Potato Gnocchi
Follow these detailed steps, and you’ll be on your way to creating exquisite homemade gnocchi that will impress everyone at your table.
Preparation: Cooking the Potatoes to Perfection
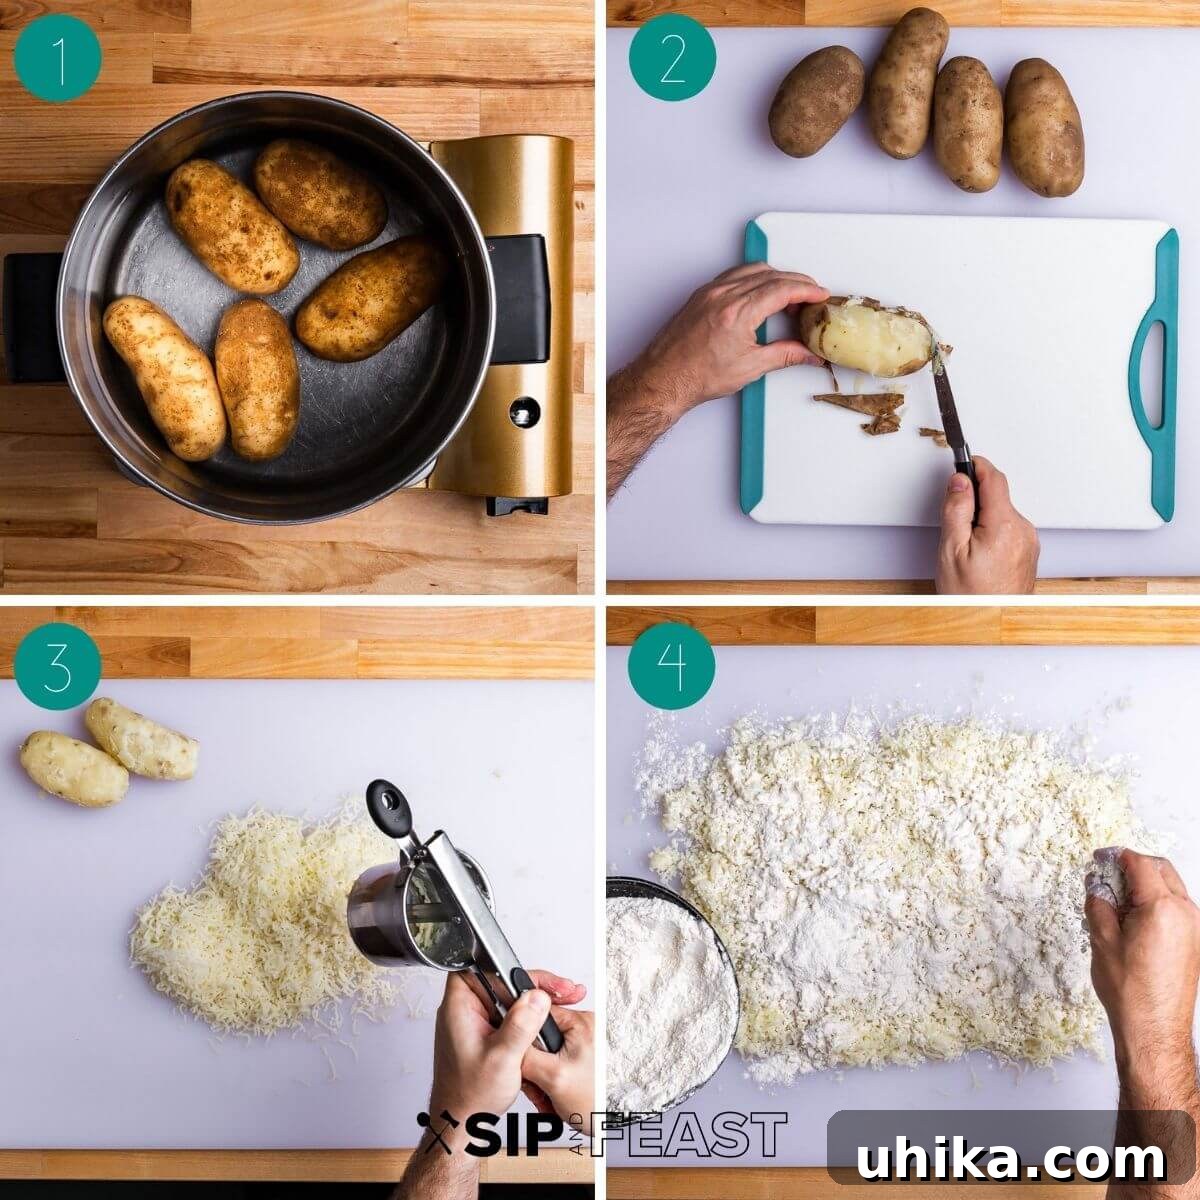
- Boil the Potatoes: Begin by placing two pounds of russet potatoes, unpeeled, into a large pot. Fill the pot with cold water, ensuring it covers the potatoes by about two inches. Starting with cold water is a critical step, as it allows the potatoes to cook more evenly from the outside in, preventing the skins from bursting prematurely and minimizing water absorption. Bring the water to a rolling boil over high heat. Once boiling vigorously, reduce the heat to medium, cover the pot with a lid, leaving it slightly ajar to allow some steam to escape. Continue to cook for approximately 30-35 minutes, or until the potatoes are wonderfully tender. To check for doneness, simply insert a sharp paring knife into the center of a potato; it should slide through with absolute ease, indicating they are perfectly cooked.
- Cool and Peel: Carefully drain the hot water from the potatoes using a colander. Immediately spread the drained potatoes out on a clean surface, like a large cutting board, to allow them to cool down. This initial cooling helps to dry them out further. Once the potatoes are cool enough to comfortably handle (typically around 10-15 minutes), remove their skins. A small, sharp paring knife works exceptionally well for scraping off the skins quickly and efficiently.
Forming the Dough: The Art of Lightness
- Rice the Potatoes: While the potatoes are still warm, but no longer piping hot, process them through a potato ricer into a large, clean bowl or directly onto your work surface. Ricing them while warm is crucial for achieving that characteristic light and airy texture. Avoid using a food processor or blender, as these methods can overwork the potatoes, developing too much starch and leading to a gluey, undesirable consistency.
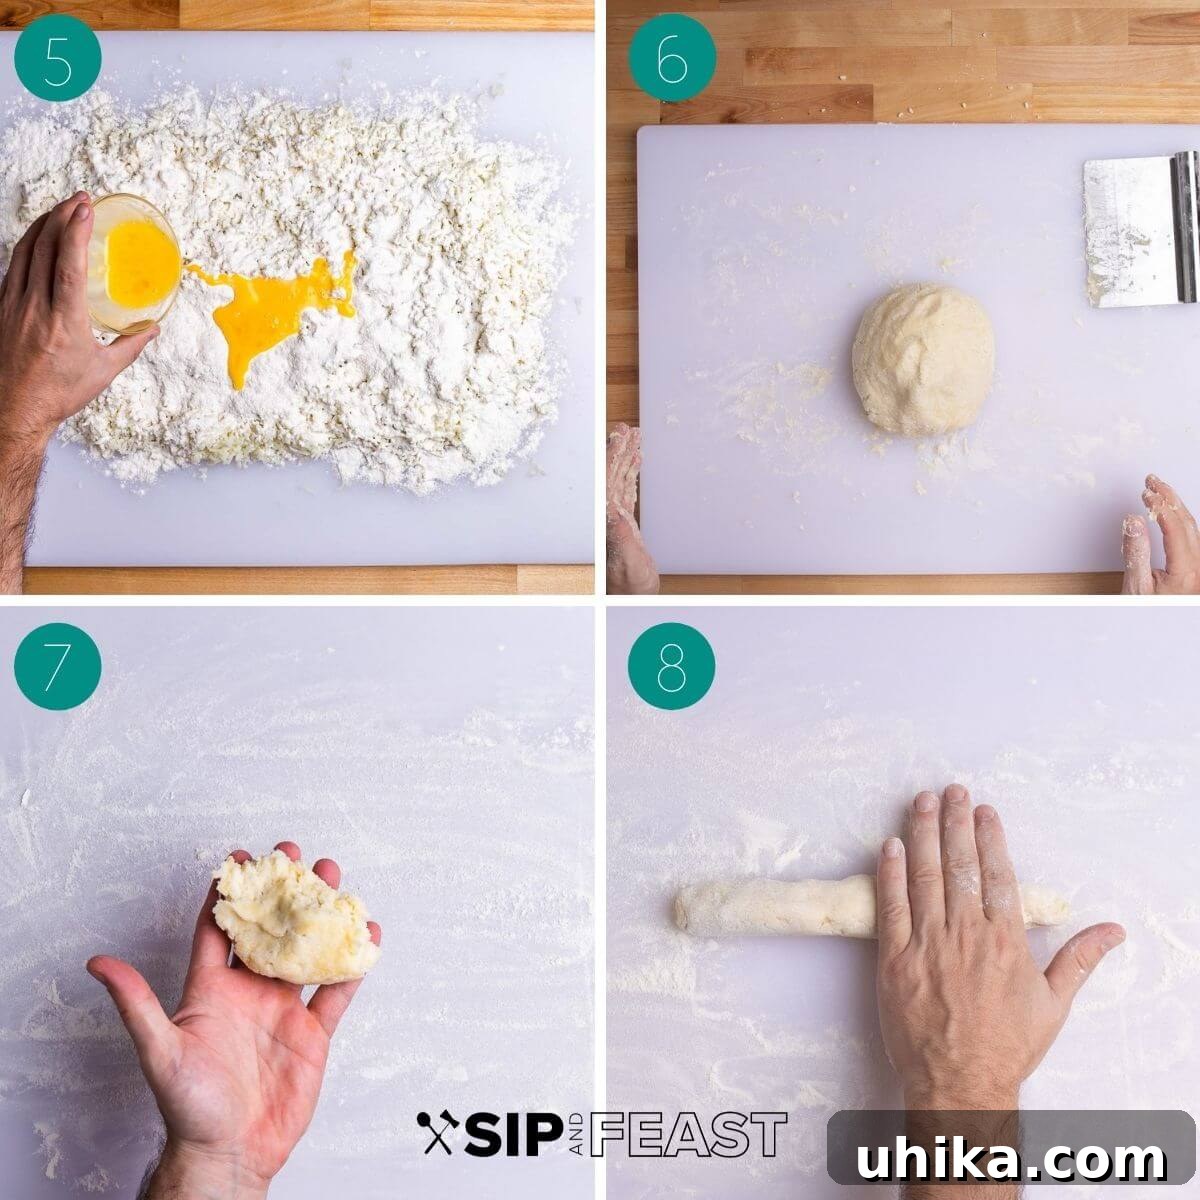
- Season and Flour: Spread the riced potatoes out evenly across a large, clean work surface. Allow them to cool down completely; this further reduces moisture. Evenly sprinkle 1 teaspoon of fine sea salt over the potatoes. Then, sprinkle approximately 1 to 1.5 cups of all-purpose flour over the riced potatoes. The exact amount of flour can vary depending on the potato’s moisture content, so it’s always better to start with slightly less and add more if needed.
- Combine the Dough Gently: Drizzle one lightly beaten large egg over the flour and potatoes. Using a bench scraper, gently begin to cut the flour and egg into the potatoes. The goal is to combine the ingredients just enough to form a cohesive dough without overmixing. You can knead the dough very briefly, for about 30-45 seconds, to bring it together. The key here is extreme gentleness and minimal handling. Over-kneading will develop the gluten in the flour, resulting in tough, chewy gnocchi instead of the tender pillows we’re aiming for.
- Form a Cohesive Ball: Continue to work the dough just until it forms a rough, slightly shaggy ball, as illustrated in the accompanying image (pic 6). If the dough feels too wet or sticky to handle, add a small amount of extra flour, a tablespoon at a time, until it comes together. Remember, the ultimate goal is to use the absolute minimum amount of flour necessary to achieve a manageable, cohesive dough. Too much flour will make your gnocchi heavy.
Shaping the Gnocchi: Ropes and Ridges
- Prepare Your Surface: Move the formed dough ball to the side. Thoroughly clean your work surface, ensuring it’s free of any sticky residue. Alternatively, use a fresh, clean, and dry surface. Lightly dust the clean surface with flour.
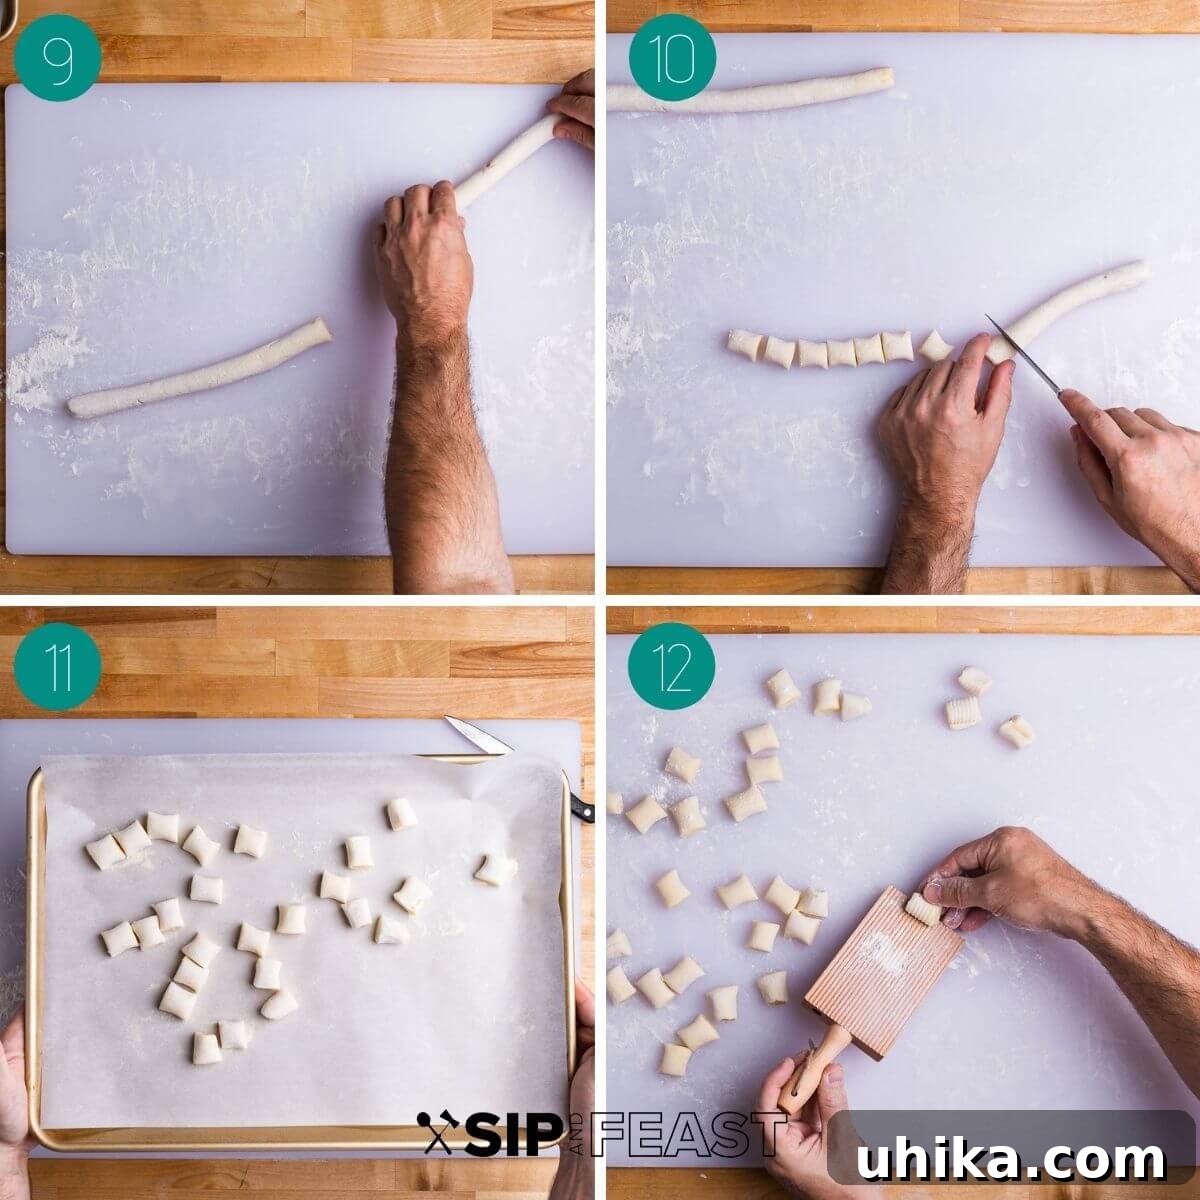
- Roll into Ropes: Take a portion of the dough, roughly the size of a lemon (about 1/6 of the total dough), and place it on your floured surface. Using the palms of your hands, begin to gently roll the dough into a long rope, aiming for a thickness of approximately 1/2 to 3/4 inch. It’s important to use the palms of your hands rather than your fingertips, as fingertips tend to compress and flatten the dough rope, whereas palms allow for a more consistent, round roll.
- Achieve Consistent Thickness: If the rope becomes too long to manage, cut it in half and continue rolling each smaller section until you achieve the desired uniform thickness. Working with shorter ropes often makes the shaping process much easier and yields more consistent results.
- Cut Individual Gnocchi: Once you have a uniformly thick rope, use a sharp knife or a pastry knife to cut the dough into individual pieces, each about 3/4 to 1 inch long. These will be your individual gnocchi.
Finishing Touches and Storage
- Prevent Sticking: Lightly sprinkle a parchment paper-lined baking sheet with a generous amount of semolina flour. Semolina flour is coarser than all-purpose flour and does an excellent job of preventing the delicate gnocchi from sticking. Carefully place the freshly cut gnocchi onto the prepared baking sheet, ensuring that none of the pieces touch each other. If they touch, they will quickly stick together, making them difficult to separate without damage. Sprinkle a little more flour over the gnocchi for extra insurance.
- Add Grooves (Optional but Recommended): Potato gnocchi are traditionally grooved to create a textured surface that better captures and holds onto sauce. You can achieve this using a specific tool called a rigagnocchi (gnocchi paddle). However, if you prefer, you can simply leave them smooth.
- Fork Alternative: No gnocchi paddle? No problem! You can achieve a similar effect by gently rolling each gnocchi piece down the tines of a fork. Place your thumb at the base of the gnocchi and roll it lightly away from you, creating those characteristic ridges and a small indentation on the underside.
- Observe the Divot: When properly grooved, you will notice a small divot or depression on the bottom of the gnocchi. This indentation, along with the ridges, helps ensure your gnocchi are perfectly coated in your chosen sauce.
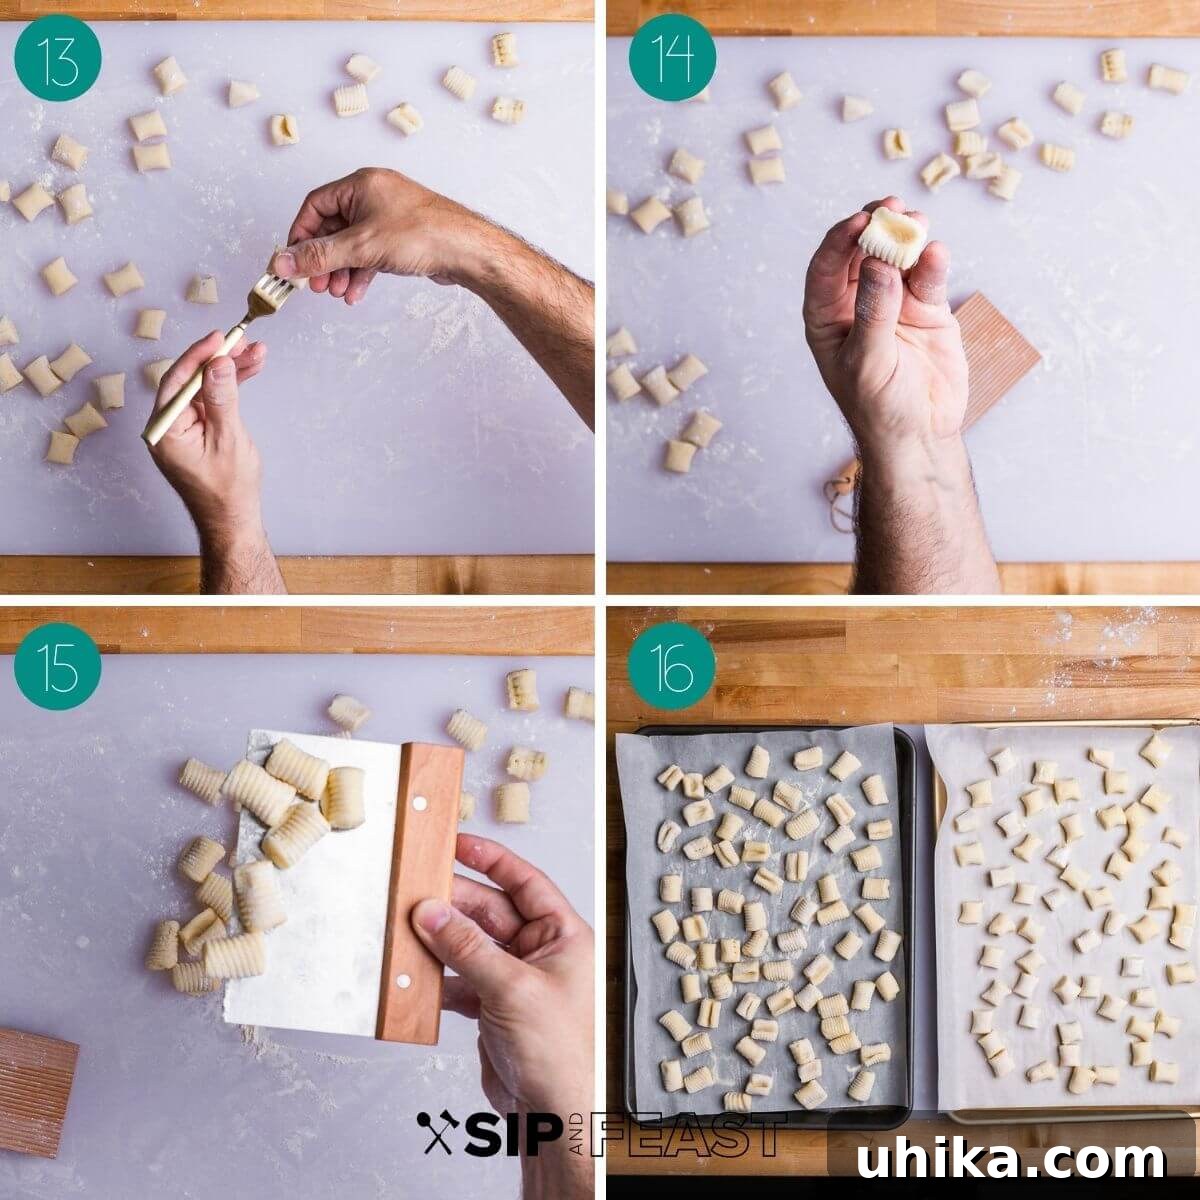
- Handling Delicate Gnocchi: Because newly formed gnocchi are quite delicate, avoid picking them up with your hands. Instead, use a bench scraper or a sharp putty knife to slide right under them. This minimizes damage and maintains their shape.
- Ready for Freezing: Continue the process with the remaining dough until all your gnocchi are formed and placed on baking sheets. The tray on the right in the image shows gnocchi without ridges, which many home cooks prefer for its simplicity and speed.
- Important Cooking Note: Before you even think about dropping your freshly made gnocchi into boiling water, ensure your chosen sauce is already hot and ready. Gnocchi cook incredibly fast. Bring a large pot of generously salted water to a rolling boil (use about 2 tablespoons of kosher salt per gallon of water). Only drop a small amount of gnocchi into the water at a time – overcrowding the pot will lower the water temperature and result in gummy gnocchi. Once the gnocchi float to the surface, wait an additional 20 seconds, then use a slotted spoon to scoop them out and allow them to drain briefly.
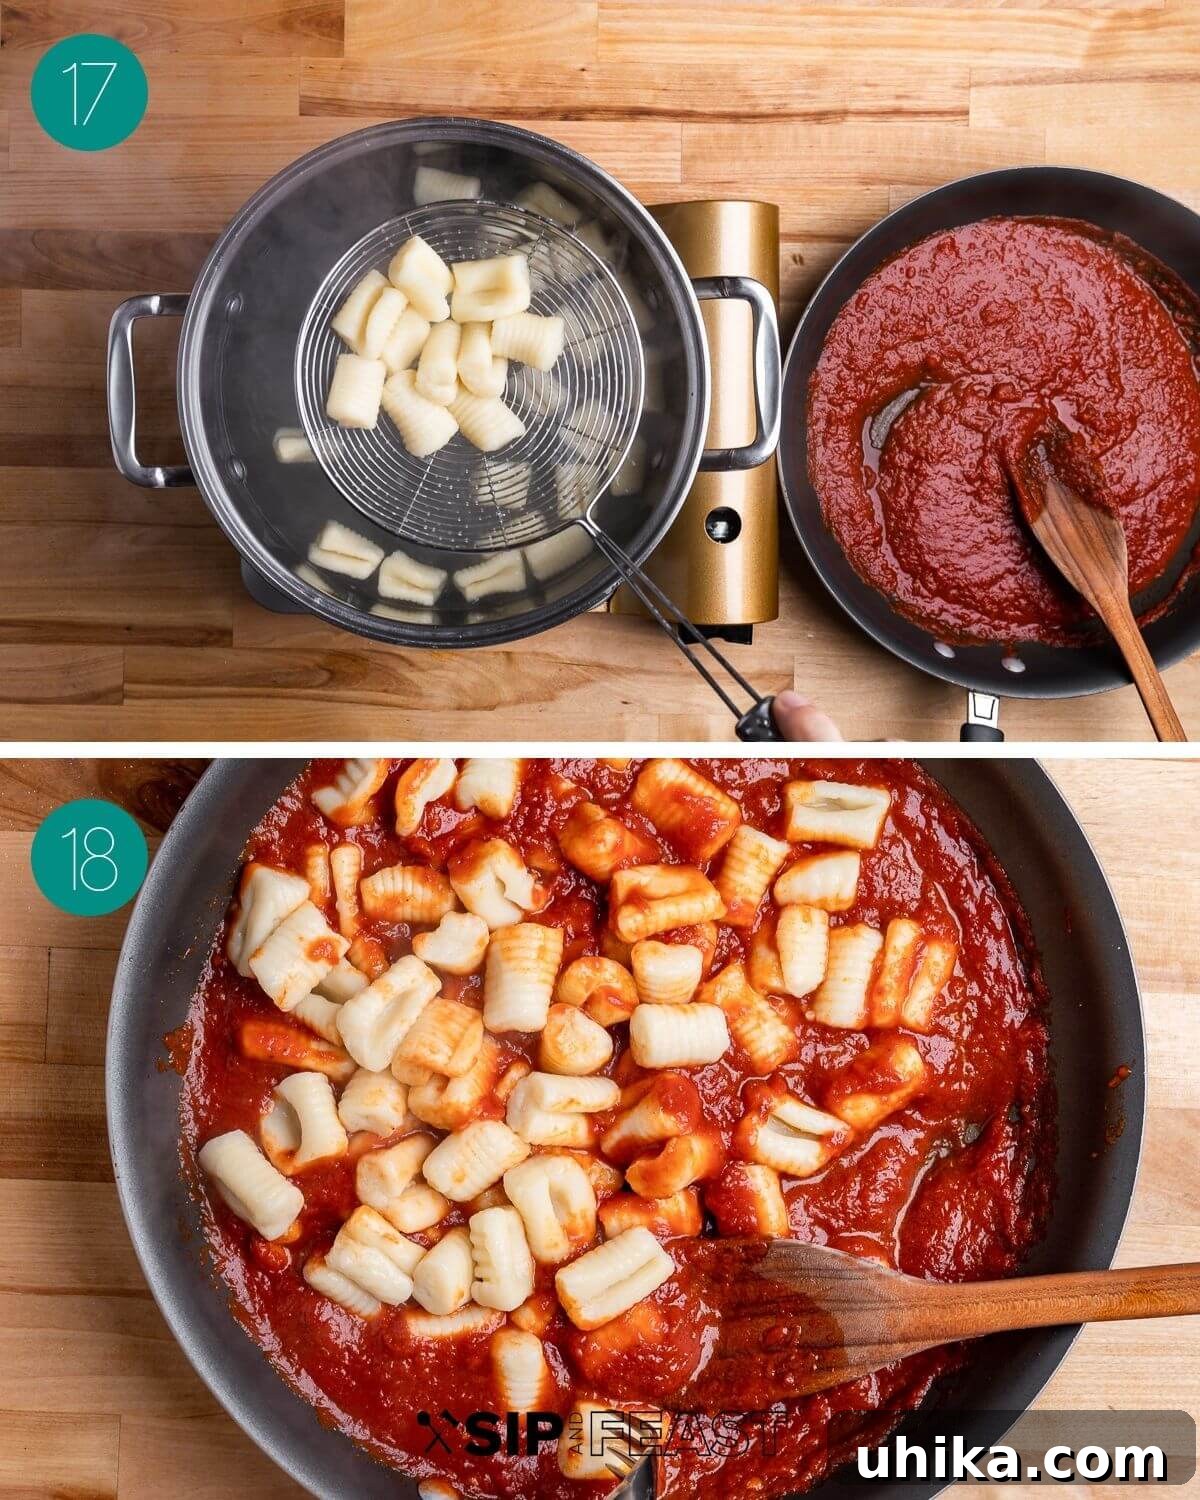
- Serve Immediately: Transfer the drained gnocchi directly into your hot sauce. Repeat the cooking process with the remaining batches. If cooking from frozen, gnocchi typically takes around 3 minutes to cook. If you’re cooking them immediately after making them, have your sauce ready without delay, as fresh gnocchi can become gummy if left to sit uncooked for too long. Serve your masterpiece and savor every tender bite!
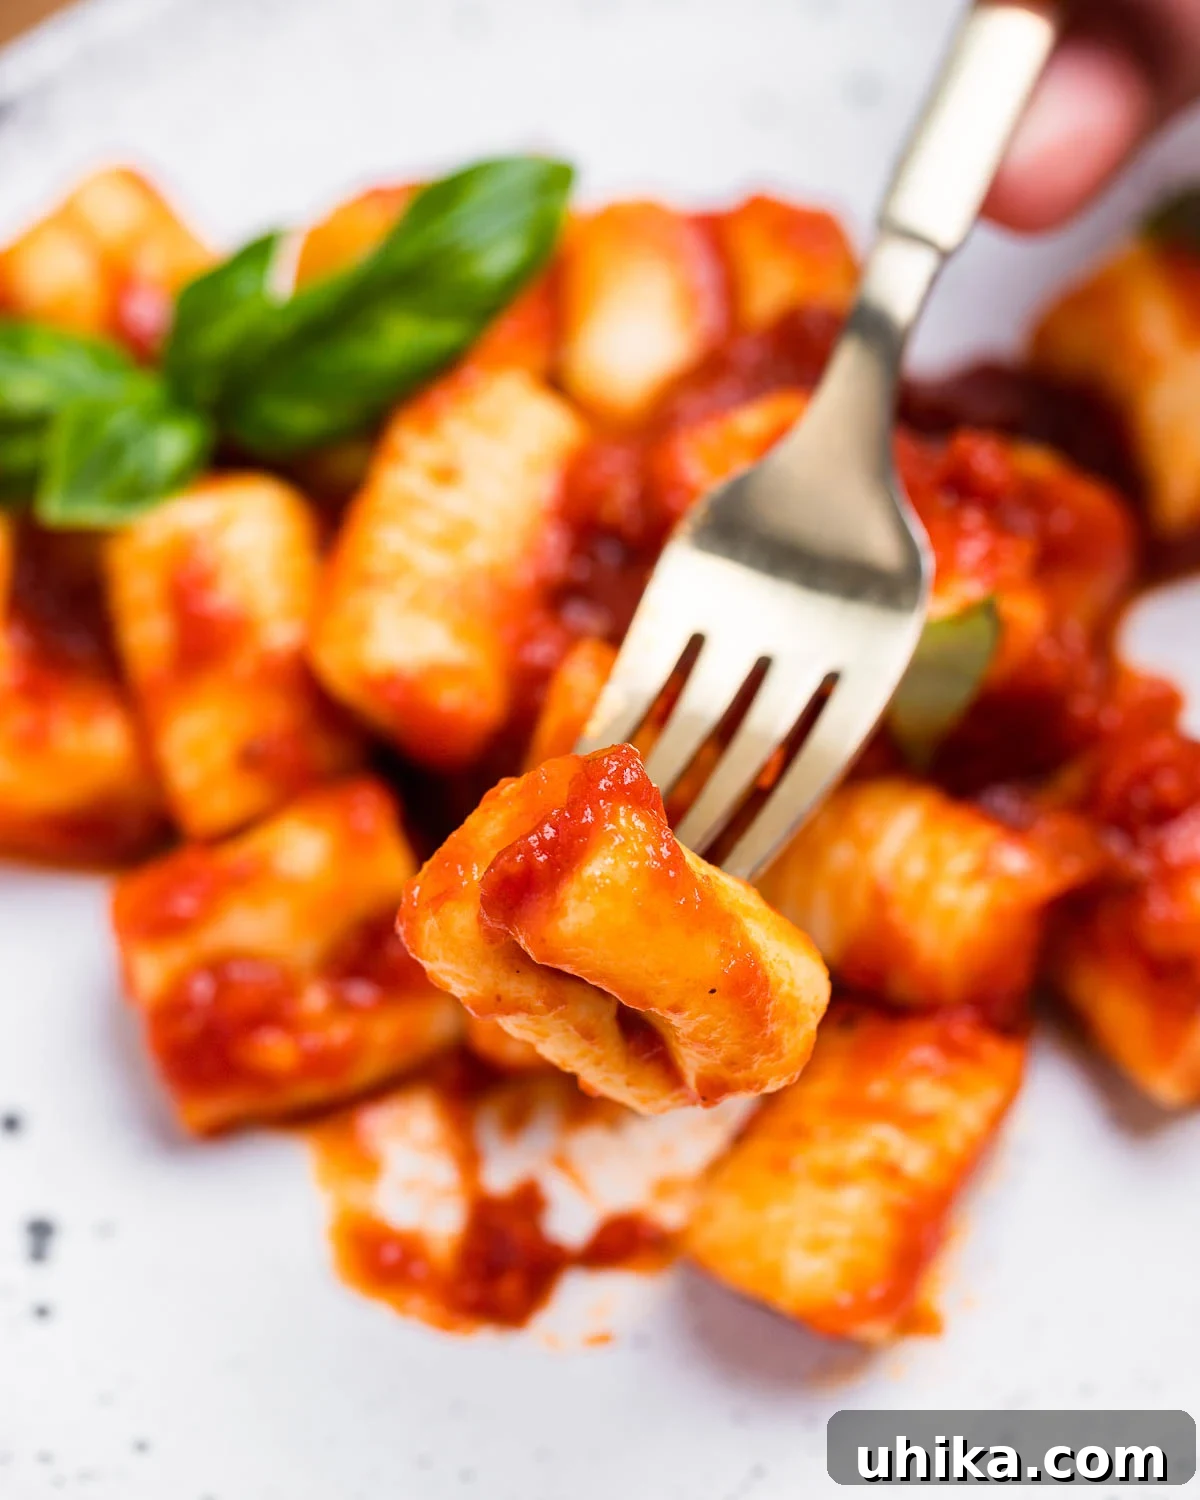
Expert Tips for Gnocchi Success
Achieving perfect gnocchi consistently comes down to a few key techniques. Keep these expert tips in mind for consistently delicious results:
- Freezing for Future Meals: Gnocchi freezes exceptionally well. After forming, flash freeze them on parchment-lined baking sheets for 2-3 hours until solid. Once hard, transfer them to freezer bags or airtight containers. They can be stored for up to 3 months, making them an ideal make-ahead meal. This allows you to have a delicious, under-20-minute weeknight dinner at your fingertips!
- Choose Dry, Starchy Potatoes: As emphasized earlier, Russet (Idaho) potatoes are your best friend for gnocchi in America due to their high starch and low moisture content. Always cook them with their skin on. The skin acts as a protective barrier, preventing excess water from seeping into the potatoes, which is critical for a light, non-gummy gnocchi.
- Start Potatoes in Cold Water: Always place potatoes in a pot of cold water and then bring it to a boil. This gradual heating helps prevent the potato skins from cracking and minimizes water absorption. A cracked skin is an open invitation for water to leach into the potato, making it soggy.
- Invest in a Potato Ricer: While not strictly essential, a potato ricer is highly recommended. It creates the perfect fluffy, uniform texture for your riced potatoes without overworking them, which is nearly impossible to replicate with a fork or masher without developing gluten. This is the one I personally use, and it truly simplifies the gnocchi-making process.
- Flour – Less is More: The golden rule for gnocchi dough is to use just enough flour to bind the ingredients into a cohesive mass, and not a bit more. Too much flour will result in heavy, dense gnocchi. Similarly, only knead the dough briefly, just until it comes together. Over-kneading develops gluten, leading to a tough, rubbery texture. Keep extra all-purpose flour on hand for dusting your work surface and hands, not for incorporating into the dough unless absolutely necessary.
- Preventing Sticking is Key: Freshly formed gnocchi are prone to sticking. To avoid this, always place them on baking sheets generously sprinkled with semolina flour. Semolina’s coarser texture creates a barrier, preventing the gnocchi from adhering to each other and to the parchment paper. Ensure ample space between each piece.
- The Float Test for Doneness: When cooking gnocchi, drop a small batch into rapidly boiling, salted water. They are perfectly cooked about 10-20 seconds after they float to the surface. This indicates they are light, tender, and ready to be scooped out and tossed with your sauce.
Delicious Ways to Serve Your Homemade Gnocchi
The beauty of homemade gnocchi lies in its versatility. While a simple coating of melted butter and a sprinkle of freshly grated Parmigiano Reggiano is always a divine choice (especially for delicate varieties like butternut squash gnocchi), the possibilities for saucing are truly endless. Here are a few irresistible ideas to inspire your next gnocchi meal:
- Classic Marinara Sauce: A vibrant, quick 15-minute marinara made with ripe plum tomatoes, aromatic garlic, and fresh basil is a timeless pairing that lets the gnocchi’s natural flavor shine.
- Hearty Ragu alla Bolognese: For a more robust and comforting dish, serve your gnocchi with an authentic Ragu alla Bolognese, a rich meat sauce based on the traditional recipe from the Bologna Chamber of Commerce.
- Fresh Pesto alla Genovese: Experience a burst of fresh flavor with homemade Pesto alla Genovese. Its bright, herbaceous notes perfectly complement the tender potato dumplings. So delicious, and surprisingly easy to prepare!
- Comforting Sausage Gnocchi Soup: For a unique twist, transform your gnocchi into a hearty and warming meal by dropping them into a creamy and delicious Sausage Gnocchi Soup.
- Brown Butter and Sage: A truly elegant and simple sauce, melted butter browned until nutty, infused with fresh sage leaves, creates a rich and aromatic coating for your gnocchi.
- Creamy Mushroom Sauce: Sautéed wild mushrooms in a decadent cream sauce offer an earthy and luxurious accompaniment to your homemade gnocchi.
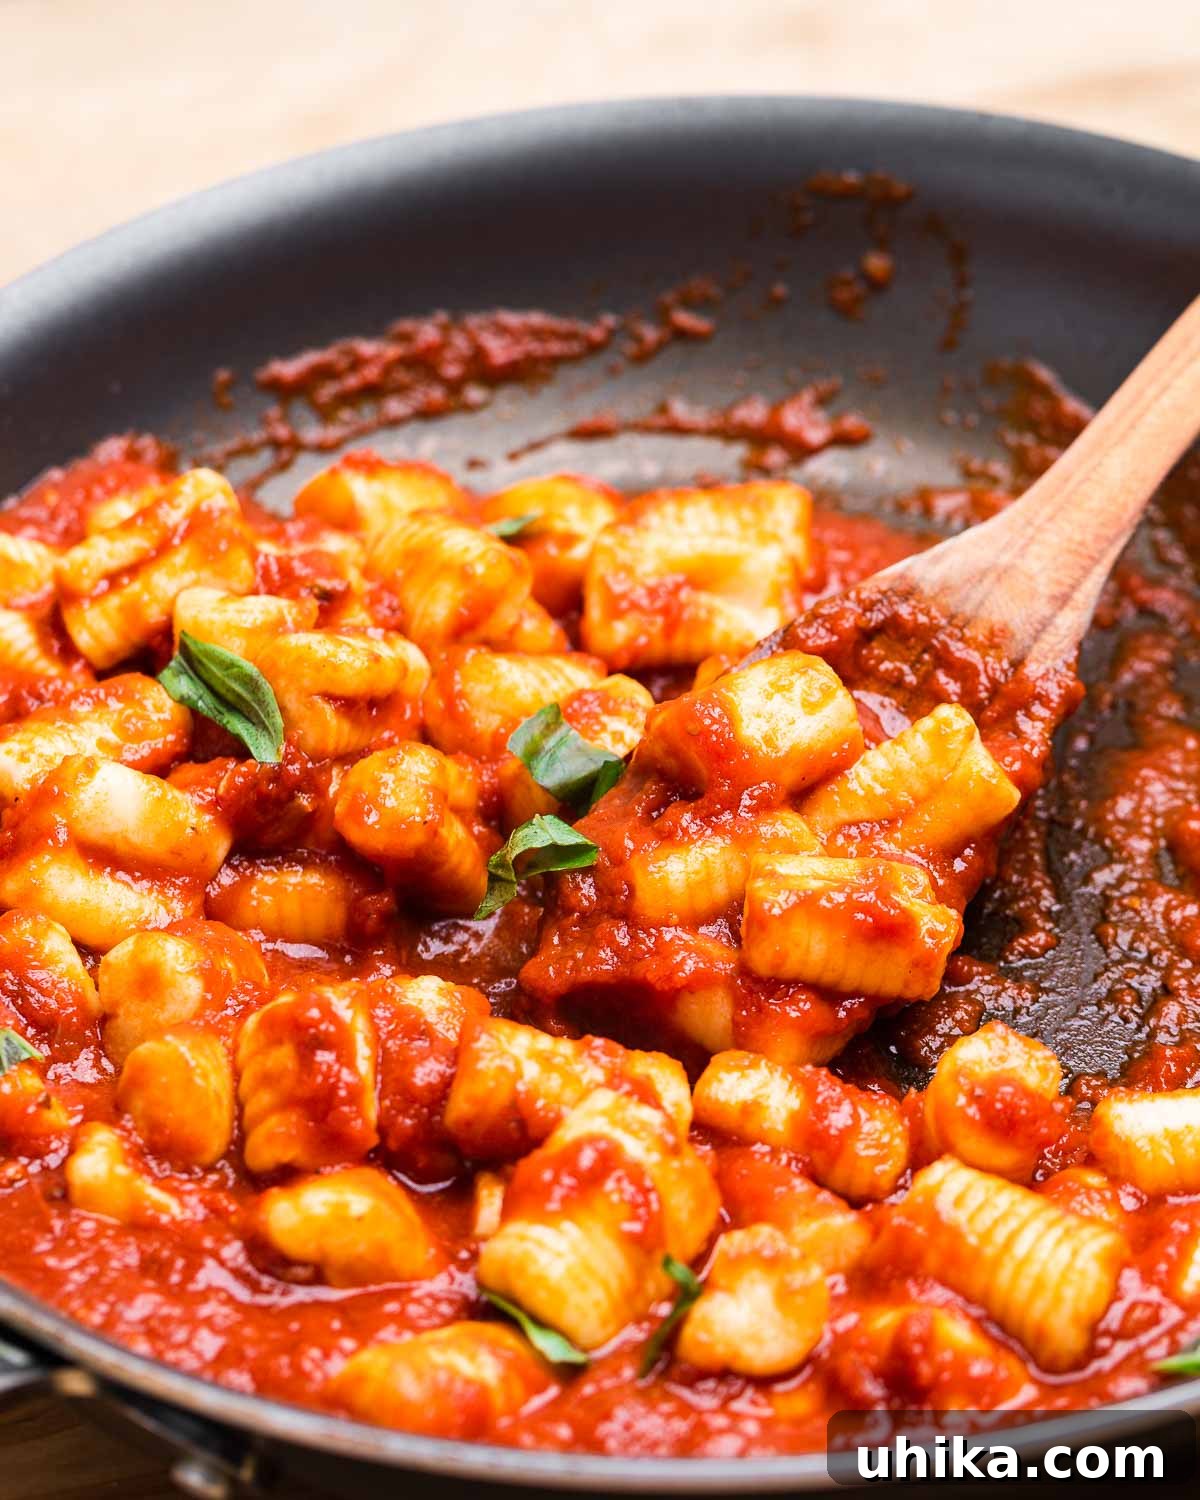
Making homemade potato gnocchi is a rewarding culinary adventure that brings immense flavor and satisfaction to your kitchen. Don’t be deterred by myths of complexity; with a little patience and attention to these detailed steps and tips, you’ll soon be enjoying perfectly tender, pillowy gnocchi that will undoubtedly become a staple in your recipe repertoire.
If you’ve enjoyed this Potato Gnocchi Recipe or any recipe on this site, we encourage you to give it a 5-star rating and share your experience in the comments below. Your feedback means the world to us!
We believe in catering to various learning preferences. If you are someone who prefers to learn by watching, you can find most of our recipes demonstrated on our YouTube channel and our Facebook Page.
For exclusive, never-before-seen videos and behind-the-scenes content, consider becoming a Patreon member today!
Classic Potato Gnocchi
James Delmage
45 mins
35 mins
1 hr 20 mins
8
Pin Recipe
Light and airy gnocchi made from riced russet potatoes, flour, and egg. Serve with your favorite sauce for the perfect Italian meal.
Ingredients
- 2 pounds russet potatoes
- 1 teaspoon fine sea salt
- 1 1/2 cups all-purpose flour plus extra if required and for dusting
- 1 large egg beaten
- 2 tablespoons semolina flour for dusting only
Instructions
- Place potatoes in pot and fill 2 inches above with cold water. Bring to a boil then turn heat to medium and cook partially covered for 30-35 minutes or until potatoes are tender. If a sharp knife slides through the potatoes, they are ready to be drained.
- Drain potatoes in a colander, then spread out on a board to cool. Once potatoes are cool enough to handle, peel and discard all the skin. Run the still warm potatoes through a ricer.
- Place the riced potatoes on a large work surface. Once potatoes are fairly cool, sprinkle with the salt, the flour, and drizzle the egg.
- Fold the mixture together with a bench scraper to incorporate the flour into the potatoes. Form a rough mass by kneading for 30-45 seconds, but don’t overdo it. If too wet use a bit more extra flour, working hard to use no more flour than necessary.
- Once a cohesive ball has been formed place it to the side. Clean the work surface completely and sprinkle flour onto the work surface.
- Grab 1/6 of the dough or about the size of a lemon and begin rolling the dough into a string about 1/2 to 3/4 of an inch thick.
- Once completely rolled out, cut with a sharp knife or bench scraper individual pieces about 3/4 to 1 inch long. Gnocchi can be grooved with a gnocchi paddle, fork, or left as is.
- Place the cut gnocchi on a parchment paper lined baking sheet that has been sprinkled with semolina flour or all-purpose flour. Make sure to keep the gnocchi pieces separated to avoid any sticking. Repeat with remaining dough.
- Once a full tray has filled up with gnocchi, place it in the freezer for 2- 3 hours to harden. Gnocchi can be cooked right away or saved in freezer bags for up to 3 months.
- To cook gnocchi, bring a large pot of salted water to boil and drop in a small batch (about 15-20 gnocchi at a time). Once the gnocchi float to the top, remove with a slotted spoon and place into your choice of sauce. Enjoy!
Notes
- The recipe makes roughly 2 pounds of gnocchi or 8 moderate-sized servings.
- Instead of boiling, the potatoes can be steamed or baked at 400f until very tender for 60-75 minutes. Some people have better results with baking the potatoes as they tend to be dryer.
- The exact amount of flour required will vary but a good general rule is 1 1/2 cups to 2 pounds of potatoes.
- Only knead for 30-45 seconds or just enough to form a cohesive mass.
- Use extra flour for rolling and handling the gnocchi to avoid sticking.
- Formed gnocchi should be cooked right away or frozen.
- Freeze gnocchi on floured baking sheets initially (2-3 hours) then store in freezer bags for up to 3 months.
Nutrition
Carbohydrates: 35.8g |
Protein: 5g |
Fat: 0.9g |
Saturated Fat: 0.2g |
Cholesterol: 20mg |
Sodium: 249mg |
Potassium: 494mg |
Fiber: 3.4g |
Sugar: 1.4g |
Calcium: 17mg |
Iron: 2mg
Nutrition information is automatically calculated, so should only be used as an approximation.
Enjoyed this recipe? Leave a comment below!
Check us out on Instagram at @sipandfeast or tag #sipandfeast!