
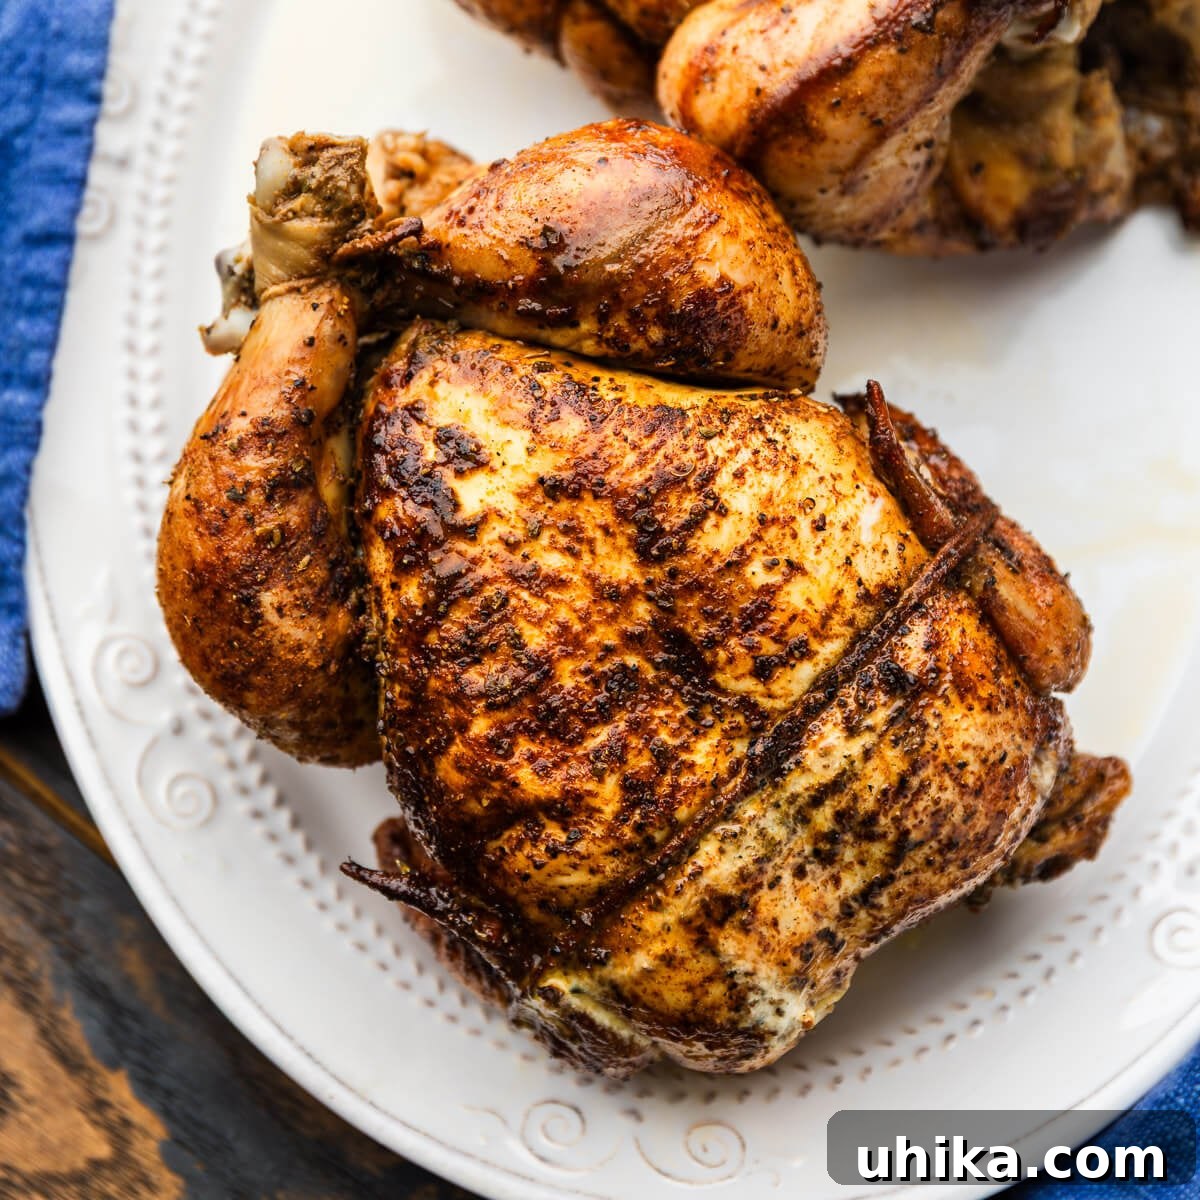
Homemade rotisserie chicken delivers superior flavor to store-bought birds, and with the right equipment it’s easier than you might think. With a rotisserie attachment, a juicy, golden whole chicken can be ready in about an hour with minimal hands-on time.
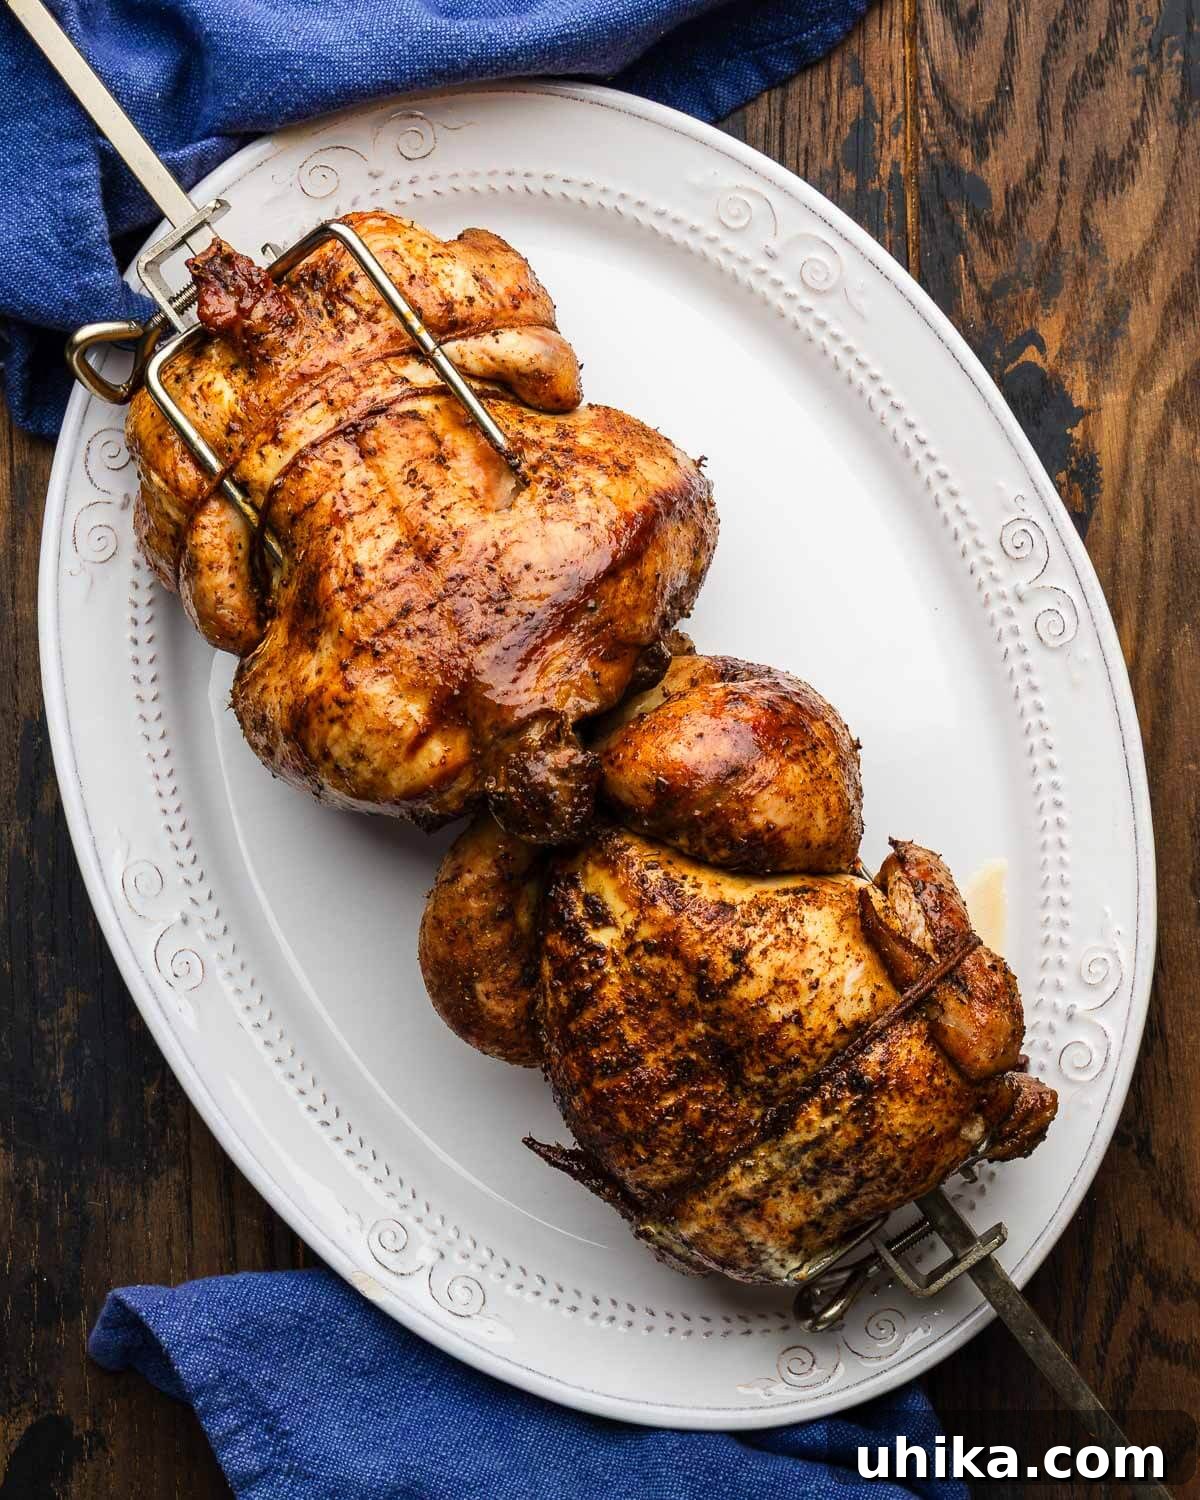

Easier (and far better) than you’d ever imagine…
If you’re wondering why bother making a rotisserie chicken at home when you can buy one ready-made, here’s the short answer: homemade wins. When prepared on a proper rotisserie, the chicken cooks evenly, stays exceptionally juicy, and develops a crisp, well-seasoned skin.
The process is mostly hands-off. After seasoning and trussing the bird, it roasts on the rotisserie for about an hour while you prepare simple sides like tortellini pasta salad, rice pilaf, or crispy roasted potatoes. A bright green sauce used for Peruvian chicken also pairs beautifully with this preparation, or you can use that marinade instead of the dry rub.
Most rotisserie attachments can accommodate two chickens, so you can cook extra for dinner and use the second bird for salads and sandwiches later in the week. The homemade result is often a showstopper—people are genuinely impressed when you present a perfectly roasted, glistening rotisserie chicken.
Recipe Ingredients
All ingredients are shown in the photo below. Notes follow to help you choose the best options.
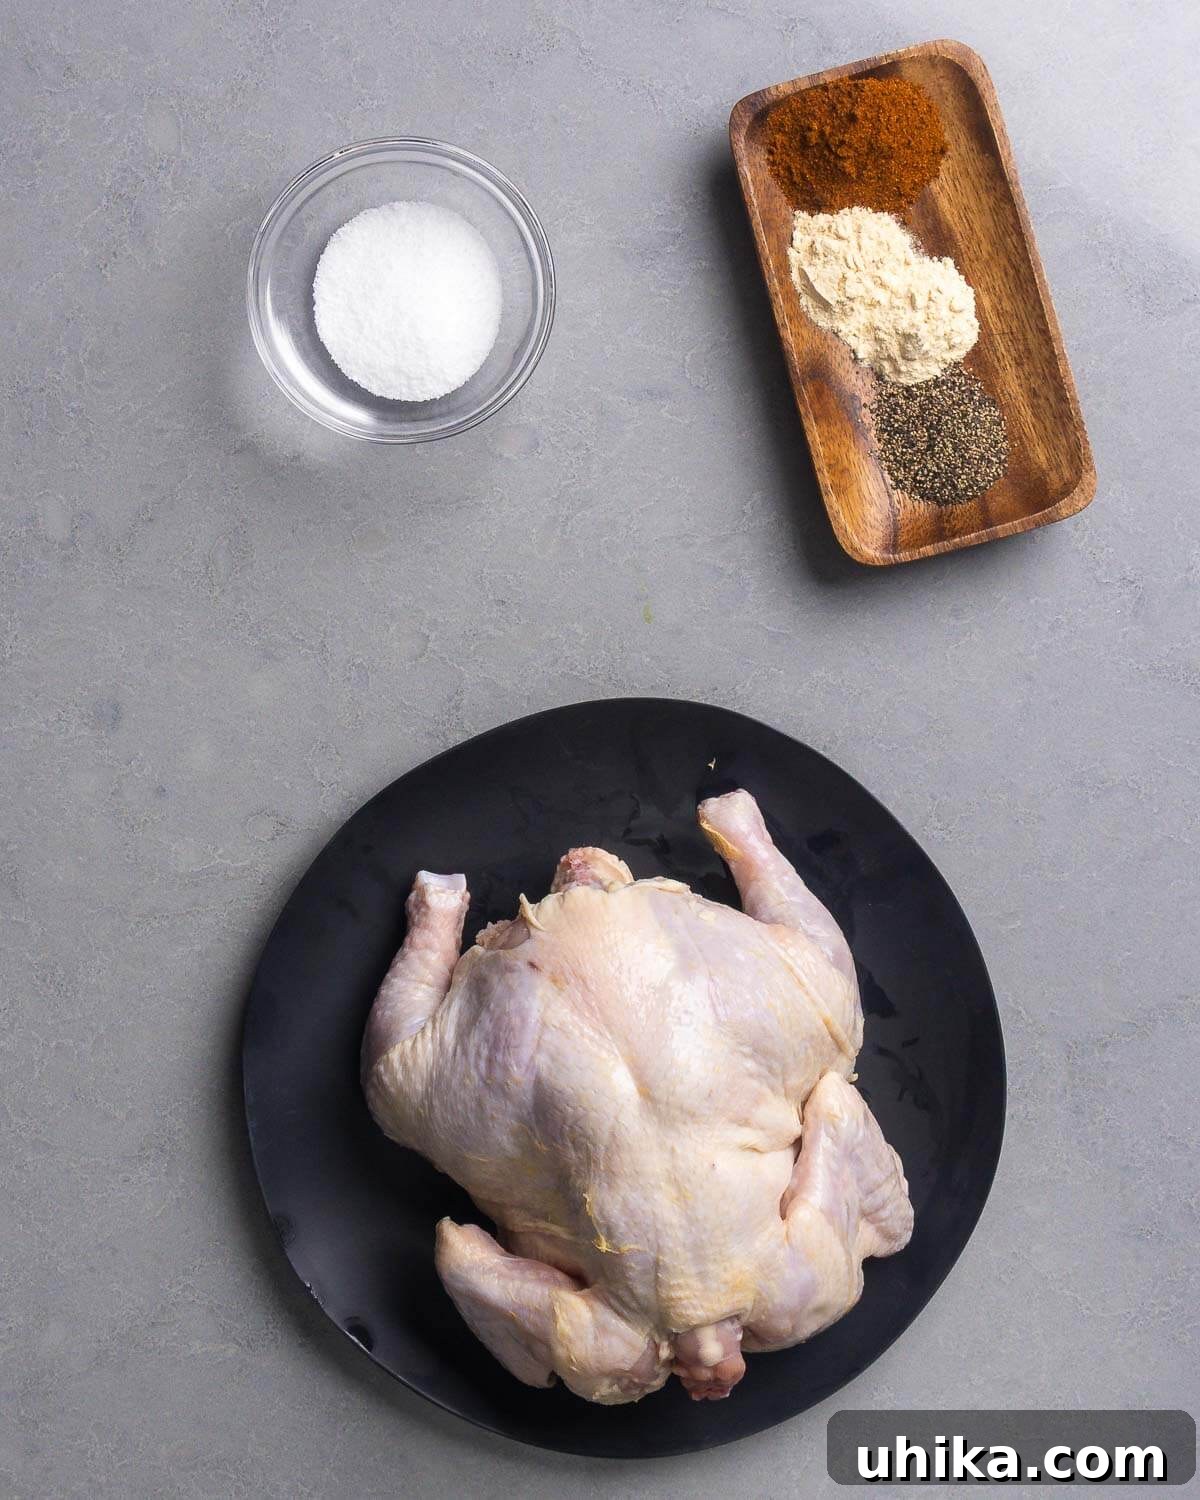
- Chicken. Use a whole young chicken, about 4–5 pounds. Smaller birds tend to be more tender. This recipe is written for one chicken, but the rotisserie can usually hold two.
- Seasoning. A simple rub of Diamond Crystal kosher salt, paprika, onion powder, garlic powder, and black pepper yields great flavor. Adjust quantities in the recipe card to suit your taste.
See the recipe card below for full ingredient amounts and the complete instructions.
How to make rotisserie chicken with the Only Fire Weber attachment
Each numbered step below corresponds to the photos in the gallery.
Note: This method uses the Only Fire Weber rotisserie attachment for a common 22″ Weber kettle, but many rotisserie kits fit other grill sizes and models.
- Mix the rub ingredients and rub them all over the chicken, including into the cavity. If possible, gently work some seasoning under the skin for deeper flavor.
- Truss the chicken with butcher’s twine: take a length of twine under the bird, crisscross over the breast, pull the string snug and wrap it under the legs. Tie the legs together and secure the wings with a short piece of twine.
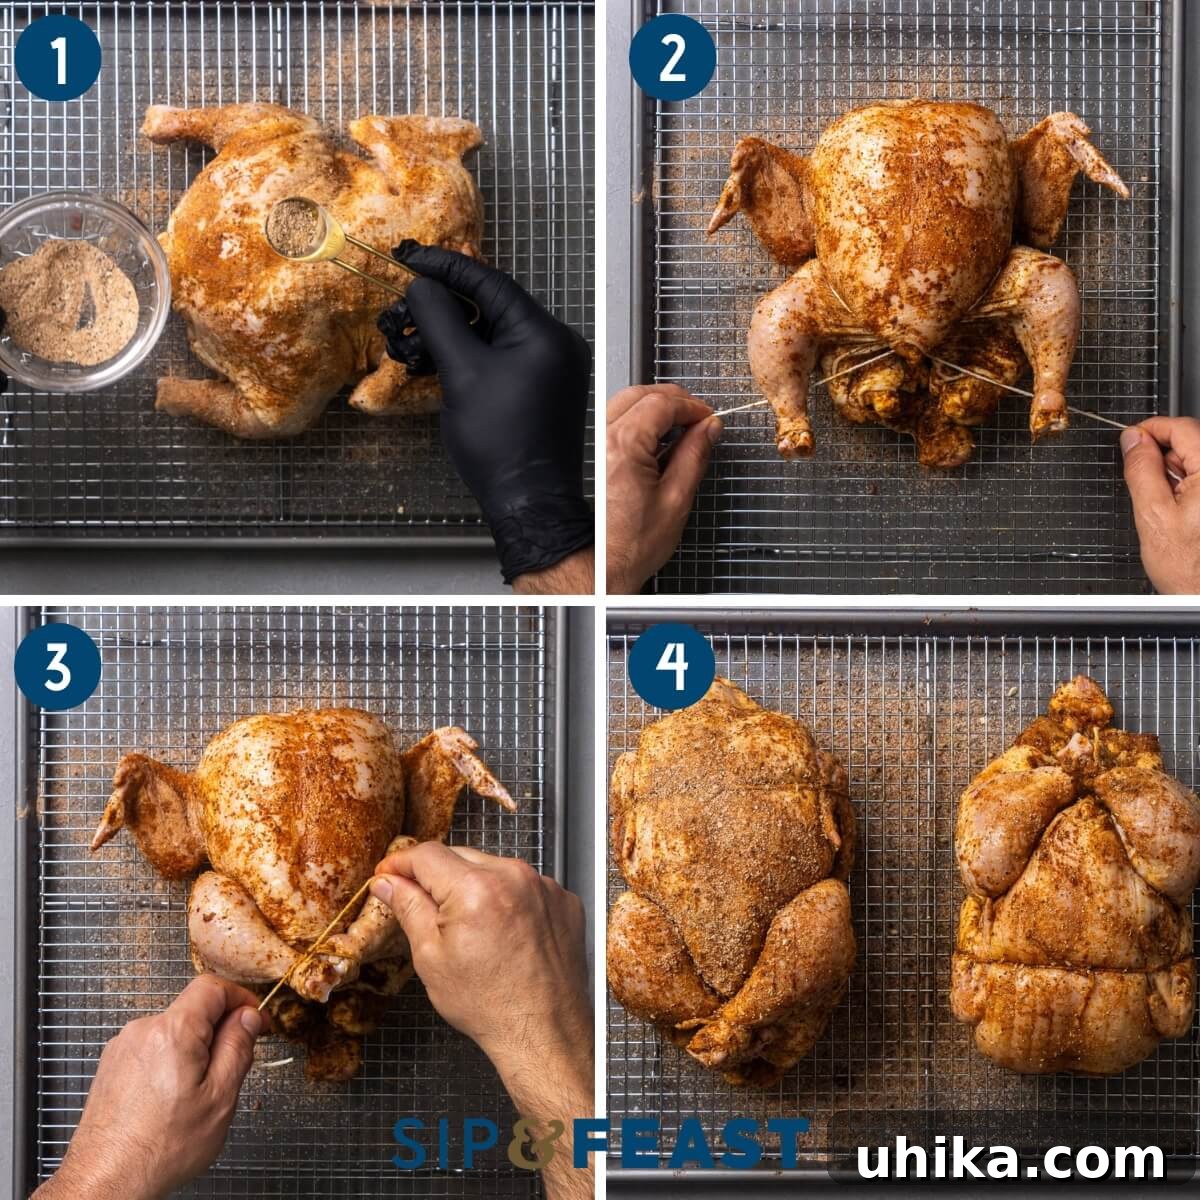
- After trussing, you can place the chicken on a wire-rack–lined baking sheet and refrigerate uncovered overnight (dry brine), or let it sit at room temperature for 1 hour before cooking.
- Although the recipe covers one chicken, the rotisserie commonly holds two. If using two, press them together on the rod so they balance and remain stable while turning.
- Assemble the rotisserie hardware: the ring rests on the grill and the rod uses pronged clamps to hold the bird in place.
- Remove the chicken from the fridge an hour before cooking if you dry-brined it. Slide one pronged clamp onto the rotisserie rod, thread the rod through the chicken, add the second clamp, center the bird, and insert the prongs to secure it. Tighten the clamps so the chicken won’t shift.
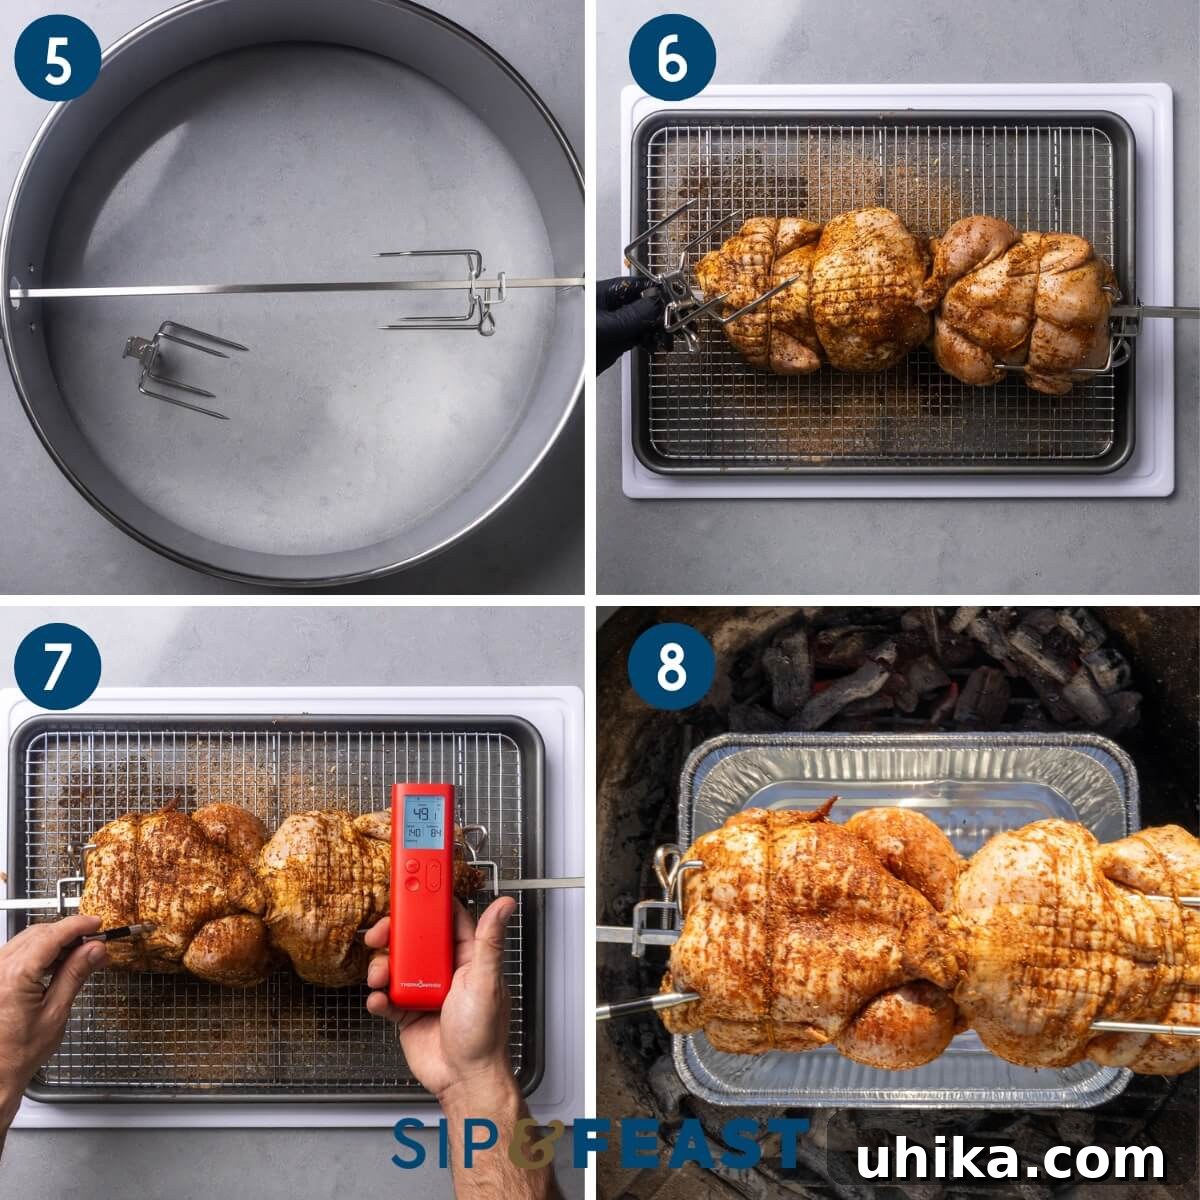
- If you have a wireless thermometer, insert the probe into the thickest part of the breast. This makes the cook nearly worry-free. Without one, check doneness occasionally with an instant-read thermometer.
- Prepare the charcoal: light a large chimney of Kingsford briquettes (about 4.5 pounds). When the coals are mostly gray on top (roughly 15 minutes), dump them into the grill and arrange them in two banks, leaving space in the center for a drip pan. Add 1 cup of water to the pan. Place 7–10 unlit briquettes on each side, touching the hot coals to help maintain heat.
- Fit the rotisserie ring over the grill, mount the rod into the motorized turning attachment, set the rod in place, plug in the motor, and immediately close the lid.
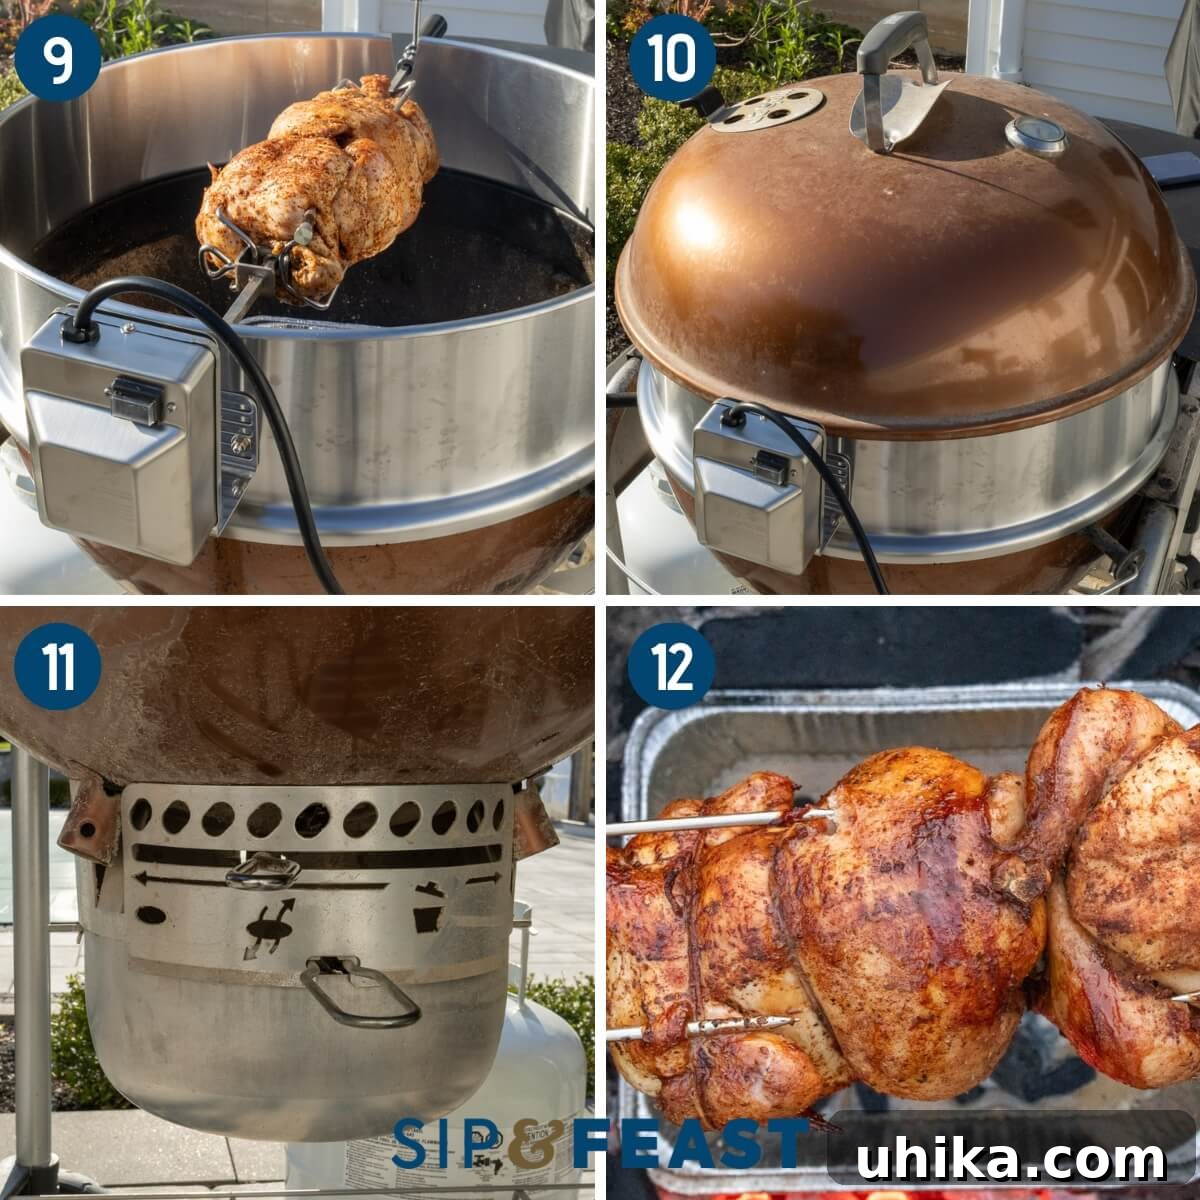
- Target a grill temperature of 350–400°F with the lid closed. Adjust bottom and top dampers to control airflow: reduce oxygen if the grill runs too hot by partially closing the bottom damper, and if needed, nearly close the top damper after about 15 minutes. Avoid closing dampers completely or you’ll extinguish the coals.
- Cook until the thickest part of the breast reaches 160°F. Turn off the rotisserie, remove the rod with heat-resistant gloves, and transfer the chicken to a cutting board. Let it rest for 10 minutes before removing clamps and sliding the bird off the rod. Serve whole or carve into portions.
Top tips
- The coal. Kingsford briquettes give steady, even heat and are my recommendation for this cook. Lump charcoal can run hotter but burns faster; reserve lump for high-heat searing like tomahawk steaks.
- The tools. A rotisserie attachment and a wireless thermometer are the most useful tools here. A drip pan filled with water placed under the chicken keeps drippings contained and helps stabilize temperature. For extra flavor, omit the water and roast oiled potato chunks with a bit of chicken stock in the pan to absorb the drippings.
- Heat control. Use the grill dampers to keep the temperature in the 350–400°F range. If it climbs above 450°F, nearly close the dampers but leave a slight gap for oxygen to avoid putting out the fire.
More chicken recipes
- Chicken souvlaki
- Spatchcock rosemary chicken and potatoes
- Garlic butter roast chicken
If you enjoyed this Homemade Rotisserie Chicken, please consider leaving a rating.
Follow the author for more recipes and videos.
Homemade Rotisserie Chicken
Pin
Equipment
-
Rotisserie kit attachment
-
Wireless meat thermometer
Ingredients
- 1 whole young chicken about 4 pounds
- 2 tablespoons Diamond Crystal kosher salt
- 1 tablespoon paprika
- 1 teaspoon onion powder
- 1 teaspoon garlic powder
- 1 teaspoon black pepper
Instructions
-
Combine the salt, paprika, onion powder, garlic powder, and black pepper. Rub the mixture evenly over the chicken, into the cavity, and under the skin where possible.
-
Truss the legs and wings with kitchen twine. For best results, place the seasoned, trussed chicken on a wire rack lined baking sheet and refrigerate uncovered overnight for a dry brine. If cooking the same day, let the chicken sit at room temperature for 1 hour.
-
About 1 hour before cooking, remove the chicken from the refrigerator. Mount the chicken on the rotisserie rod using the pronged clamps, center it, and tighten the clamps so the bird is secure.
-
If using a wireless thermometer, insert the probe into the thickest part of the breast. Otherwise, plan to check internal temperature periodically with an instant-read thermometer.
-
Light a chimney of briquettes (about 4.5 lb). When the coals are mostly gray on top, spread them into two banks with space in the center for a drip pan. Add 1 cup of water to the pan and place a few unlit briquettes against the hot coals to maintain heat.
-
Set the rotisserie ring, attach the motorized turning unit, mount the rod, switch the motor on, and close the grill lid.
-
Aim for a covered grill temperature of 350–400°F. Adjust dampers to regulate heat. A 4 lb chicken at this temperature usually takes about 60 minutes to reach 160°F internal in the breast; times will vary with grill conditions.
-
When the breast reaches 160°F, turn off the rotisserie, remove the rod with heatproof gloves, and transfer the chicken to a cutting board. Rest 10 minutes before removing clamps and carving or serving whole.
Notes
- Charcoal choice. Briquettes provide steadier, longer-lasting heat. Lump charcoal heats hotter but burns faster.
- Temperature control. Use the grill dampers to manage heat; don’t close them entirely or you’ll smother the coals.
- Thermometer. A wireless probe lets you monitor temperature without interrupting the rotisserie.
- Drip pan. A water-filled pan keeps the cook moist and catches drippings. It can double as a roasting pan for potatoes tossed with oil, salt, pepper, and a bit of chicken stock.
- Storage. Refrigerate leftovers up to 3 days or freeze broken-down meat for up to 3 months.
Nutrition
Nutrition information is an approximation.