
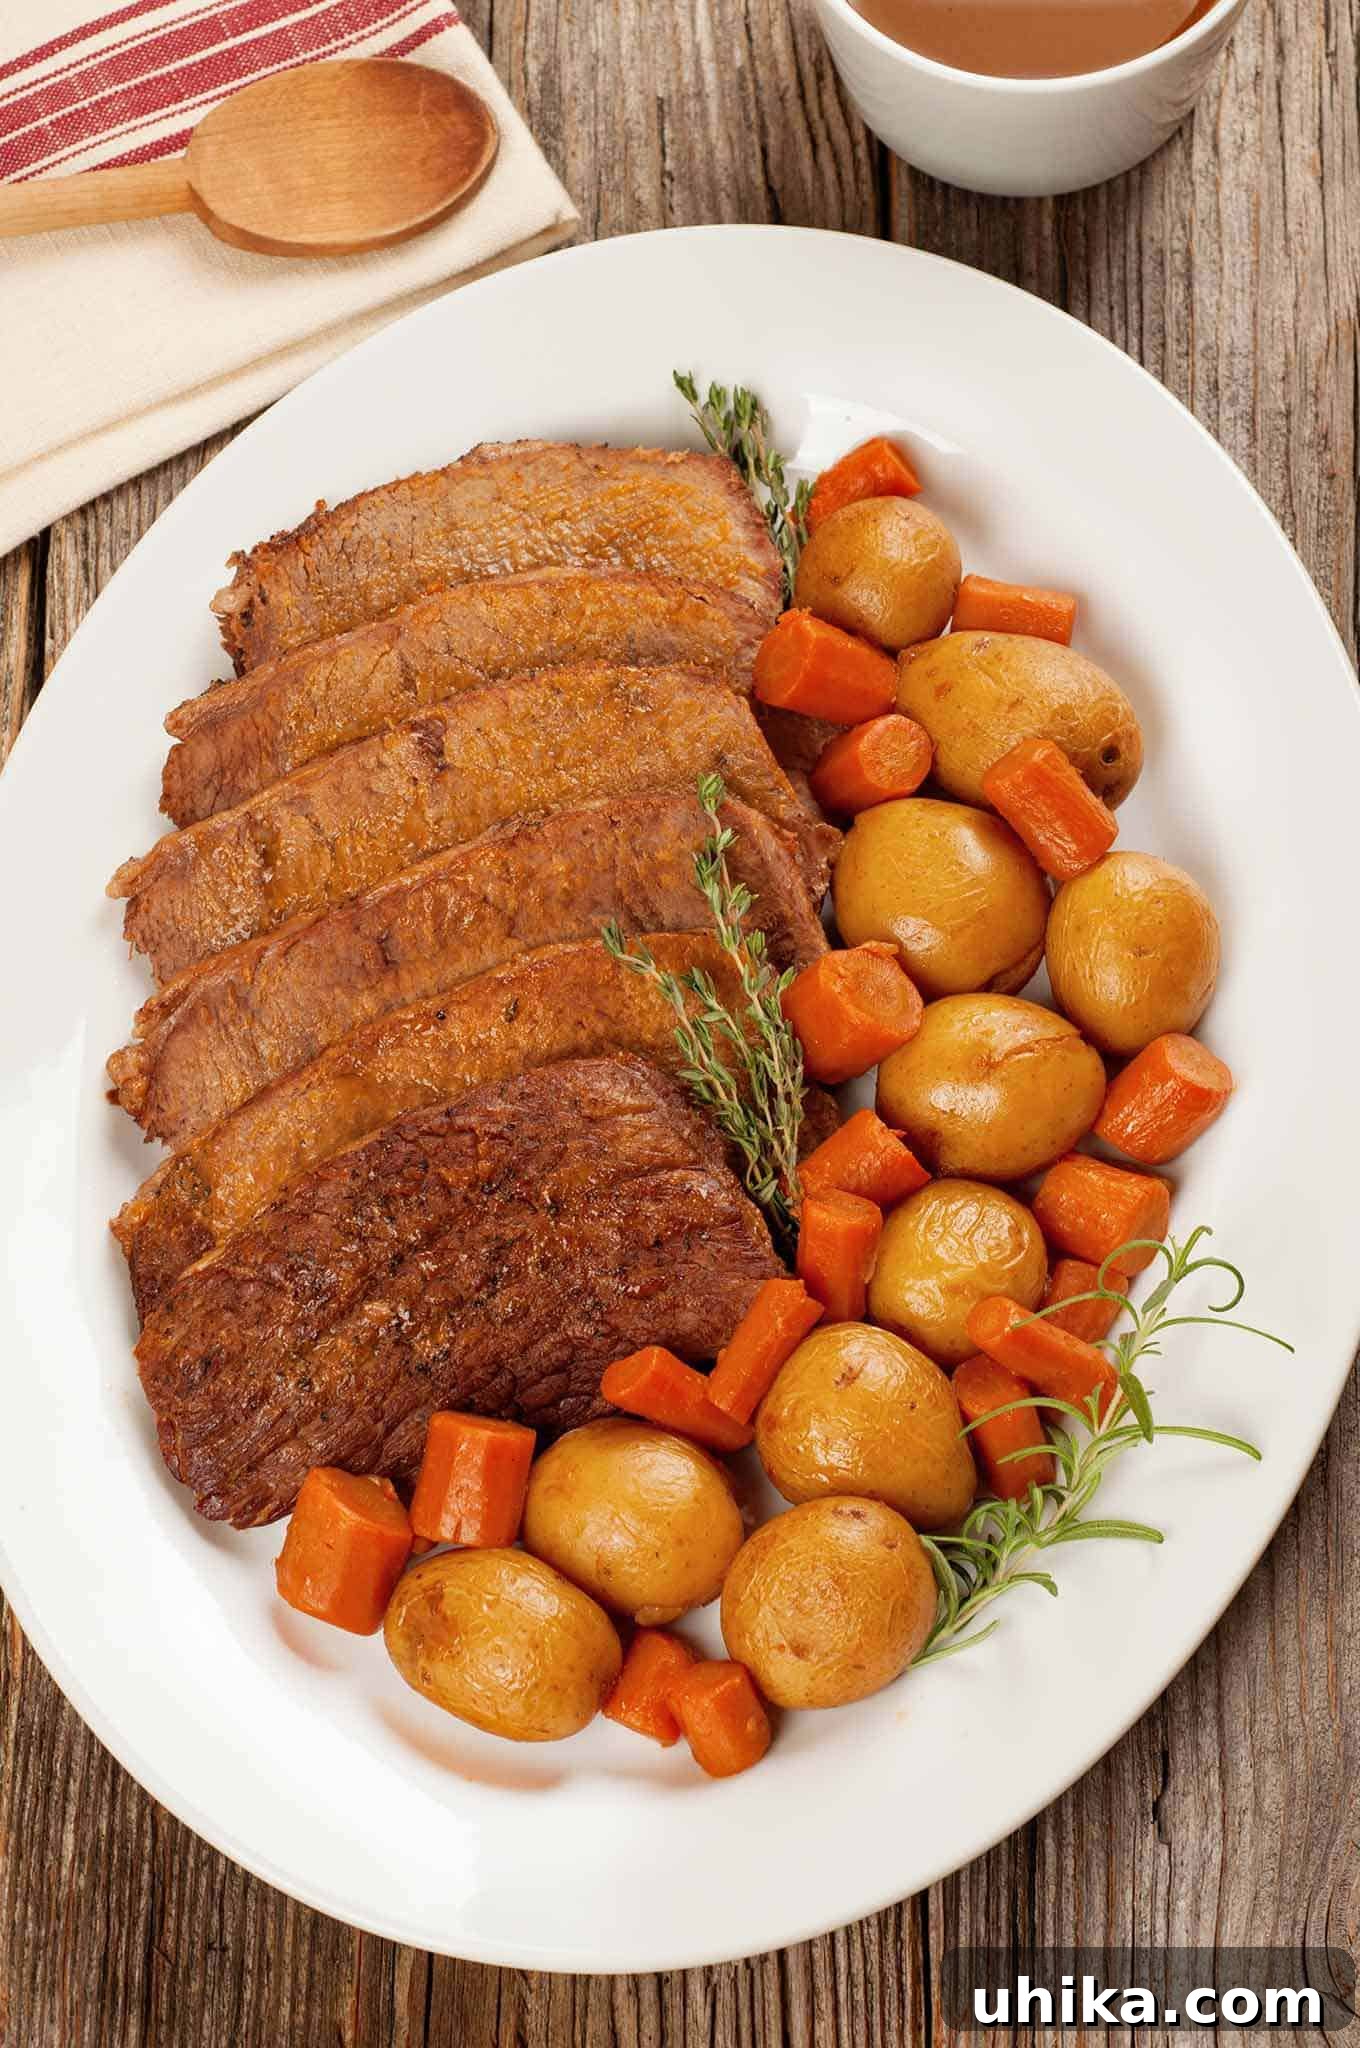
The Ultimate Pressure Cooker Pot Roast: Tender, Juicy, and Flavorful
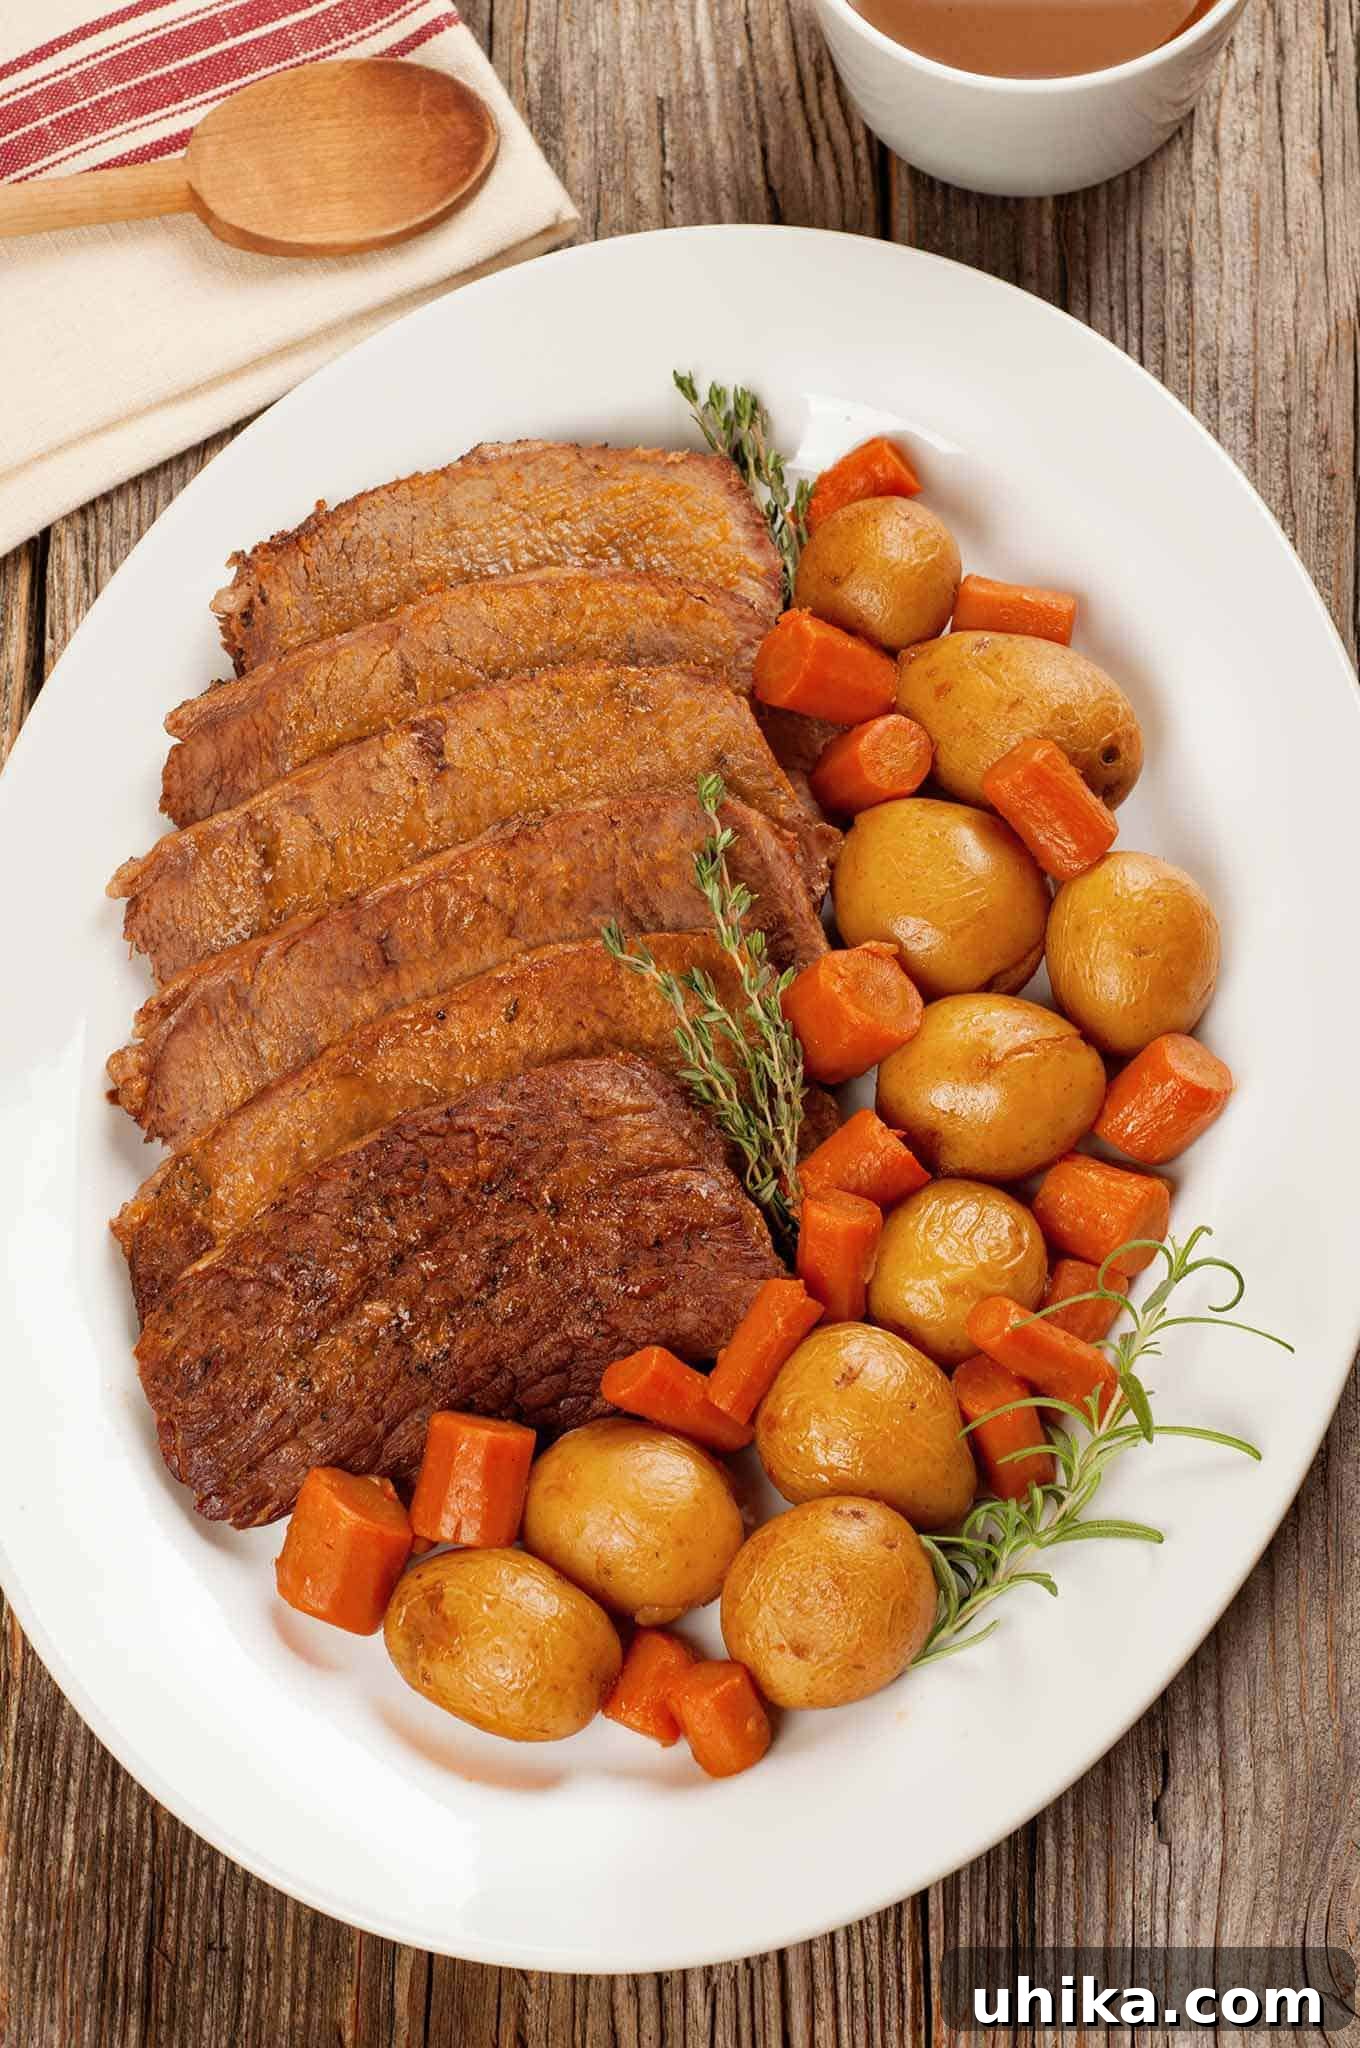
Imagine a pot roast so tender it practically melts in your mouth, infused with deep, savory flavors, and ready in a fraction of the time traditional methods demand. This isn’t just a culinary dream; it’s the reality when you harness the power of a pressure cooker. Forget spending hours waiting for tough cuts of beef to become fork-tender. Our pressure cooker pot roast recipe transforms a robust rump roast into a magnificent meal in just over an hour, delivering exceptional tenderness, juiciness, and an explosion of taste. It’s the perfect solution for a comforting weeknight dinner or a special family gathering when time is of the essence.
Why Choose a Pressure Cooker for Your Pot Roast?
For centuries, cooks have relied on slow, moist heat to transform less tender cuts of meat into succulent masterpieces. However, the advent of the pressure cooker revolutionized this process. While a slow cooker or oven might require 4-6 hours (or even more) to achieve the desired tenderness for a rump roast, a pressure cooker slashes this time dramatically. Here’s why it’s the superior choice for pot roast, making it a favorite among home cooks seeking both quality and efficiency:
- Unrivaled Speed: The most obvious benefit is the cooking speed. By increasing the internal pressure and temperature, a pressure cooker cooks food much faster than conventional methods. A tough cut like rump roast, which usually takes hours to become tender, can be perfectly cooked in approximately 60-70 minutes under pressure, making it ideal for busy schedules.
- Exceptional Tenderness: High pressure forces moisture deep into the meat fibers, effectively breaking down tough collagen and connective tissues. This process occurs far more efficiently and quickly than in open pots or ovens, resulting in meat that is incredibly tender, almost shreddable, without drying it out. The collagen transforms into gelatin, contributing to a rich mouthfeel.
- Intensified Flavors: The sealed environment of a pressure cooker prevents aromatic compounds and moisture from escaping. This means all the wonderful flavors from your beef, vegetables, and seasonings are concentrated and infused back into the dish. The result is a richer, more profound taste experience where every ingredient’s essence is amplified.
- Juicier Results: Because cooking happens so quickly and in a sealed pot, less moisture evaporates from the food. Your pot roast remains wonderfully juicy and moist, preventing the dry, sometimes stringy texture that can occur with prolonged cooking in an oven or slow cooker. This retention of natural juices contributes significantly to the overall deliciousness.
- Energy Efficiency: Faster cooking times translate directly into less energy consumption compared to stovetop simmering or oven baking for several hours. This makes pressure cooking a more eco-friendly and cost-effective method for preparing hearty meals.
- One-Pot Convenience: Many modern pressure cookers, especially electric models, allow you to sear the meat, sauté the aromatics, and then pressure cook, all in the same pot. This multi-functionality minimizes cleanup, making meal preparation even more convenient.
If you’re looking for other hearty beef dishes that benefit from the pressure cooker’s efficiency, you might also enjoy our recipe for Pressure Cooker Beef Stew.
Choosing the Right Cut for Pot Roast
While our recipe specifically calls for a rump roast, known for its lean profile and robust beefy flavor, pot roast traditionally shines with cuts that benefit from long, slow, moist-heat cooking to become tender. These cuts typically come from the harder-working muscles of the animal, meaning they have more connective tissue (collagen) that breaks down into gelatin during cooking, creating that signature melt-in-your-mouth texture that defines a perfect pot roast. Understanding these cuts is key to selecting the best beef for your pressure cooker.
- Rump Roast (Bottom Round Roast): This cut, used in our recipe, is from the hindquarter of the steer. It’s lean but very flavorful. Its natural toughness makes it an ideal candidate for the pressure cooker, as high pressure excels at breaking down its dense muscle fibers, ensuring it softens beautifully without becoming dry.
- Chuck Roast (Chuck Shoulder Pot Roast, Chuck Eye Roast): Arguably the most popular choice for traditional pot roast. Chuck comes from the shoulder and is well-marbled with fat and an abundance of connective tissue. This marbling and collagen yield exceptionally tender, moist, and flavorful results that literally shred with a fork once cooked. If you prefer a richer pot roast, chuck is an excellent alternative.
- Brisket: While often associated with barbecue, brisket (especially the “point” or “deckle” cut with more fat, or the leaner “flat” cut) can also make an exceptional pot roast. Like chuck, it has a good amount of connective tissue that breaks down beautifully under pressure, leading to a moist and flavorful dish.
No matter your choice, ensure your beef is fresh and of good quality. A cut weighing between 3 to 3.5 pounds is ideal for feeding 4-6 people generously, providing enough hearty servings for a family meal or leftovers.
Pressure Cooker Pot Roast Recipe
Recipe Details
- Author: Lynne Webb
- Prep Time: 15 minutes
- Cook Time: 1 hour 35 minutes
- Total Time: 1 hour 50 minutes
- Servings: 4-6 servings
- Description: This pressure cooker pot roast recipe delivers incredibly tender, juicy, and flavorful beef with classic vegetables in significantly less time than traditional methods.
Ingredients
- 1 (3 to 3-1/2 lb) beef rump roast
- 4 to 5 cloves garlic, peeled and sliced lengthwise
- Salt and freshly ground black pepper, to taste
- 2-3 tablespoons olive oil, for searing
- 1 medium yellow onion, halved lengthwise and cut into 1/2-inch slices
- 2 cups low-sodium beef or chicken broth (divided)
- 1 tablespoon tomato paste
- 1-1/2 teaspoons soy sauce
- 1 lb carrots, peeled and cut into 1-inch chunks
- 1 lb whole baby gold potatoes (about 10 medium-sized)
- 1-1/2 tablespoons cornstarch
- 1/4 cup cold water (for cornstarch slurry)
Instructions
- Prepare the Roast: Begin by preparing your rump roast. Using a small, sharp knife, make 6 to 8 (approximately 1-inch deep) slits uniformly across both the top and bottom surfaces of the roast. Take the pre-sliced garlic slivers and insert one into each slit. This technique helps infuse the garlic flavor deep into the meat as it cooks. Liberally season the entire surface of the roast on all sides with salt and freshly ground black pepper. Don’t be shy with the seasoning; it’s crucial for flavor development.
- Sear the Beef: Pour about 1 to 2 tablespoons of olive oil into the bottom of your pressure cooker pot. Heat the oil over medium-high heat until it shimmers, indicating it’s hot enough. Carefully place the seasoned rump roast into the hot oil. Sear the beef thoroughly on all sides, allowing it to brown for about 1 to 1-1/2 minutes per side. This crucial step, known as the Maillard reaction, creates a rich, caramelized crust and builds an incredible depth of flavor. Once seared, transfer the roast to a clean plate and set it aside. If there’s excessive rendered fat in the pot, carefully drain most of it, leaving only a tablespoon or so. Add about 1 more tablespoon of olive oil if needed.
- Sauté Aromatics: Add the thinly sliced yellow onion to the pressure cooker pot. Cook the onions, stirring constantly, over medium-high heat until they have softened and become translucent, which typically takes about 2 to 3 minutes.
- Deglaze the Pot: Pour about 1/4 cup of the beef or chicken broth into the pressure cooker. Immediately use a wooden spoon or spatula to vigorously scrape up all the flavorful browned bits (fond) that have accumulated on the bottom of the pan during searing and sautéing. This step is essential not only for incorporating those rich flavors into your gravy but also for preventing a “burn” warning, especially in electric pressure cookers.
- Combine Liquids and Vegetables: Add the remaining beef or chicken broth, along with the tomato paste and soy sauce, to the pressure cooker. Stir the mixture well to ensure the tomato paste is fully dissolved and combined. Then, add the 1-inch chunks of carrots and the whole baby gold potatoes, spreading them somewhat evenly across the bottom of the pot. Add any remaining sliced garlic here as well.
- Position the Roast: Gently nestle the seared beef roast directly into the center of the vegetables in the pressure cooker. Ensure the liquid isn’t already bubbling vigorously; if it’s not quite simmering, increase the heat slightly until it just begins to bubble.
- Seal and Pressurize: Carefully place the lid securely onto your pressure cooker and lock it according to your manufacturer’s instructions. Set the cooker for high pressure (typically 15 psi for most models).
- Cook Under Pressure: Continue cooking until your pressure cooker indicates it has reached full pressure. For many stovetop cookers, this takes approximately 8 minutes on medium-high heat (around 375°F). Once full pressure is reached, maintain this pressure level for about 5 minutes. Then, gradually reduce the heat to medium (for stovetop models), ensuring the pressure is consistently maintained and you can still see a steady stream of steam escaping from the vent. Electric models usually maintain pressure automatically once set.
- Complete Cooking Time: Cook the pot roast for a total of 1 hour from the moment the cooker first came to full pressure. (Please refer to the “Notes” section below for adjustments to cooking time based on the specific size of your roast). After the 1-hour pressure cooking time is complete, remove the pressure cooker from the heat source and allow the pressure to release naturally. Do NOT attempt a quick release; natural release is crucial for ensuring the meat’s tenderness and allowing its fibers to relax and reabsorb juices. This natural release can take 15-20 minutes or more.
- Rest the Meat: Once the pressure has fully released and the lid can be safely opened, carefully transfer the cooked rump roast to a carving board. Tent it loosely with aluminum foil and let it rest for at least 10-15 minutes. This resting period is vital for the juices to redistribute throughout the meat, guaranteeing a tender and moist roast when carved.
- Remove Vegetables: While the meat rests, use a slotted spoon to gently transfer the now incredibly tender potatoes and carrots to a separate serving bowl. Cover them to keep them warm and set them aside. Be very gentle when handling them, as they will be quite soft after pressure cooking.
- Prepare for Gravy: Carefully strain all the pan juices from the pressure cooker into a separate heatproof bowl. You can discard the cooked solids (onions and garlic) at this point, or if you prefer a chunkier gravy, you can leave some of the softened onions.
- Defat the Juices: Pour as much of the strained liquid as possible into a gravy/fat separator. Allow it to sit undisturbed for about 5 minutes, which gives the fat time to rise to the top. Carefully pour the defatted juices into a 2-cup measuring cup, leaving the fat behind. Repeat this defatting process with any remaining juices if necessary. You should aim for approximately 2 cups of defatted juices. If you have less, simply add a little extra beef broth or water to reach the 2-cup mark.
- Make the Gravy: Return the defatted juices to the pressure cooker pot (or transfer to a medium saucepan if preferred). Bring the mixture to a brisk boil over medium-high heat. In a small separate bowl, whisk the 1-1/2 tablespoons of cornstarch thoroughly into 1/4 cup of cold water until you have a smooth, lump-free slurry.
- Thicken the Gravy: Gradually add the cornstarch slurry to the boiling pan juices in the pressure cooker, stirring constantly with a whisk or spoon. Continue to cook and stir until the gravy thickens to your desired consistency and becomes smooth, which typically takes about 2 to 3 minutes. Be careful not to overcook, as the gravy can become excessively thick or gluey. Once thickened, transfer the rich, flavorful gravy to a warm serving bowl.
- Serve: Carve the rested pot roast into slices. For best results with rump roast, refer to the carving tip in the “Notes” section. Arrange the sliced beef beautifully on a large serving platter alongside the tender potatoes and carrots. Drizzle some of the prepared gravy over the roast and vegetables, and pass the remaining gravy at the table for individual preference. Serve immediately and enjoy!
Notes for the Perfect Pot Roast
- Adjusting Cook Time for Roast Size: The recommended 1 hour of pressure cook time is suitable for a 3 to 3-1/2 lb rump roast. If your roast is at the higher end of this weight range (closer to 3-1/2 lbs), or if you prefer it extra tender, you can safely add an extra 7 to 8 minutes to the initial 1-hour pressure cook time. This ensures maximum tenderness and perfect doneness.
- Carving Tip for Rump Roast: Cuts of meat used for pot roast, especially leaner ones like rump roast, have large muscle fibers and a tendency to shred rather than slice cleanly, particularly when very tender. For the neatest and most uniform slices, consider using an electric carving knife, which often does an excellent job with this type of meat. Alternatively, a very sharp, thin-bladed carving knife can work, but be prepared for some natural shredding. Always slice against the grain of the meat.
- Natural Pressure Release is Key: It is critically important to always use natural pressure release for pot roasts. Quick release can cause the meat fibers to seize up suddenly due to the rapid temperature drop, resulting in a less tender, tougher texture. The slow, gradual release of pressure allows the meat to relax gently and reabsorb its juices, guaranteeing a moist and succulent result.
Tips for an Even Better Pressure Cooker Pot Roast
Achieving a truly exceptional pot roast in your pressure cooker goes beyond just following the steps. Incorporating these expert tips will elevate your dish from good to unforgettable:
- Don’t Skip the Searing: This step is non-negotiable! Searing the roast before pressure cooking creates a rich, caramelized crust through the Maillard reaction. This not only enhances the visual appeal but, more importantly, adds incredible depth, complexity, and savory notes to the overall flavor of your pot roast and ultimately, the gravy.
- Deglaze Thoroughly: After searing the meat and sautéing the aromatics, you’ll find browned bits (fond) stuck to the bottom of the pot. These bits are flavor gold! Scraping them up with a splash of broth is called deglazing, and it’s essential for building a deep, rich foundation for your gravy. It also prevents any potential “burn” warnings in electric pressure cookers.
- Layering Matters for Vegetables: While it might seem minor, placing the beef roast on top of the vegetables (like carrots and potatoes) helps them cook without becoming overly mushy. They benefit from the flavorful cooking liquid but aren’t directly exposed to the intense heat at the very bottom of the pot, maintaining a better texture.
- Consider Fresh Herbs: For an aromatic boost, consider adding a few sprigs of fresh rosemary or thyme to the pot along with the broth and vegetables. Their earthy notes complement beef beautifully. If your pressure cooker allows for a quick addition of ingredients (some electric models do), you could even add them during the last 10-15 minutes of cooking. Otherwise, fresh herbs make a wonderful garnish before serving.
- Taste and Adjust Seasoning: Always taste your gravy before serving. Seasonings can mellow during pressure cooking. Adjust with additional salt, freshly ground black pepper, or even a dash more soy sauce if it needs an extra layer of umami. A little acidity from a squeeze of lemon juice or a splash of red wine vinegar can also brighten flavors.
Serving Suggestions for a Complete Meal
A classic pressure cooker pot roast is a hearty and satisfying meal in itself, featuring tender beef, rich gravy, and soft, flavorful vegetables. However, it pairs wonderfully with a few simple sides to round out the experience and add delightful contrasts in texture and flavor.
- Creamy Mashed Potatoes: An absolute, undeniable classic pairing! Mashed potatoes are perfect for soaking up every last drop of that savory, luscious gravy, turning each bite into pure comfort.
- Green Beans or Asparagus: Steamed or roasted green vegetables, such as tender green beans or crisp asparagus, add a fresh contrast, a touch of vibrant color, and essential nutrients to the plate, cutting through the richness of the pot roast.
- Crusty Bread or Dinner Rolls: A warm, crusty baguette or soft dinner rolls are ideal for sopping up any remaining gravy or broth, ensuring no delicious drop goes to waste.
- Simple Side Salad: A light, crisp green salad with a bright vinaigrette dressing can offer a refreshing counterpoint to the rich and savory flavors of the pot roast, cleansing the palate between bites.
Storage and Reheating Your Pot Roast
One of the best things about pot roast is that leftovers are often even more flavorful the next day, as the flavors have had more time to meld and deepen. Here’s how to properly store and reheat your delicious creation:
- Refrigeration: Allow any leftover pot roast, gravy, and vegetables to cool completely to room temperature (within 2 hours of cooking). Then, transfer them into separate airtight containers. Store in the refrigerator for up to 3-4 days. Storing gravy separately can help maintain its consistency.
- Freezing for Longer Storage: For extended preservation, you can freeze the cooked beef and gravy. It’s often best to freeze them separately, but they can also be frozen together. Ensure they are completely cooled before transferring to freezer-safe bags or containers, leaving a little headspace if using rigid containers. Frozen pot roast will keep well for up to 3 months. Be aware that vegetables like potatoes and carrots may become slightly mushier after freezing and thawing, but they are still perfectly safe and edible.
- Gentle Reheating: To reheat, transfer the desired portion to a saucepan or skillet on the stovetop. Reheat gently over low to medium-low heat, stirring occasionally. If the gravy has thickened too much during storage, add a splash of beef broth or water to reach your desired consistency. You can also reheat individual portions in the microwave in short bursts, stirring frequently to ensure even heating. Avoid overheating, which can dry out the meat.
Frequently Asked Questions (FAQs)
- Can I use a different cut of beef for this pressure cooker pot roast recipe?
- Absolutely! While rump roast is excellent, chuck roast or bottom round roast are fantastic alternatives. Chuck roast, in particular, is highly recommended for its rich marbling, which contributes to incredibly tender and flavorful results that are perfect for shredding. If using a significantly larger or smaller cut than 3-3.5 lbs, you might need to adjust the pressure cooking time slightly.
- What should I do if my pressure cooker doesn’t seem to be reaching full pressure quickly?
- First, ensure that your pressure cooker lid is properly sealed and locked, and that the steam release valve is in the correct sealed (or closed) position. Check for any steam leaks around the lid gasket. Sometimes, increasing the heat slightly can help the pot come to pressure faster, but avoid using excessive heat that could scorch the bottom. If your cooker consistently struggles to reach or maintain pressure, it might be an indication that the gasket or valve needs to be replaced or the cooker needs maintenance.
- My gravy isn’t thickening as much as I’d like. What’s the best way to fix it?
- Ensure your cornstarch slurry is completely lump-free and that you are adding it to boiling liquid while stirring constantly. If the gravy is still too thin after a couple of minutes of simmering, you can mix another small amount of cornstarch (1/2 to 1 teaspoon) with an equal amount of cold water to create a new slurry, and then gradually add this to the boiling gravy, stirring continuously, until your desired thickness is reached. Remember, gravy will also thicken slightly as it cools.
- Can I add other vegetables to this pot roast recipe?
- Yes, absolutely! Pot roast is incredibly versatile. Mushrooms, celery stalks, parsnips, or even pearl onions can make wonderful additions. For firmer vegetables, add them along with the potatoes and carrots at step 5. Softer vegetables like mushrooms can be sautéed with the onions or added during the last 10-15 minutes of cooking (if your pressure cooker allows for a quick ingredient addition without depressurizing), or simply sautéed separately and added before serving for the best texture.
- Is this recipe suitable for an Instant Pot or other electric pressure cookers?
- Yes, this recipe is perfectly adaptable for an Instant Pot or any other brand of electric pressure cooker. You will use the “Sauté” function for searing the beef and cooking the onions. Then, you’ll select the “Manual” or “Pressure Cook” function on High Pressure for the recommended cooking time, followed by a natural pressure release. Follow your specific model’s instructions for sealing and releasing pressure.
Conclusion: A New Favorite for Your Table
This pressure cooker pot roast recipe is more than just a meal; it’s an experience of deep comfort, rich flavor, and remarkable culinary efficiency. By embracing the pressure cooker, you unlock a world of tenderness and concentrated taste that simply can’t be matched by traditional methods in such a short timeframe. Gone are the days of tough pot roasts or waiting hours for dinner; now, succulent, fall-apart beef is within reach on any day of the week. Whether you’re a seasoned pressure cooker enthusiast or just beginning your journey with this incredible appliance, this recipe is destined to become a staple in your culinary repertoire. Gather your ingredients, prepare to be amazed by the transformation, and enjoy the ultimate tender, juicy, and flavorful pot roast that will undoubtedly impress everyone at your table. Happy cooking!