
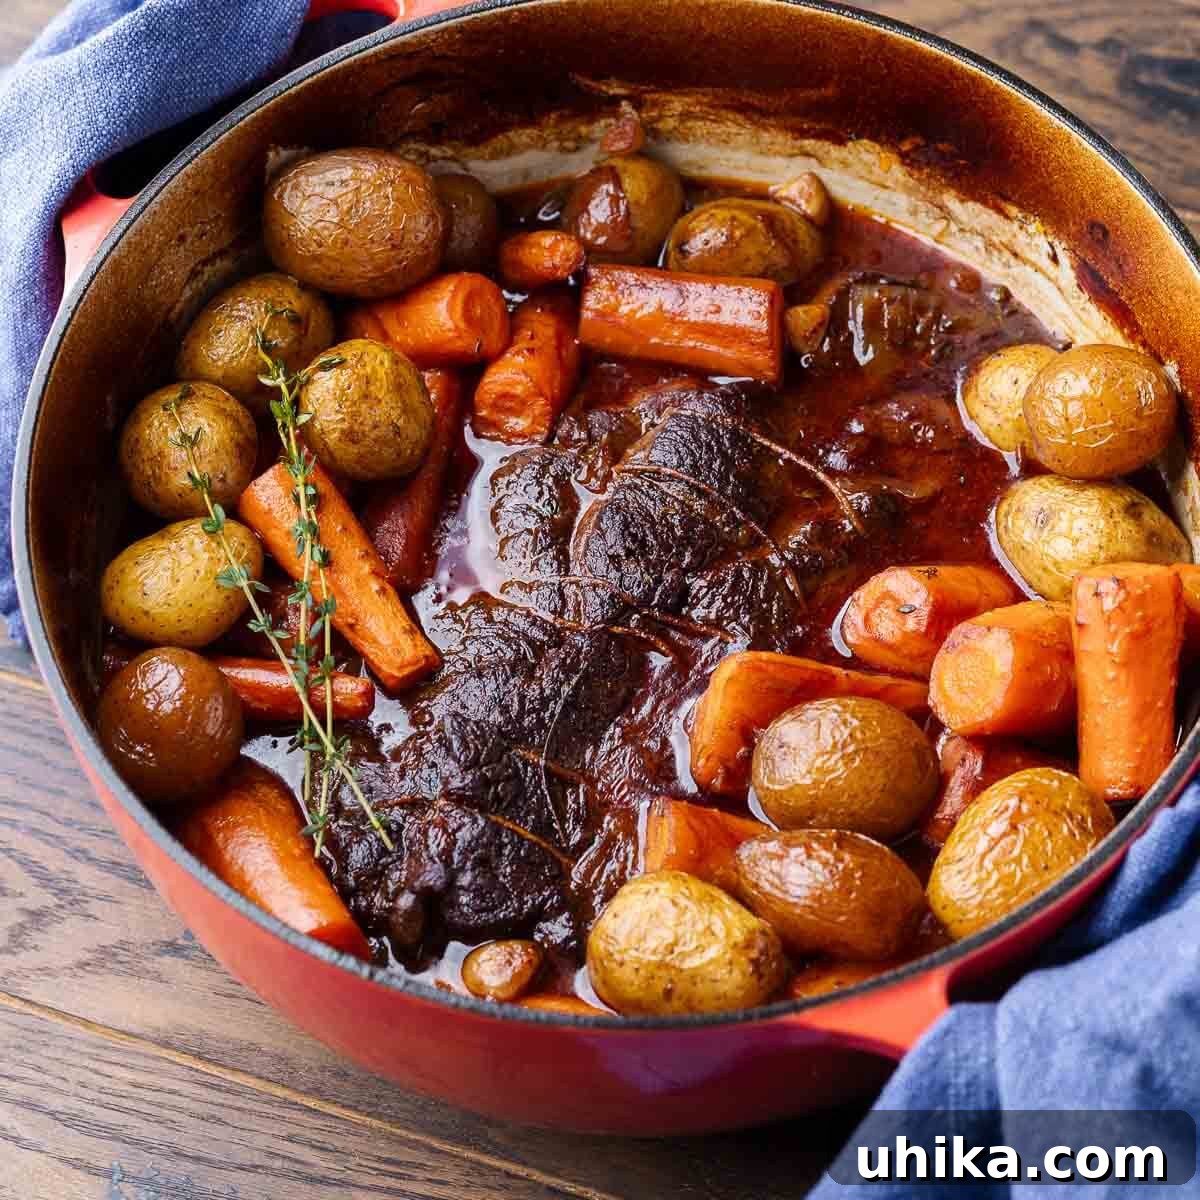
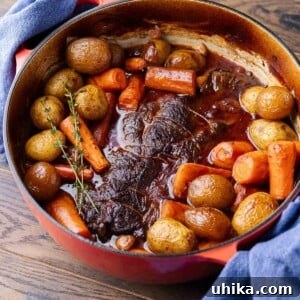
Welcome to the heart of comfort food! Our Classic Pot Roast recipe promises a truly unforgettable meal, featuring impossibly tender braised beef, perfectly cooked carrots, and melt-in-your-mouth potatoes, all enveloped in a rich, deeply flavored sauce. This timeless dish is more than just a meal; it’s an experience, bringing warmth and joy to any gathering. We believe that simple, wholesome ingredients, combined with proven techniques, can transform an ordinary cut of meat into an extraordinary culinary masterpiece. And the best part? It’s surprisingly easy to achieve, especially with our step-by-step guide.
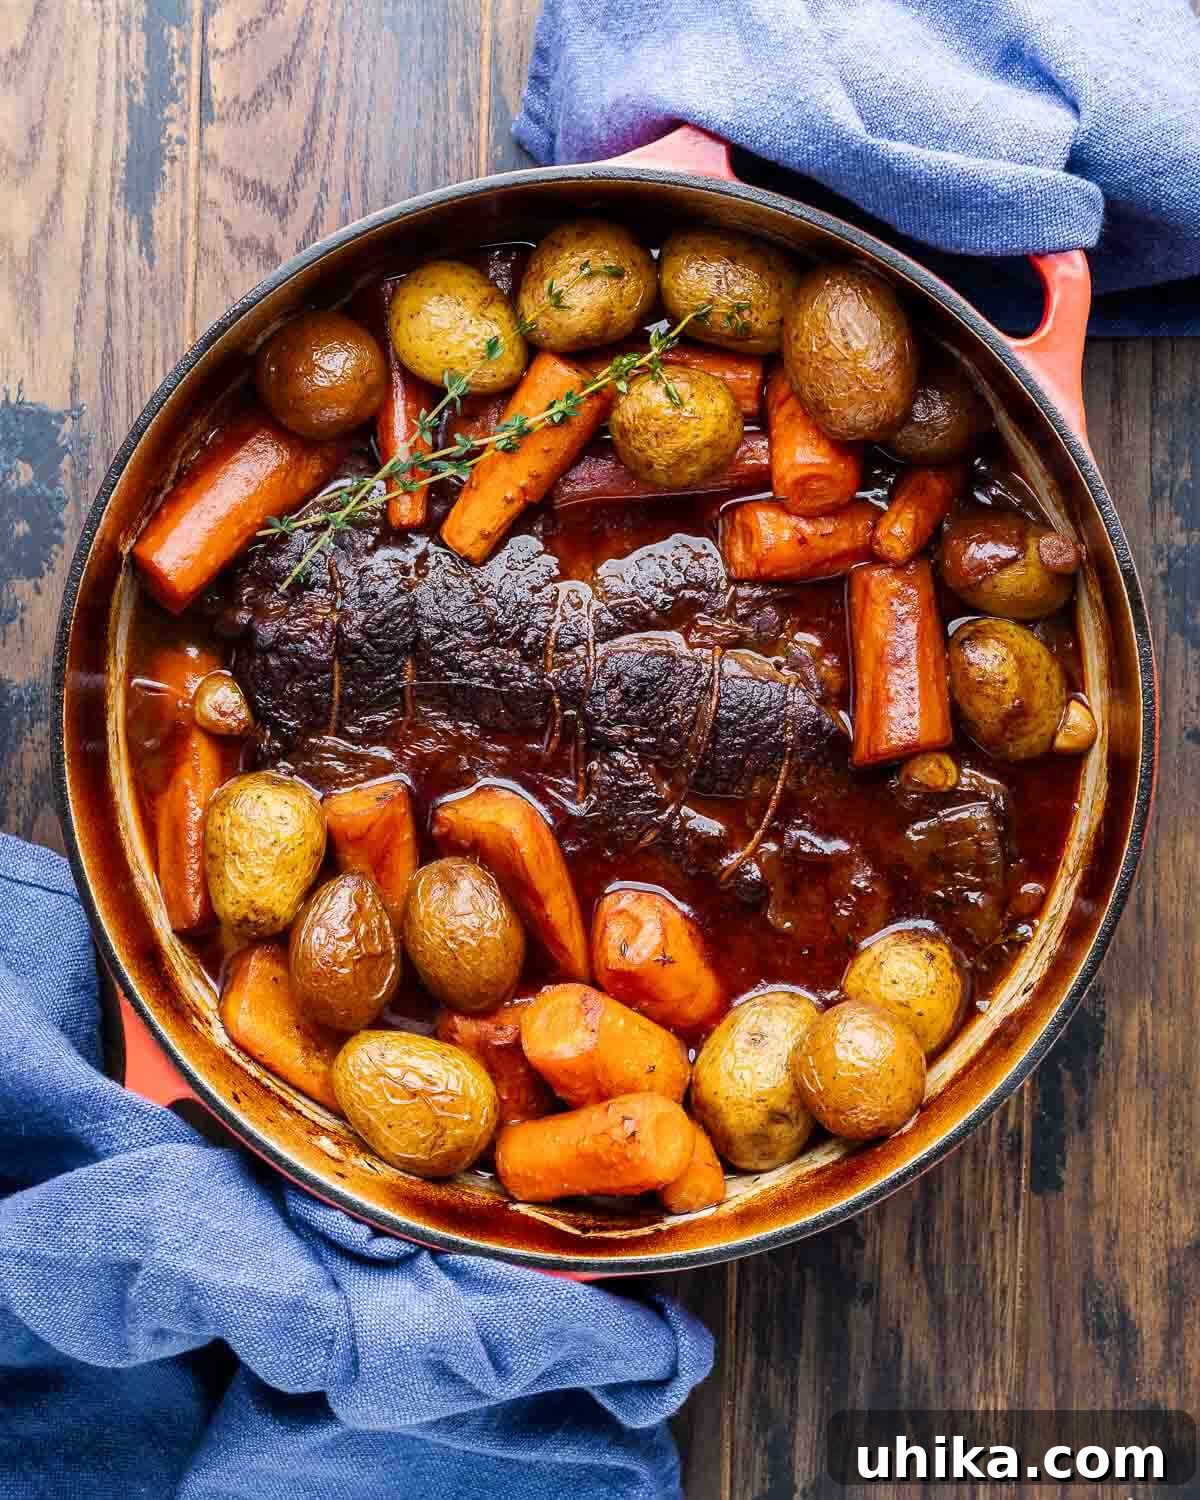

Pot Roast – The Epitome of Easy, Classic Comfort
There’s something uniquely satisfying about a pot roast. Unlike more complex braised dishes such as Beef Bourguignon, Stracatto, or Sauerbraten, this classic pot roast (often affectionately known as Yankee Pot Roast) simplifies the process without sacrificing an ounce of flavor or heartiness. My aim with this recipe is to demystify the art of slow-cooked beef, providing a method that consistently delivers maximum flavor, incredibly tender beef, and a deeply satisfying sauce that will quickly become a family favorite. It’s the kind of dish that fills your home with an inviting aroma and leaves everyone at the table feeling nourished and content.
The beauty of this recipe lies in its simplicity and the depth of flavor achieved through careful searing and long, slow braising. Each step is designed to build layers of taste, ensuring that every bite of beef, every tender carrot, and every soft potato is infused with deliciousness. This is more than just cooking; it’s about creating cherished memories around the dinner table.
Table of Contents
- Pot Roast – The Epitome of Easy, Classic Comfort
- Essential Recipe Ingredients
- Mastering the Classic Pot Roast: Step-by-Step
- Expert Tips for the Perfect Pot Roast
- Serving Suggestions and Pairings
- Make Ahead & Storage Tips
- More Comforting Beef Recipes
- Classic Pot Roast Recipe Card
Essential Recipe Ingredients for Unmatched Flavor
Crafting the perfect pot roast begins with selecting the right ingredients. Below, you’ll find a detailed breakdown of what you need, along with special notes to help you achieve the best results. The ingredients pictured below offer a visual guide, but the descriptions provide deeper insights into their role in this classic dish.
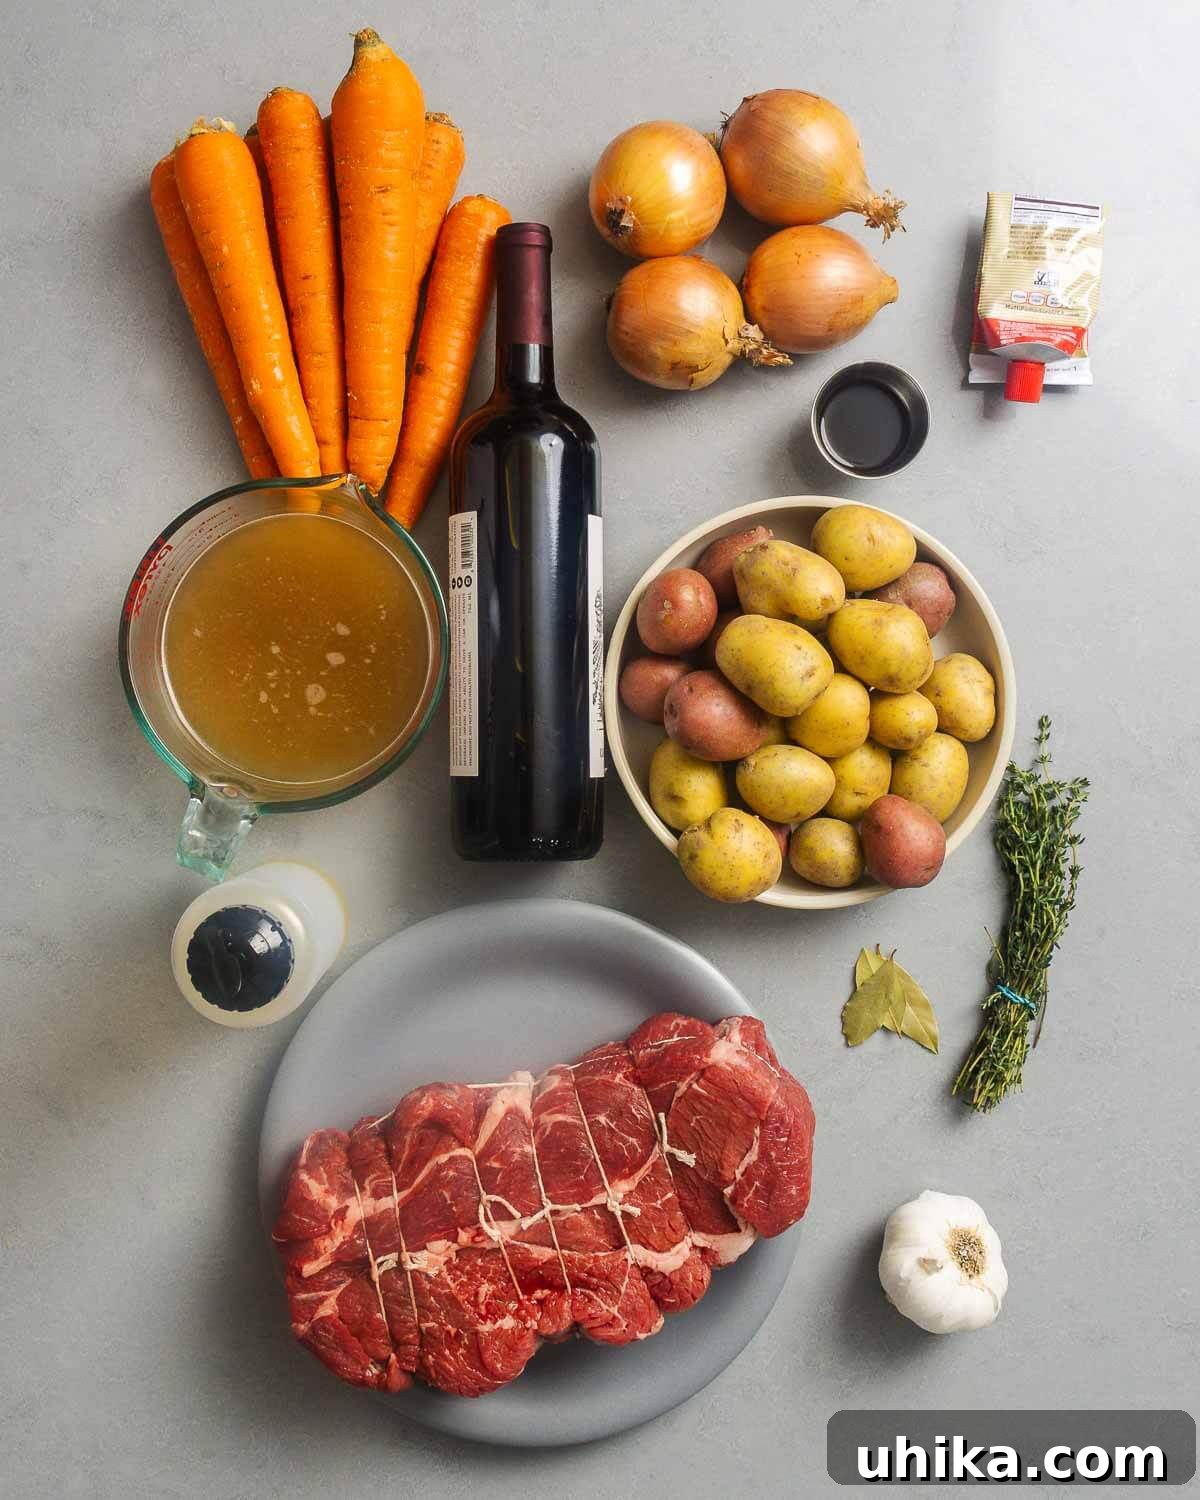
- Chuck Roast: The Heart of the Dish. For an unbelievably tender and flavorful pot roast, a chuck roast is my top recommendation. This cut, sourced from the shoulder of the cow, boasts an excellent fat profile and abundant connective tissue. While this might sound undesirable, during the long, slow braising process, this connective tissue breaks down into gelatin, infusing the meat with moisture and creating that signature melt-in-your-mouth texture. It’s also a budget-friendly choice, making it a true culinary gem. Chuck roast is incredibly versatile, also performing beautifully in recipes like Italian Beef Stew, Steak Pizzaiola, and Beef Barley Soup. If chuck roast isn’t available, you can use leaner cuts such as rump roast, top round, or bottom round, though the cooking time may need slight adjustment to ensure tenderness.
- Beef Stock: The Flavor Foundation. A high-quality beef stock is crucial for developing the rich, savory base of your pot roast sauce. While I highly recommend using homemade beef stock for superior depth of flavor, a good low-sodium store-bought beef stock will also work wonderfully. For a quick and easy solution, a beef base like Better than Bouillon can be dissolved in hot water to create an excellent substitute, offering concentrated flavor.
- Dry Red Wine: A Touch of Sophistication. A dry red wine, such as a Cabernet Sauvignon, Merlot, or Chianti, adds complexity and a beautiful depth of flavor to the sauce. The acidity in the wine also helps to tenderize the meat, contributing to the overall succulence of the dish. If you prefer to avoid alcohol, simply replace the wine with an equal amount of additional beef stock. The roast will still be delicious, albeit with a slightly different flavor profile.
- Tomato Paste: The Umami Booster. A small amount of tomato paste, whether from a can or a tube, plays a vital role in building the robust flavor and body of the pot roast sauce. Its concentrated umami notes add a richness that enhances the entire dish, creating a more cohesive and satisfying gravy.
- Worcestershire Sauce: A Secret Weapon. This fermented condiment is a powerhouse of flavor, adding a tangy, savory, and slightly sweet punch that complements beef beautifully. It’s a versatile ingredient that elevates many beef recipes, and in pot roast, it contributes a subtle depth that you’ll notice but might not be able to pinpoint, making the sauce truly special.
- Aromatics (Onions & Garlic): The unsung heroes of flavor. Large yellow onions, slowly caramelized, form the sweet base of the sauce, while fresh garlic adds a pungent warmth. Don’t rush their cooking; patience here pays off in layers of flavor.
- Fresh Herbs (Thyme & Bay Leaves): These simple herbs infuse the braising liquid with their aromatic essence, lending a classic, earthy fragrance that defines traditional pot roast. Tying the thyme sprigs together makes them easy to remove before serving.
- Root Vegetables (Potatoes & Carrots): Chunky red or small yellow potatoes and carrots not only add vibrant color and essential nutrients but also absorb the rich flavors of the braising liquid, becoming incredibly tender and delicious accompaniments to the beef.
- Flour: The Thickening Agent. A small amount of all-purpose flour, when cooked with the onions and tomato paste, creates a roux that helps to thicken the sauce, giving it a luxurious, velvety texture.
- Olive Oil & Neutral Oil: For Searing and Sautéing. Olive oil provides a lovely base for sautéing the aromatics, while a high smoke point neutral oil (like vegetable or avocado oil) is perfect for searing the beef, ensuring a beautiful brown crust without burning.
- Salt and Pepper: Seasoning to Perfection. Essential for enhancing all the other flavors. Season generously at each stage of cooking to build depth.
For precise measurements and quantities, please refer to the comprehensive recipe card below.
Mastering the Classic Pot Roast: A Step-by-Step Guide
Creating a truly delicious pot roast is a journey of patience and simple techniques that yield incredible results. Follow these detailed steps to ensure your beef is fork-tender and your sauce is rich and irresistible.
- Prepare the Oven and Beef: Begin by preheating your oven to 325°F (160°C). Position an oven rack in the middle, ensuring there’s ample space to comfortably fit your Dutch oven with its lid. Next, take your 4-pound chuck roast. If it isn’t already, tie it securely with kitchen twine. This helps the roast maintain a uniform shape, ensuring even searing and consistent cooking throughout the long braise. Pat the beef thoroughly dry with paper towels – this is crucial for achieving a good sear – and season it generously on all sides with salt and freshly ground black pepper.
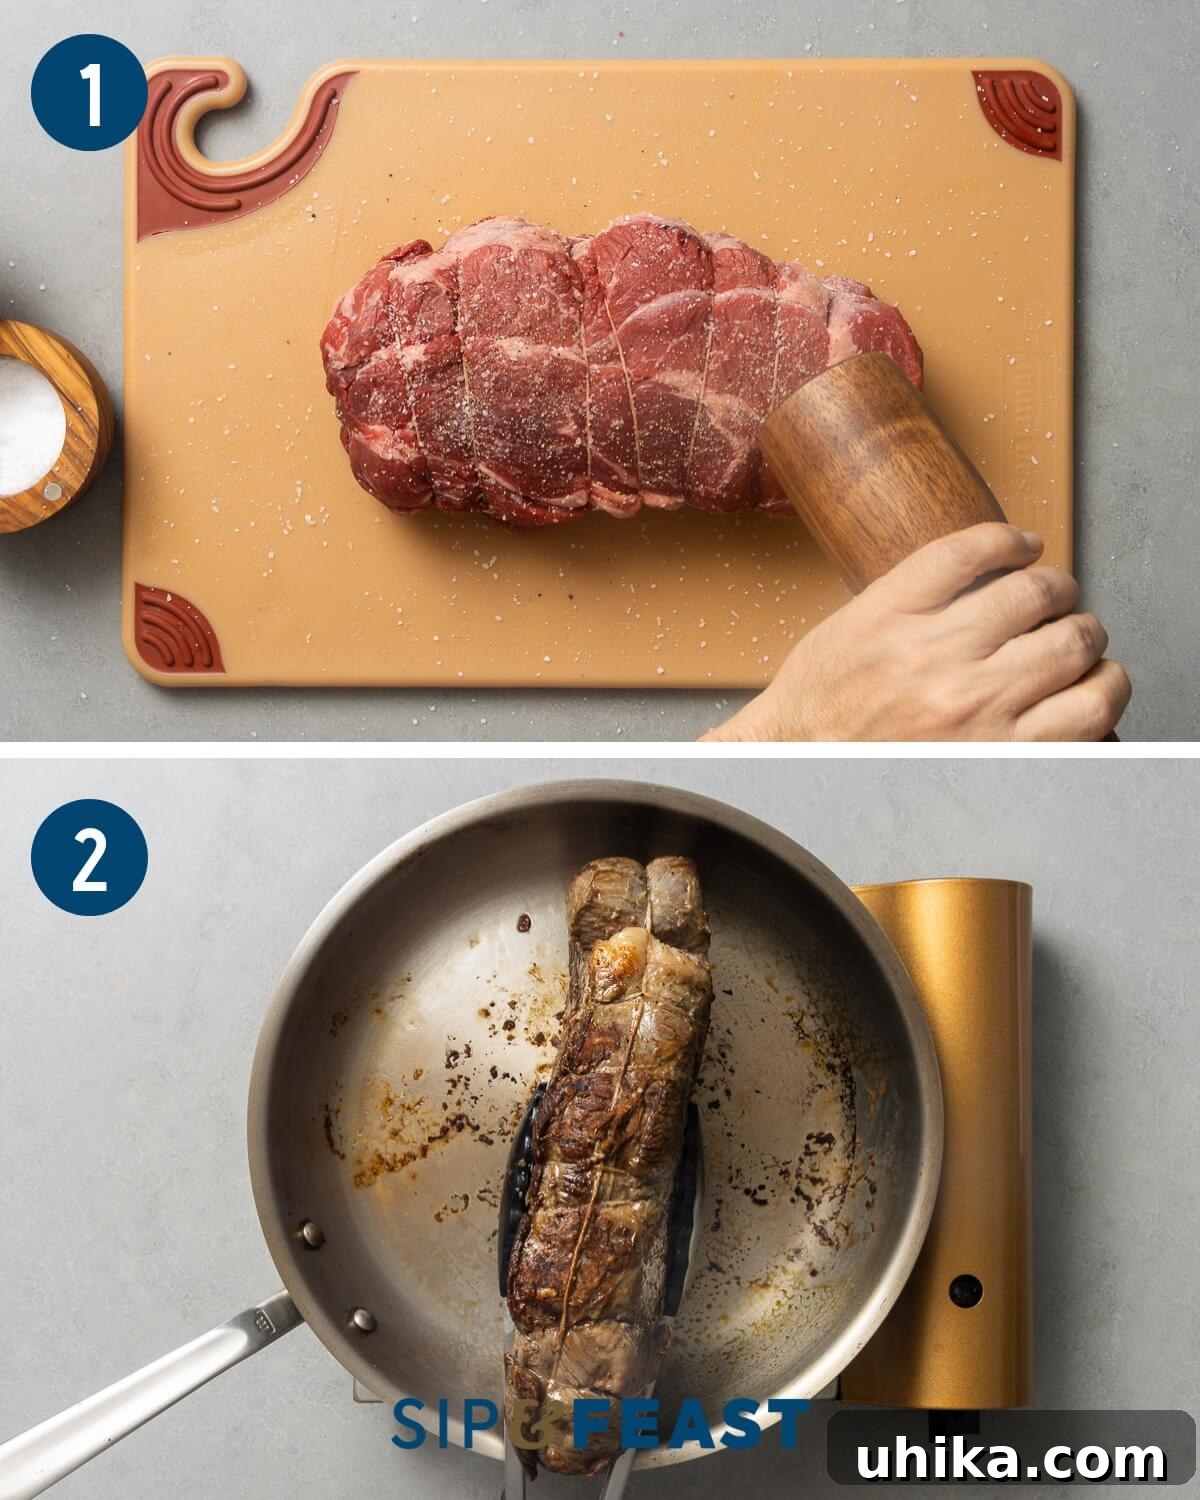
- Sear the Chuck Roast: Place a large, heavy-bottomed pan (cast iron works wonderfully) over medium-high heat. Add 2 tablespoons of a neutral oil, such as vegetable or avocado oil, and allow it to heat until shimmering. Carefully place the seasoned chuck roast into the hot pan. Sear vigorously on all sides until a deep, golden-brown crust forms – this usually takes about 15 minutes in total, roughly 3-4 minutes per side. Searing is a critical step; it locks in moisture and develops complex flavors through the Maillard reaction. Once beautifully browned, remove the roast from the pan and set it aside on a plate to rest.
- Deglaze for Flavor: With the roast removed, you’ll notice delicious browned bits (fond) stuck to the bottom of the pan. These are packed with flavor! Add 1/2 cup of beef stock to the hot pan and immediately use a flat wooden spoon or spatula to scrape up all those flavorful bits. Stir constantly until they dissolve into the stock, creating a rich pan sauce. Taste this liquid – if it tastes burnt, discard it. Otherwise, combine this deglazed liquid with the remaining beef stock in a separate bowl and set it aside. This concentrated flavor will be the backbone of your pot roast gravy.
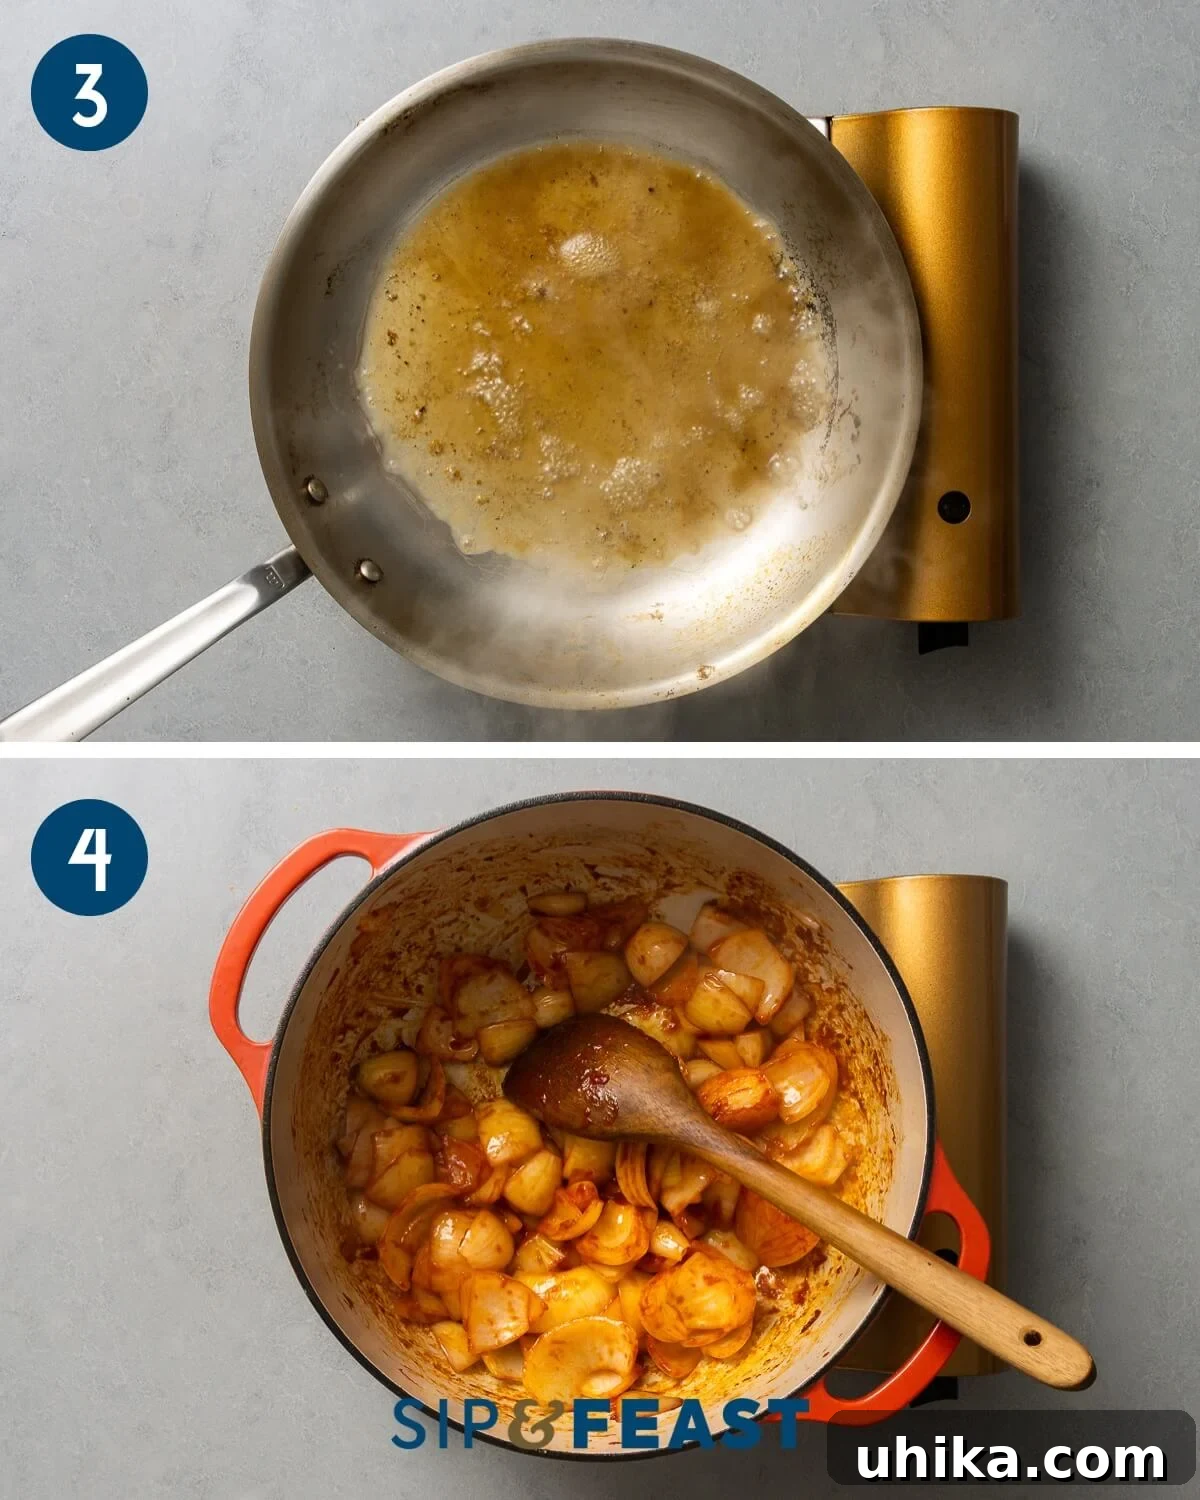
- Sauté Aromatics and Build the Roux: Now, transfer to your large Dutch oven. Heat 1/4 cup of olive oil over medium heat. Add the chopped large yellow onions along with a pinch of salt. Sauté the onions for about 10 minutes, stirring occasionally, until they become soft and translucent. Next, add the minced garlic and cook for another 2 minutes until it becomes fragrant – be careful not to burn it. Stir in the tomato paste and cook for 3 minutes, allowing its flavors to deepen. Finally, sprinkle in 1/4 cup of all-purpose flour. Stir continuously for about 1 minute, cooking out the raw flour taste, until all white specks disappear and the mixture forms a light roux. This roux will be key to thickening your sauce.
- Create the Braising Liquid: Gradually pour the reserved beef stock mixture and the dry red wine into the Dutch oven, whisking constantly to prevent any flour lumps from forming. Add the tied thyme sprigs, bay leaves, and Worcestershire sauce. Bring the mixture to a gentle boil, continuing to stir until the sauce begins to thicken slightly. The aroma at this stage will be absolutely incredible!
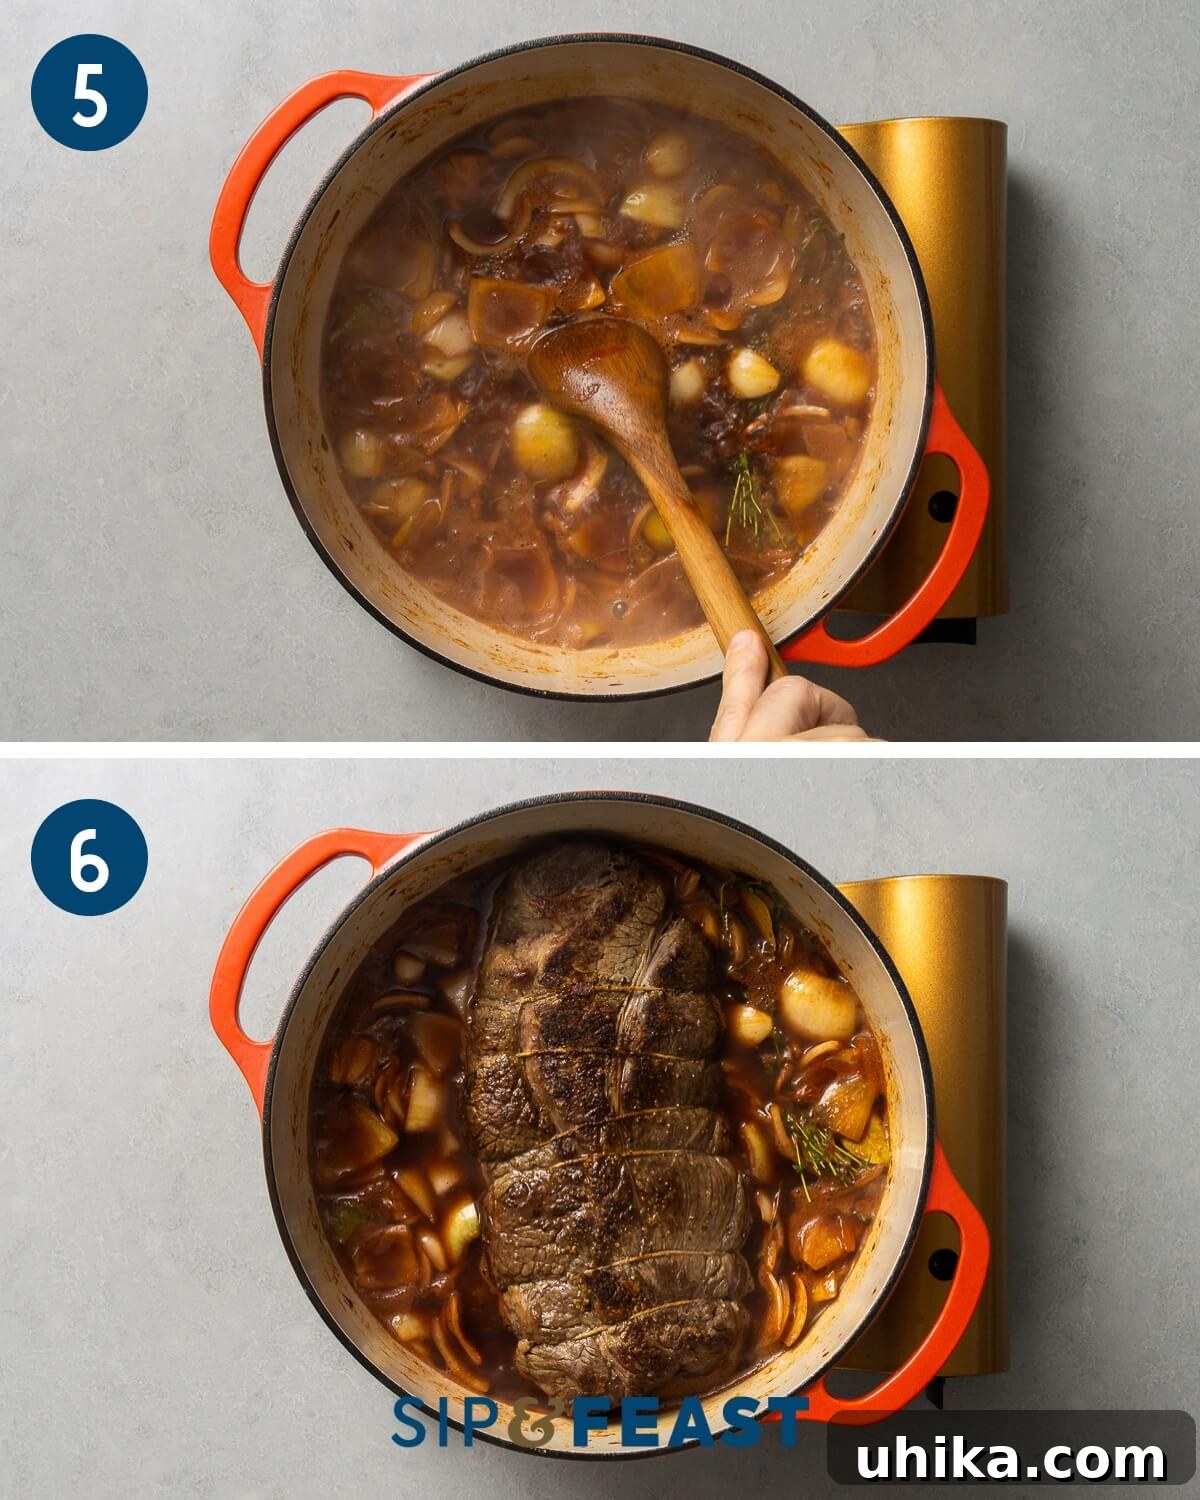
- Begin the Braise: After the sauce has boiled for about 2 minutes, turn off the heat. Carefully return the seared chuck roast to the Dutch oven, ensuring it’s nestled into the flavorful liquid. Cover the pot tightly with its lid and transfer it to the preheated oven. Let it braise for an initial 1 1/2 hours. This slow, moist heat will begin the process of tenderizing the meat.
- Add Vegetables and Continue Braising: After the first 1 1/2 hours, carefully remove the Dutch oven from the oven and uncover it. Quickly add the chunky potatoes and carrots around the beef. Cover the pot again and return it to the oven for another 2 to 2 1/2 hours. The total braising time will be between 3 1/2 to 4 hours, or until the meat is incredibly fork-tender and reaches an internal temperature of 200-210°F (93-99°C). At this point, even a gentle poke with a fork should easily shred the meat.
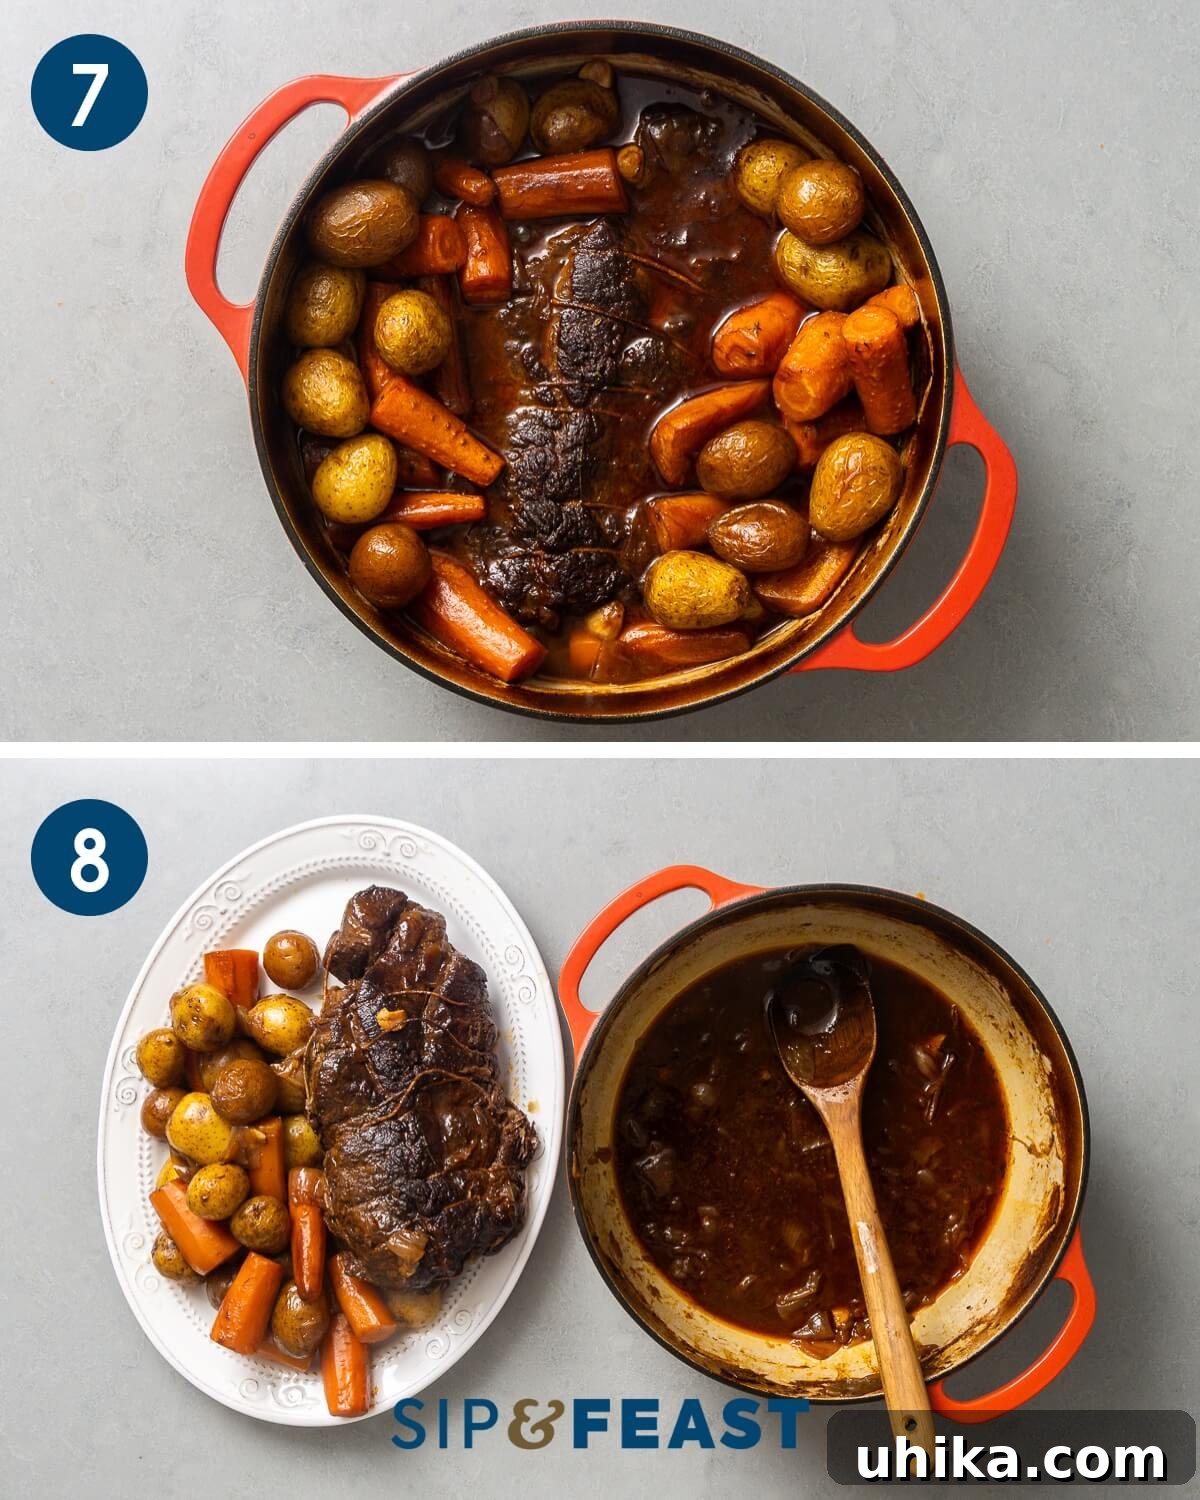
- Finish and Serve: Once the pot roast is perfectly tender, remove the Dutch oven from the oven. Carefully transfer the pot roast, carrots, and potatoes to a large serving platter and tent loosely with foil to keep warm while you prepare the sauce. Remove and discard the bay leaves and the thyme bundle from the Dutch oven.
- Refine the Sauce: The sauce should be wonderfully thick from the flour. If there’s excess fat, you can de-grease it by laying paper towels on the surface to absorb the fat, or by using a ladle to skim it off. For an even richer, thicker, and smoother gravy, you have a few options:
- Immersion Blender: Use an immersion blender directly in the pot to blend some of the softened onions and a few potatoes into the sauce. This creates a beautifully silky and naturally thickened gravy.
- Reduce: Place the Dutch oven with just the sauce over medium-high heat and simmer, stirring occasionally, until it reduces to your desired consistency, coating the back of a wooden spoon.
- Slurry: If you desire a very thick sauce, mix 2 tablespoons of all-purpose flour with 1/4 cup of cold water to create a slurry. Whisk this into the simmering sauce and cook for a few minutes until it thickens.
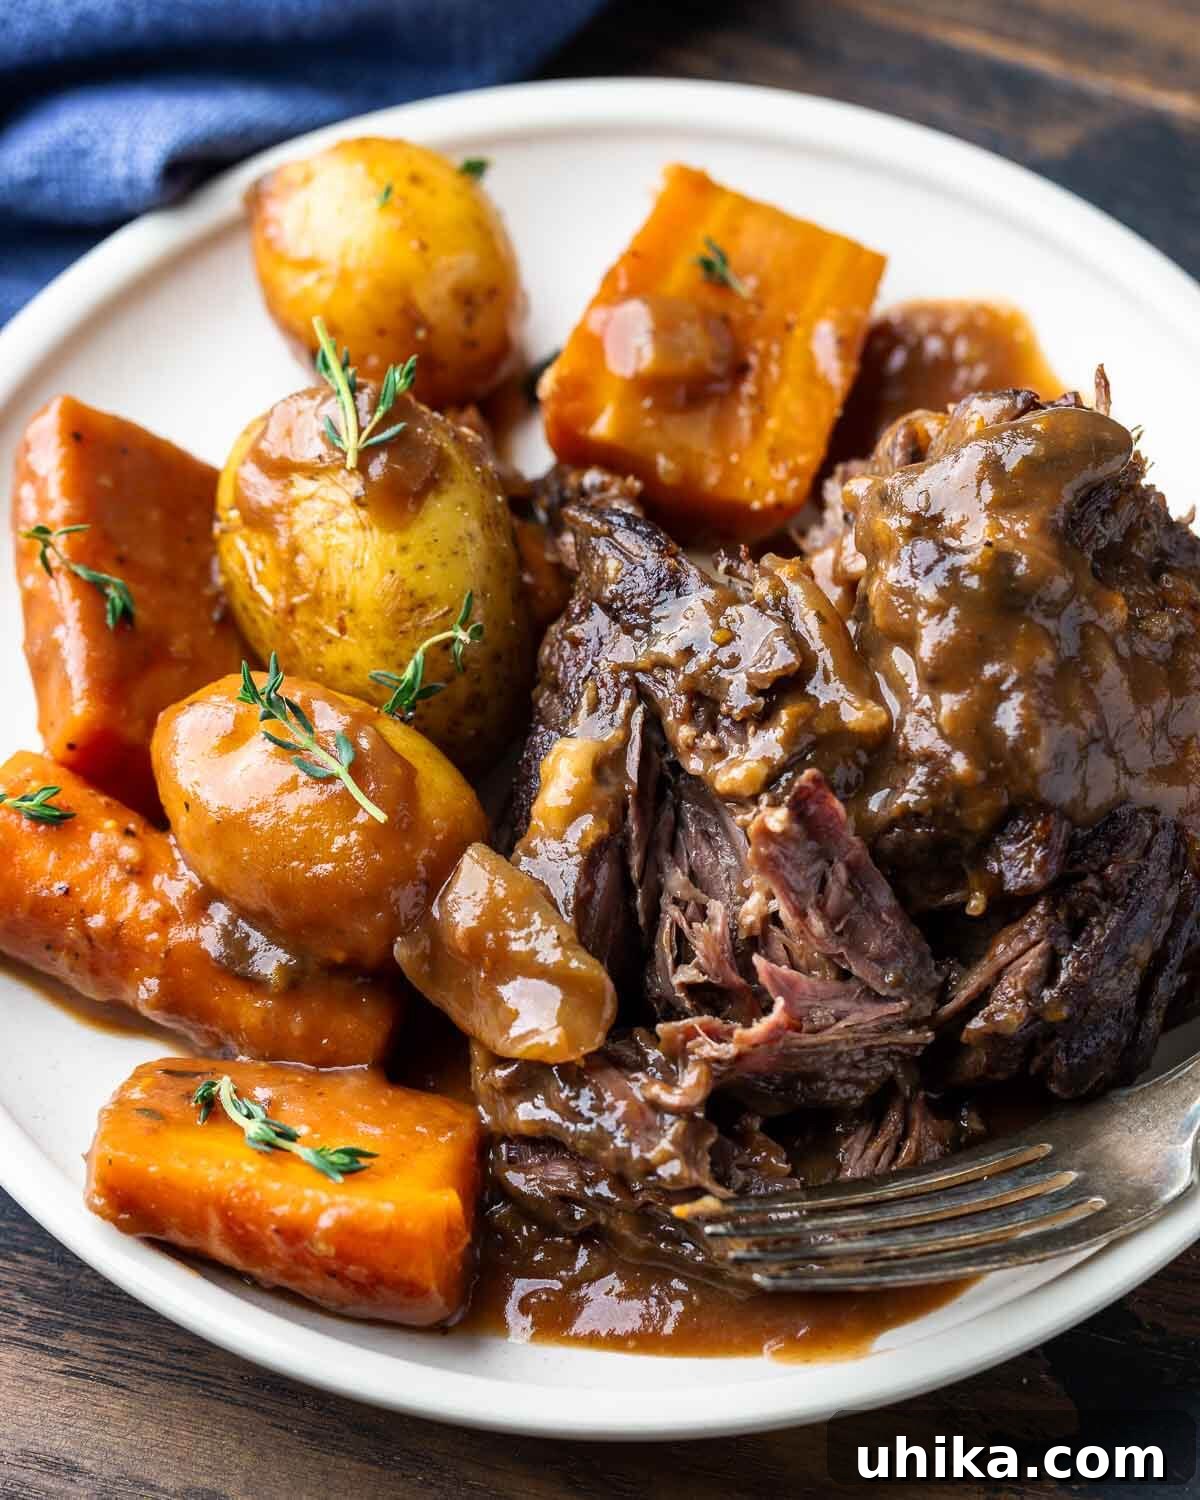
- Present and Enjoy: The roast can be either shredded with two forks for a rustic presentation or cut into thick chunks, then mixed gently with the prepared sauce. Discard any large pieces of fat from the beef before serving. Taste the carrots and potatoes and season with additional salt and pepper as needed. Garnish generously with fresh minced flat-leaf Italian parsley for a burst of color and freshness. Serve hot and savor every comforting bite!
Expert Tips for the Perfect Pot Roast
- Tie the Beef for Even Cooking: Don’t skip tying your chuck roast with kitchen twine. This simple step helps the meat maintain a compact, even shape, which is essential for uniform searing on all sides and ensures that the meat cooks evenly throughout the long braising process. If you’re unsure, your butcher will usually be happy to do it for you.
- Searing in a Separate Pan (Optional but Recommended): For a large pot roast, I often prefer to sear the beef in a separate, heavy-bottomed pan before transferring it to the Dutch oven. Searing can take around 15 minutes to achieve a proper crust on all sides, and during this time, some bits at the bottom of the searing pan might get overly dark or even burnt. When deglazing that pan with beef stock, taste the liquid carefully. If it has a burnt flavor, it’s better to discard it than to add it to your main braising stock. Once deglazed (or if you don’t deglaze the searing pan), you can then proceed with the recipe in your Dutch oven, knowing your braising liquid will be perfect.
- The Homemade Stock Advantage: For a truly restaurant-quality pot roast with unparalleled depth of flavor, using homemade beef stock makes a significant difference. The rich gelatin and complex flavors from homemade stock elevate the entire dish, giving you superior results every time. If homemade isn’t an option, choose the best low-sodium store-bought stock you can find.
- Don’t Rush the Braise: Pot roast thrives on low and slow cooking. Resist the temptation to increase the oven temperature or shorten the cooking time. The magic happens over several hours as the connective tissues in the chuck roast slowly break down, transforming tough fibers into incredibly tender, succulent meat. Patience is key to achieving that perfect fork-tender texture.
- Rest Your Roast: Once the pot roast is cooked, transferring it to a platter and tenting it with foil allows the juices to redistribute throughout the meat. This crucial resting period ensures that the beef remains incredibly moist and flavorful when sliced or shredded.
- Thickening the Gravy: While the flour in the initial roux should thicken the sauce adequately, if you prefer an even thicker, richer gravy, an immersion blender is your best friend. Blending a portion of the softened onions and potatoes directly into the sauce creates a velvety texture without needing additional thickeners. Alternatively, you can simmer the sauce over medium-high heat to reduce it, or create a simple slurry of flour and water and whisk it in.
Serving Suggestions and Pairings
A classic pot roast is a meal in itself, but a few thoughtful additions can elevate the experience:
- Classic Plate: I love to cut the pot roast into generous chunks and serve it on a plate alongside a few tender carrots and potatoes, then spoon a generous amount of the rich, thickened pot roast sauce over everything.
- Shredded Delights: For a more casual approach, you can shred all the pot roast before serving and gently toss it with the sauce. This is fantastic for creating pot roast sandwiches or sliders the next day!
- Creamy Sides: Serve with a dollop of mashed potatoes (if you haven’t included them in the braise) or creamy polenta for an extra comforting touch.
- Freshness: A crisp green salad with a light vinaigrette can provide a refreshing contrast to the richness of the pot roast.
- Bread for Dipping: Don’t forget some crusty bread to soak up every last drop of that amazing gravy!
Make Ahead & Storage Tips
- Make-Ahead Magic: Pot roast is one of those dishes that often tastes even better the next day! The flavors have more time to meld and deepen. Simply let the cooked pot roast cool completely, then refrigerate the entire Dutch oven, covered, for up to 3-4 days.
- Reheating Leftovers: To reheat, gently warm the pot roast and vegetables in the Dutch oven on the stovetop over low heat, or in a 300°F (150°C) oven until heated through. You might need to add a splash of beef stock or water if the sauce has thickened too much in the fridge.
- Freezing: Pot roast freezes beautifully. Transfer cooled pot roast, vegetables, and sauce to airtight containers or freezer-safe bags. It can be frozen for up to 3 months. Thaw overnight in the refrigerator before reheating.
More Comforting Beef Recipes to Explore
If you love the rich, savory flavors of pot roast, you’ll surely enjoy these other comforting beef dishes:
- Prime Rib Au Jus – A show-stopping roast perfect for special occasions.
- Swiss Steak – Tender steak in a rich tomato gravy.
- Peposo – A rustic Tuscan beef stew, intensely flavorful with black pepper.
- Beef Braciole – Flavorful beef rolls slow-cooked in tomato sauce.
We hope you’ve enjoyed this detailed guide to creating the ultimate Classic Pot Roast. Your feedback is invaluable, so if you’ve tried this recipe, please consider giving it a 5-star rating!
Stay connected and discover more culinary inspiration by following us on YouTube and our Facebook Page. For exclusive content and behind-the-scenes access, consider becoming a Patreon member.
Classic Pot Roast Recipe Card
Classic Pot Roast
by James Delmage
Rating: 4.97 from 80 votes
Prep Time: 10 mins | Cook Time: 4 hrs | Total Time: 4 hrs 10 mins
Servings: 6
Pin Recipe
Classic pot roast is the ultimate comfort food dish. Tender braised beef, potatoes, and carrots marry together in the most flavorful sauce!
Ingredients
- 4 pound (1.8kg) chuck roast, tied
- 2 1/2 teaspoons (16g) fine sea salt
- 1/2 teaspoon pepper
- 2 tablespoons (30ml) neutral oil (such as avocado, vegetable, etc.)
- 1/4 cup (60ml) olive oil
- 2 large yellow onions, cut into large pieces
- 8 cloves garlic, chopped
- 3 tablespoons (45g) tomato paste
- 1/4 cup (32g) all-purpose flour
- 1 1/2 cups (360ml) dry red wine
- 2 cups (480ml) low-sodium beef stock, divided
- 2 large bay leaves
- 2 tablespoons (30ml) Worcestershire sauce
- 10 sprigs thyme, tied
- 1 1/2 pounds (680g) red or small yellow potatoes, cut into large chunks
- 2 pounds (908g) carrots, cut into 3-inch chunks
- 3 tablespoons minced flat-leaf Italian parsley for garnish
- Salt and pepper to taste
Instructions
- Preheat oven to 325°F (160°C) and set the rack in the middle of the oven to accommodate a Dutch oven with its lid.
- Heat a large pan to medium heat. Pat the chuck roast dry with paper towels then season with salt and pepper. Add the neutral oil to the pan along with the chuck roast. Sear until browned on all sides (about 15 minutes total) then remove the roast to a plate.
- Add a 1/2 cup of beef stock to the pan and scrape off all of the browned bits. Taste the sauce to make sure it’s not burnt. If it is, discard, otherwise pour the pan sauce into the same vessel as the remaining beef stock and set aside.
- Heat a large Dutch oven to medium heat, add the olive oil and onions along with a pinch of salt, and cook until translucent (about 10 minutes). Add the garlic and cook for another 2 minutes or until fragrant.
- Add the tomato paste and cook for 3 minutes then add the flour and mix until all of the white specks have vanished (about 1 minute).
- Add the red wine, beef stock, thyme, bay leaves, and Worcestershire sauce to the pot and bring to a boil while stirring to break up any flour clumps. Boil for 2 minutes then turn off the heat and add the roast back to the pot and cover. Place into the oven to roast.
- After 1 1/2 hours, remove the pot and uncover it. Quickly add the potatoes and carrots to the pot and cover again. Return to the oven for another 2 to 2 1/2 hours or until the meat reaches an internal temperature of 200-210°F (93-99°C).
- Place the pot roast and veggies on a plate and tent with foil. Remove and discard the bay leaves and thyme bundle from the Dutch oven.
- To de-grease the sauce, lay paper towels on top of the sauce to absorb the fat then discard or use a ladle to skim some of the fat.
- The sauce will usually be quite thick from the added flour, but for an even thicker sauce, simply use an immersion blender to blend the softened onions and a few potatoes. Alternatively, heat just the pot with the sauce over medium-high heat to reduce until the sauce coats the back of a wooden spoon. Or make a slurry of 2 tablespoons flour and 1/4 cup of water. Pour into the simmering sauce and stir for a few minutes until adequately thickened.
- The roast can be shredded or cut into chunks and mixed with the sauce. Any large pieces of fat can be discarded right before serving. Season the carrots and potatoes with salt and pepper to taste and garnish with parsley. Enjoy!
Notes
- Cut of beef: Chuck roast makes the best pot roast due to its unique fat profile, but other leaner roasts such as rump roast, top round, and bottom round can also be used.
- Sauce consistency: Many people will enjoy the pot roast sauce as is and will not need to make a thicker gravy. If you do enjoy a thicker sauce, by all means, follow the instructions to boil and/or add a slurry of flour and water.
- Separate pan for searing: For this large of a pot roast I like to use a searing pan since it will take about 15 minutes to effectively sear all of the sides. During this time the bottom of the pan might get overly black or burnt. When deglazing with part of the beef stock be sure to taste test it before adding the liquid back to the remaining stock. If it tastes burnt, don’t pour it back with the unused beef stock. After this step you can move on to cooking the recipe in a large Dutch oven.
- Make-ahead: Pot roast is even better the next day. Simply let the roast cool then refrigerate the Dutch oven covered.
- Leftovers: Leftovers can be saved for up to 3 days in the fridge and can be reheated in the oven.
Nutrition
Nutrition information is automatically calculated, so should only be used as an approximation.
- Calories: 944kcal
- Carbohydrates: 46.6g
- Protein: 105.9g
- Fat: 30g
- Saturated Fat: 9.8g
- Cholesterol: 305mg
- Sodium: 1260mg
- Potassium: 2115mg
- Fiber: 8.6g
- Calcium: 109mg
- Iron: 13mg
Like this? Leave a comment below!
Check us out on Instagram at @sipandfeast or tag #sipandfeast!