

Indulge in the simple pleasure of homemade chocolate chip scones! These delightful pastries are a perfect addition to any breakfast spread, a comforting companion for your afternoon tea, or a satisfying sweet treat after dinner. With their irresistible crumbly texture, rich buttery flavor, and just the right touch of sweetness from generous chocolate chips, they’re truly a timeless classic. Best of all, this recipe is designed to be incredibly easy to follow, ensuring baking success even for novice bakers.

The Allure of Homemade Chocolate Chip Scones
Few baked goods evoke a sense of warmth and comfort quite like a perfectly crafted scone. And when you infuse that classic scone experience with the universally loved flavor of chocolate chips, you create something truly magical. This recipe for chocolate chip scones isn’t just another baking project; it’s an invitation to create moments of pure bliss. Imagine biting into a scone that’s crispy on the outside, wonderfully tender and flaky on the inside, with pockets of melted chocolate bursting through. It’s an experience that transcends a simple snack, elevating it into a cherished memory.
I’ve refined this specific chocolate chip scone recipe over many years, and it has consistently delivered outstanding results. These scones are so delicious, they rarely last long in my kitchen! They are incredibly versatile, serving as an ideal grab-and-go breakfast option for busy mornings, a delightful dessert, or even a sophisticated accompaniment to a leisurely afternoon tea. For an authentic English experience, I highly recommend serving them warm with a dollop of rich clotted cream and a spoonful of vibrant raspberry preserves. The combination of textures and flavors is simply divine, transforming your tea time into a truly memorable event.
Table of Contents
- How to make Perfect Chocolate Chip Scones
- Essential Ingredients for Fluffy Scones
- Expert Tips for Scone Success
- Serving Suggestions & Delightful Variations
- Storage and Make-Ahead Options
- More Baked Goods You’ll Love
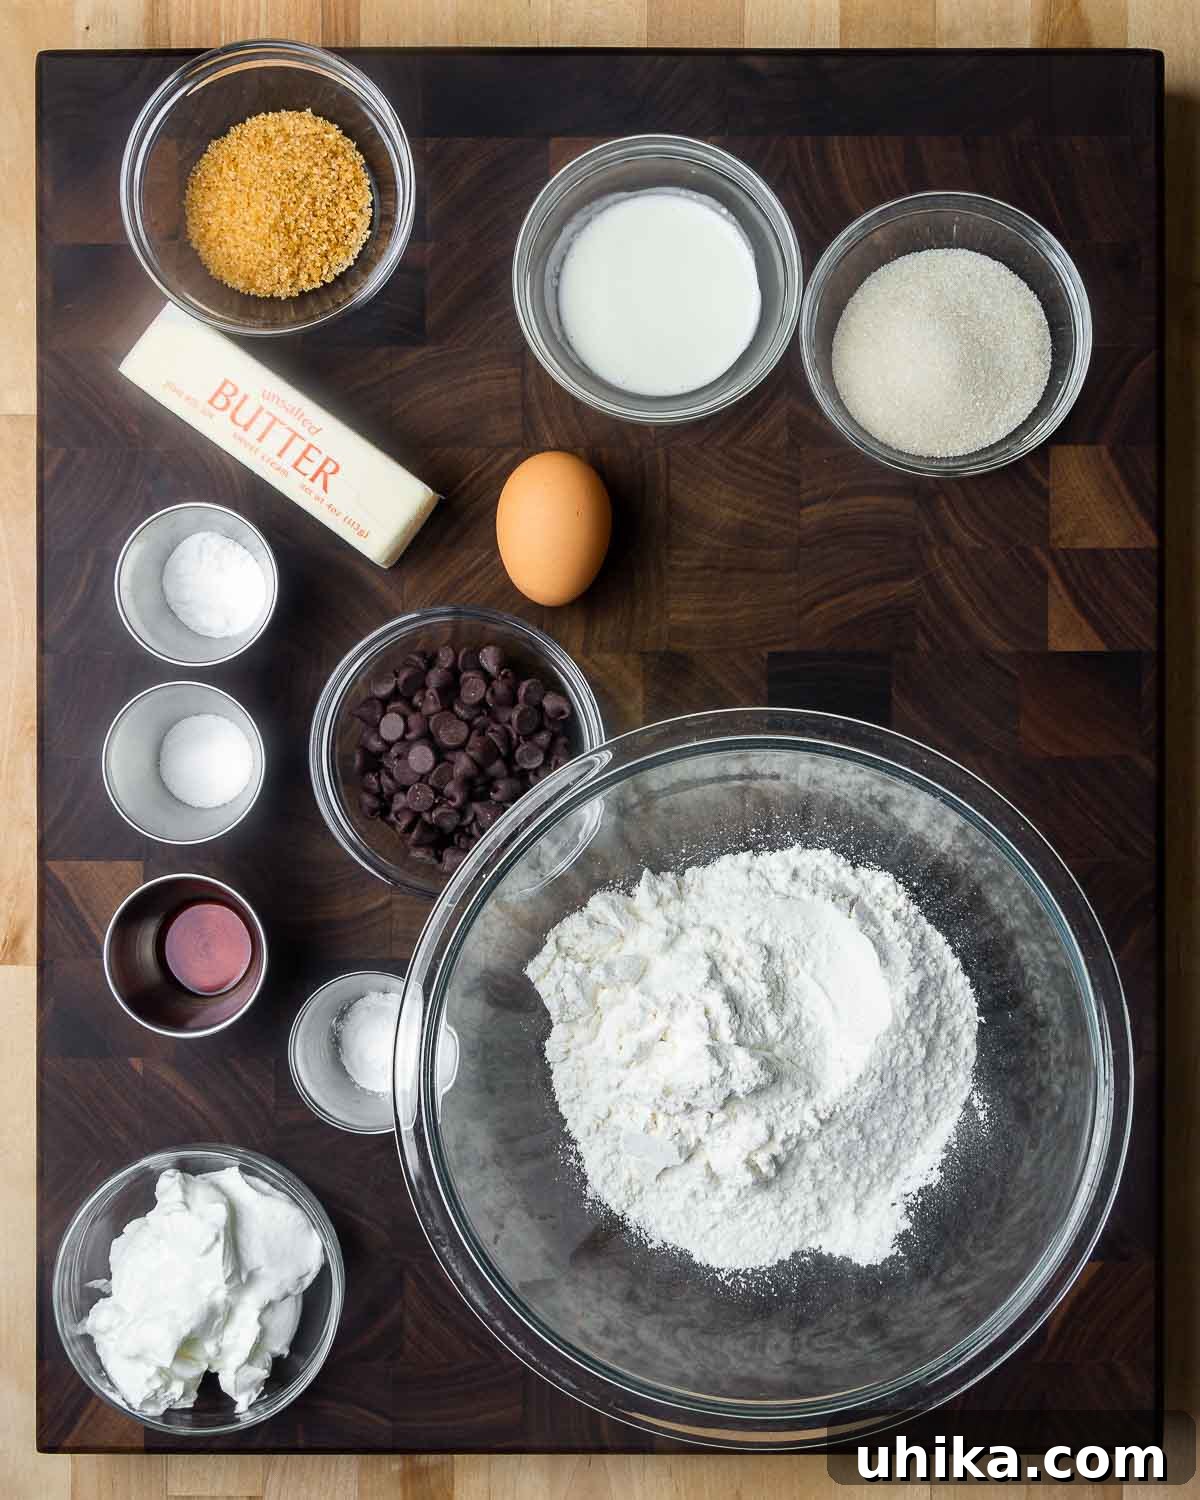
How to Make Perfect Chocolate Chip Scones: A Step-by-Step Guide
Crafting these delectable chocolate chip scones is a straightforward process that yields incredibly rewarding results. Follow these detailed steps to achieve light, buttery, and perfectly sweet scones every time. Each step below corresponds to the accompanying process photos for easy visualization.
- Prepare Your Workspace and Dry Ingredients: Begin by preheating your oven to 400°F (200°C) and positioning an oven rack in the middle. Line a baking sheet with parchment paper, which will prevent sticking and ensure even baking. In a large mixing bowl, combine 2 cups (240g) of all-purpose flour, 1/3 cup (66g) of granulated sugar, 1 teaspoon of baking powder, 1 teaspoon of baking soda, and 1/2 teaspoon of salt. Whisk these dry ingredients together thoroughly to ensure they are well combined, which is crucial for the scone’s rise and texture. (Photo #1)
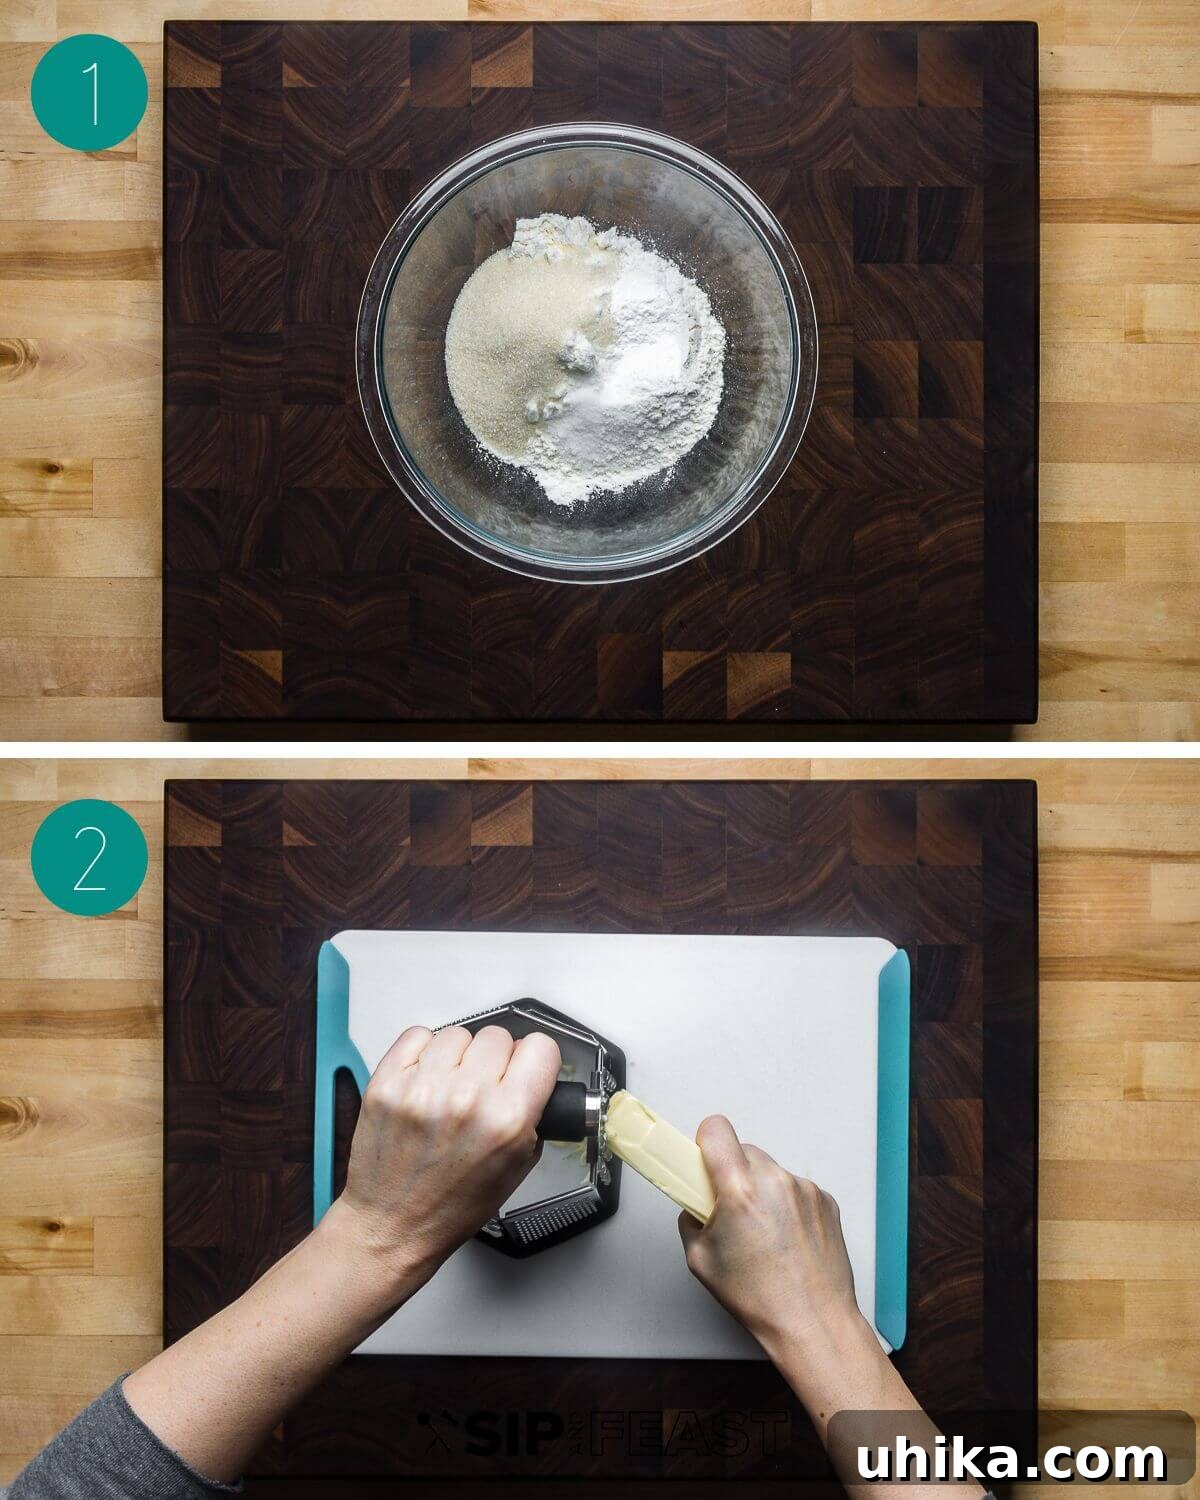
- Incorporate the Frozen Butter: Using the large holes of a box grater, grate 8 tablespoons (1 stick or 113g) of frozen unsalted butter directly into the flour mixture. Freezing the butter is a key technique for achieving a light and flaky scone, as it creates pockets of steam during baking. (Photo #2)
- Cut in the Butter: Add the grated butter to your dry mixture. Using your hands or a pastry cutter, gently work the butter into the flour until the mixture resembles coarse crumbs, with some pea-sized pieces of butter remaining. The goal is to coat the flour in butter without overworking the dough, which can lead to tough scones. (Photo #3)
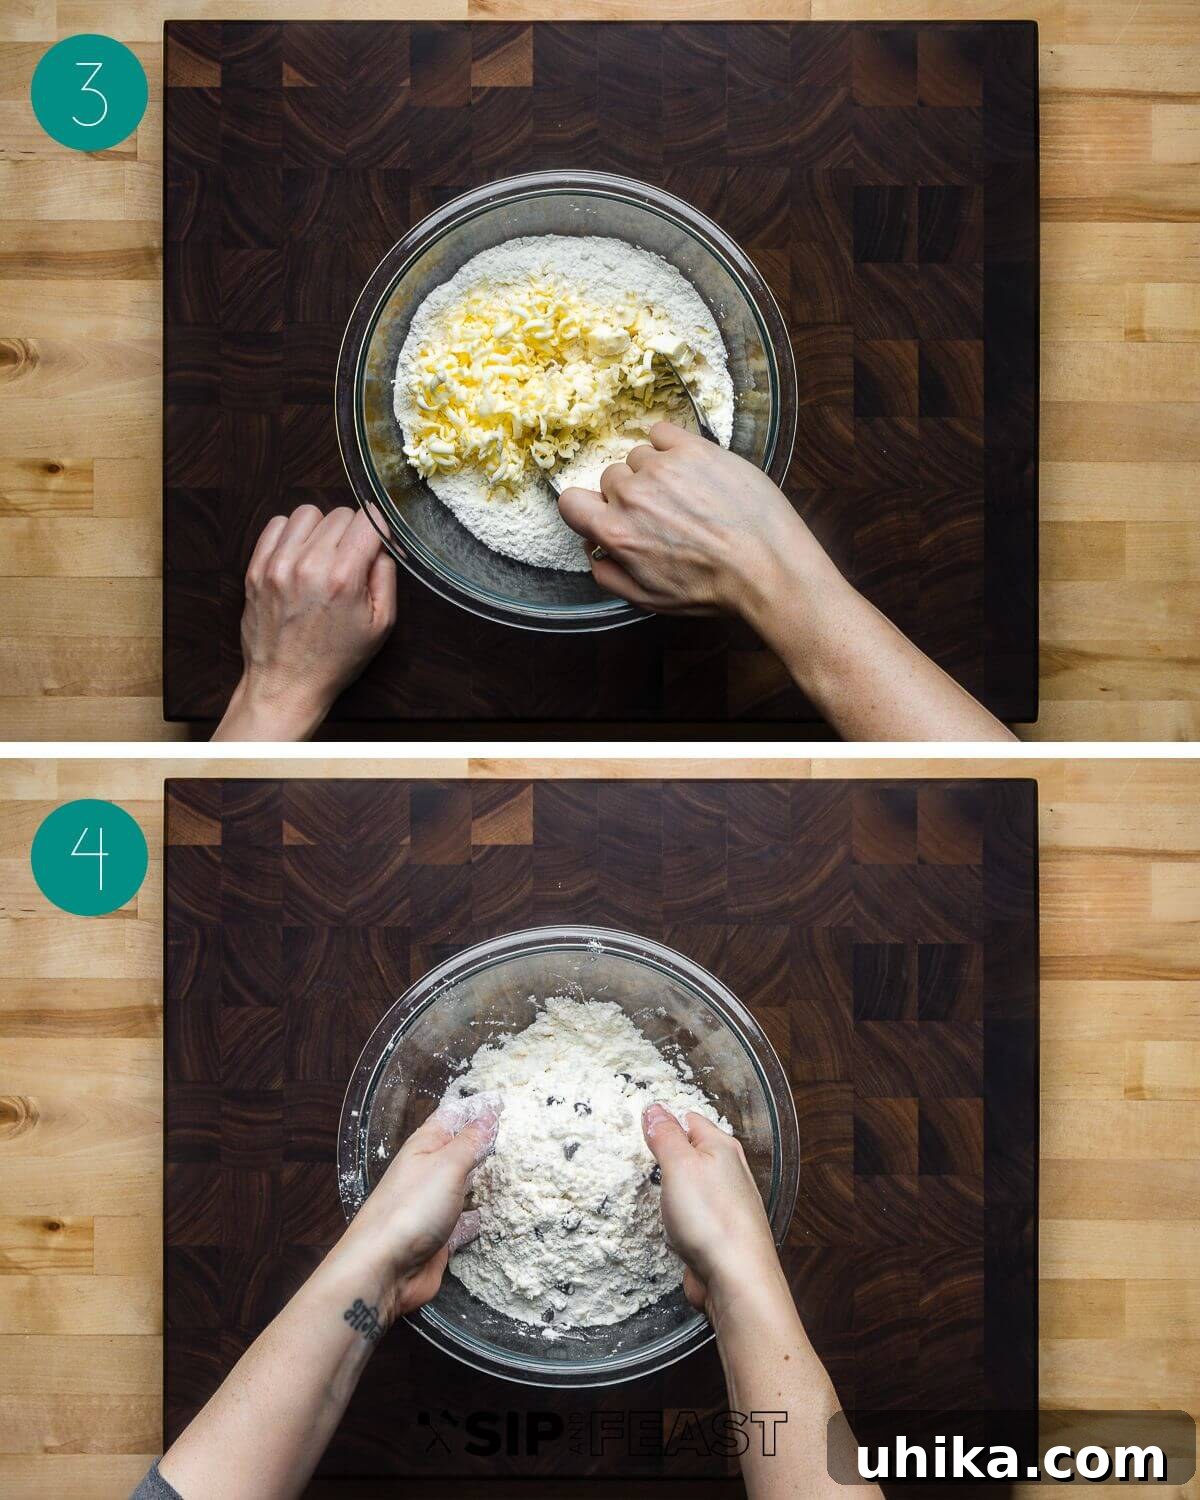
- Add Chocolate Chips: Stir in 1/2 cup (85g) of your favorite chocolate chips until they are evenly distributed throughout the dry ingredients. This ensures every bite of your scone will be studded with delightful chocolate. (Photo #4)
- Prepare Wet Ingredients: In a separate small bowl, whisk together one large egg, 1 1/2 teaspoons of vanilla extract, and 1/2 cup (113g) of sour cream until fully combined. The sour cream adds moisture and tang, contributing to the scone’s tender crumb. (Photo #5)
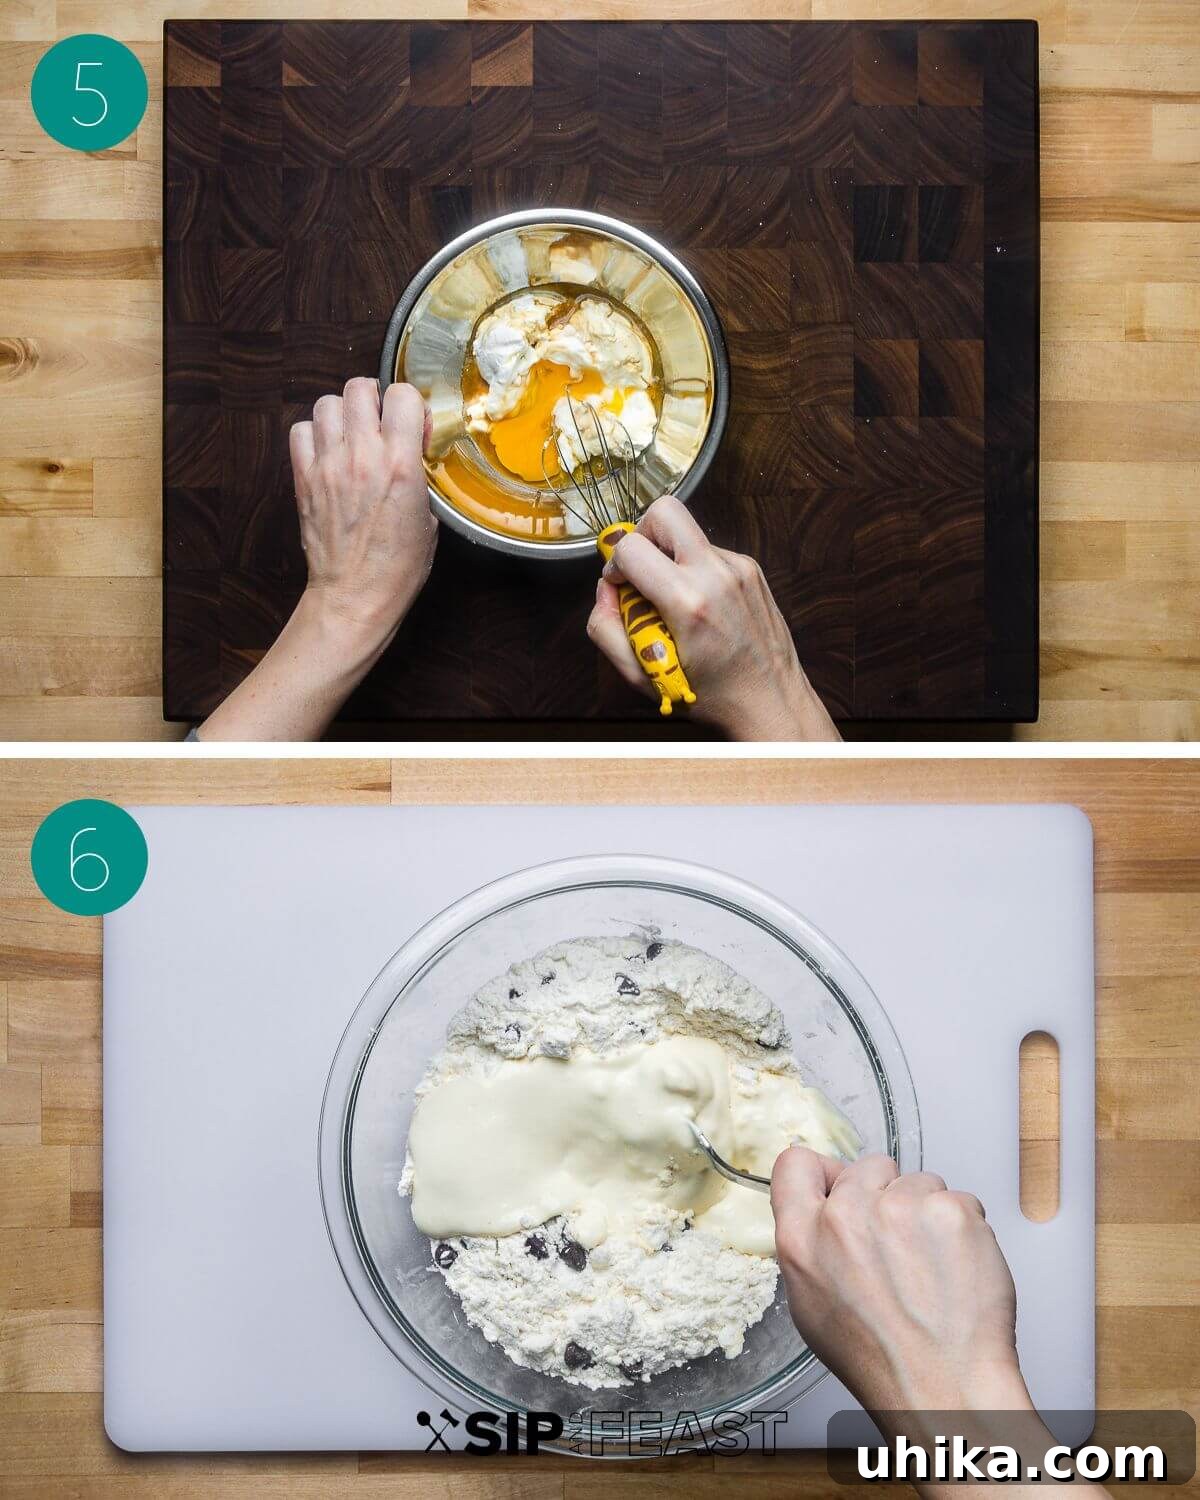
- Combine Wet and Dry Mixtures: Pour the sour cream mixture into the large bowl with the flour and butter mixture. Using a fork, gently stir until large clumps begin to form and the ingredients are just combined. Avoid overmixing; the dough should still look shaggy and slightly crumbly. (Photo #6)
- Form the Dough: Lightly flour your hands. Carefully gather the dough and begin to shape it into a ball directly in the bowl, using minimal handling. (Photo #7)
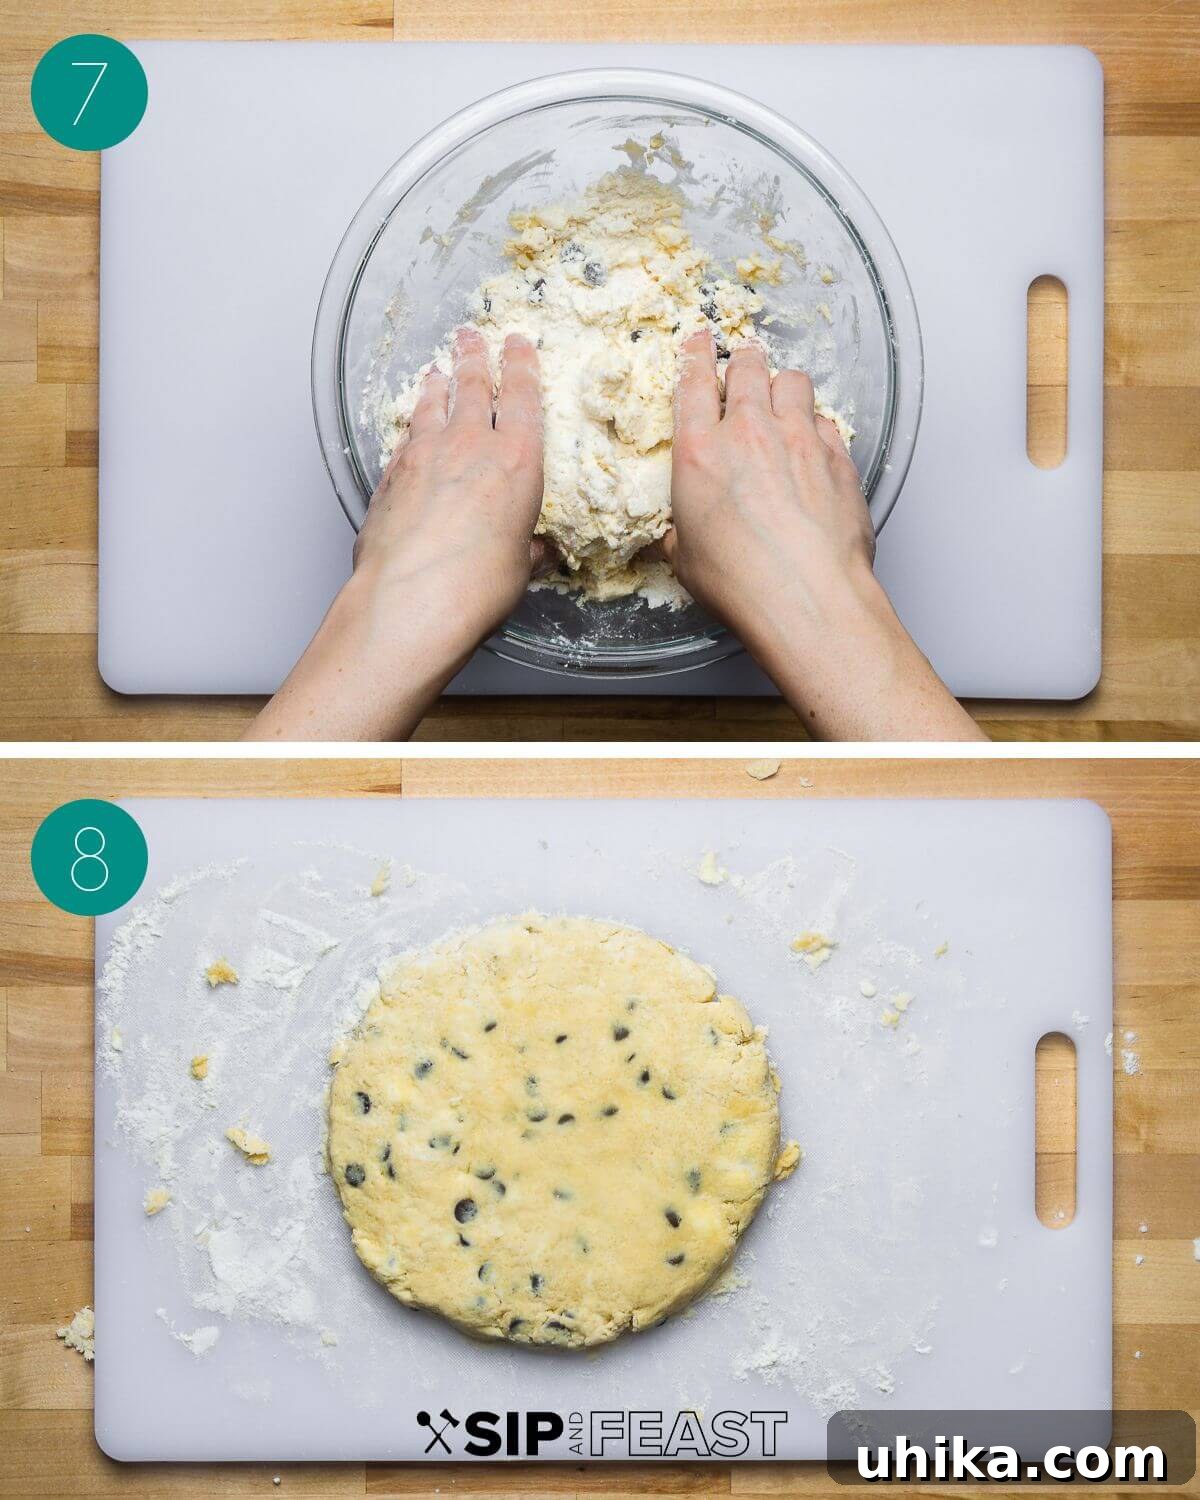
- Shape and Cut the Scones: Transfer the dough ball to a lightly floured surface. Work it just enough to bring the mixture completely together—remember, over-kneading develops gluten, leading to tough scones. Gently pat or roll the dough into an 8-inch (20 cm) circle, about 1-inch thick. Using a sharp knife or a pastry cutter, slice the dough into 8 equal triangles, like cutting a pizza. (Photo #8)
- Chill and Prepare for Baking: Carefully transfer the scone triangles to the parchment paper-lined baking sheet, spacing them about 3 inches apart to allow for expansion. Place the entire baking sheet in the refrigerator to chill for at least 15 minutes. Chilling the dough firm up the butter, which again promotes a flaky texture. After chilling, use a pastry brush to lightly coat the tops of each scone with heavy cream. This helps them brown beautifully. For an extra touch of sweetness and sparkle, sprinkle the tops with turbinado sugar if desired. (Photo #9)

- Bake and Serve: Bake the chocolate chip scones in your preheated oven for 17-20 minutes. They are done when the edges turn golden brown and the tops are lightly browned and firm to the touch. Remove the baking sheet from the oven and allow the scones to rest on it for 5 minutes before transferring them to a wire rack to cool slightly. Serve your warm, fresh-baked scones with raspberry jam, clotted cream, or simply a pat of butter, and savor every delicious bite! (Photo #10)

Expert Tips for Scone Success
Achieving the perfect scone texture – that coveted flaky, tender crumb – relies on a few key techniques. Keep these tips in mind as you bake to ensure your chocolate chip scones turn out beautifully every time:
- Avoid Overmixing the Dough: This is arguably the most critical rule for scone making. Overmixing develops the gluten in the flour, resulting in tough, chewy scones rather than light and crumbly ones. Mix the dough just until the ingredients are barely combined and large clumps form. A shaggy, somewhat messy dough is a sign of success!
- The Importance of Cold Butter and Chilling: Using frozen butter and grating it into the flour helps create tiny pockets of butter throughout the dough. As the scones bake, these butter pieces melt and release steam, pushing apart the layers of dough to create that characteristic flaky texture. Chilling the shaped scones before baking solidifies the butter once more, preventing it from melting too quickly in the oven and ensuring maximum lift and flakiness. A minimum of 15 minutes is good, but you can chill them for longer or even overnight!
- Check for Doneness Accurately: Oven temperatures can vary significantly, so relying solely on the recipe’s baking time might not be enough. Begin checking your scones around the 17-minute mark. Look for visual cues: the edges should be a lovely golden brown, and the tops should have a delicate, light brown hue. A scone that is too pale might be underbaked and doughy inside, while one that is too dark will be dry.
- Don’t Twist the Cutter (or Knife): When cutting your scones, press straight down with your knife or pastry cutter without twisting. Twisting seals the edges of the scone, which can prevent it from rising properly and inhibit that beautiful flaky separation.
- Use Quality Ingredients: While simple, the quality of your ingredients makes a difference. Fresh baking powder and baking soda are essential for proper leavening. Good quality butter contributes significantly to flavor, and a robust vanilla extract enhances the overall aroma.
Serving Suggestions & Delightful Variations
Chocolate chip scones are incredibly delicious on their own, but they also serve as a fantastic canvas for various toppings and flavor enhancements. Here’s how to elevate your scone experience:
Classic Pairings:
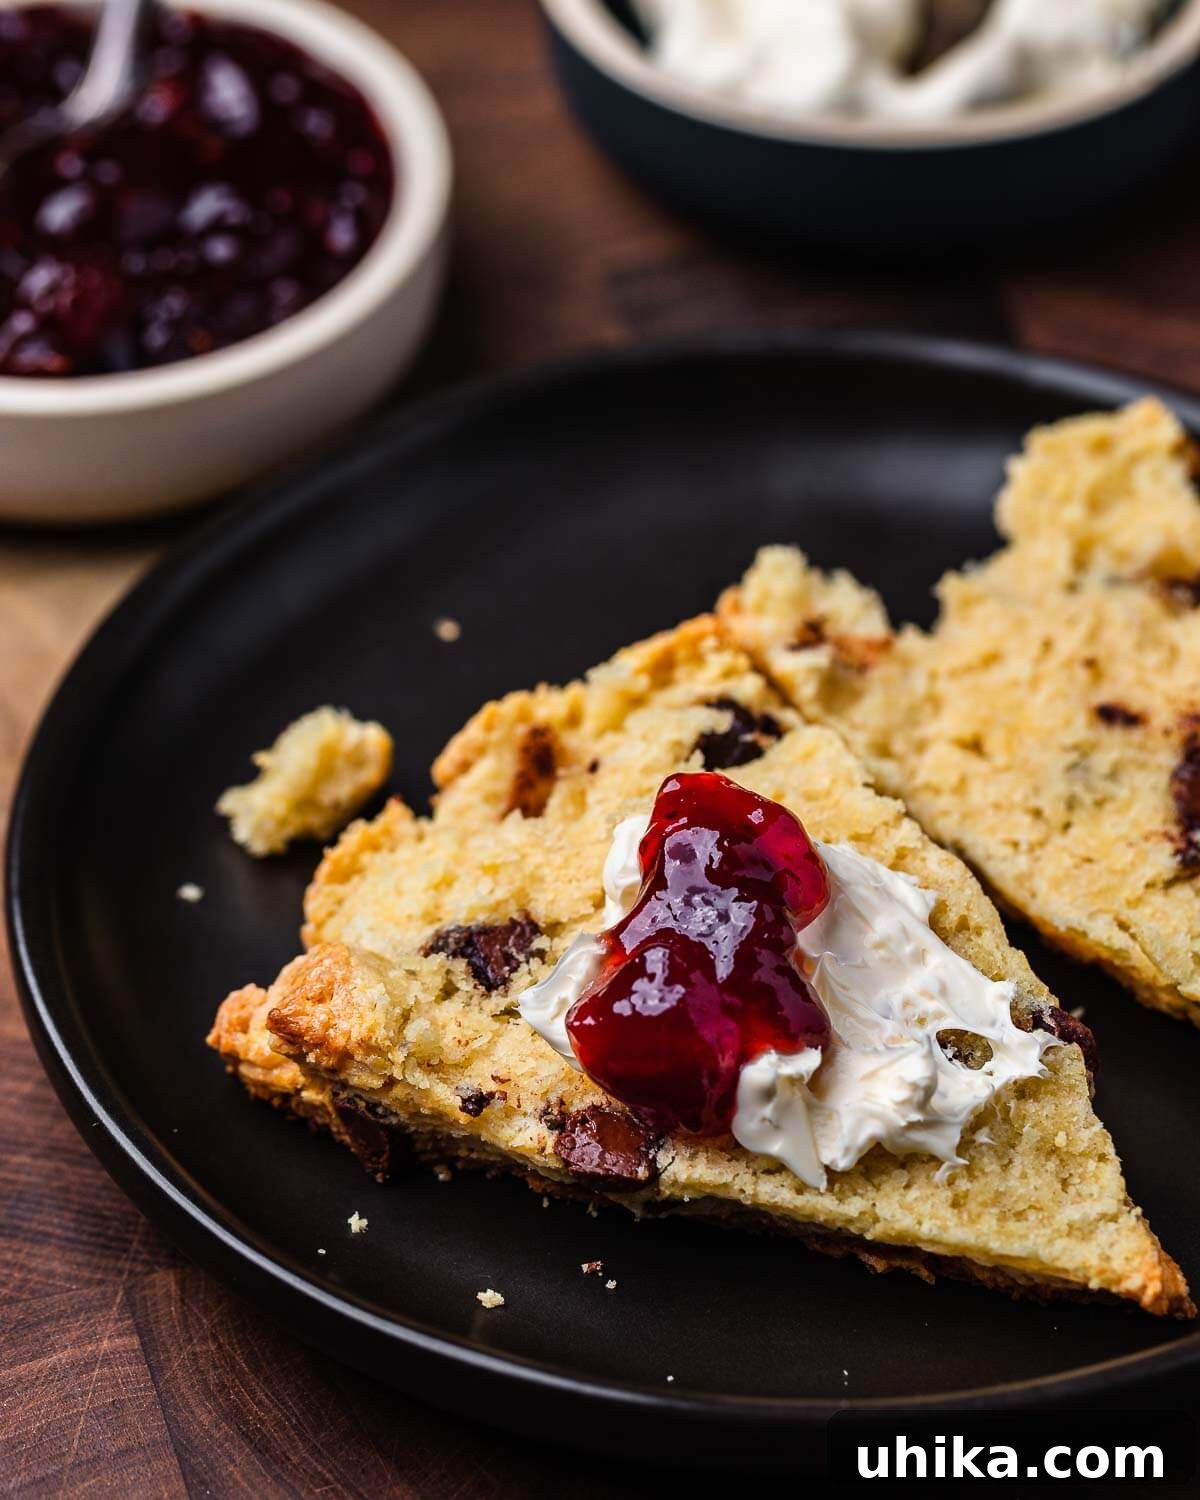
- Clotted Cream: For a truly authentic British scone experience, a generous dollop of clotted cream is a must. Its rich, thick texture and slightly sweet, nutty flavor perfectly complement the buttery scone.
- Fruit Preserves or Jam: Raspberry jam is a traditional choice and provides a wonderful tart contrast to the sweet chocolate. Strawberry, apricot, or even a citrus marmalade would also be excellent.
- Fresh Berries: A side of fresh raspberries, strawberries, or blueberries adds a burst of freshness and natural sweetness.
- Lemon Curd: A tangy lemon curd can cut through the richness of the scone and chocolate, offering a bright and zesty flavor profile.
- Tea or Coffee: Scones are, of course, the quintessential accompaniment to a hot cup of tea (Earl Grey, English Breakfast, or even a fragrant herbal tea) or a freshly brewed coffee.
Creative Variations:
- Nutty Scones: Fold in a handful of chopped pecans, walnuts, or almonds along with the chocolate chips for added crunch and flavor.
- Citrus Zest: Grate in the zest of an orange or lemon into the dry ingredients for a subtle, fragrant citrus note that pairs beautifully with chocolate.
- Different Chocolates: Experiment with white chocolate chips, dark chocolate chunks, or a mix of milk and semi-sweet for varying degrees of sweetness and intensity.
- Spiced Scones: Add 1/2 teaspoon of cinnamon or a pinch of nutmeg to the dry ingredients for a warm, spiced scone that’s perfect for cooler weather.
Storage and Make-Ahead Options
These chocolate chip scones are best enjoyed fresh from the oven, but you can certainly prepare them in advance or store leftovers to savor later.
- Storing Baked Scones: Once cooled, store baked scones in an airtight container at room temperature for up to 2 days. For longer storage, you can keep them in the refrigerator for up to 5 days. Reheat briefly in a microwave or oven to restore some of their warmth and tenderness before serving.
- Freezing Baked Scones: Fully cooled, baked scones can be frozen for up to 1-2 months. Wrap them individually in plastic wrap, then place them in a freezer-safe bag. Thaw at room temperature and reheat as desired.
- Freezing Unbaked Scones: For fresh-baked scones on demand, you can freeze the unbaked scone wedges! After slicing the dough into triangles, place them on a parchment-lined baking sheet and freeze until solid (about 1-2 hours). Once frozen, transfer them to a freezer-safe bag and store for up to 1 month. When ready to bake, place frozen scones on a prepared baking sheet, brush with cream, and sprinkle with sugar. You may need to add an extra 3-5 minutes to the baking time.
More Delicious Baked Goods You’ll Love
If you’ve enjoyed these delectable chocolate chip scones, we encourage you to explore more of our favorite recipes that perfectly bridge the gap between delightful breakfast treats and satisfying desserts:
- Cranberry Orange Scones – A bright and zesty twist on the classic scone, perfect for citrus lovers.
- Pan-Banging Chocolate Chip Cookies – Experience perfectly chewy cookies with crinkly edges.
- Chocolate Chip Banana Bread – A moist and flavorful classic, elevated with chocolate chips.
- Almond Biscotti – Crunchy Italian cookies, ideal for dipping in coffee or tea.
- Cinnamon Rolls with Cream Cheese Frosting – Indulgent, soft, and sweet rolls for a comforting breakfast or brunch.
If you’ve enjoyed this chocolate chip scone recipe or any other recipe on our site, please consider sharing your feedback!
We value your thoughts and strive to create content that resonates with all learning styles. For those who prefer to learn by watching, you can find many of our recipes, including similar delightful bakes, on our YouTube channel and our Facebook Page.
Thank you for baking with us!
Chocolate Chip Scones Recipe
by James Delmage
Rating: 5 out of 5 stars (8 votes)
Prep Time: 10 mins | Cook Time: 20 mins | Chilling Time: 15 mins | Total Time: 45 mins
Yields: 8 scones

Chocolate chip scones are a wonderful treat for breakfast, or an afternoon snack with tea or coffee. These scones are crumbly, buttery, and so simple to make!
Ingredients
- 2 cups (240g) all-purpose flour, plus more for bench flour
- 1/3 cup (66g) sugar
- 1 teaspoon baking powder
- 1 teaspoon baking soda
- 1/2 teaspoon salt
- 8 tablespoons (113g) unsalted butter, frozen
- 1/2 cup (113g) sour cream
- 1 large egg
- 1 1/2 teaspoons vanilla extract
- 1/2 cup (85g) chocolate chips
- 2 tablespoons heavy cream, for brushing
- Turbinado sugar, optional, for topping
Instructions
- Preheat your oven to 400°F (200°C) and set the rack to the middle level. Line a baking sheet with parchment paper.
- In a large bowl, whisk together the all-purpose flour, granulated sugar, baking powder, baking soda, and salt.
- Using the large holes of a box grater, grate the frozen butter directly into the flour mixture.
- Using your hands or a pastry cutter, work the butter into the flour until the mixture resembles coarse crumbs with some pea-sized pieces of butter remaining.
- Add the chocolate chips to the flour mixture and stir until they are evenly incorporated.
- In a separate small bowl, whisk together the sour cream, vanilla extract, and egg until well combined.
- Pour the sour cream mixture into the flour mixture. Using a fork, gently stir until large clumps form and the ingredients are just combined. Avoid overmixing.
- Lightly flour your hands. Gather the dough and gently shape it into a ball. Transfer it to a lightly floured surface and pat or roll it into an 8-inch (20 cm) circle, about 1-inch thick.
- Using a sharp knife, slice the dough into 8 triangular wedges. Place the scones on the parchment paper-lined baking sheet, spacing them about 3 inches apart. Chill in the refrigerator for at least 15 minutes.
- After chilling, remove the scones from the refrigerator. Brush the tops of each scone with heavy cream. If using, sprinkle a pinch of turbinado sugar over the tops for a sparkling finish.
- Bake in the preheated oven for 17-20 minutes, or until the edges are golden brown and the tops are lightly browned and firm.
- Allow the scones to rest on the baking sheet for 5 minutes before transferring them to a wire rack. Serve warm with raspberry jam, clotted cream, or butter, and enjoy!
Notes
- For best results and maximum flakiness, ensure your butter is thoroughly frozen before grating. You won’t be able to grate the entire stick, so when you get near the end, simply cut the remaining piece into small, cold cubes.
- The uncooked scones should chill for a minimum of 15 minutes in the refrigerator, but they can also be prepared and chilled overnight. This is an excellent make-ahead option for fresh morning scones.
- This recipe was developed for a conventional oven. If you are using a convection oven, reduce the temperature by 25°F (15°C) and begin checking for doneness at the 75% mark of the total baking time.
- Store baked scones in an airtight container at room temperature for up to 2 days, or in the refrigerator for up to 5 days. They can also be frozen for longer storage.
Nutrition Information
(Note: Nutrition information is an approximation and can vary based on ingredients and preparation.)
- Serving: 1 scone
- Calories: 356 kcal
- Carbohydrates: 39.3g
- Protein: 5.4g
- Fat: 19.4g
- Saturated Fat: 13.2g
- Cholesterol: 67mg
- Sodium: 174mg
- Potassium: 106mg
- Fiber: 1.2g
- Sugar: 14g
- Calcium: 47mg
- Iron: 2mg
Nutrition information is automatically calculated, so should only be used as an approximation.
Like this recipe? Leave a comment below!
Connect with us on Instagram at @sipandfeast or tag #sipandfeast to share your creations!