
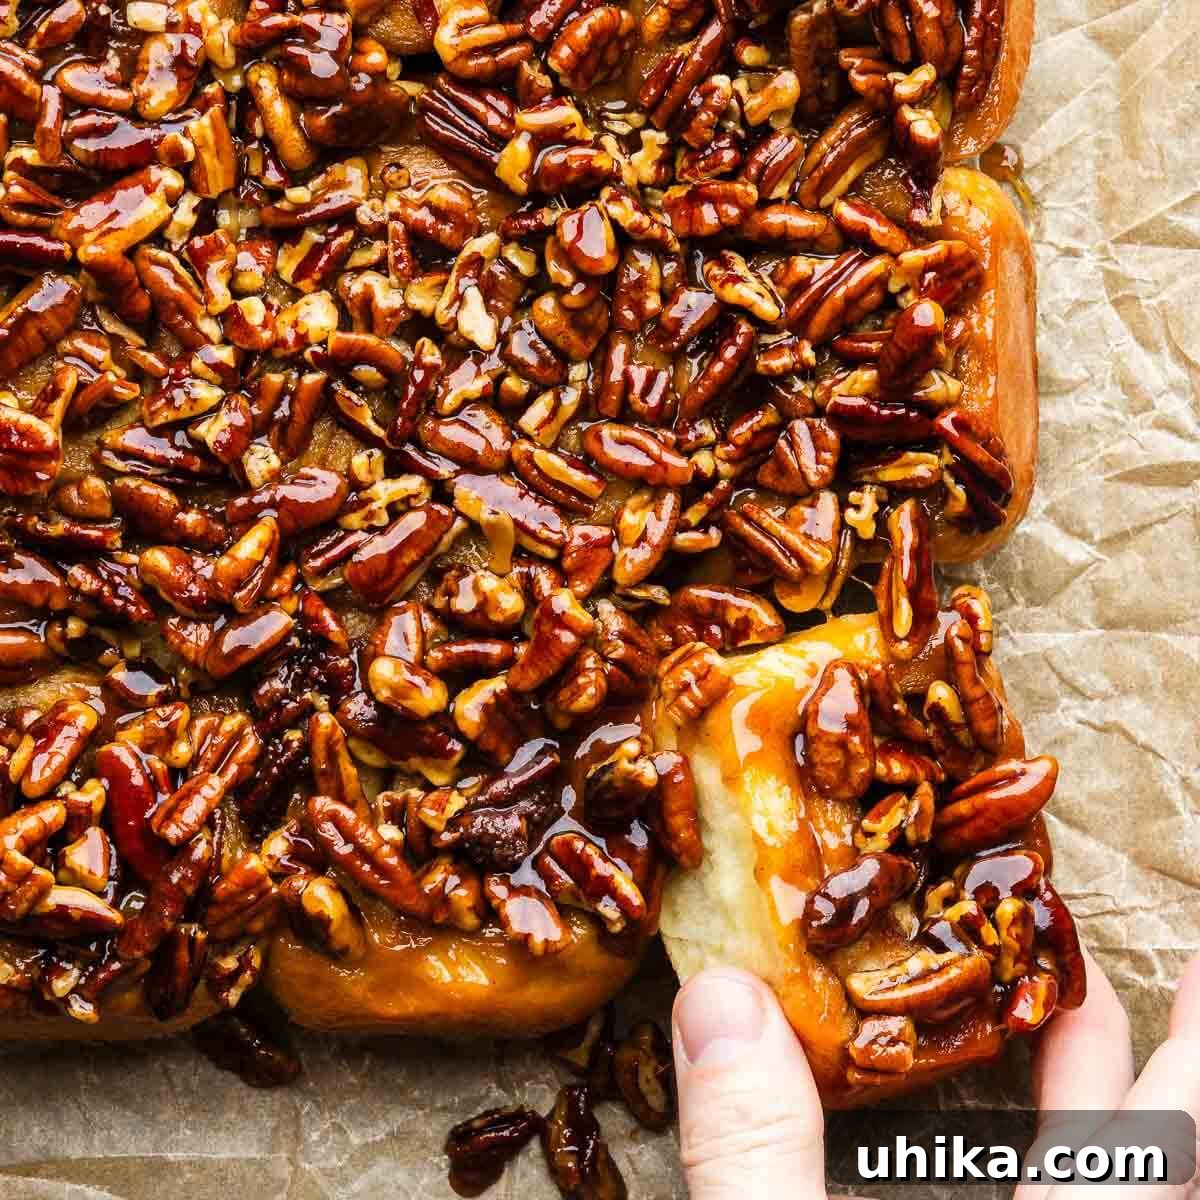
Irresistible Homemade Sticky Buns: Your Ultimate Guide to a Sweet Indulgence
Prepare to fall in love with these incredibly delicious sticky buns, a true masterpiece of yeasted dough, generously rolled with warm cinnamon and sugar, and baked to perfection with a gooey caramel-pecan topping. More than just a breakfast pastry, these homemade sticky buns are a versatile treat that pairs wonderfully with your morning coffee and can easily transform into an decadent dessert with a scoop of vanilla ice cream. This comprehensive guide will walk you through creating these sweet, tender, and utterly unforgettable buns right in your own kitchen.
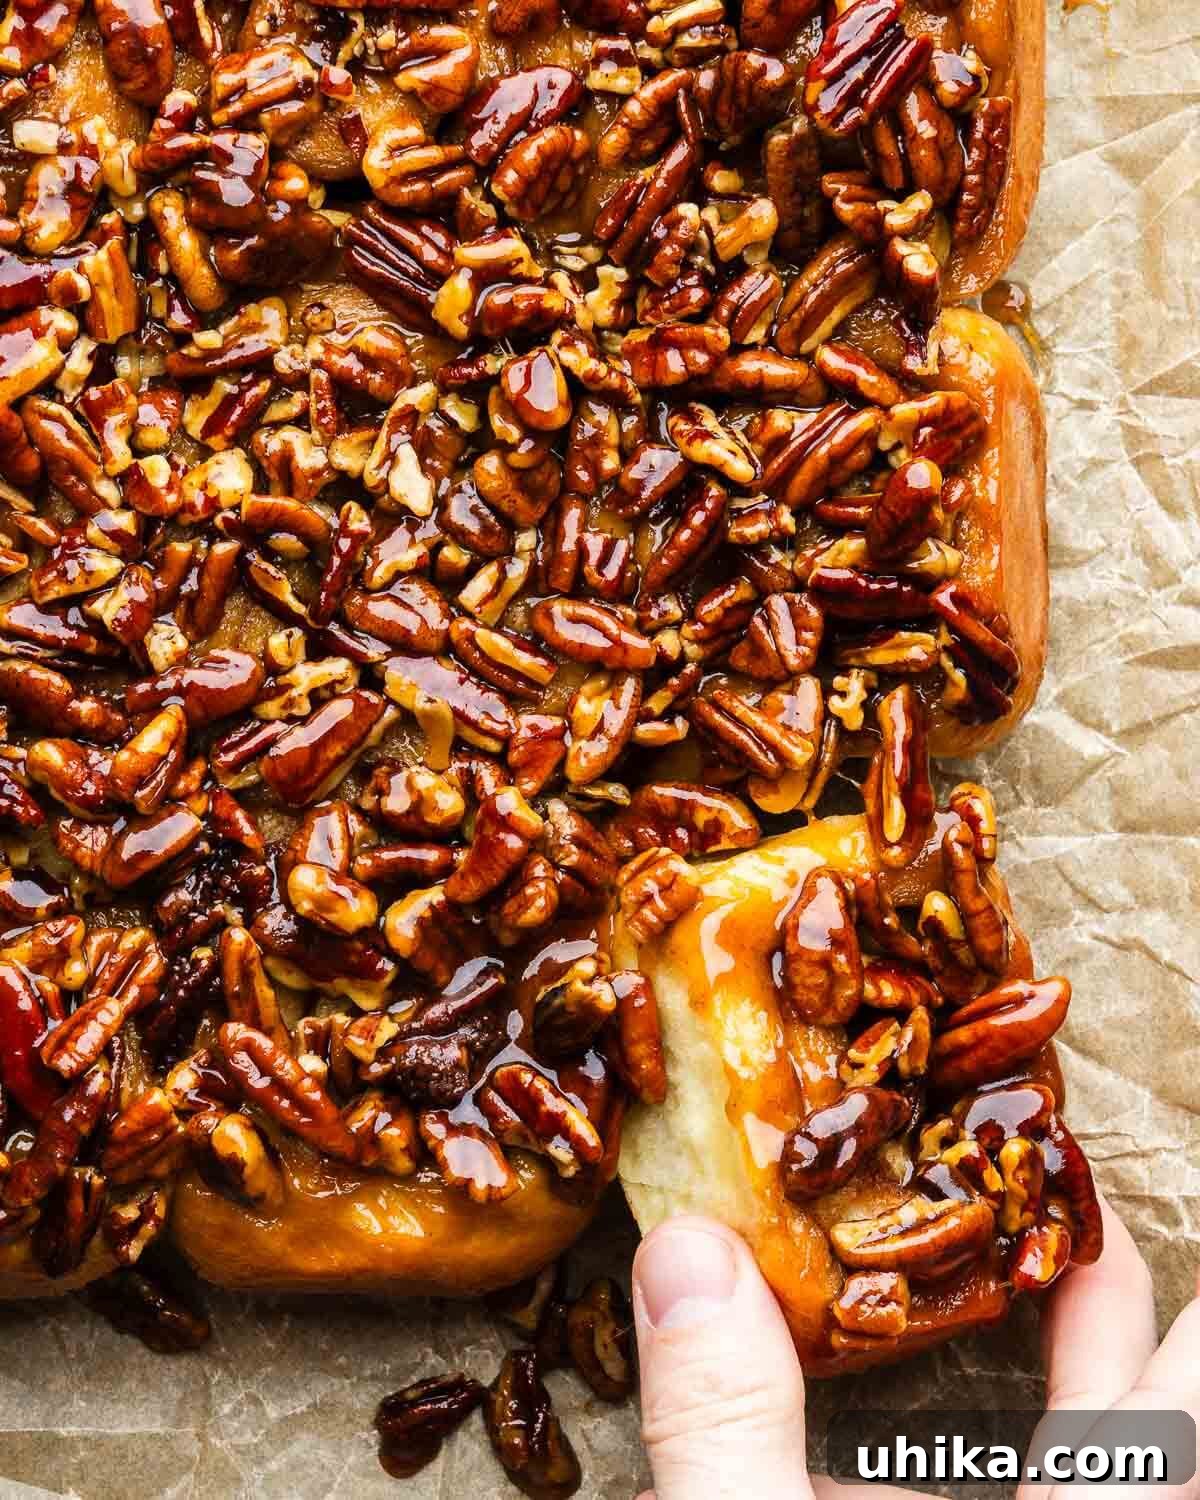

A Beloved Pennsylvania Dutch Tradition
These incredibly delicious sticky buns boast a rich heritage, originating from the Pennsylvania Dutch (German) settlers who brought their treasured baking traditions to the United States during the 18th and 19th centuries. Often affectionately known as “schnecken,” which is German for snails – a nod to their coiled shape – these sweet, rolled delights have become a staple for breakfast, brunch, an afternoon pick-me-up, or even a grand dessert.
Imagine the best elements of a classic cinnamon roll melding with the rich, nutty goodness of a pecan pie. That, my friends, is precisely what a sticky bun delivers! It’s an unparalleled fusion of soft, fluffy dough, spiced cinnamon sugar, and a gloriously sticky, caramelized pecan topping that’s simply irresistible.
While I adore making these for special holiday mornings, their charm extends beyond festive occasions. They make a fantastic addition to any brunch spread, perfectly complementing savory dishes like a hearty potato frittata or a quiche. Their versatility and crowd-pleasing appeal make them a go-to recipe for any gathering or a delightful weekend indulgence.
Essential Ingredients for Perfect Sticky Buns
Crafting the perfect sticky bun begins with high-quality ingredients. Each component plays a vital role in achieving that signature fluffy dough, warm cinnamon swirl, and decadent caramel-pecan topping. Below, you’ll find a visual overview of the ingredients, followed by detailed notes to guide your selection.
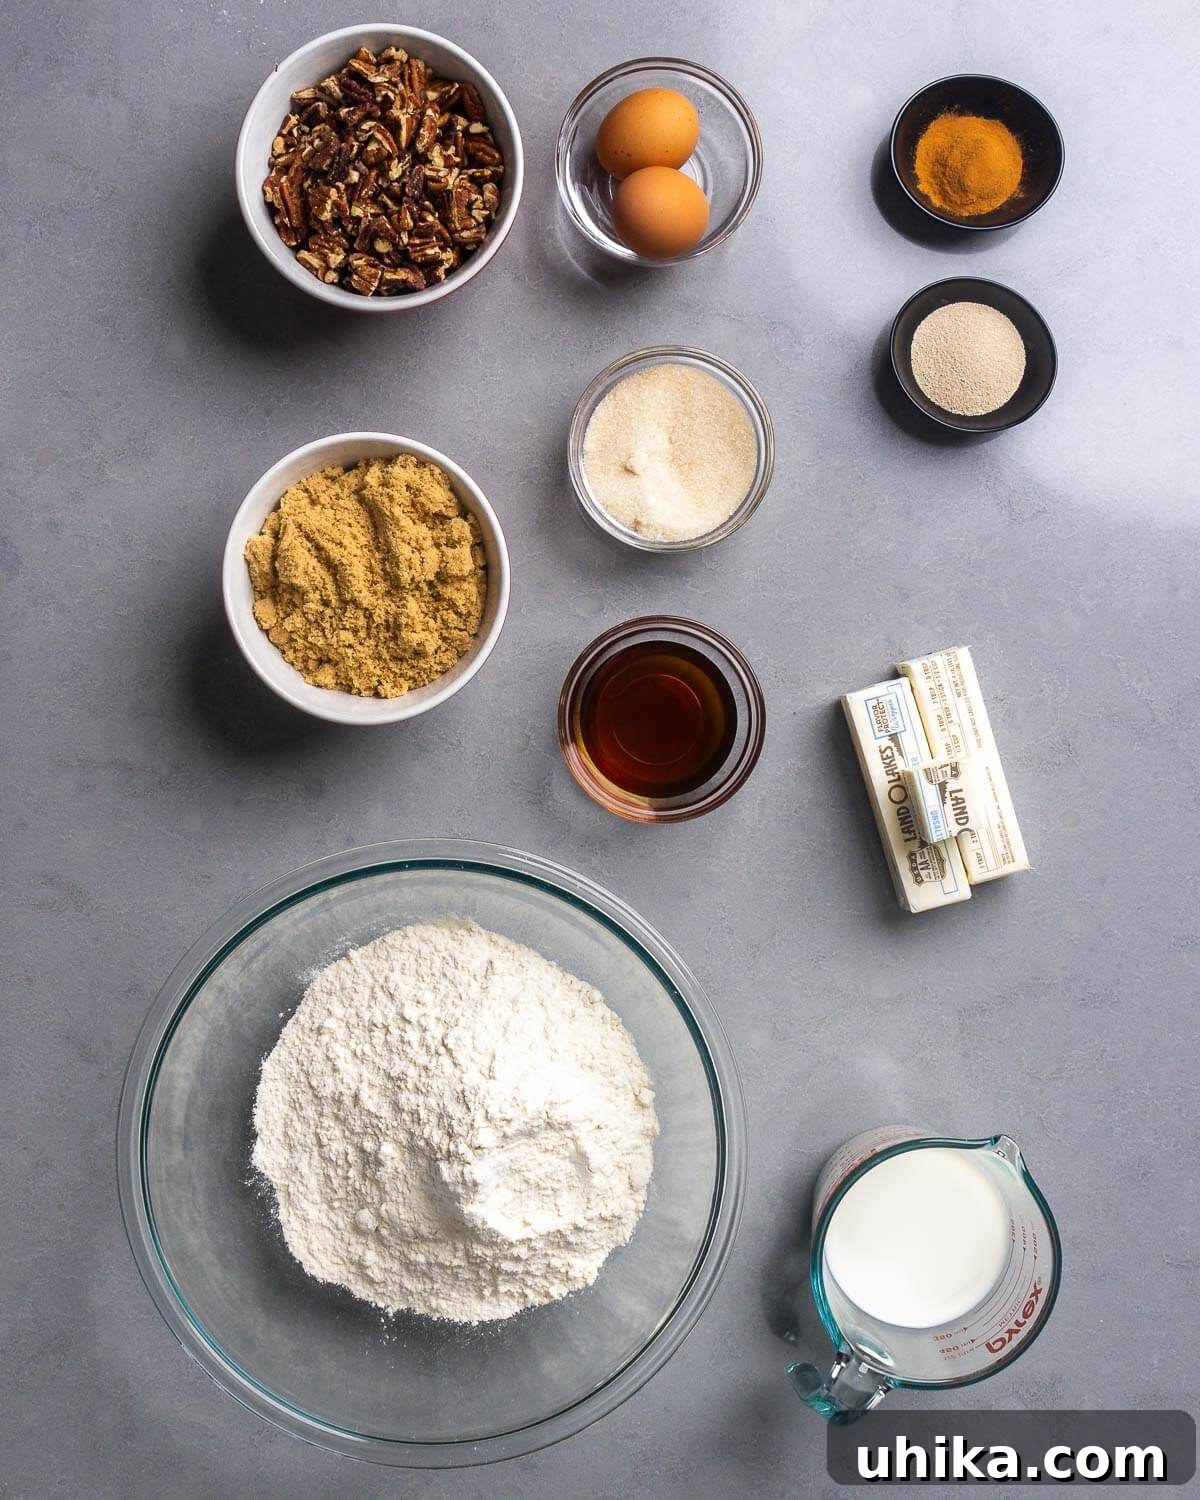
- For the Dough: Our homemade sticky bun dough is a delightful blend of all-purpose flour, granulated sugar, fine sea salt, instant yeast, whole milk, unsalted butter, and eggs. For consistent results and ease of use, I highly recommend using instant yeast. It doesn’t require prior proofing in a warm liquid and can be mixed directly with your dry ingredients. If you opt for active dry yeast, remember to activate it first by dissolving it in the warm milk and butter mixture; look for visible bubbling, which confirms the yeast is alive and ready to work its magic. Using room temperature milk, butter, and eggs helps the dough come together smoothly and ensures optimal yeast activity.
- For the Topping: The luscious, gooey topping is a highlight of these buns. While pecans are my preference, feel free to substitute with walnuts, or create a delicious blend of both. The remaining ingredients for this irresistible topping include unsalted butter, dark corn syrup, brown sugar (either light or dark will work beautifully), a pinch of sea salt to balance the sweetness, and a touch of water. If you prefer not to use corn syrup, pure honey or maple syrup are excellent alternatives that will still yield a wonderfully caramelized and sticky finish.
- For the Filling: The heart of the sticky bun’s flavor comes from its simple yet impactful filling. This involves softened unsalted butter, packed light or dark brown sugar for a rich sweetness, and generous amounts of ground cinnamon, which infuses the rolls with an inviting warmth and aromatic spice. Ensure your butter is at room temperature for easy spreading.
For precise measurements and quantities, please refer to the comprehensive recipe instructions below.
Crafting Your Sticky Buns: A Step-by-Step Guide
Creating these delightful sticky buns is a rewarding baking project. Follow these detailed steps, correlating with the numbered process images, to ensure perfectly tender, gooey, and flavorful results every time.
- Begin by preparing your dough. In a large mixing bowl, combine the all-purpose flour, granulated sugar, fine sea salt, and instant yeast. In a separate heatproof measuring cup, gently warm the unsalted butter and whole milk in the microwave for approximately 45 seconds, or until the mixture reaches a temperature of 110°F. This precise temperature is crucial for activating the yeast without killing it. Once warm, pour this liquid mixture into the dry ingredients, along with the two large eggs.
- Using a sturdy spatula or a wooden spoon, mix all the ingredients together until a shaggy, cohesive dough begins to form. Don’t worry if it looks a bit rough at this stage; it will smooth out with kneading.
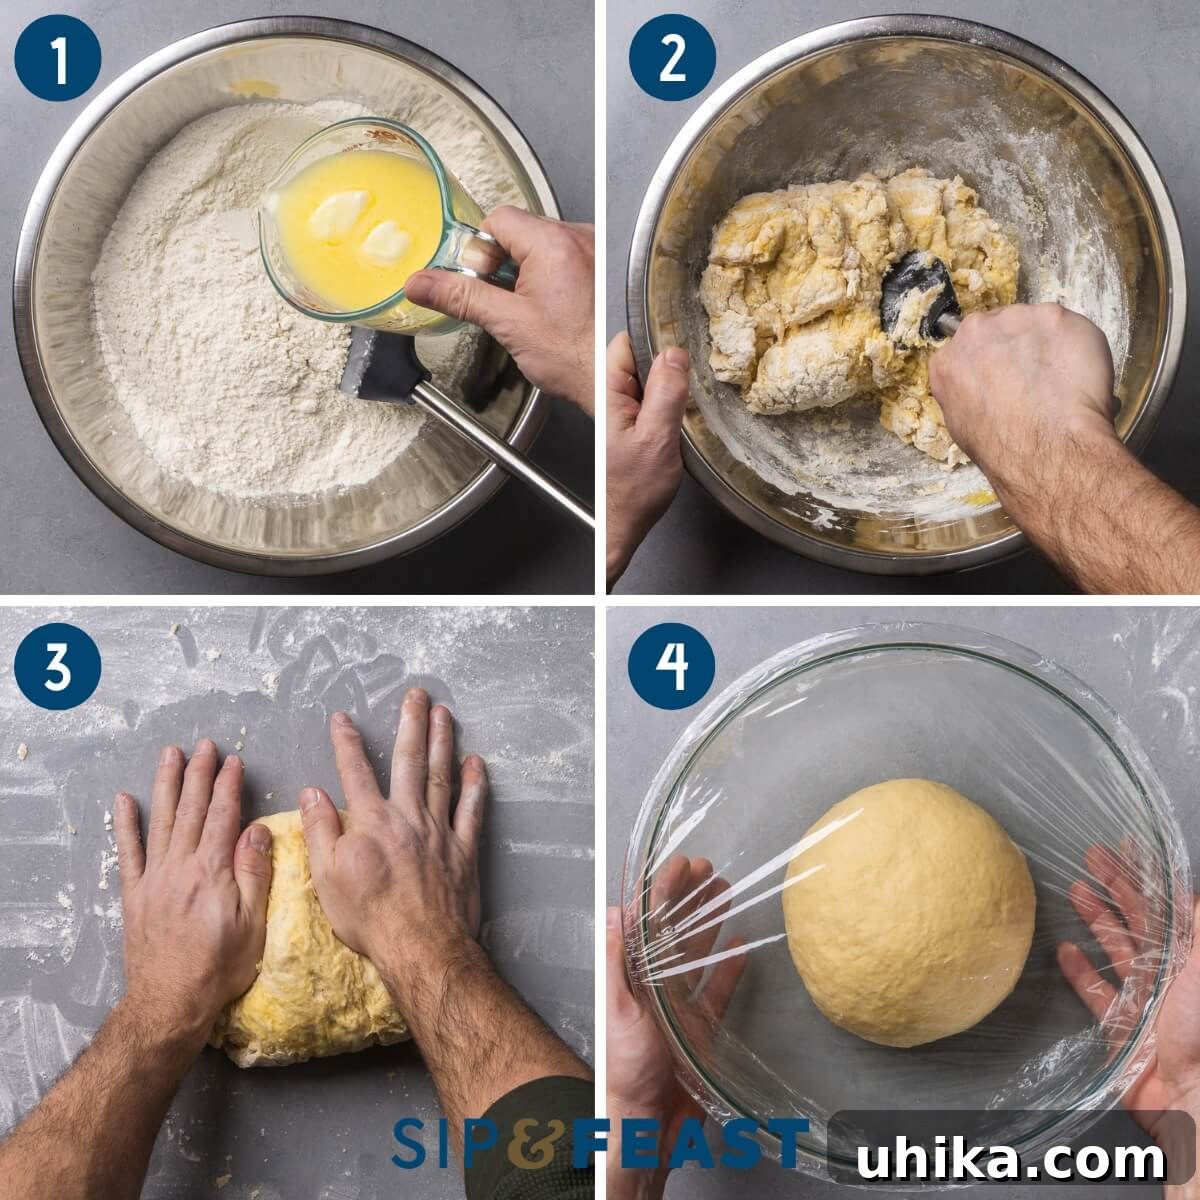
- Transfer the shaggy dough onto a lightly floured surface. Knead the dough vigorously for 5 to 8 minutes, or until it transforms into a smooth, elastic ball. If you find the dough excessively sticky, incorporate an additional 1/4 cup of flour, one tablespoon at a time, and continue kneading until it’s more manageable. For those using a stand mixer, knead on low to medium speed (typically level 3 on KitchenAid mixers) for about 5 minutes until smooth.
- Once kneaded, place the smooth dough ball into a lightly oiled bowl. Turn the dough once to coat it evenly with oil, then cover the bowl tightly with plastic wrap. Find a warm spot in your kitchen and let the dough rise for approximately 2 hours, or until it has visibly doubled in size. A warm environment is key for proper proofing.
- While the dough is proofing, prepare your decadent sticky topping. Lightly grease a 9×13-inch baking dish. Evenly spread the chopped pecans across the bottom of the prepared dish, forming a single layer.
- In a small saucepot, melt the unsalted butter over medium heat. Once melted, stir in the dark corn syrup, brown sugar, sea salt, and water. Bring the mixture to a gentle simmer, stirring constantly, until all the sugar has dissolved and the ingredients are well combined. This creates the caramel base for your topping.
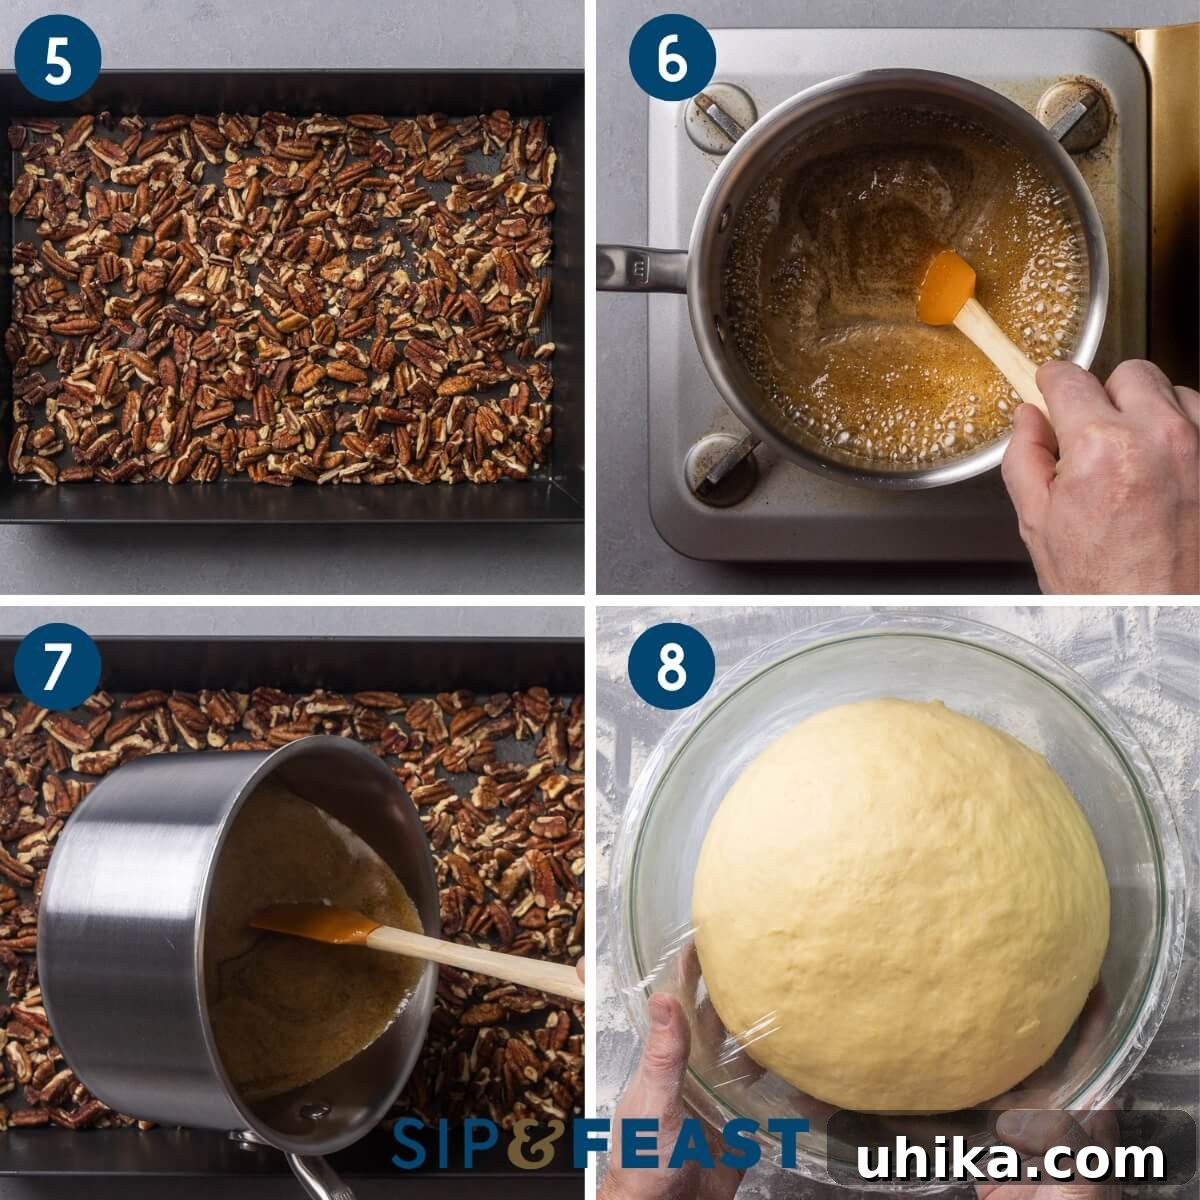
- As soon as the topping mixture is simmering and fully combined, remove the pot from the heat. Carefully pour this hot caramel mixture over the layer of pecans in your prepared baking dish. Set the dish aside; this will be the bottom layer for your sticky buns.
- Once your dough has successfully doubled in size, gently transfer it from the bowl to a lightly floured surface. Punch the dough down to release the air, preparing it for shaping.
- Using a rolling pin, roll the dough out evenly into a large rectangle, approximately 12×20 inches in dimensions. Aim for a consistent thickness across the entire rectangle.
- Evenly spread the softened, room temperature unsalted butter over the entire surface of the rolled-out dough, leaving a small border at one of the longer edges. Then, generously sprinkle the brown sugar and ground cinnamon over the butter. Use your hands to gently press the cinnamon-sugar mixture into the butter, ensuring it adheres well to the dough for tight rolling.
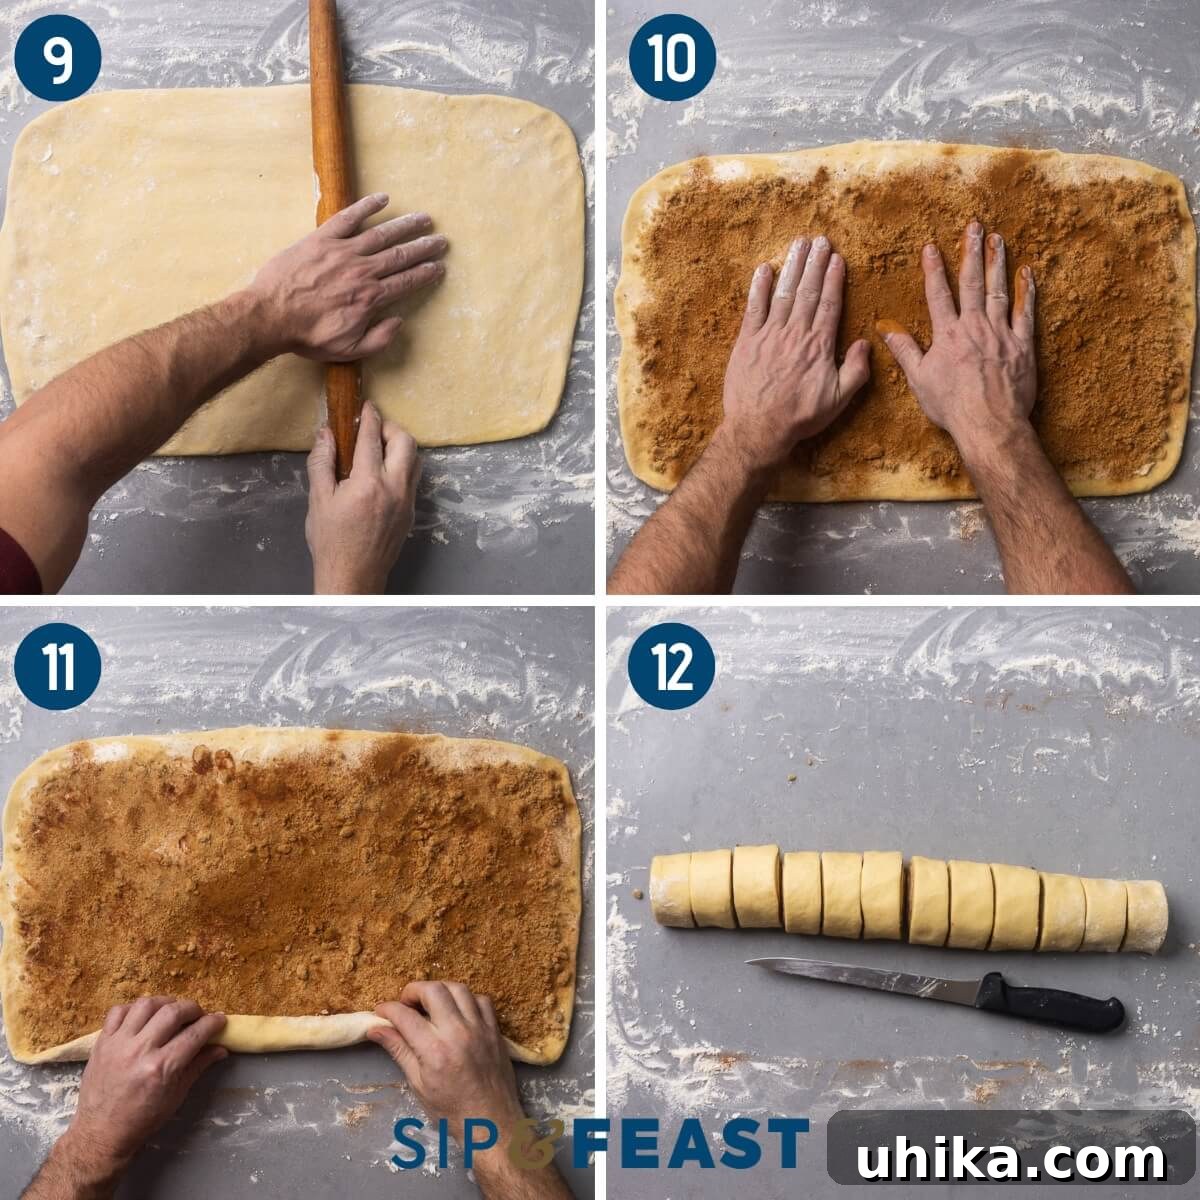
- Starting from one of the longer, buttered edges, tightly roll the dough into a 20-inch long cylinder. A tight roll is crucial for well-defined spirals in your buns.
- Using a sharp knife or unflavored dental floss, carefully trim off about 1 inch from each end of the rolled cylinder. These ends can be baked separately (perhaps in a small ramekin) or discarded. Then, slice the remaining cylinder into 12 equal-sized pieces, aiming for consistent thickness to ensure even baking.
- Arrange the cut rolls into the prepared baking dish on top of the pecan-caramel mixture, ensuring they are evenly spaced. Cover the dish loosely with plastic wrap and place it in a warm area to rise for another 30 to 60 minutes, or until the rolls have doubled in size. This second proofing creates light and airy buns. Make-ahead option: Alternatively, immediately after covering with plastic wrap, place the dish of rolls into the refrigerator. They will proof slowly overnight, ready for baking the next day.
- Preheat your oven to 350°F (175°C) and position the oven rack to the middle level. Bake the sticky buns for 25 to 30 minutes, or until their internal temperature reaches 190°F (88°C) when checked with an instant-read thermometer. If you notice the tops browning too quickly, gently cover the dish with aluminum foil for the remaining baking time. Once baked, remove the dish from the oven and place it on a wire rack to cool for just 5 minutes. This brief cooling period helps the caramel set slightly before inverting.
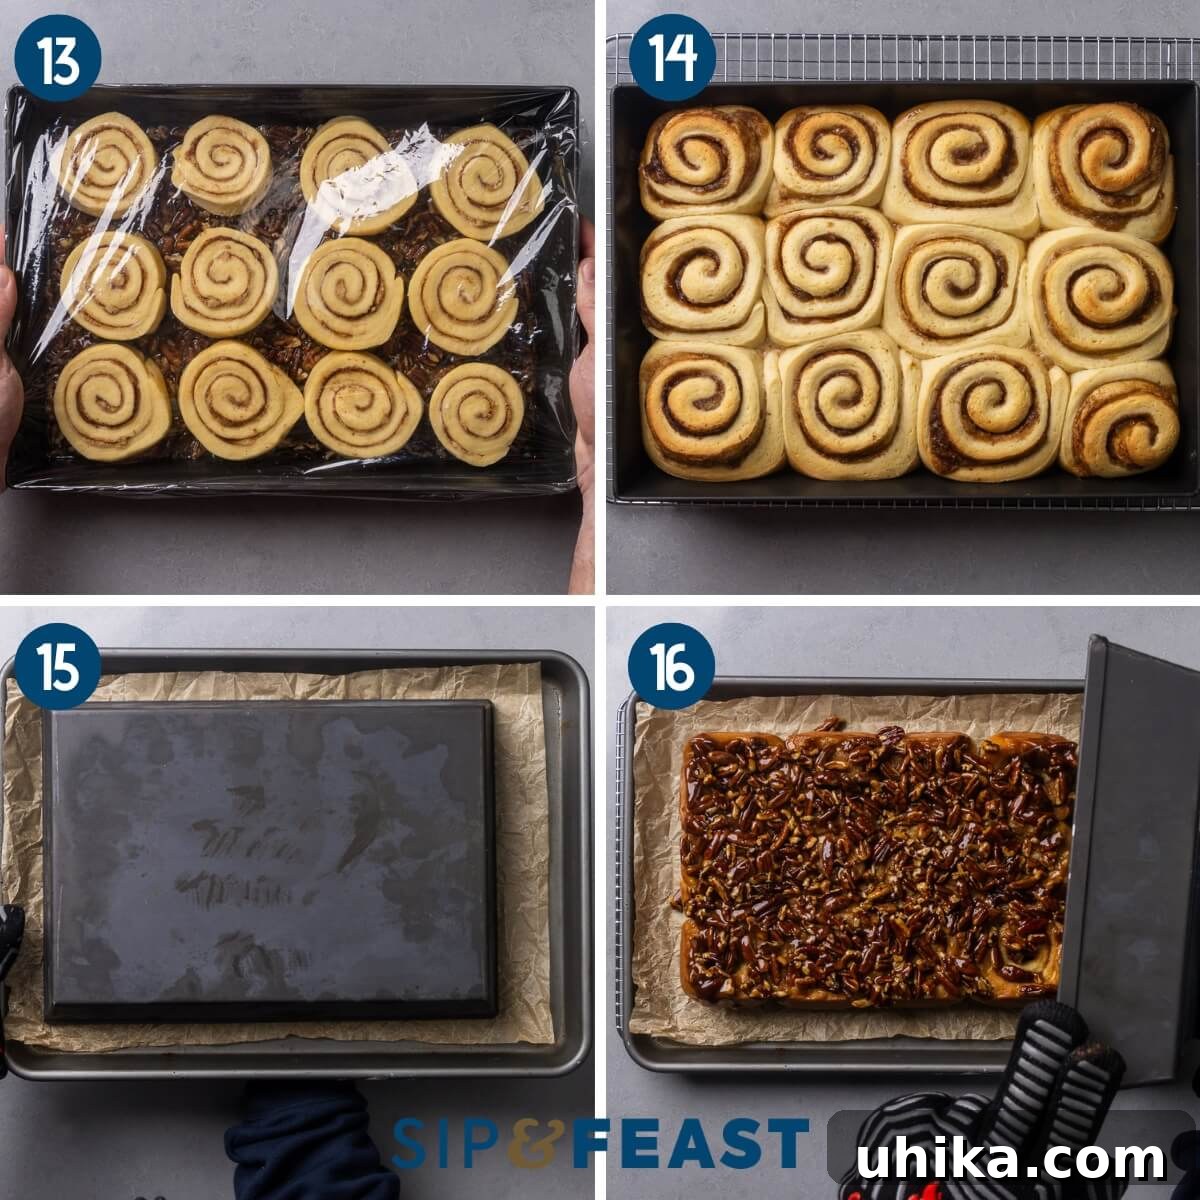
- After the 5-minute cooling period, carefully invert the entire baking dish onto a large parchment paper-lined baking sheet or serving platter. This allows the caramelized pecan topping to beautifully coat the top of each bun.
- Gently lift the baking pan away, revealing your magnificent, gooey sticky buns. Serve them warm right away and savor every delectable bite! Enjoy the fruits of your labor!
Expert Tips for Sticky Bun Success
- Optimizing Cold Kitchen Proofing: During colder months, yeasted doughs like those for sticky buns, pizza dough, or bread can take significantly longer to proof. To create an ideal warm environment, I highly recommend using a baking heat pad set to 78-80°F (25-27°C). Alternatively, a sunny windowsill or an oven with just the light on can also provide a suitable warm spot. Another trick is to boil a cup of water in the microwave, remove the cup, and immediately place your covered dough inside the warm microwave (turned off) to proof. Always monitor the dough for doubling in size rather than strictly adhering to a timer.
- Achieving Temperature Accuracy: Precision with temperature is crucial for baking success. To ensure your liquid mixture for the dough is exactly 110°F (43°C) and later that your baked buns reach an internal temperature of 190°F (88°C), invest in a reliable instant-read thermometer. This indispensable tool eliminates guesswork, guaranteeing perfect yeast activation and fully cooked, tender buns every time.
- Mastering Make-Ahead Prep: For busy holidays like Easter, Christmas, or Thanksgiving, or simply for a convenient weekend breakfast, preparing sticky buns in advance is a game-changer. Just like chocolate chip scones, these buns can be assembled the day before. After you’ve placed the cut buns onto the pecan-caramel mixture in the baking dish, cover them tightly with plastic wrap and refrigerate overnight, or for up to 2 days. The cold fermentation process will not only slowly proof the rolls but also enhance their flavor. Simply remove from the fridge, allow to come to room temperature for about 30-60 minutes while your oven preheats, then bake as directed.
- Effortless Bun Cutting: For clean, even slices of your rolled dough, a thin, sharp knife is ideal. Alternatively, unflavored dental floss can work wonders: simply slide it under the log, cross the ends over the top, and pull to slice through with precision.
- Customizing Bun Size: This recipe yields 12 standard-sized sticky buns. If you prefer larger, more substantial buns, you can cut the log into 9 pieces. For smaller, more delicate buns, you can aim for 15 equal-sized pieces, adjusting the baking time slightly as needed.
- Storing and Reheating Leftovers: Any leftover sticky buns can be stored in an airtight container in the refrigerator for up to 5 days. To enjoy them again, simply reheat in a preheated oven at 350°F (175°C) for 5-7 minutes, or for a quicker option, microwave them for 15-20 seconds until warm and gooey.
More Delightful Baked Goodies to Explore
If you’ve enjoyed the versatility of sticky buns – serving equally well as breakfast or dessert – you’ll love these other fantastic baked goods from our collection. They’re perfect for satisfying your sweet tooth any time of day!
- Apple Coffee Cake with Easy Crumb Topping
- The Best Classic Pound Cake
- Moist and Flavorful Zucchini Bread
If you’ve enjoyed this Homemade Sticky Buns recipe, please consider giving it a 5-star rating below. Your feedback is greatly appreciated!
Stay connected with us! Watch our latest culinary adventures on YouTube, follow along on our Facebook Page, and become a Patreon member to gain exclusive access to full-meal videos and behind-the-scenes content.
Sticky Buns Recipe
James Delmage
1 hr
30 mins
3 hrs
4 hrs 25 mins
12
Pin
Ingredients
For the dough
- 4 1/2 cups all-purpose flour plus more as needed
- 1/2 cup granulated sugar
- 1/2 teaspoon fine sea salt
- 4 teaspoons SAF instant yeast
- 1 1/4 cups whole milk room temperature
- 6 tablespoons unsalted butter room temperature
- 2 large eggs room temperature
For the topping
- 2 cups chopped pecans
- 6 tablespoons unsalted butter
- 1/4 cup dark corn syrup
- 2/3 cup brown sugar dark or light
- 1/4 teaspoon fine sea salt
- 3 tablespoons water
For the filling
- 5 tablespoons unsalted butter room temperature
- 3/4 packed cup brown sugar dark or light
- 1 tablespoon ground cinnamon
Instructions
For the dough
- In a large bowl combine the flour, sugar, salt, and instant yeast.
- Add the butter and milk to a heatproof measuring cup and microwave for 45 seconds or until the temp reaches 110°F. Pour the milk mixture into the dry ingredients along with the egg and mix with a spatula until a shaggy dough forms.
- Transfer the dough to a floured surface and knead for 5-8 minutes or until a smooth ball forms. If the dough is too sticky, add a 1/4 cup of flour and knead again. Place the dough into an oiled bowl and cover with plastic wrap. Let the dough sit in a warm spot for 2 hours or until it doubles size.
For the topping
- Meanwhile, prepare the topping. Grease a 9×13-inch baking dish or pan. Spread the chopped pecans out into an even layer in the bottom of the pan. In a saucepot over medium heat, melt the butter and add the corn syrup, brown sugar, salt, and water. Once simmering and combined remove the pot from the heat and pour it over the pecans in the pan. Set aside.
Make the rolls and filling
- Move the dough to a floured surface and punch it down. Roll it out to a 12×20-inch rectangle.
- Spread the softened room temp butter onto the dough and sprinkle the brown sugar and cinnamon on top. With your hands or a spatula, lightly press the sugar and cinnamon into the dough so that it sticks for rolling. Tightly roll the dough into a 20-inch long cylinder. With a sharp knife, cut 1-inch off each end then cut the cylinder into 12 equal sized pieces. The ends can be baked in another dish or discarded.
- Place the rolls equally spaced into the dish. You might need an extra small round baking dish for 3 of the rolls. Cover with plastic wrap, place in a warm area, and let rise for 30-60 minutes or until the rolls double in size. Note: If you want to bake the next day, place in the fridge covered tightly with plastic wrap right after adding the rolls to the baking dish.
- Preheat oven to 350°F and set the rack to the middle level. Bake the rolls for 25-30 minutes or until the internal temp of the rolls reach 190°F when checked with an instant read thermometer. If the rolls brown too quickly, lightly cover with foil for remaining baking time. When the rolls finish baking, set the baking dish on a wire rack to cool for 5 minutes then invert the pan onto a large platter so that the bottom shows as the top. Serve right away. Enjoy!
Notes
- Yeast: I always recommend working with instant yeast (SAF brand is what I use) because you don’t need to proof it in a warm liquid and it can be mixed with dry ingredients and salt right away. This is the yeast that most bakeries and pizzerias use for its consistency and long shelf life especially when stored in the freezer. If using active yeast, add it to the warm milk and butter first, and check for bubbles to make sure it’s alive. Once it bubbles mix it in with the dry ingredients and form your dough.
- Stand Mixer: For a stand mixer, knead for 5 minutes on low speed (Kitchenaid level 3).
- Cold kitchen proofing: My favorite baking tool to use during the winter months is a baking heat pad set to 78-80°F. Other warm spots that will work are sunny windows or placing it into an oven with the light turned on. Alternatively, you can boil a cup of water in the microwave, turn off the microwave leaving the cup inside, and immediately add the baking dish and close the door. No matter which way you choose, make sure to check for when the dough doubles in size.
- Cutting the buns: Use a thin sharp knife or unflavored dental floss to make cutting easier.
- Number of buns: For larger sticky buns, cut into 9 pieces, or for smaller buns, cut into 12 or even 15 equal sized pieces.
- Overnight and bake next day: If you want to make ahead simply cut the rolls and add them to the baking dish. Cover and place in the fridge overnight or up to 2 days. Remove from the fridge, preheat your oven, and bake. They will taste better too, since the cold fermentation process will create more flavor.
- Leftovers: Store in an airtight container in the fridge for up to 5 days. The buns can be reheated in the oven for 5-7 minutes at 350°F or in the microwave for 15-20 seconds.
Nutrition information is automatically calculated, so should only be used as an approximation.
Enjoyed this recipe? Share your thoughts below!
Find us on Instagram @sipandfeast and tag your creations with #sipandfeast!