

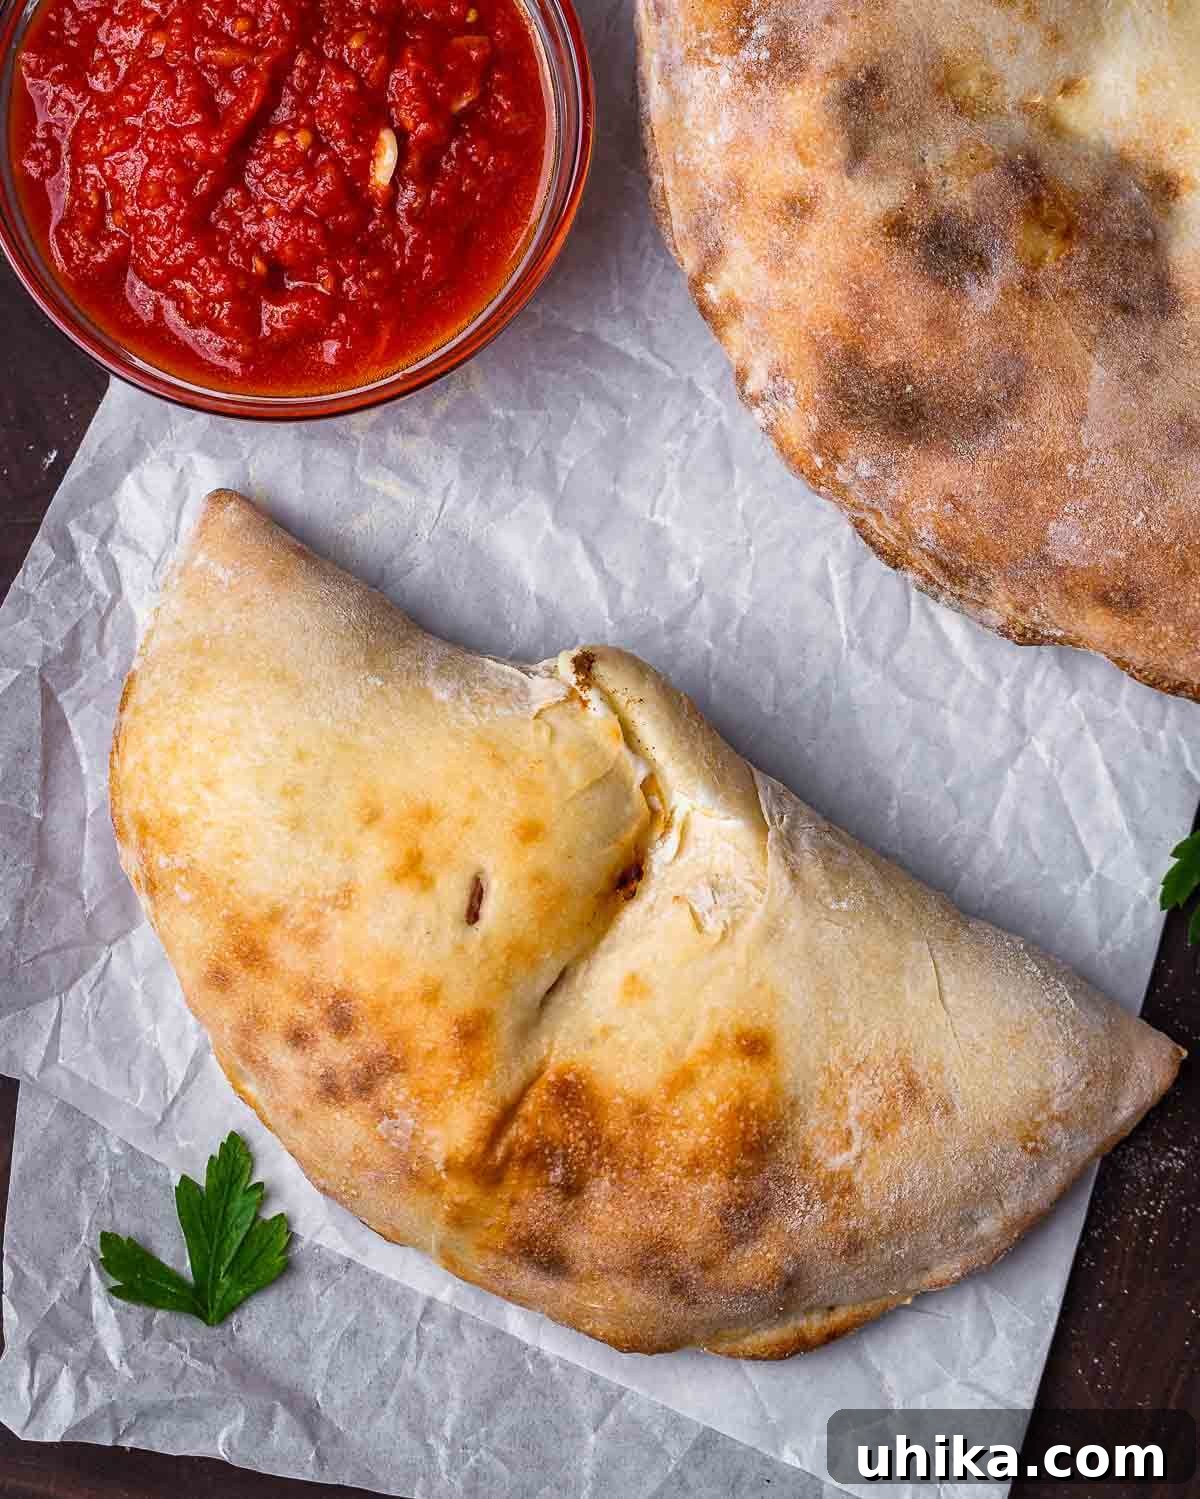
Experience the ultimate comfort food with our authentic Pizzeria-Style Cheese Calzone recipe. These delightful handheld pockets, crafted from tender pizza dough, are generously filled with a luscious, creamy blend of ricotta, mozzarella, and Pecorino Romano cheeses. Baked to golden perfection and served alongside a vibrant, simple marinara sauce for dipping, homemade calzones are a cherished tradition in our kitchen, and we’re certain they’ll become a new favorite in yours too!
Discovering the Magic of Homemade Calzones
For those who frequently visit our culinary corner, you’ll know our profound appreciation for pizza dough. Its versatility truly knows no bounds, offering a canvas for countless delicious creations. Among these, the cheese calzone stands out as a particularly rewarding and incredibly satisfying way to transform simple dough into a spectacular meal. It’s more than just a folded pizza; it’s a distinct culinary experience, offering a delightful interplay of textures and flavors.
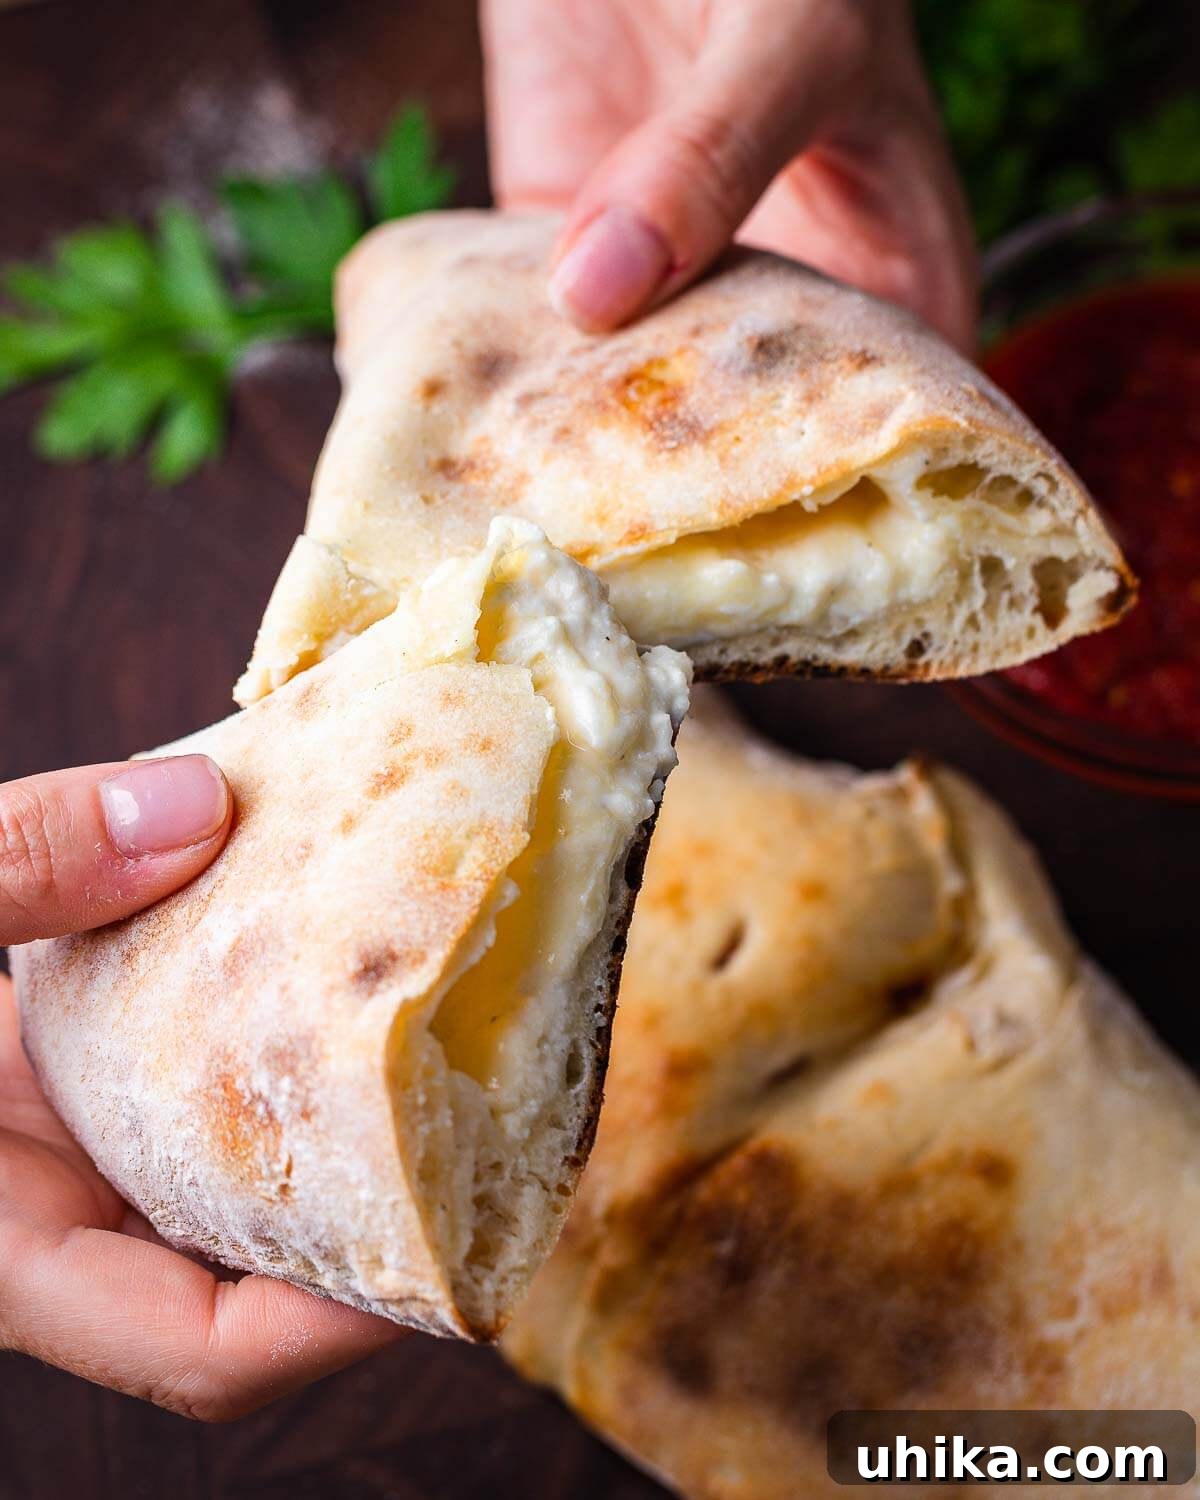
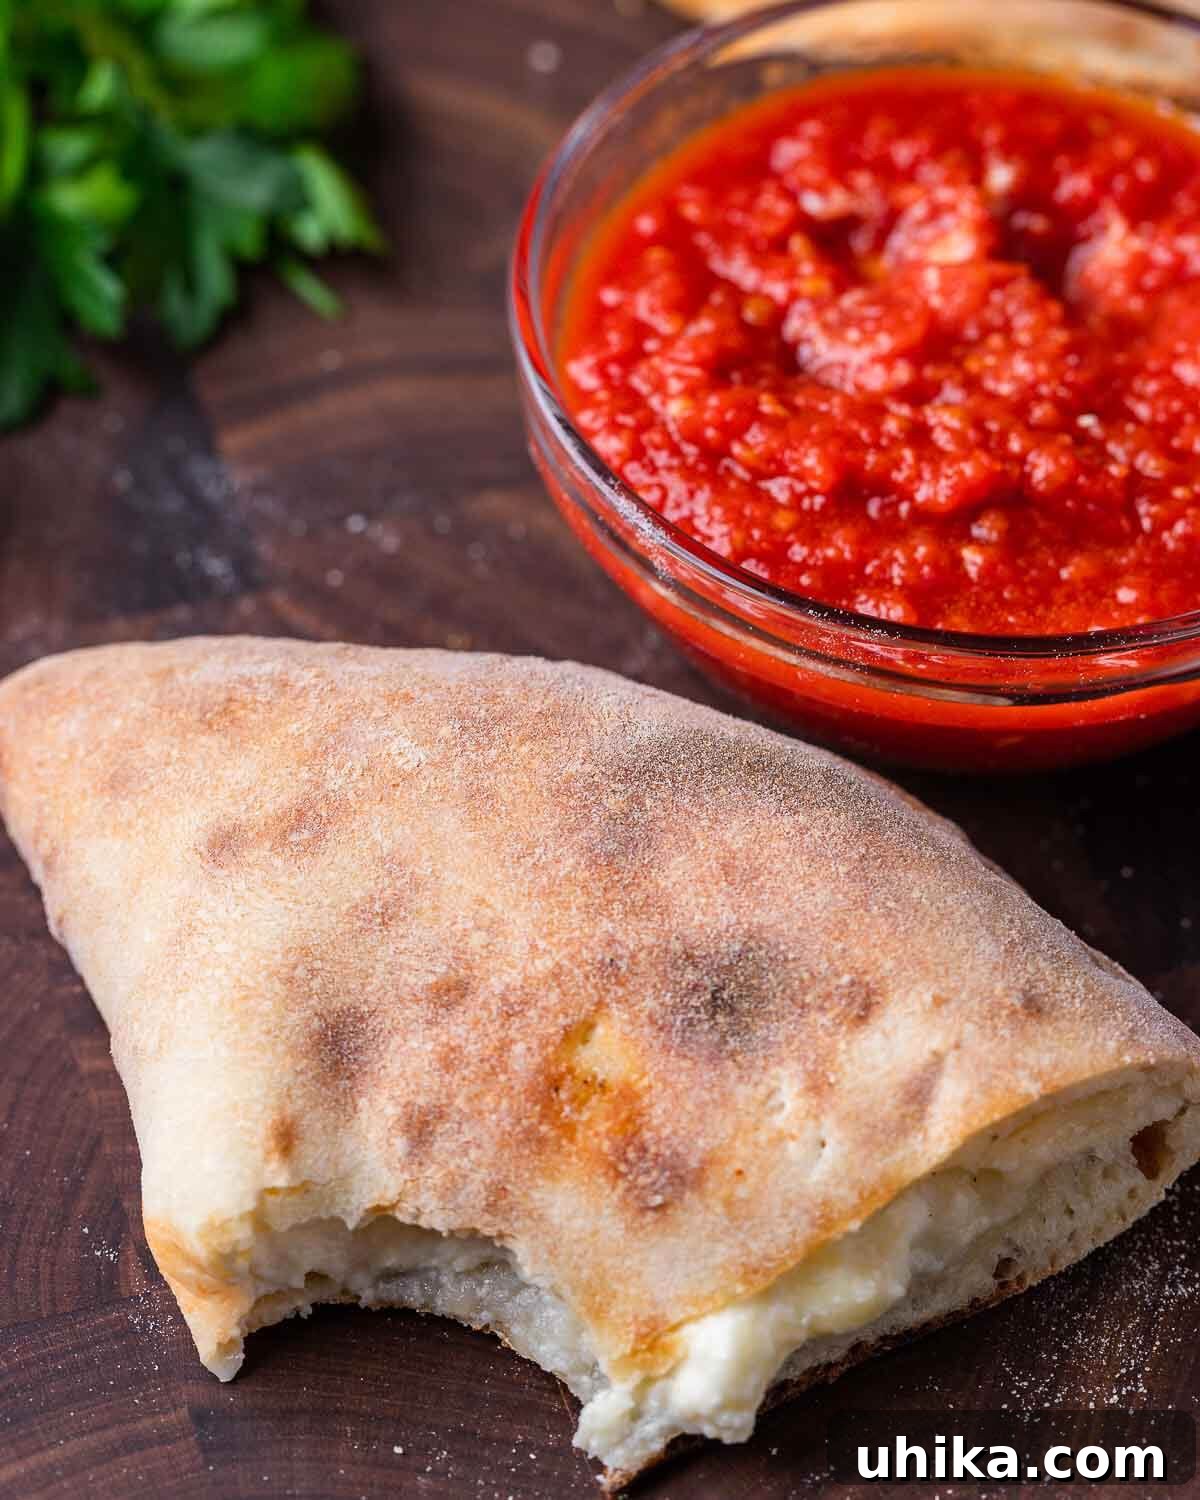
Our recipe guides you in crafting calzone pockets with a signature golden, leopard-spotted crust that boasts a perfect chewiness. Inside, a harmonious blend of creamy ricotta, melty mozzarella, and sharp Pecorino Romano awaits. We’ve refined our process to provide you with several options, ensuring you can achieve authentic New York pizzeria-quality calzones right in your own home. These delectable pockets are traditionally served with a side of robust, garlicky marinara sauce – perfect for dipping. This New York style contrasts with the Italian tradition, where the sauce is often baked directly inside the calzone. Both are delicious, but for that classic NYC experience, a side of sauce is key.
The Signature Cheese Blend: Our Secret to Irresistible Calzones
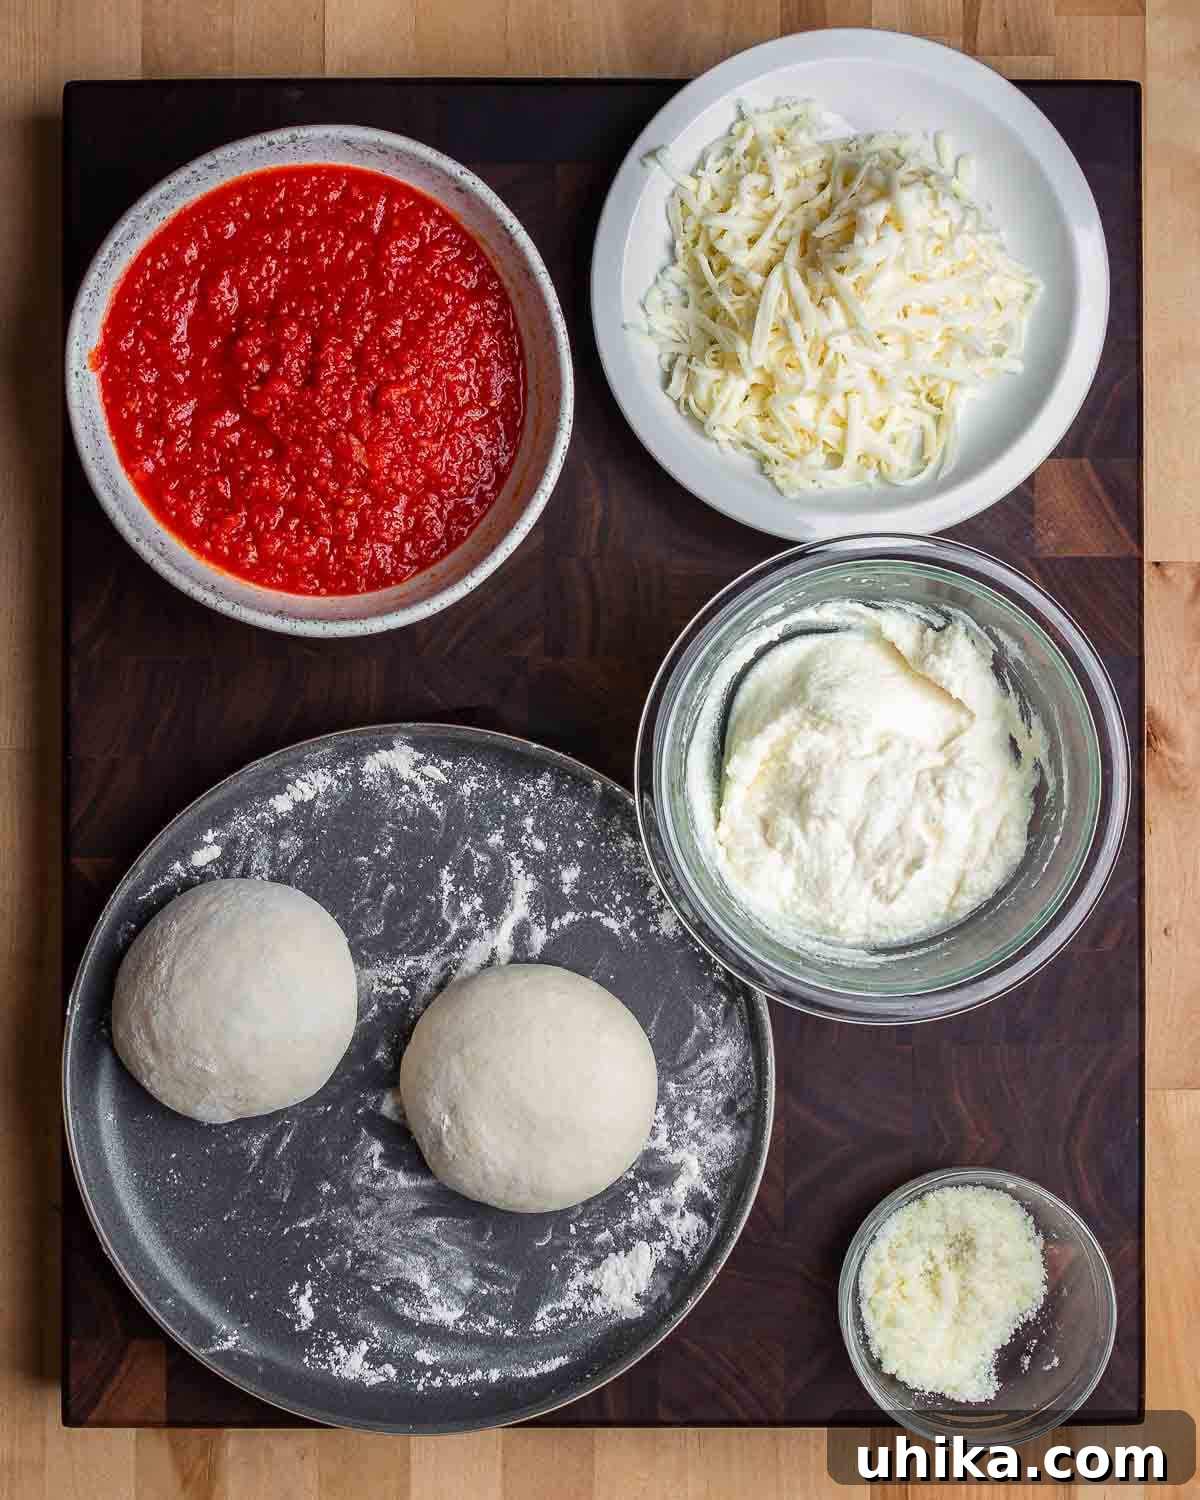
The heart of any great cheese calzone lies in its filling, and ours is designed for maximum flavor and creaminess. We meticulously select a trio of cheeses, each contributing its unique characteristics to create a balanced and utterly delicious experience.
- Ricotta Cheese: This is the creamy foundation of our filling. Its delicate, slightly sweet flavor and smooth texture bind the other cheeses together, creating a luxurious mouthfeel. For the best results, we emphasize the importance of draining your ricotta overnight. Excess moisture can make your calzone soggy and prone to bursting during baking, so a dry ricotta is crucial for a perfect consistency.
- Mozzarella Cheese: The quintessential pizza cheese, mozzarella brings that irresistible stretch and mild, milky flavor to the calzone. We recommend using low-moisture, block mozzarella and shredding it yourself, as pre-shredded varieties often contain anti-caking agents that can affect melt and texture. Its gooey nature ensures a satisfying pull with every bite.
- Pecorino Romano Cheese: To add a punch of savory depth and a delightful tang, we incorporate grated Pecorino Romano. This aged sheep’s milk cheese provides a salty, sharp counterpoint to the milder ricotta and mozzarella, elevating the overall flavor profile. A little goes a long way in adding that authentic Italian flair.
Together, these cheeses melt into a warm, comforting mixture that perfectly complements the chewy, flavorful crust. Seasoned simply with a touch of salt and freshly ground black pepper, this filling is truly the star of our pizzeria-style calzone.
Crafting Your Calzone: A Step-by-Step Visual Guide
Follow these detailed instructions to create perfect pizzeria-style calzones. Each step is designed to guide you through the process, from preparing your dough to achieving that ideal golden crust.
Important Note: This guide assumes you have already prepared your pizza dough and marinara sauce. For your convenience, our comprehensive recipes for homemade New York-style pizza dough and easy marinara sauce are available separately. Alternatively, you are welcome to use quality store-bought dough and sauce to streamline your cooking process.
- Prepare the Dough and Oven: Approximately 2 hours before you plan to make your calzones, remove the dough balls from the refrigerator. Allow them to come to room temperature, which makes them easier to work with and ensures better elasticity. If you’re using a baking or pizza steel, position it on a rack about 7 inches below the top of your oven. Preheat your oven to a scorching 525°F (275°C) for a full 45-60 minutes. This extended preheating ensures the steel reaches and maintains its high temperature, crucial for a crispy crust. Carefully remove the dough balls from their containers, trying to maintain their natural round shape. Lightly dust both sides of each dough ball with flour, and similarly dust your work surface to prevent sticking. The side of the dough that was resting at the bottom of the proofing container (usually slightly stickier) will become the top of your calzone. Begin to gently stretch the dough by pressing your fingertips into the center and slowly working your way outwards in a circular motion. You can also carefully hold the edge of the dough and let gravity assist in stretching it.
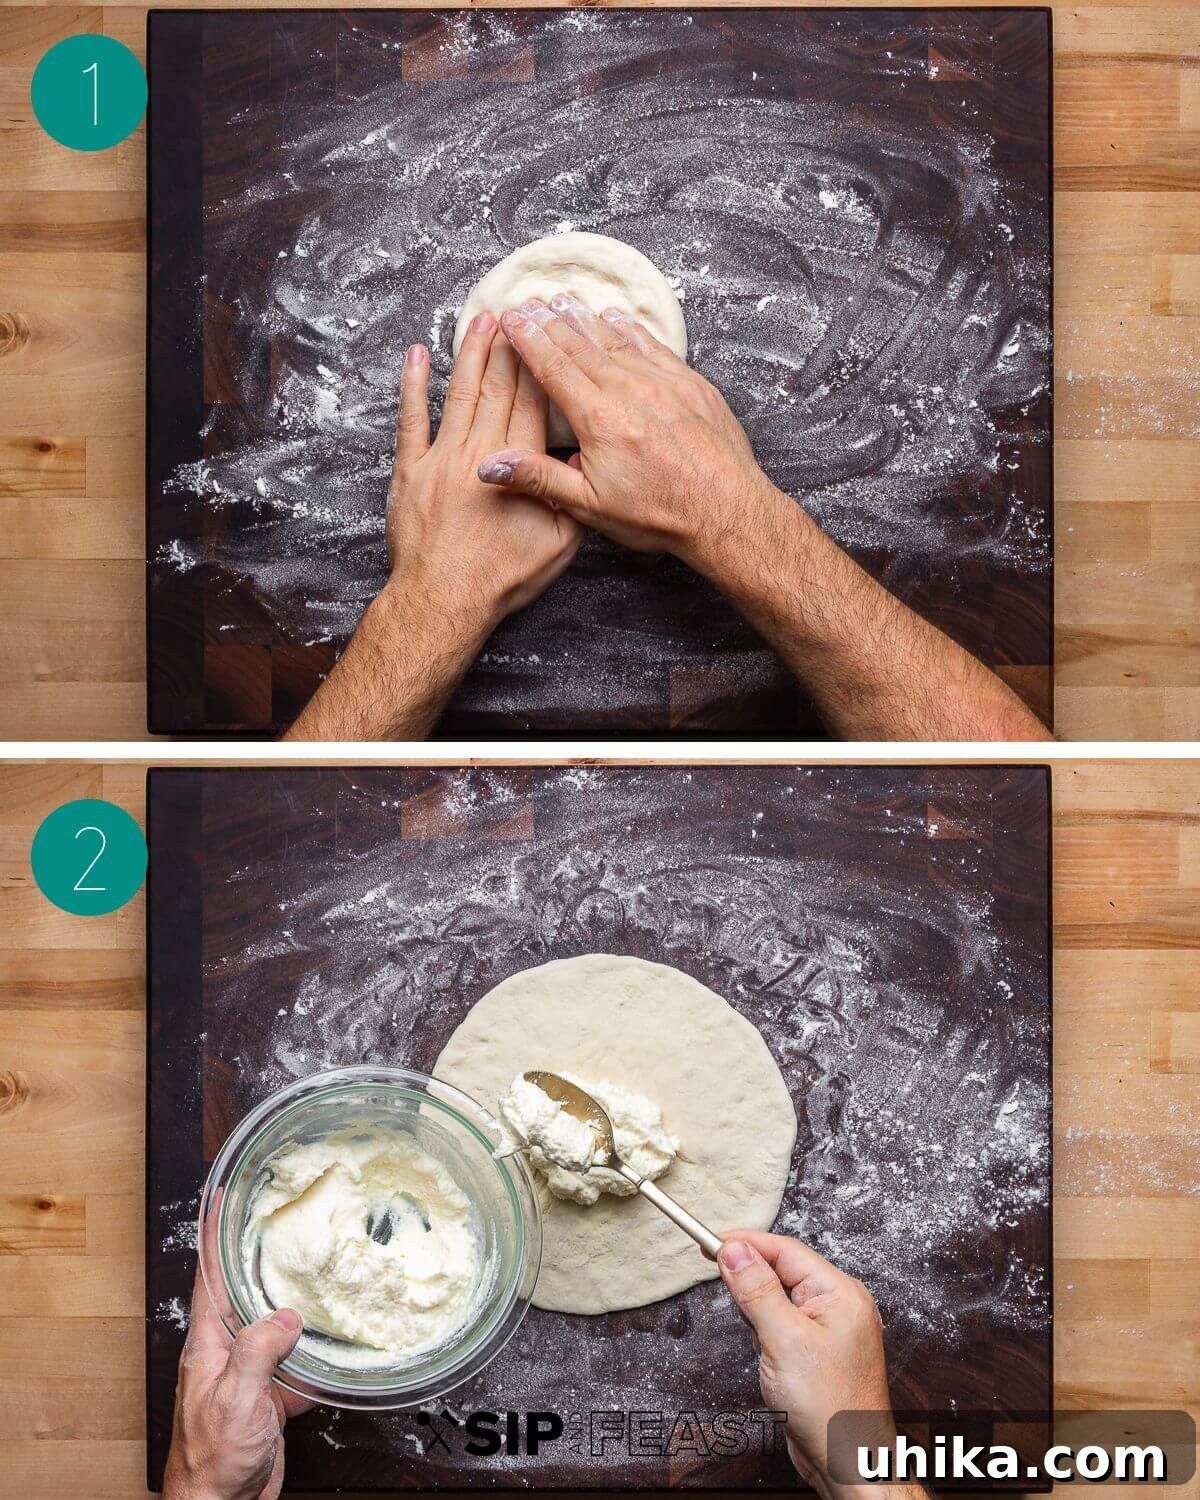
- Shape the Dough and Add Ricotta: Continue to stretch the dough until it forms a circle roughly 8-10 inches in diameter. Aim for an even thickness throughout the circle, ensuring a consistent bake. Once your dough is stretched, spoon about 3 ounces of your thoroughly strained ricotta cheese into the center of the circle. Straining the ricotta, ideally overnight, is vital to prevent a watery filling that could lead to a soggy calzone.
- Layer the Mozzarella: Take approximately 1/2 cup of shredded mozzarella cheese and gently ball it in your hand. This helps to create a cohesive layer of cheese that will melt beautifully. Place this mozzarella “ball” directly on top of the ricotta in the center of the dough.
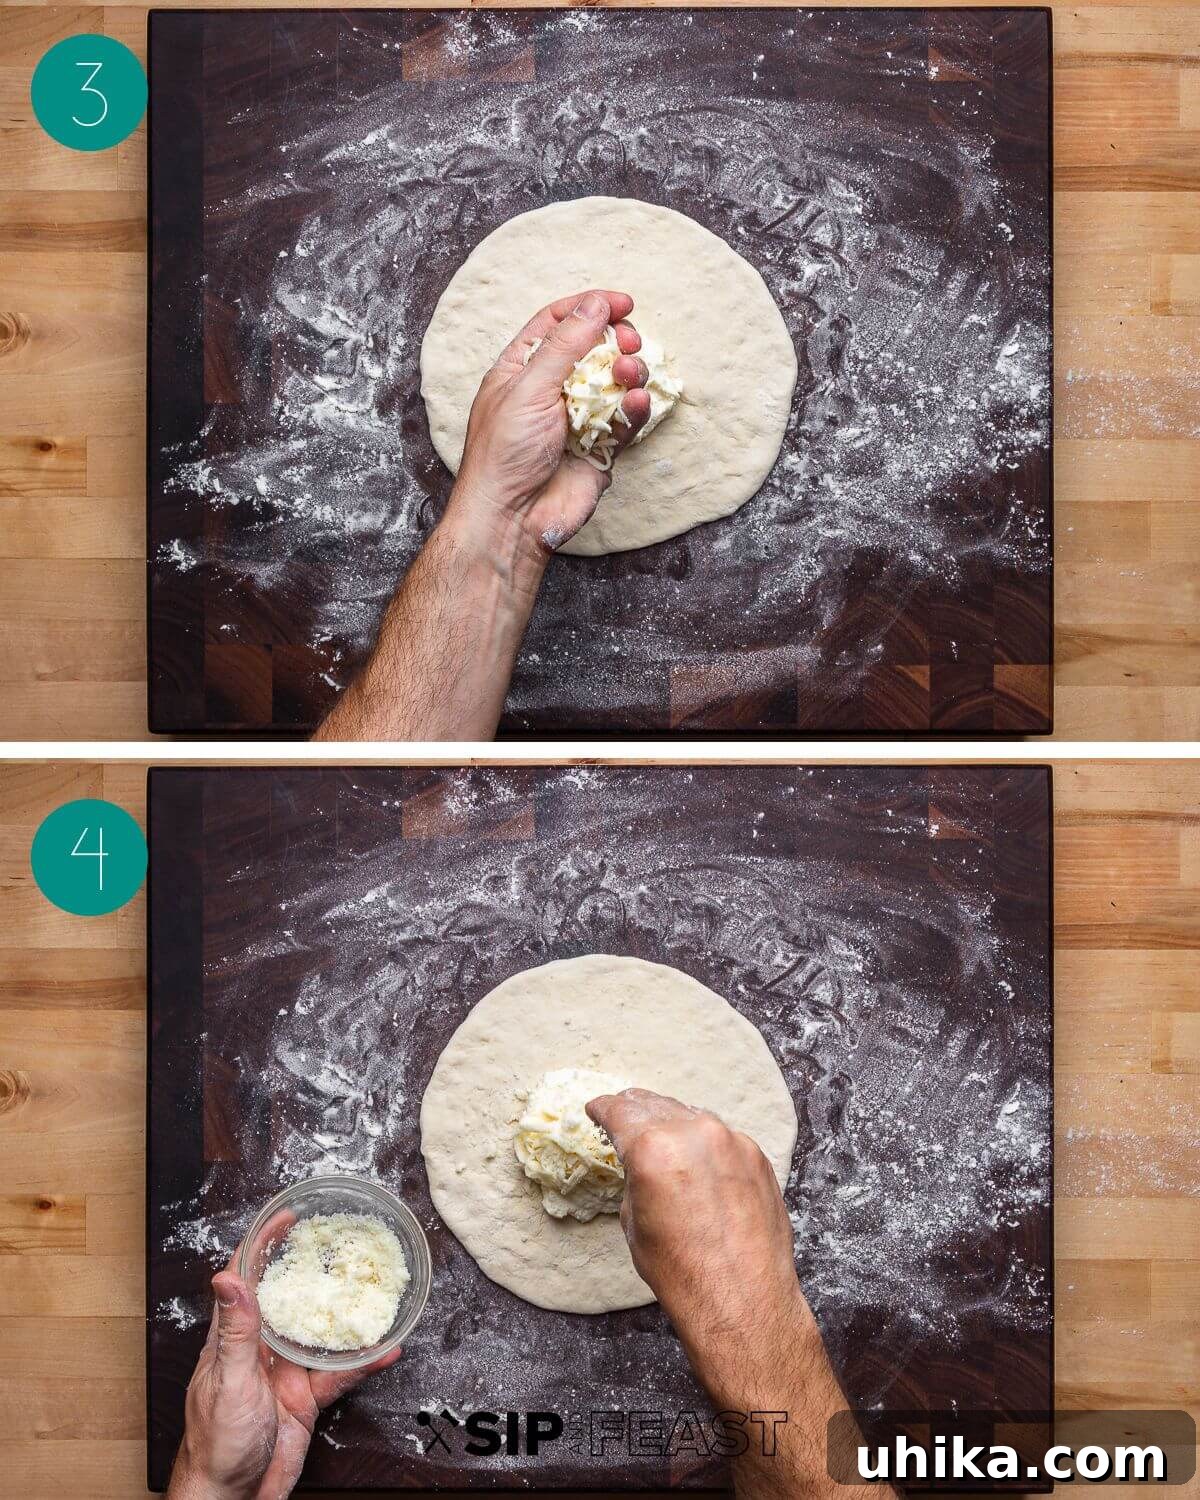
- Season the Filling: Generously sprinkle about 1 tablespoon of grated Pecorino Romano cheese over the mozzarella and ricotta. This adds a wonderful salty and tangy depth. Finish with a pinch of salt and freshly ground black pepper to taste, enhancing all the flavors.
- Fold and Seal: Lightly moisten the edges of the dough with a touch of water using your fingertips. This acts as a natural glue, helping the dough seal securely. Carefully fold one half of the dough over the cheese filling to meet the other edge, creating a perfect half-moon shape.
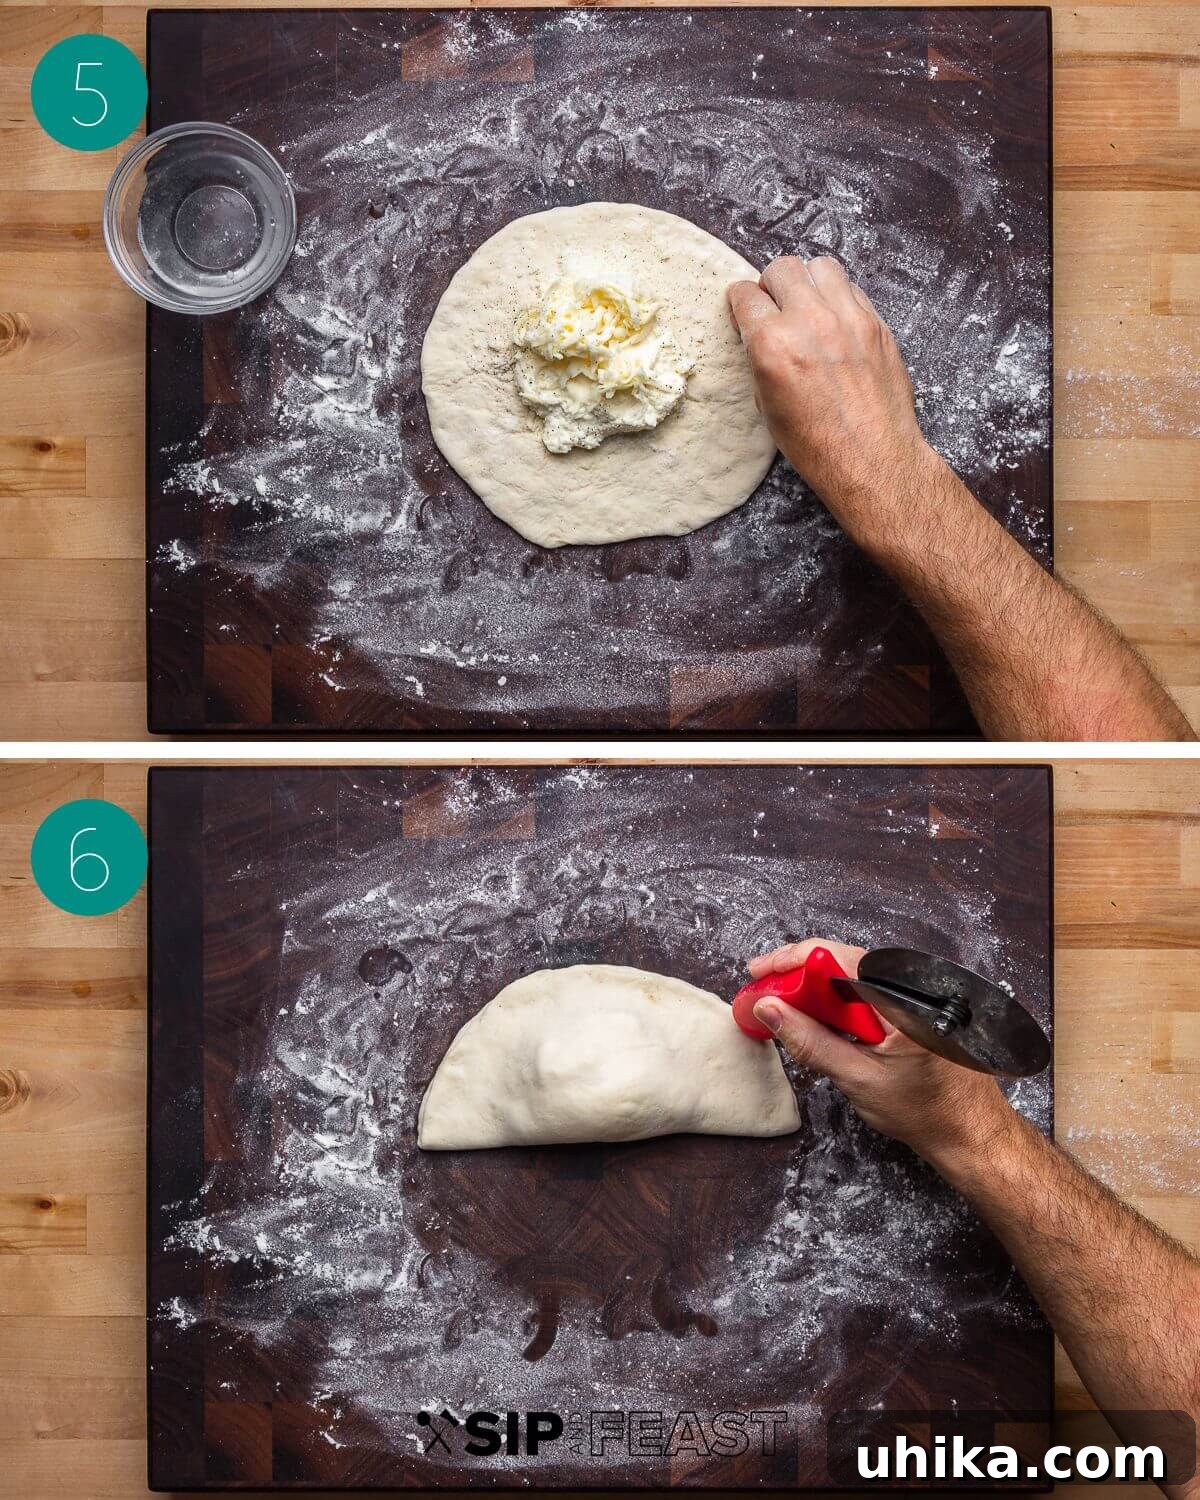
- Crimp the Edges: To ensure the cheese filling remains securely inside during baking, use a spoon, a fork, or the blunt end of a pizza cutter to press tightly along the sealed edges. This crimping creates a strong, decorative seal, preventing any delicious cheese from oozing out.
-
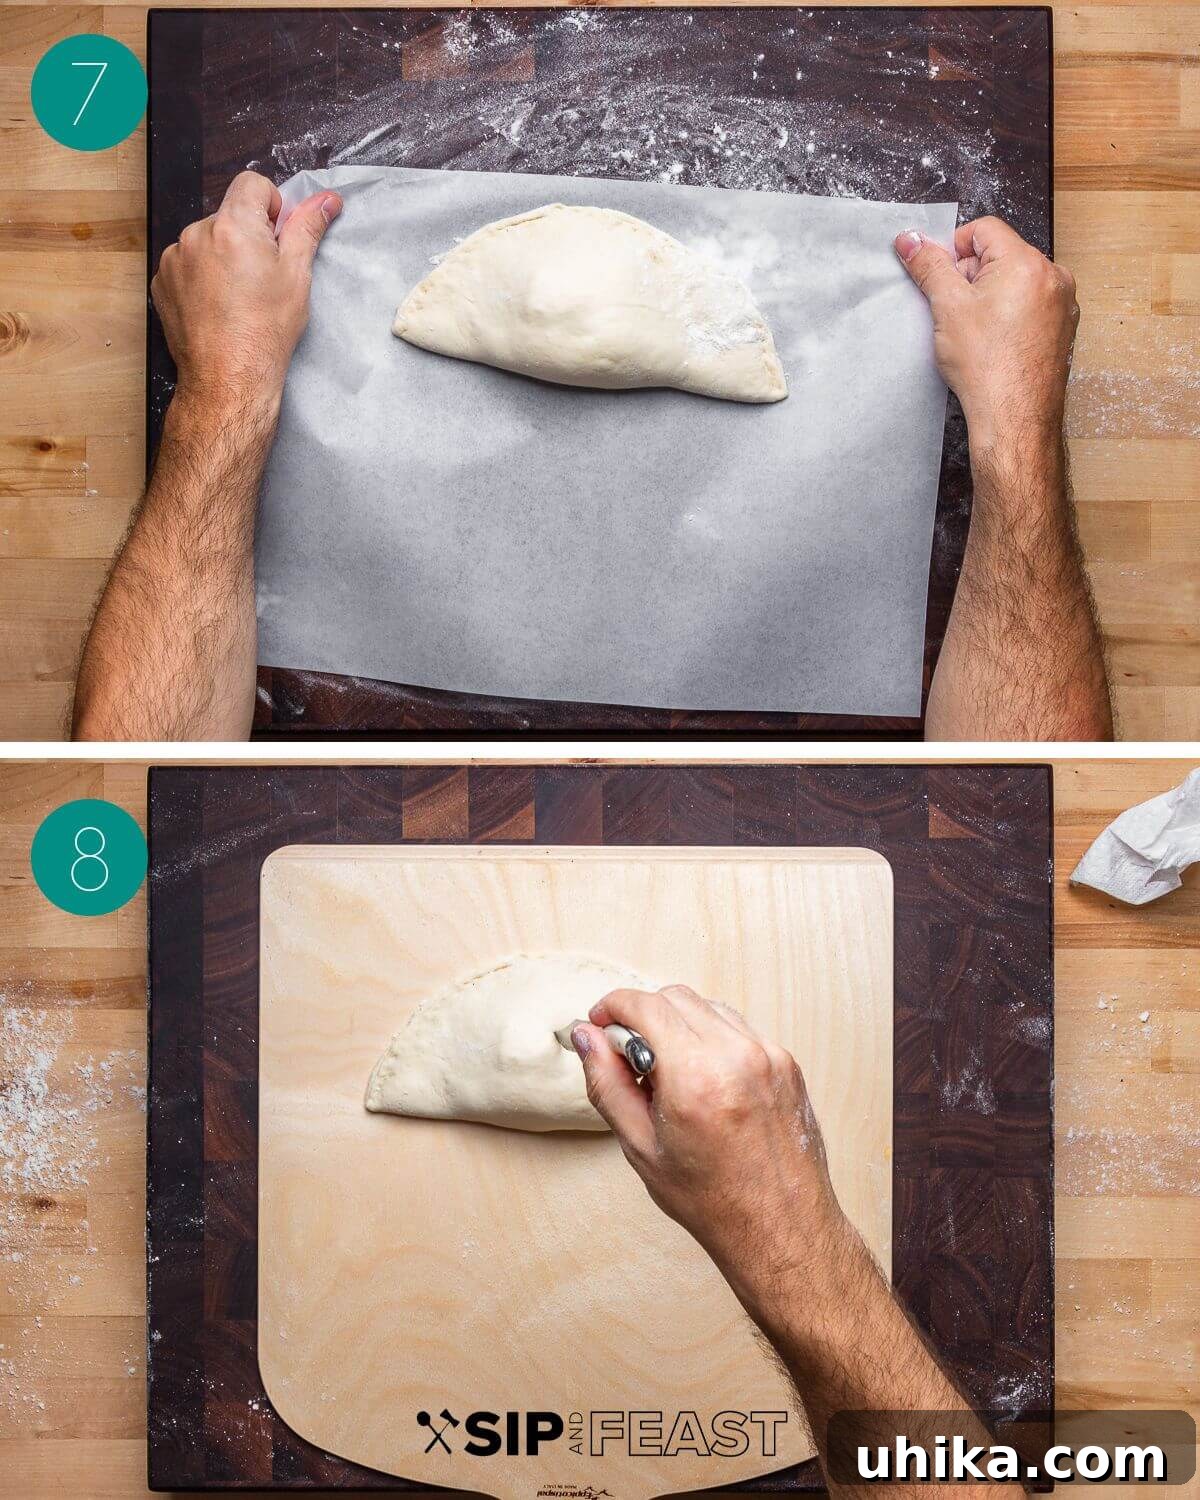
Prepare for Launching: Lightly dust a wooden pizza peel with semolina flour. Semolina’s coarser texture acts like tiny ball bearings, allowing the calzone to slide effortlessly without sticking, which is crucial for a smooth transfer to the hot oven. If you prefer, slide the calzone onto a sheet of parchment paper first, then transfer the parchment paper with the calzone onto the wooden pizza peel. This can make the transfer process less daunting for beginners.
Note: You might find it easier to perform the entire dough stretching and filling process directly on the semolina-dusted wooden pizza peel, or on a sheet of parchment paper, rather than on a cutting board as sometimes depicted. Choose the method that feels most comfortable and efficient for you.
-
Final Prep and Initial Bake (Pizza Steel): Once the calzone is on the dusted peel (or parchment on the peel), use a sharp knife to carefully cut a small slit into the top of the calzone. This allows steam to escape during baking, preventing the calzone from puffing up excessively and potentially bursting. Lightly brush the top of the calzone with a bit of olive oil; this will contribute to a beautiful golden-brown crust. Before launching, give the peel a gentle shake to ensure the calzone moves easily and won’t stick.
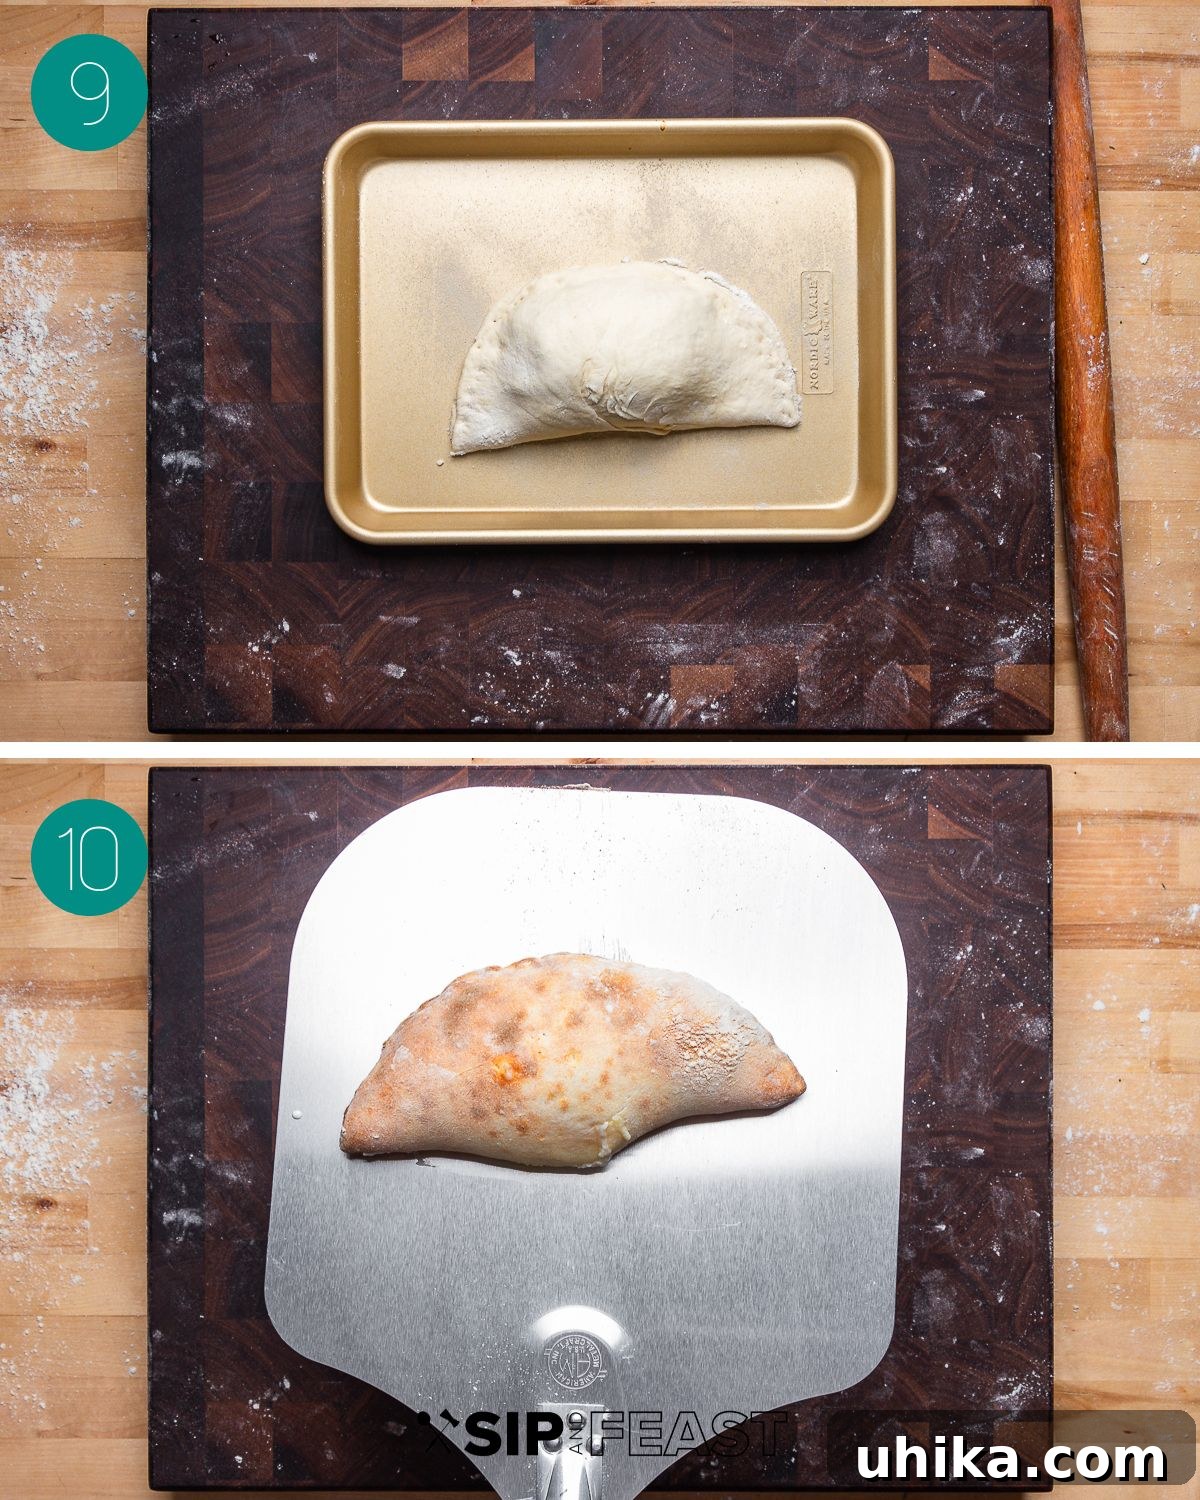
Carefully slide, or “launch,” the calzone from the peel directly onto the preheated pizza steel. Bake for approximately 6-8 minutes. After about 3 minutes, use a metal peel to turn the calzone 180 degrees. This promotes more even cooking and browning. If you are making multiple calzones (this recipe yields 4), you can typically cook 2 calzones on the steel at the same time. Simply repeat the process for the remaining calzones. - Alternative Baking Method (Baking Sheet): If you are not comfortable launching dough with a pizza peel, or if you don’t own a pizza steel, you can achieve excellent results by baking your calzones on a baking sheet. Place the baking sheet in the middle to upper level of your oven. Avoid placing it on the bottom rack, as this will almost certainly result in a burnt bottom crust. When using a baking sheet instead of direct contact with a steel, you’ll likely need to extend the baking time by approximately 2 minutes. The differences in crust color and texture between these two methods are minor and often negligible, as illustrated below. You will still achieve a wonderfully cooked calzone.
- Rest and Serve: Once baked to a beautiful golden-brown, remove the calzone from the steel (or baking sheet) using the metal peel. Crucially, allow the calzone to rest for 8-10 minutes before cutting into it. This resting period allows the incredibly hot cheese filling to set, preventing it from oozing out excessively and creating a messy situation. Serve your piping hot calzones with a generous side of your favorite marinara sauce for dipping. Enjoy the delicious fruits of your labor!
- Comparing Baking Surfaces (Top Crust): In this image, you can observe the subtle difference in color and leopard-spotting on the top crust of calzones baked on a pizza steel versus those baked on a baking sheet. While the pizza steel often produces a slightly more pronounced char and crisp, the baking sheet still yields a beautifully golden and delicious top crust, proving that both methods deliver excellent results.
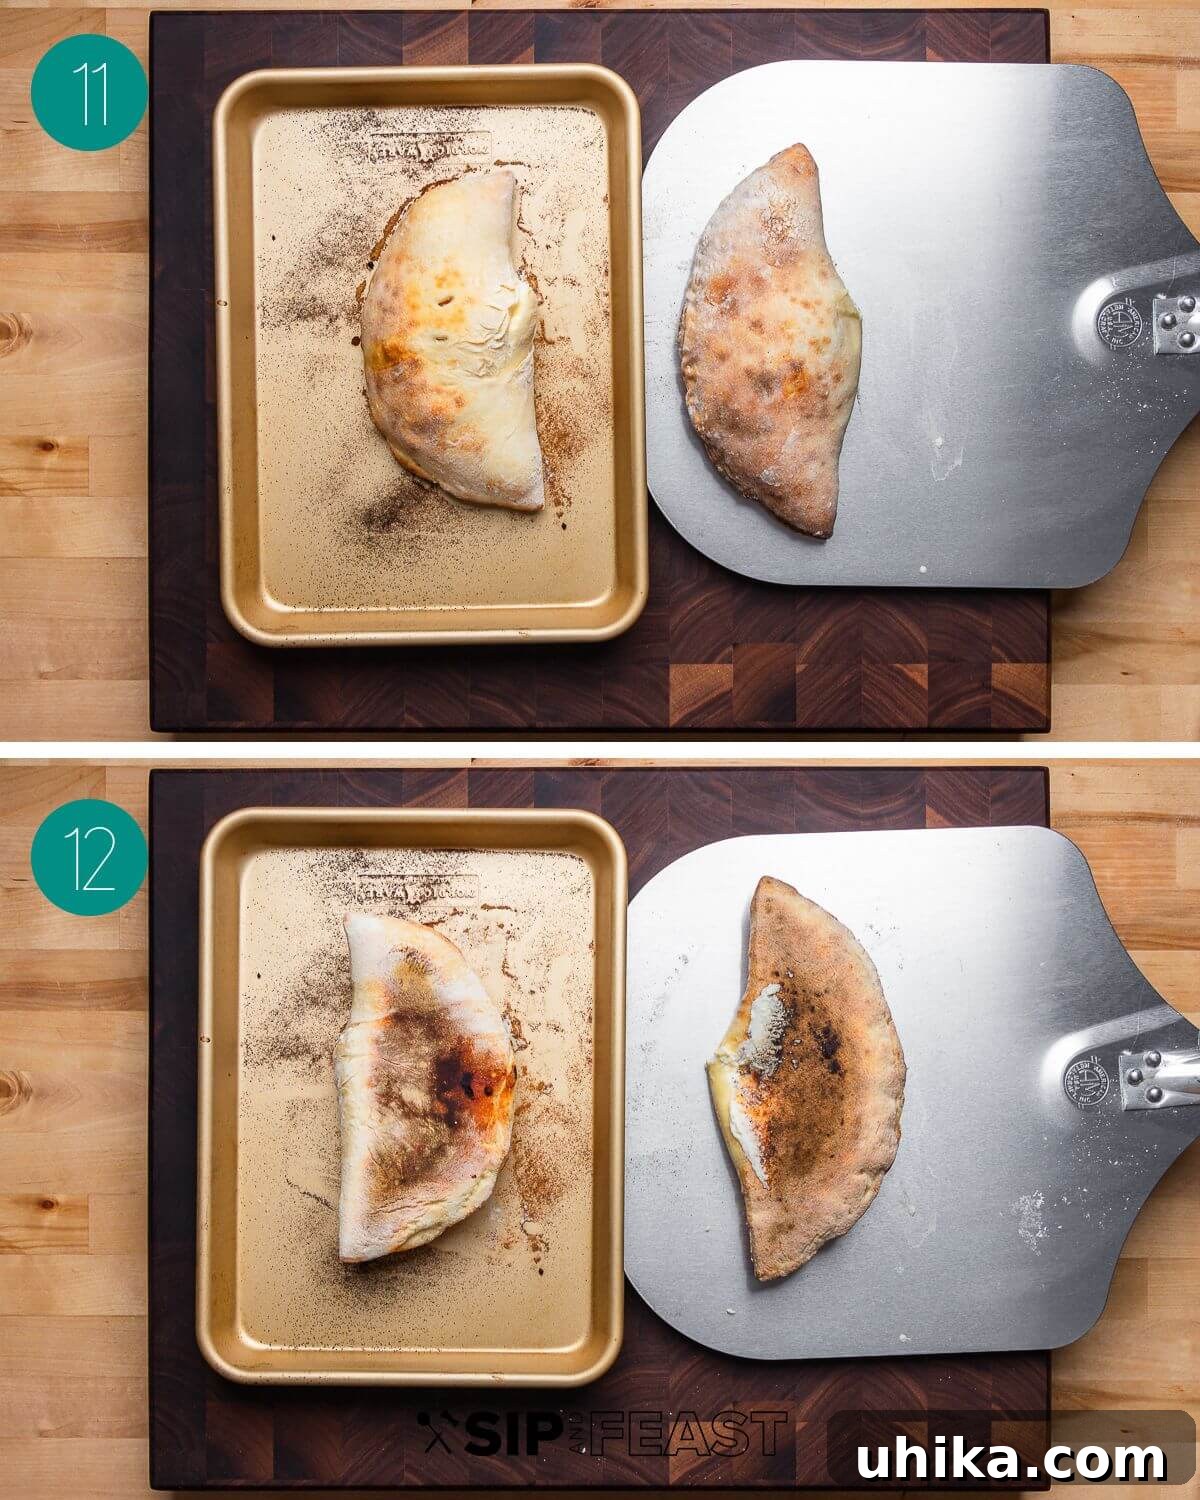
- Comparing Baking Surfaces (Bottom Crust): Here, the difference in the coloring and crispness on the bottom of the calzone is generally more significant between a pizza steel and a baking sheet. A pizza steel, with its superior heat retention and direct contact, often creates a more deeply browned, crispier bottom crust with characteristic “leopard spots.” While a baking sheet might result in a less intensely browned bottom, it will still be thoroughly cooked and delicious. As mentioned, the choice depends on your comfort and equipment, and excellent results are achievable with either method.
Essential Tips for Pizzeria-Quality Cheese Calzones at Home
Achieving a truly exceptional homemade calzone is within reach with a few key techniques and considerations. Follow these expert tips to elevate your baking and consistently produce perfect, pizzeria-worthy results.
- The Foundation: Quality Pizza Dough: The crust is paramount to a great calzone. We passionately advocate for using homemade, cold-fermented pizza dough whenever possible. Our recommended standard pizza dough recipe yields four 6-ounce dough balls, perfectly sized for this recipe. If you use our recipe, ensure the dough undergoes at least 12 hours of cold fermentation in the refrigerator; a 24-hour fermentation will further develop its flavor and texture, resulting in an even more delicious crust. Cold fermentation not only enhances taste but also makes the dough easier to handle. If time is a constraint, a high-quality store-bought dough or even dough procured from a reputable local pizzeria makes an excellent substitute. Regardless of its origin, always allow your dough to sit at room temperature for at least 2 hours before stretching and filling. This relaxation period is crucial for dough elasticity and ease of handling.
- The Creamy Heart: Perfectly Drained Ricotta: The quality and preparation of your ricotta cheese are critical for a creamy, not watery, filling. For the best possible results, we strongly advise draining your ricotta in a colander or fine-mesh sieve, ideally overnight in the refrigerator. This process removes excess whey, preventing your calzone from becoming soggy and potentially bursting during baking. If you’re pressed for time, you can place the ricotta in a large piece of cheesecloth and gently squeeze out the moisture. Be aware that some ricotta brands, like Polly-O, tend to be naturally wetter and will require more draining time. Other brands, such as Galbani or Calabro, often have a drier consistency and may need less drainage.
-
Mastering the Heat: Prep and Baking Surface: We’ve outlined a couple of options for both preparing and baking your calzones, each with its own advantages.
- Pizza Steel Method (Recommended for Crispness): The most straightforward and effective method for achieving a wonderfully crisp, leopard-spotted crust is to prepare your calzone directly on a semolina-dusted wooden pizza peel and then launch it onto a preheated pizza steel. Semolina flour is indispensable here; its coarse texture acts as tiny ball bearings, allowing the calzone to slide effortlessly. Before launching, always give the peel a gentle shake to confirm the calzone moves freely. The intense, even heat of a pizza steel mimics a professional pizza oven, delivering superior crust development.
- Baking Sheet Method (User-Friendly Alternative): If you don’t own a pizza steel or are not comfortable with the launching technique, baking on a quality baking sheet is a fantastic alternative. Prepare your calzone on a lightly floured surface or directly on parchment paper, then transfer it to the baking sheet. When using a baking sheet, the baking time will typically increase by about 2 minutes. We recommend placing the sheet in the middle to upper half of the oven to prevent the bottom from burning while still achieving good browning. For enthusiasts, detailed instructions for making your own pizza steel from raw steel are available, or you can purchase a ready-made pizza steel or pizza stone.
- Creative Calzone Fillings: While this recipe focuses on a classic cheese-only calzone, the possibilities for customization are endless! Feel free to experiment by adding other delicious ingredients. Popular choices include thinly sliced Italian deli meats such as ham, salami, prosciutto, or capicola. Cooked vegetables like sautéed mushrooms, spinach (ensure it’s well-drained), or caramelized onions can also add wonderful flavor and texture. Just remember not to overfill, and ensure any added vegetables are pre-cooked and not overly watery.
- The Critical Rest: Patience is a Virtue: Much like baked pasta dishes such as lasagna, allowing your calzone to rest after baking is incredibly important. For these cheese calzones, we recommend a resting period of approximately 8-10 minutes before slicing and serving. This allows the internal cheese filling, which is bubbling hot and very fluid straight out of the oven, to cool slightly and set. Skipping this step often results in the cheese oozing out into a messy puddle upon the first cut, diminishing the enjoyment. A little patience ensures a perfect, contained, and creamy filling.
Beyond the Calzone: More Delectable Pizza Dough Creations
If you’ve fallen in love with making cheese calzones and are eager to explore the vast potential of pizza dough, you’re in for a treat! Pizza dough is an incredibly versatile ingredient, forming the base for an array of delightful Italian-American dishes. Consider trying these other fantastic recipes that transform simple dough into exciting meals and snacks.
- Pizza Fritta – A Neapolitan street food classic featuring fried pizza dough, often topped with sweet or savory ingredients.
- Panzerotti – Similar to a calzone but typically smaller and deep-fried until gloriously golden and puffy.
- Pepperoni Pinwheels – Fun and flavorful spirals of pizza dough rolled with pepperoni and cheese, perfect as an appetizer or snack.
- Stromboli – A hearty Italian-American turnover, packed with various Italian meats and cheeses, baked until golden and served with marinara for dipping.
We hope you thoroughly enjoy creating and savoring this pizzeria-style cheese calzone recipe. If you’ve tried this, or any other recipe from our site, please consider leaving a 5-star rating and a review to share your experience. Your feedback helps us continue to provide delicious and inspiring recipes!
To accommodate various learning styles, most of our recipes are also available in video format. You can find us on YouTube and our Facebook Page for visual guidance and additional culinary inspiration.
Cheese Calzone
James Delmage
10
mins
55
mins
1
d
1
d
1
hr
5
mins
4
calzone

Pin
Ingredients
For four 6-ounce pizza dough balls
- 406 grams bread flour or 3 1/4 cups
- 2 grams instant yeast or half teaspoon
- 8 grams fine sea salt or 1 1/2 teaspoons
- 4 grams sugar or 1 teaspoon
- 260 grams cold water 9 ounces
- 14 grams olive oil or 1 tablespoon
For the marinara sauce
- 1/4 cup olive oil
- 5 cloves garlic sliced
- 1/4 teaspoon crushed hot red pepper flakes
- 1 28-ounce can crushed plum tomatoes
- 1 teaspoon Sicilian oregano
- 1 salt and pepper
For the calzone
- 4 6-ounce pizza dough balls from above or use store bought dough
- 4 tablespoons Pecorino Romano grated, divided
- 2 cups block mozzarella cheese shredded
- 1 pound ricotta drained overnight
- salt and pepper to taste
- semolina flour for launching
Instructions
For the dough balls
-
Place water in a bowl large enough to hold both the water and all the dry ingredients and still have room to spare. Mix together dry ingredients in another bowl.
-
Add dry ingredients to water a bit at a time and mix thoroughly to form a dry rough mass.
-
Pour the oil over the dough, mix again to scrape off any dough residue stuck to side of the bowl, and place the rough shaggy dough onto a work surface.
-
Knead the dough for 5-7 minutes. If the dough is too sticky, place a clean bowl inverted over the dough and wait 30 minutes before resuming. Return to kneading (just make sure to knead for at least a total of 5 minutes).
-
Place the bowl over the dough once more and let sit for 30-40 minutes to warm up before forming the dough ball.
-
After 40 minutes divide into 4 equal-weight balls. Pull each dough ball towards its end repeatedly to form a smooth ball. Pinch the seam side and place the dough balls seam side down into an oiled bowl (using individual containers or a large proofing box works best) and cover tightly with plastic wrap. Refrigerate for at least 12 but ideally 24 hours before using.
For the marinara sauce
-
In a saucepot, saute the garlic in olive oil over medium-low heat until golden (about 2-3 minutes).
-
Add the hot red pepper flakes and cook for 30 seconds more. Add the plum tomatoes and bring sauce to a simmer. Simmer for 5-7 minutes then season with oregano and salt and pepper to taste.
For the calzone
-
Remove dough balls 2 hours prior to making each calzone. Place the baking steel approx 7″ below the top of the oven and preheat oven to 525f for 45-60 minutes.
-
Dust wooden peel with semolina flour. This will help launch the calzone without sticking.
-
Remove dough ball from the container (trying to maintain round shape) and dust both sides with flour. The stickier side of the dough (bottom of proofing container) will be the top of the calzone.
-
Stretch the dough by pressing your fingers into the dough and turning in a circular motion. You can hold the dough and use gravity to stretch it as well. Form a circle roughly 8-10”. Once satisfied with the stretching place dough onto the wooden peel and make sure it moves easily.
-
Place the ricotta (about 3 ounces) into the center of the circle and sprinkle with Pecorino Romano cheese. Take around a 1/2 cup of shredded mozzarella cheese and ball it with your hands. Place the mozzarella ball on top of the ricotta. Season the mozzarella and ricotta with a sprinkle of salt and pepper.
-
Wet the edges of the dough with a touch of water then fold the dough over to create a half moon shape. With a spoon, fork, or handle end of a pizza cutter press tightly to form a seal.
-
Cut a slit into the top of the calzone to allow air to escape. Brush a bit of olive oil on top of the calzone. Make sure the calzone moves easily before launching in the next step. 2 calzones can be cooked on the steel at the same time. Repeat process for a total of 4 calzone.
-
Launch the calzone onto the pizza steel and cook for roughly 6-8 minutes. Turn the calzone with a metal peel at the 3-minute mark to achieve even cooking. Note: the calzone can be cooked on a baking sheet (will take about 2 minutes longer) if you don’t want to attempt the launching process.
-
After removing the calzone wait 8-10 minutes before cutting so that the cheese doesn’t ooze out completely. Serve with marinara sauce. Enjoy!
Notes
- Any pizza dough can be used. For this recipe, we used 24 ounces of our standard pizza dough which makes four 6-ounce dough balls.
- The calzone can be cooked on a baking sheet but will take 1-2 minutes longer than on a pizza steel or stone. If you feel uneasy about the launching process this is a good option.
- Use your own premade marinara or store-bought to skip the sauce preparation step.
- Ham, salami, soppressata, capicola, and other meats can be added.
- Leftovers can be saved for up to 3 days in the refrigerator and should be reheated in the oven at 350f until hot.
Nutrition
Calories:
988
kcal
|
Carbohydrates:
78.2
g
|
Protein:
26
g
|
Fat:
63.6
g
|
Saturated Fat:
20.1
g
|
Cholesterol:
42
mg
|
Sodium:
1300
mg
|
Potassium:
127
mg
|
Fiber:
5.8
g
|
Sugar:
0.6
g
|
Calcium:
135
mg
|
Iron:
2
mg
Nutrition information is automatically calculated, so should only be used as an approximation.
Like this? Leave a comment below!
Check us out on Instagram at @sipandfeast or tag #sipandfeast!