
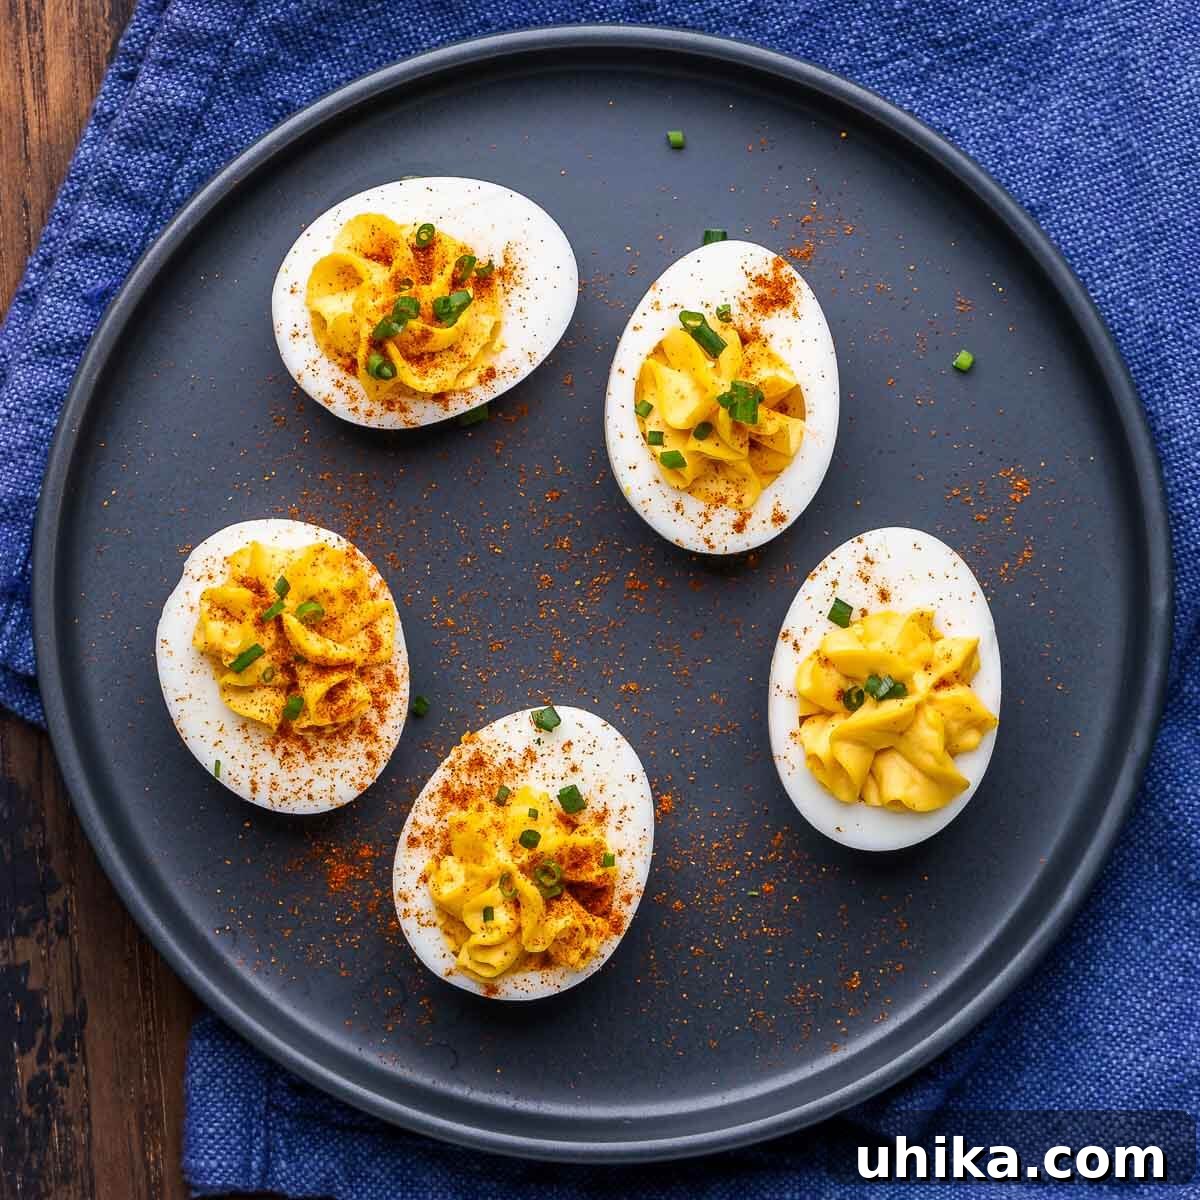
Indulge in the timeless charm of these classic Deviled Eggs! Renowned for their irresistibly creamy texture, delightful tangy flavor, and effortless preparation, deviled eggs are the quintessential appetizer for any gathering. Whether it’s a festive Easter brunch, a casual summer barbecue, an elegant cocktail party, or any family get-together, these bite-sized delights are always a crowd-pleaser that vanish quickly from the platter.
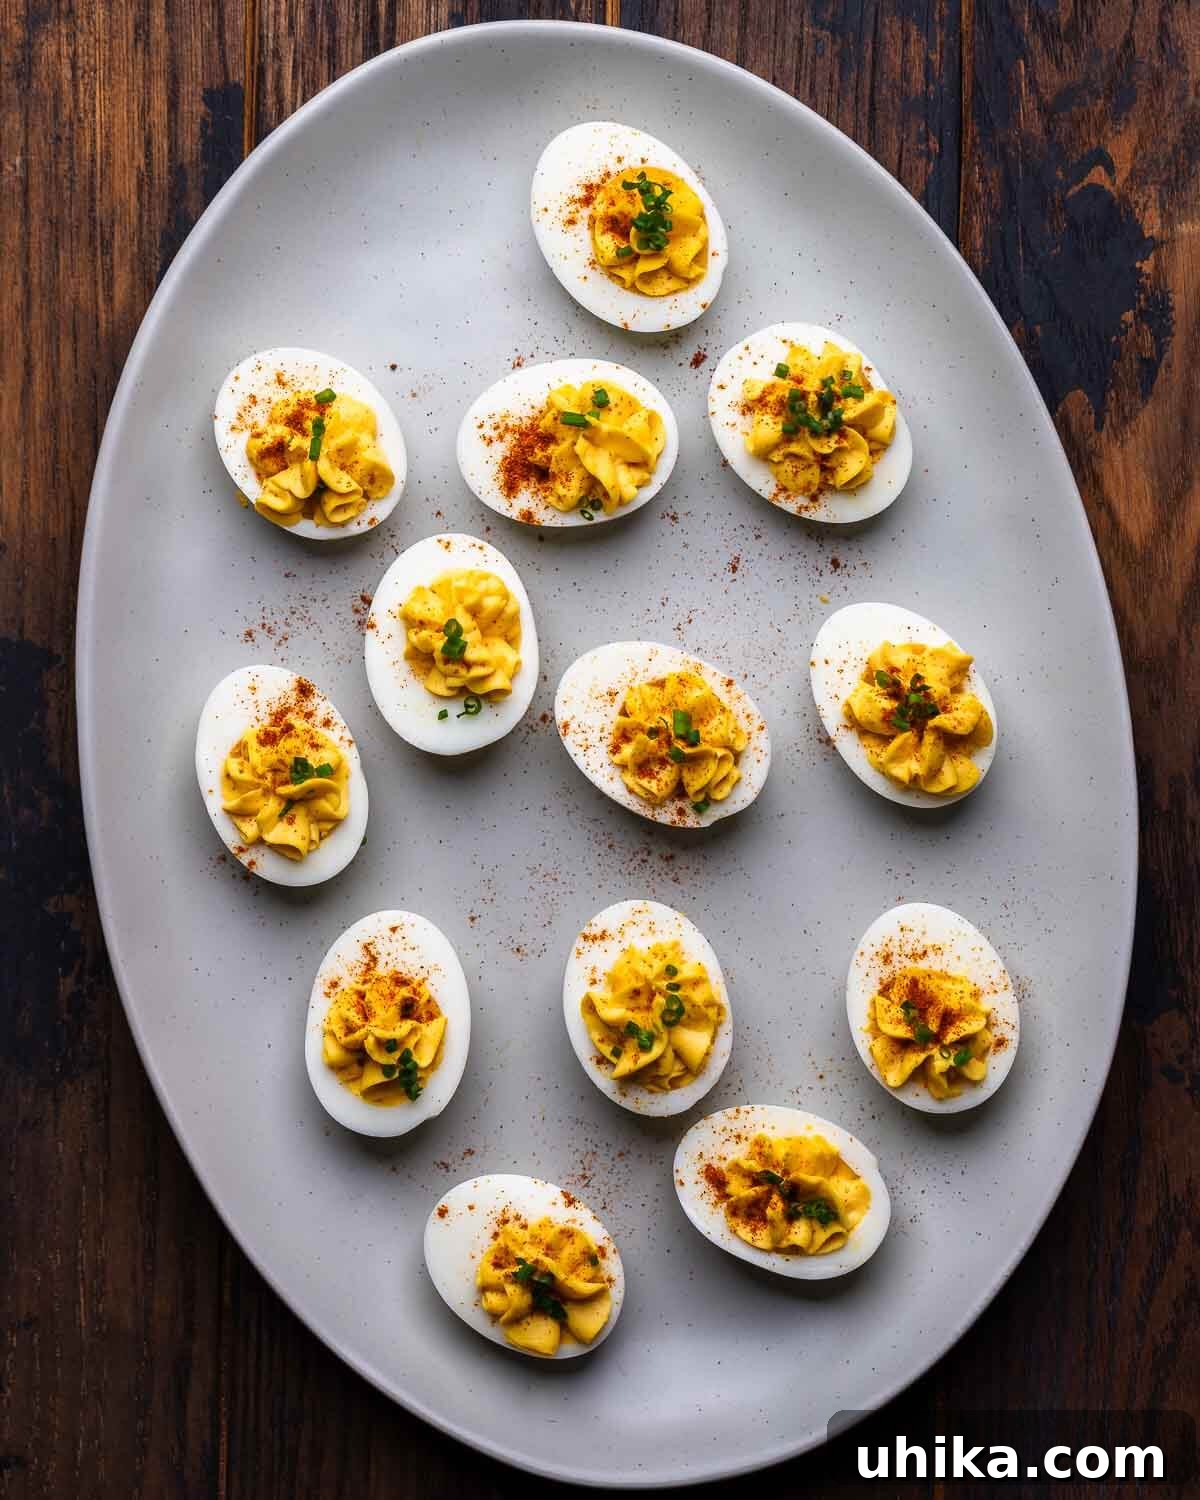
Deviled eggs hold a special place in many traditions, particularly around Easter. After the joyous occasion of coloring Easter eggs or baking elaborate treats like Italian Easter bread, you often find yourself with an abundance of perfectly hard-boiled eggs. Instead of letting them go to waste, transforming them into these savory appetizers is a cherished activity for the whole family. Kids adore helping with the mashing and filling, making it a fun kitchen project. Once served, their captivating taste makes it truly impossible to eat just one!
The history of deviled eggs dates back to ancient Rome, where boiled eggs were served with spicy sauces as a starter. The term “deviled” became popular in the 18th century, referring to dishes prepared with hot seasonings like mustard, paprika, or cayenne pepper. Over centuries, this simple dish has evolved into the creamy, flavorful delight we know and love today, maintaining its status as a beloved culinary staple across cultures.
Essential Ingredients for Perfect Deviled Eggs
Crafting the perfect deviled egg requires a thoughtful selection of fresh, high-quality ingredients. While the core components are simple, each plays a crucial role in achieving that signature creamy texture and balanced, tangy flavor profile. Below, you’ll find a visual guide to the main ingredients, followed by detailed notes to help you make the best choices for your batch.
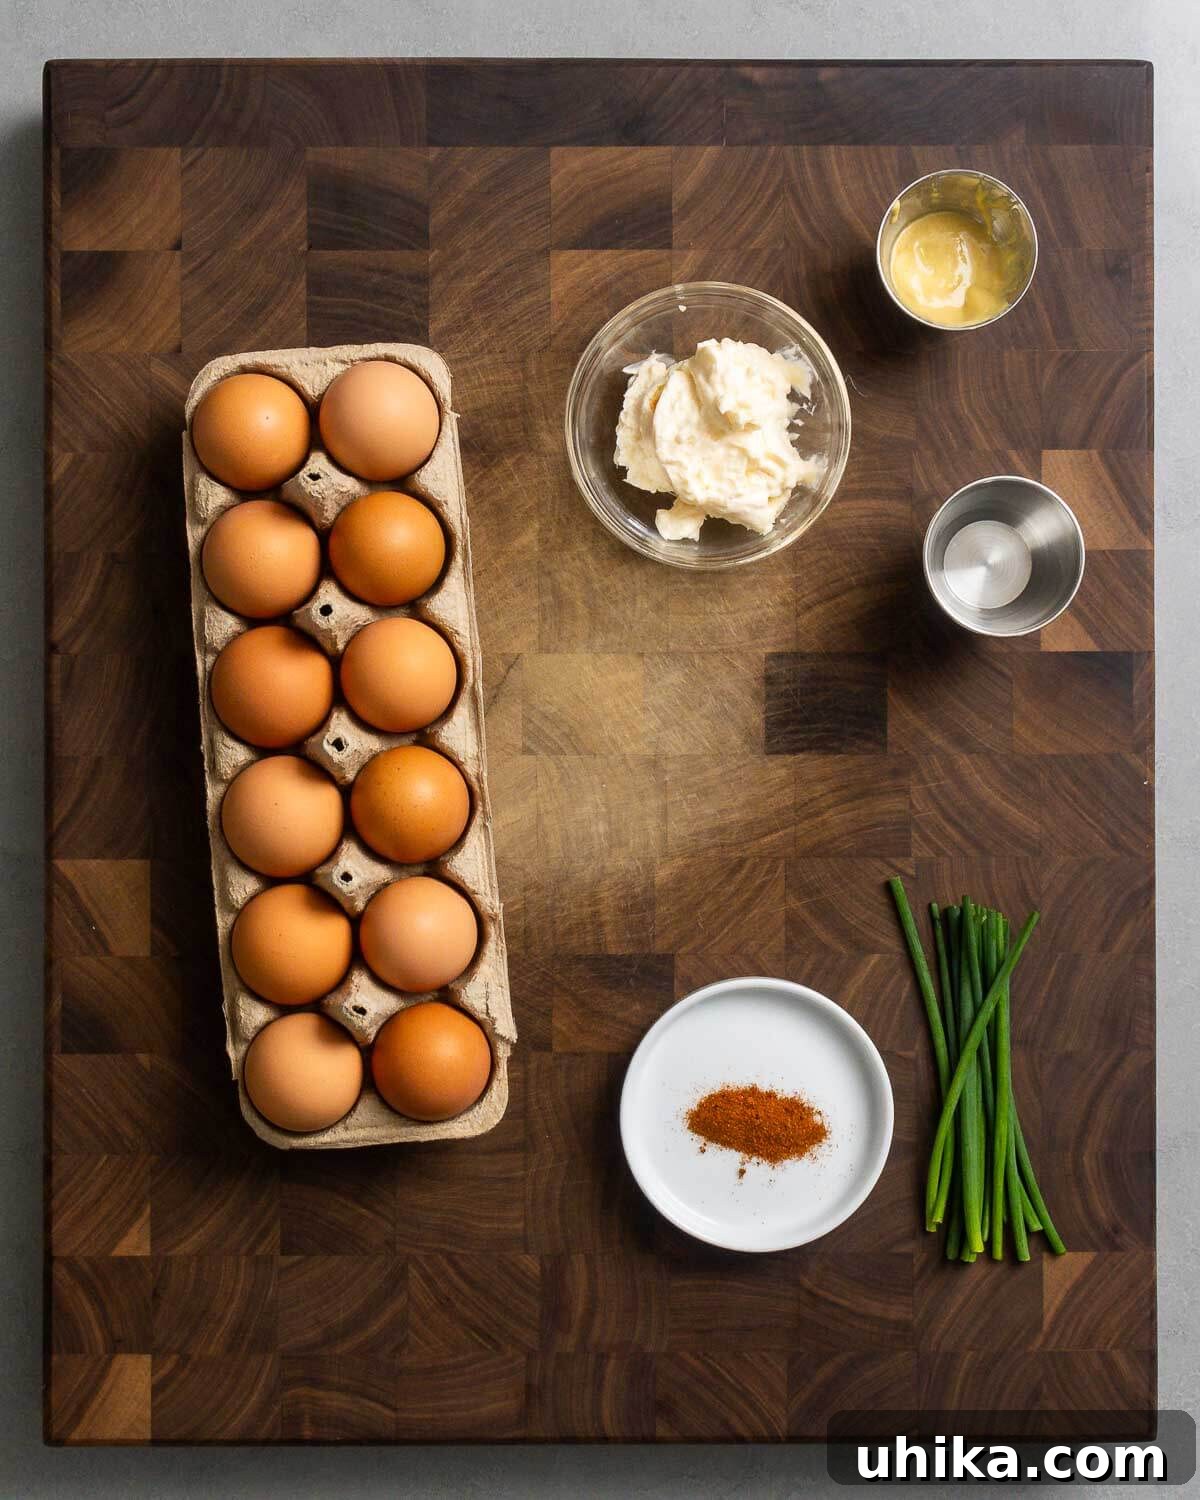
For a complete list of specific quantities, please refer to the recipe card below.
- Eggs: The foundation of any great deviled egg recipe. While fresh eggs are wonderful for many dishes, slightly older eggs (those closer to their expiration date, typically 7-10 days old) are actually easier to peel once hard-boiled. This is because as eggs age, the pH level of the egg white increases, making it less likely to stick to the shell. This small trick saves a lot of frustration and ensures beautifully smooth egg whites for your deviled eggs. Avoid farm-fresh eggs if you want to skip the peeling struggle, and save those for a delicious NY deli style bacon egg and cheese sandwich or a rich spaghetti carbonara.
-
Creamy Filling Base: The heart of the deviled egg flavor comes from a harmonious blend.
- Mayonnaise: Provides the essential creaminess and binds the yolk mixture together. For a richer flavor, consider using a good quality full-fat mayonnaise. If you’re looking for a lighter option, Greek yogurt or even sour cream can be substituted, though they will slightly alter the tang and texture.
- Dijon Mustard: Adds a sharp, pungent kick that perfectly complements the richness of the egg yolks. Its unique flavor profile is key to classic deviled eggs. You can experiment with other mustards like spicy brown or a touch of whole-grain mustard for added texture and flavor depth.
- White Vinegar: Crucial for adding that characteristic tangy brightness that cuts through the richness and balances the flavors. Apple cider vinegar can also be used for a slightly fruitier tang.
Together, these ingredients create a smooth, luscious filling with an irresistible savory and tangy profile. For a unique twist, you could also consider adding a pinch of curry powder for an exotic flavor, or a spoonful of fresh basil pesto for an herbaceous touch, as shown in some variations later in this article.
-
Garnish: Beyond just decoration, garnishes add texture, color, and an extra layer of flavor.
- Fresh Chives: Offer a mild oniony flavor and a vibrant green visual appeal.
- Paprika: A classic garnish, adding a beautiful reddish hue and a hint of smoky flavor, especially if you opt for smoked paprika.
Feel free to get creative with your garnishes! Other excellent options include finely chopped fresh parsley or dill, crispy bacon bits, a sprinkle of cayenne pepper for heat, a tiny dollop of sriracha, or even finely chopped capers for an extra briny note.
Step-by-Step Guide: Crafting Your Deviled Eggs
Creating perfect deviled eggs is a straightforward process, but a few key techniques can elevate your results from good to exceptional. Follow these steps for an appetizer that will impress everyone.
- Boil the Eggs Perfectly: Place 12 large eggs gently into a medium-sized pot. Fill the pot with cold water, ensuring the water level is about 1/2-inch above the eggs. Bring the water to a rolling boil over high heat. As soon as the water reaches a full boil, immediately remove the pot from the heat, cover it tightly with a lid, and let the eggs sit undisturbed for exactly 15 minutes. This method helps to cook the eggs evenly without overcooking the yolks, preventing the dreaded green ring.
- Chill with an Ice Bath: While the eggs are resting, prepare a large bowl filled with ice and cold water. After 15 minutes, carefully transfer the hot eggs from the pot into the ice bath. Allow them to sit in the ice water for at least 10 minutes. The ice bath immediately stops the cooking process and causes the egg whites to slightly contract, making them significantly easier to peel. This rapid cooling also helps to preserve the vibrant yellow color of the yolk.
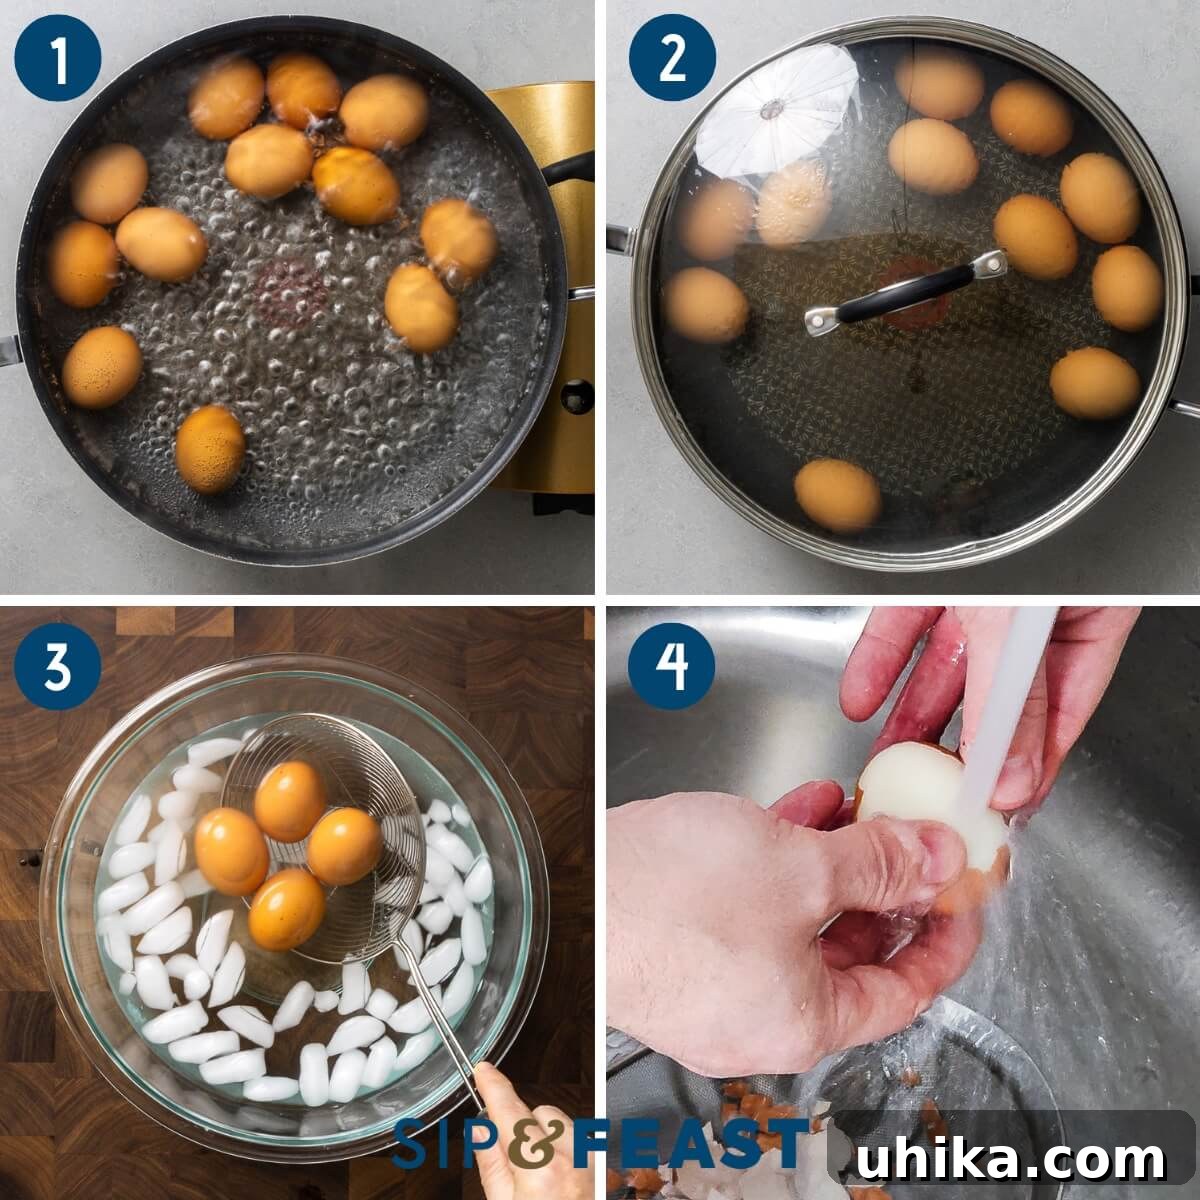
- Gentle Peeling for Flawless Whites: Once the eggs are completely chilled, it’s time to peel them. The best and most gentle way to remove the shells is under cold running water in your sink. Gently tap the egg all around to crack the shell, then begin peeling from the wider end where the air pocket is located. The running water helps to get between the membrane and the egg white, assisting in smooth shell removal and minimizing tears or dimples in the egg whites.
- Halve and Separate Yolks: Using a sharp knife, carefully slice each peeled egg in half lengthwise. You want clean cuts to create an appealing presentation. Gently scoop out the bright yellow yolks and transfer them into a medium-sized mixing bowl. Keep the hollowed-out egg white halves organized on a platter or serving tray.
- Mash the Yolks to Perfection: With a fork, thoroughly mash the egg yolks until they are completely smooth and free of any lumps. This step is crucial for achieving a creamy, consistent filling that will pipe beautifully. For an even smoother consistency, you can push the mashed yolks through a fine-mesh sieve, or use a small food processor for larger batches.
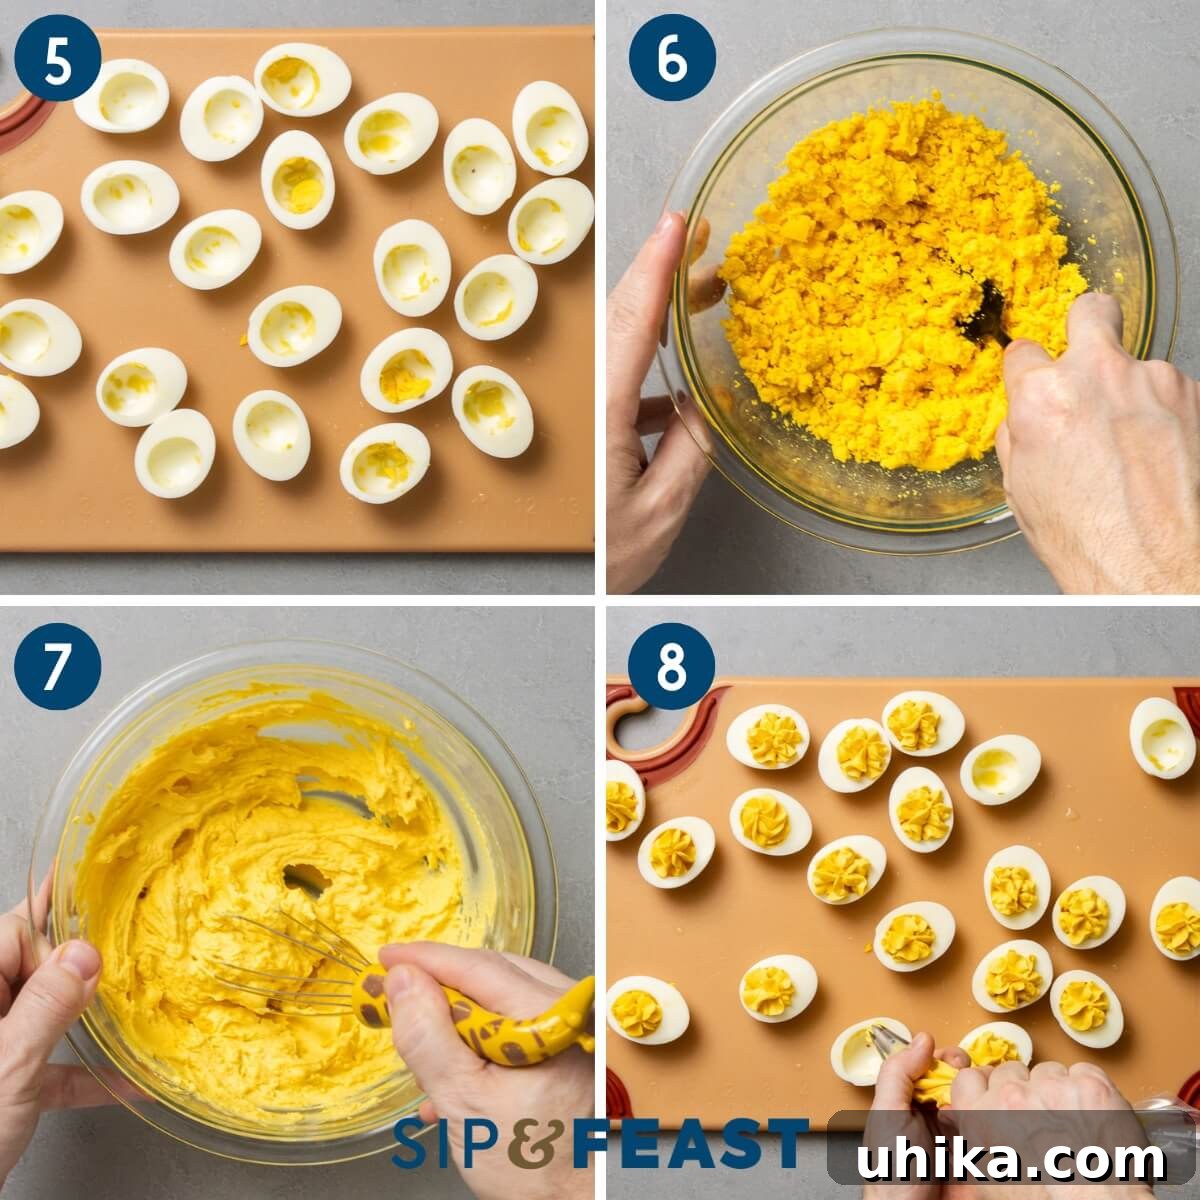
- Mix the Creamy Filling: Add 1/3 cup of mayonnaise, 1 tablespoon of white vinegar, and 1 tablespoon of Dijon mustard to the mashed egg yolks. Whisk everything together thoroughly until the mixture is completely smooth, creamy, and well combined. Once mixed, taste the filling and adjust the seasoning as needed with salt and freshly ground black pepper. Don’t be shy; perfect seasoning is key to a delicious deviled egg!
- Pipe and Garnish: Transfer the creamy egg yolk mixture into a piping bag fitted with your desired tip (a star tip adds a beautiful decorative touch). If you don’t have a piping bag, a sturdy Ziploc bag with one corner snipped off will work just as well. Pipe the filling gracefully into each egg white half, creating a neat mound. Finally, garnish your deviled eggs with 1 tablespoon of finely minced fresh chives and 1 teaspoon of paprika for a pop of color and extra flavor. Your delightful deviled eggs are now ready to be enjoyed!
Expert Tips for Deviled Egg Perfection
- The Age of Eggs Matters: For the easiest peeling and most visually appealing egg whites, avoid using extremely fresh, just-laid eggs. Slightly older eggs—those that are about 7-10 days old but still well within their expiration date—are ideal. As eggs age, their pH level increases, and the membrane inside loosens its grip on the albumen (egg white), allowing the shell to detach more cleanly after boiling. This small detail can save you a lot of effort and frustration.
- Mastering the Art of Peeling: Gentle handling is paramount when peeling hard-boiled eggs for deviled eggs. Aggressive peeling can lead to unsightly torn or dimpled egg whites, which, while perfectly fine for egg salad, aren’t ideal for the polished look of deviled eggs. The best technique involves cracking the egg all over, then rolling it gently on a flat surface to further loosen the shell. Then, peel it under a stream of cold running water. The water helps lubricate the space between the shell and the egg, allowing the shell to slide off smoothly and intact.
- Piping for Presentation: If you’re aiming for that classic, elegant swirl of filling using a piping bag and a star tip, ensure your egg yolk mixture is exceptionally smooth. Any small lumps of yolk can clog the tip, leading to a messy and frustrating experience. If your mashed yolks aren’t perfectly smooth, consider pressing the mixture through a fine-mesh sieve before adding it to the piping bag. For larger batches or if you prefer a simpler look, a regular round tip (or simply snipping a corner off a Ziploc bag) works perfectly fine, but a smooth mixture remains key for effortless piping.
- Make Ahead and Storage: Deviled eggs are best assembled close to serving time to maintain their freshness and appearance. However, you can prepare the hard-boiled eggs and the yolk filling separately a day in advance. Store the peeled egg white halves covered in the refrigerator, and keep the yolk filling in an airtight container. Assemble and garnish just before your guests arrive. Once assembled, deviled eggs can be refrigerated for up to 3 days, but their texture and flavor are best within 24 hours.
- Balancing Flavors: The key to a truly delicious deviled egg lies in the balance of creamy, tangy, and savory notes. Always taste your yolk filling before piping. Adjust salt, pepper, and vinegar as needed. A little extra pinch of salt can bring out all the flavors, and a dash more vinegar can brighten the entire mixture.
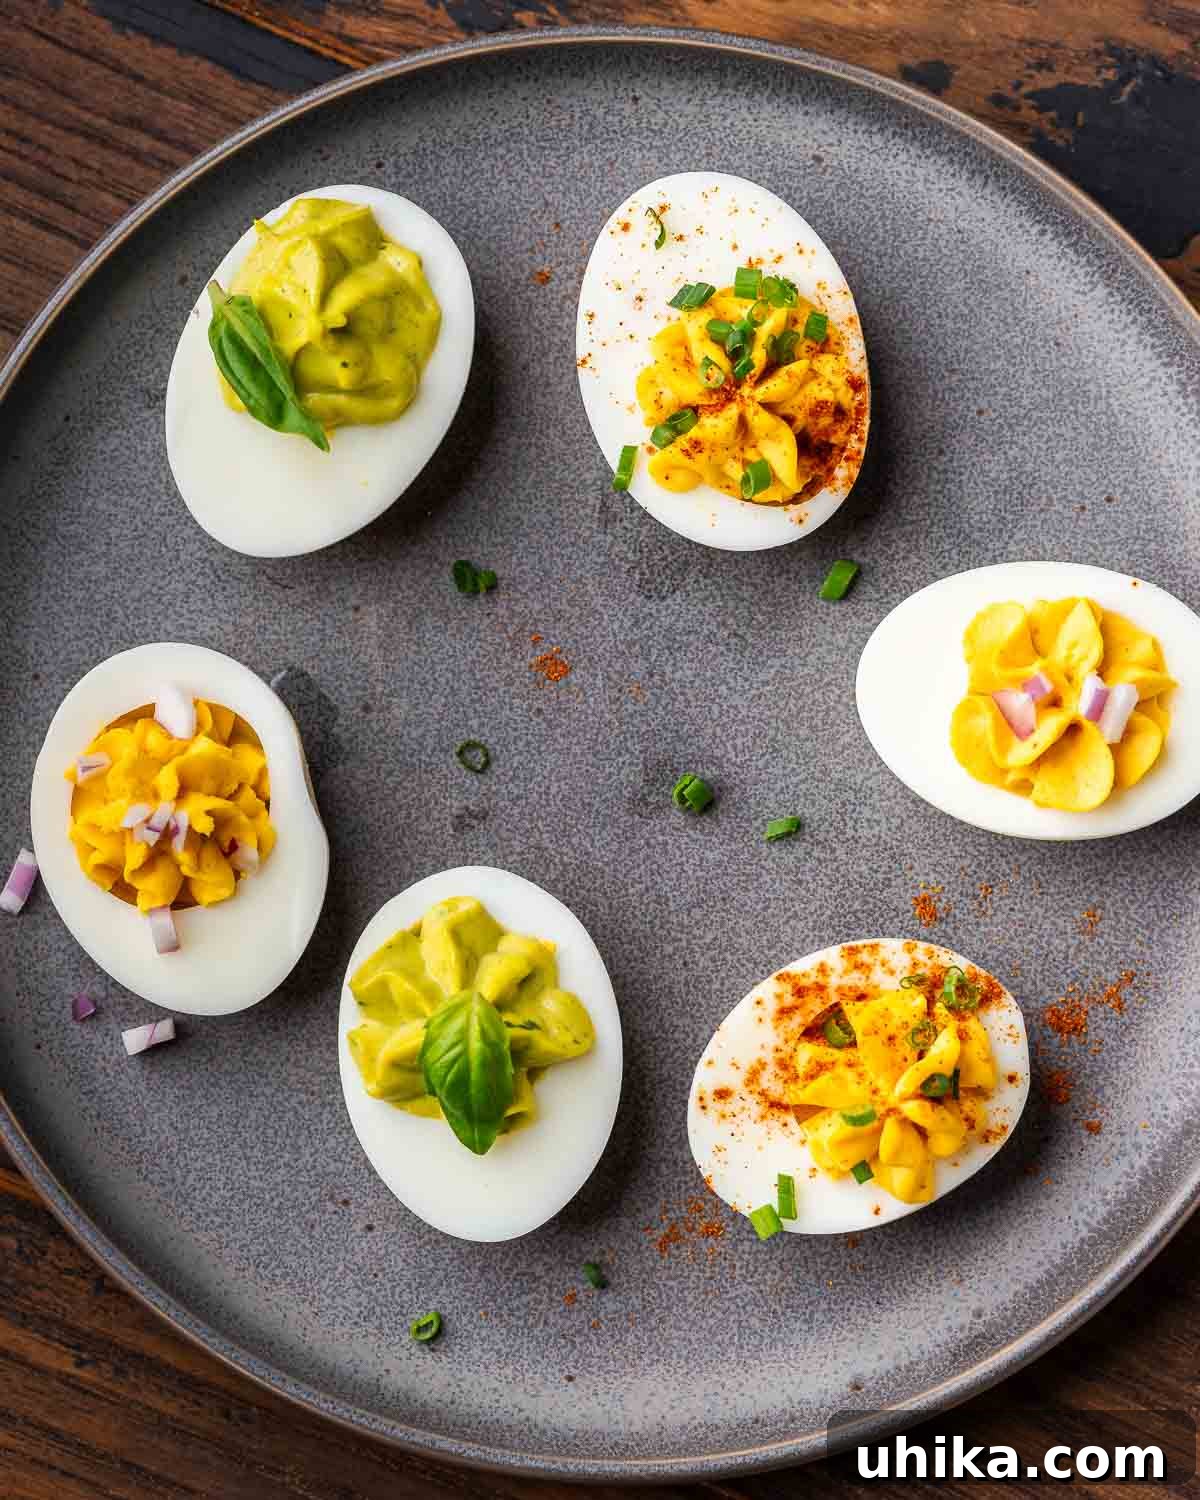
Deviled eggs are highly customizable! This image showcases deviled eggs with different filling variations on a grey plate, offering a glimpse into the creative possibilities beyond the classic recipe.
More Impressive Appetizers You’ll Love
If you enjoy creating delicious appetizers that leave a lasting impression on your guests, just like these classic deviled eggs, then you’ll undoubtedly appreciate these other fantastic recipes from our collection:
- The Best Charcuterie Board – Learn everything you need to know to construct an epic charcuterie board that’s both stunning and delicious, perfect for any occasion!
- Spinach Artichoke Dip – A timeless, creamy, and cheesy dip that’s perfect for sharing. Serve it hot with crunchy veggies or your favorite tortilla chips.
- Shrimp Cocktail – An elegant and incredibly easy appetizer featuring succulent shrimp and a homemade cocktail sauce that truly seals the deal.
- Caprese Skewers – Simple, fresh, and bursting with flavor, these skewers are a beautiful and healthy option for any party.
- Bruschetta with Fresh Tomatoes – A vibrant Italian classic featuring toasted bread topped with ripe tomatoes, basil, and garlic.
We hope you’ve enjoyed this Classic Deviled Eggs Recipe! If you’ve tried this or any other recipe on our site, we’d love for you to give it a 5-star rating and share your thoughts in the comments section below. Your feedback helps us grow and inspires other home cooks!
We strive to cater to various learning styles. If you are someone who prefers to learn by watching, you can discover most of our recipes and cooking demonstrations on our YouTube channel and our Facebook Page.
Classic Deviled Eggs
James Delmage
Rating: 5 out of 5 stars (based on 6 votes)
25 mins
15 mins
40 mins
24 deviled eggs

Pin Recipe
Ingredients
- 12 large eggs
- 1/3 cup (80g) mayonnaise
- 1 tablespoon (15g) Dijon mustard
- 1 tablespoon (15g) white vinegar
- salt and pepper to taste
- 1 tablespoon minced chives for garnish
- 1 teaspoon paprika for garnish
Instructions
-
Place the eggs into a pot and fill with water to only a 1/2-inch above the eggs. Bring to a boil, then cover and remove the pot from the heat. Let the eggs sit covered for 15 minutes.
-
In a large bowl, prepare an ice water bath. Place the eggs into the bath and let sit for 10 minutes. Peel the eggs.
-
Slice the eggs in half lengthwise and remove the yolks to a small bowl.
-
Add the mayo, mustard, and vinegar to the bowl and mash the yolks. Mix well until smooth and creamy. Taste the mixture and season with salt and pepper to taste.
-
Fill the mixture into a plastic bag and cut the tip off or add to a piping bag. Pipe the mix into the egg white halves and top with the paprika and chives for garnish. Enjoy!
Notes
- Hard-boiled eggs are far easier to peel when run under cool water.
- Deviled eggs can be refrigerated for up to 3 days.
Nutrition
Calories: 81kcal | Protein: 6.5g | Fat: 5.6g | Saturated Fat: 1.6g | Cholesterol: 186mg | Sodium: 127mg | Potassium: 76mg | Fiber: 0.1g | Sugar: 0.5g | Calcium: 29mg | Iron: 1mg
Nutrition information is automatically calculated and should only be used as an approximation.
Like this? Leave a comment below!
Check us out on Instagram at @sipandfeast or tag #sipandfeast!