
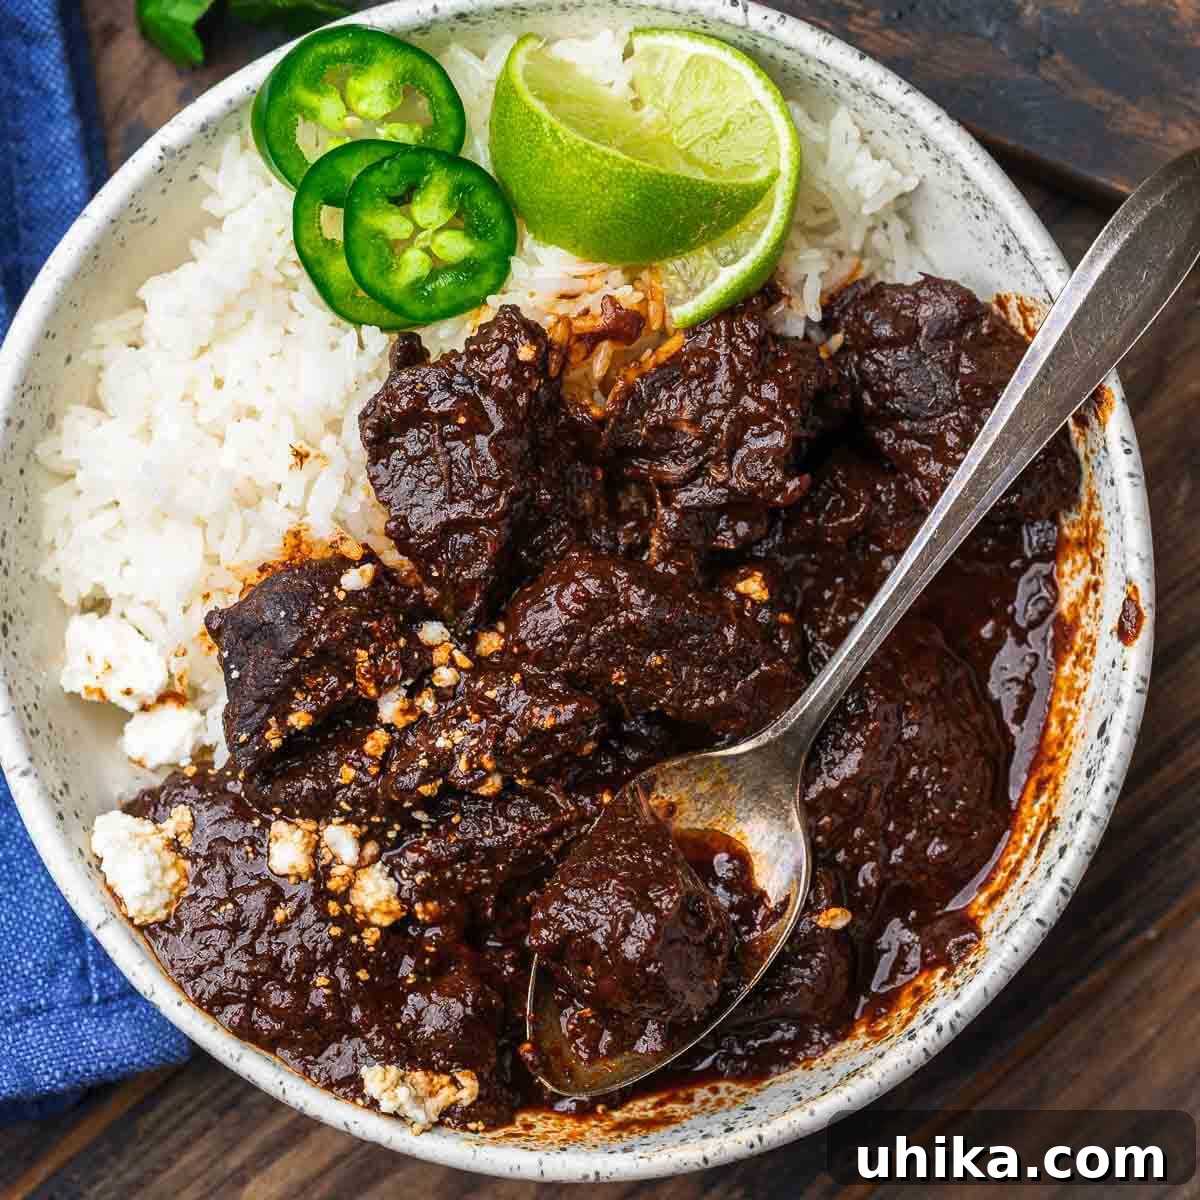
Authentic Chili Colorado: A Rich & Smoky Mexican Beef Stew Recipe
Deep, smoky, and incredibly delicious, Chili Colorado is a hearty Mexican stew made with tender chunks of beef slow-braised in a vibrant red chili sauce. This authentic recipe promises a rich, complex flavor that is surprisingly easy to achieve at home, making it an ideal choice for a comforting weeknight meal or a festive gathering.
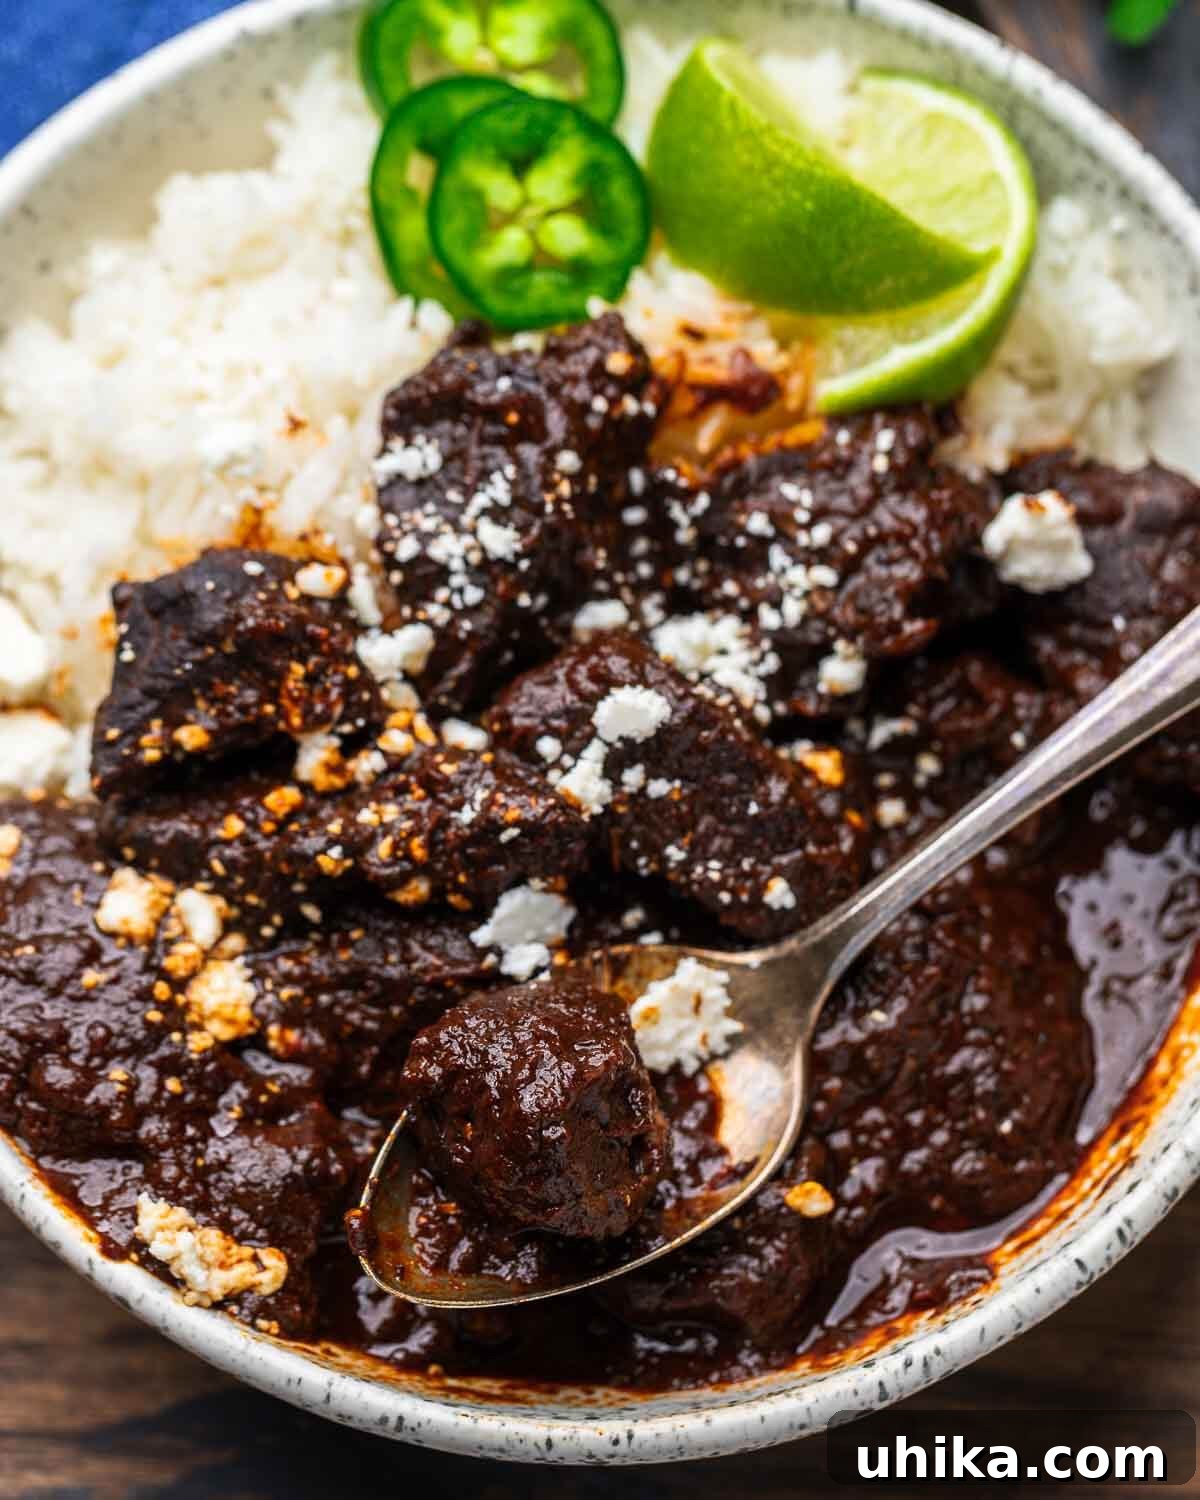
What is Chili Colorado? Unpacking the Name
The name Chili Colorado often sparks curiosity. It’s not, as many might assume, named after the American state of Colorado. Instead, its origin lies in the Spanish word “colorado,” which translates to “colored-red” or “reddish in color.” This perfectly describes the dish’s defining characteristic: a rich, deep red sauce that is as visually appealing as it is flavorful.
At its heart, Chili Colorado is a traditional Mexican beef stew, renowned for its profound depth of flavor. This richness is primarily derived from a carefully selected blend of dried red chiles – typically guajillo, ancho, and pasilla – which are rehydrated and blended into a smooth, aromatic sauce. The beef, often chuck roast, is then braised gently in this sauce until it reaches an unbelievably tender, melt-in-your-mouth consistency.
The Culinary Canvas: A Flavorful Mexican Classic
This red chili stands out as a true Mexican culinary gem. Unlike some spicier chili variations, Chili Colorado typically offers a mild heat profile, allowing the complex, smoky, and earthy notes of the dried chiles to truly shine. It’s a comforting dish that embodies the soul of traditional Mexican cooking, often passed down through generations.
Traditionally, Chili Colorado is served alongside warm Mexican rice and freshly made flour tortillas, perfect for soaking up every last drop of the delectable sauce. To enhance the experience, I love to top mine with a sprinkle of cotija cheese for a salty tang, slices of fresh jalapeños for a subtle kick (since the chili itself is mild), vibrant lime wedges to brighten the flavors, and a generous sprinkle of fresh cilantro. For a complete meal, pair it with a refreshing cucumber jalapeño margarita.
While this robust red chili is perfect for any cozy night in, it’s also a spectacular hit for larger gatherings. Imagine serving a steaming pot of Chili Colorado at game-day parties or Super Bowl events, alongside other crowd-pleasing favorites like homemade guacamole, classic Buffalo wings, and a creamy spinach artichoke dip. It’s a versatile dish that always impresses!
Essential Ingredients for Authentic Chili Colorado
Crafting an authentic Chili Colorado starts with selecting the right ingredients. Each component plays a vital role in building the layered flavors that make this dish so special.
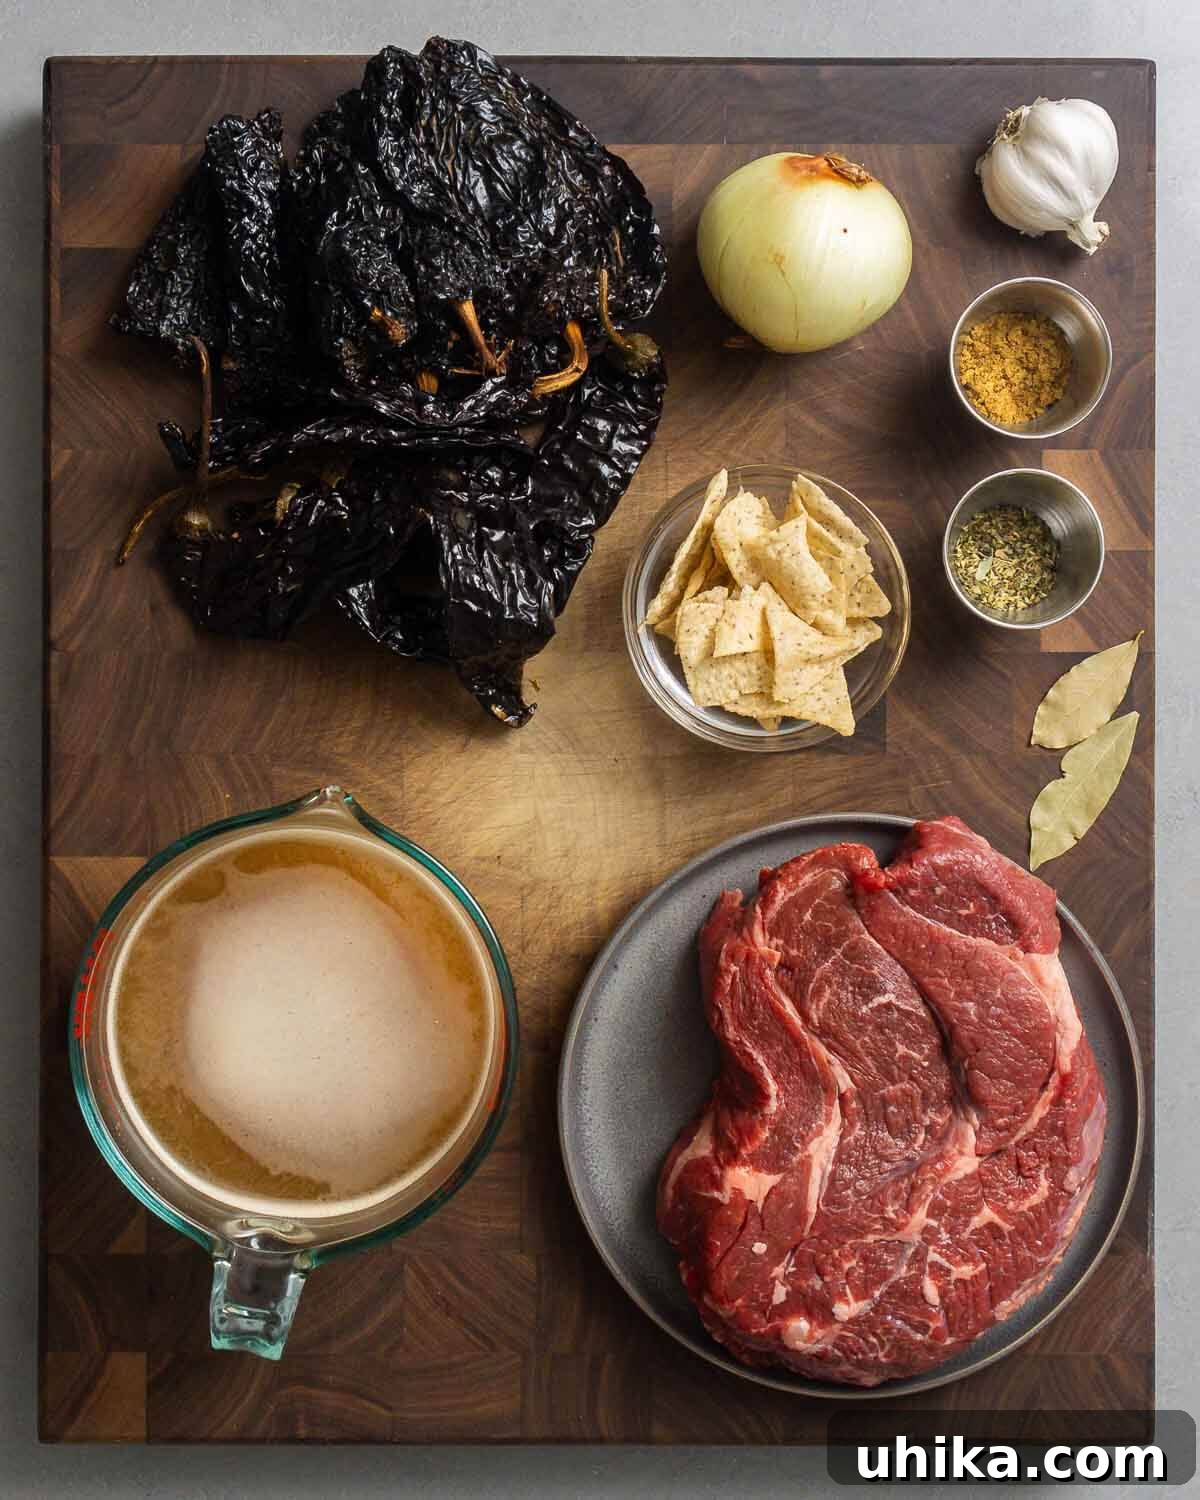
- Dried Red Chiles: The Heart of the Sauce. For an unparalleled depth of flavor, I recommend a blend of ancho, pasilla, and guajillo chiles.
- Ancho Chiles: These are dried poblano peppers, offering a mild, fruity, and slightly smoky flavor. They contribute to the dark color and rich body of the sauce.
- Guajillo Chiles: Known for their vibrant red color and sweet, tangy, somewhat fruity notes, guajillos add a bright complexity.
- Pasilla Chiles: Often described as having an earthy, raisin-like flavor with a hint of bitterness and deep smokiness, pasillas add a crucial dimension.
While chili powder can be a convenient substitute, it simply cannot replicate the nuanced, robust flavor profile achieved with whole dried chiles. Investing in a bag of these chiles is well worth it, as they last a long time and can be used in other fantastic recipes like turkey chili and classic beef chili. You can often find them at Mexican markets or readily available online.
- Chuck Roast: The Perfect Cut for Braising. I prefer to buy an entire chuck roast and cube it myself into 1-inch pieces. This allows for better control over the size and trim. Chuck roast is ideal for slow braising because its marbling and connective tissues break down beautifully over low heat, resulting in incredibly tender, succulent beef that practically melts in your mouth. Butcher shops and warehouse clubs like Costco often offer great prices on quality chuck roasts.
- Lard or Neutral Oil: For Authentic Flavor and Searing. Traditionally, Chili Colorado would be made with lard, which imparts a distinct richness and flavor. However, if lard isn’t available or preferred, a neutral oil such as avocado oil, canola oil, or vegetable oil makes an excellent substitute for searing the beef and sautéing the aromatics.
- Beef Stock: The Foundation of Flavor. Using a high-quality beef stock is crucial for a deeply flavored chili. If you have the time, making homemade beef stock is always the best option, offering superior flavor and allowing you to control the sodium levels. Otherwise, opt for a low-sodium beef base or a good quality store-bought beef broth.
- Aromatics and Herbs: Enhancing the Depth.
- Onion & Garlic: Essential flavor building blocks, providing a savory base.
- Mexican Oregano: Distinct from Mediterranean oregano, Mexican oregano has a more citrusy and earthy flavor that pairs perfectly with chiles. If unavailable, dried Sicilian oregano can be used as a substitute.
- Ground Cumin: Adds a warm, earthy, and slightly pungent note characteristic of Mexican cuisine.
- Bay Leaves: Contributes a subtle, herbaceous depth to the braising liquid.
- Tortilla Chips (Optional Thickener): Crushed tortilla chips are a traditional and ingenious way to thicken the chili and add a subtle corn flavor. This step is optional, depending on your desired consistency.
For precise measurements and quantities, please refer to the detailed recipe card below.
Mastering Chili Colorado: A Step-by-Step Guide
Creating this rich and flavorful Mexican stew is a rewarding experience. Follow these detailed steps to achieve perfect, tender beef and a sublime red chile sauce.
Preparing the Dried Chiles: The Flavor Foundation
- De-stem and Seed the Chiles: Carefully remove the stems and as many seeds as possible from 6 dried ancho chiles, 5 dried pasilla chiles, and 3 dried guajillo chiles. While removing all seeds isn’t necessary, it helps reduce bitterness and ensures a smoother sauce.
- Toast the Chiles: In a dry pan over medium heat, toast the prepared chiles for about 30 seconds per side. Watch them carefully; they should become very fragrant and slightly pliable, but not burnt, which can make the sauce bitter.
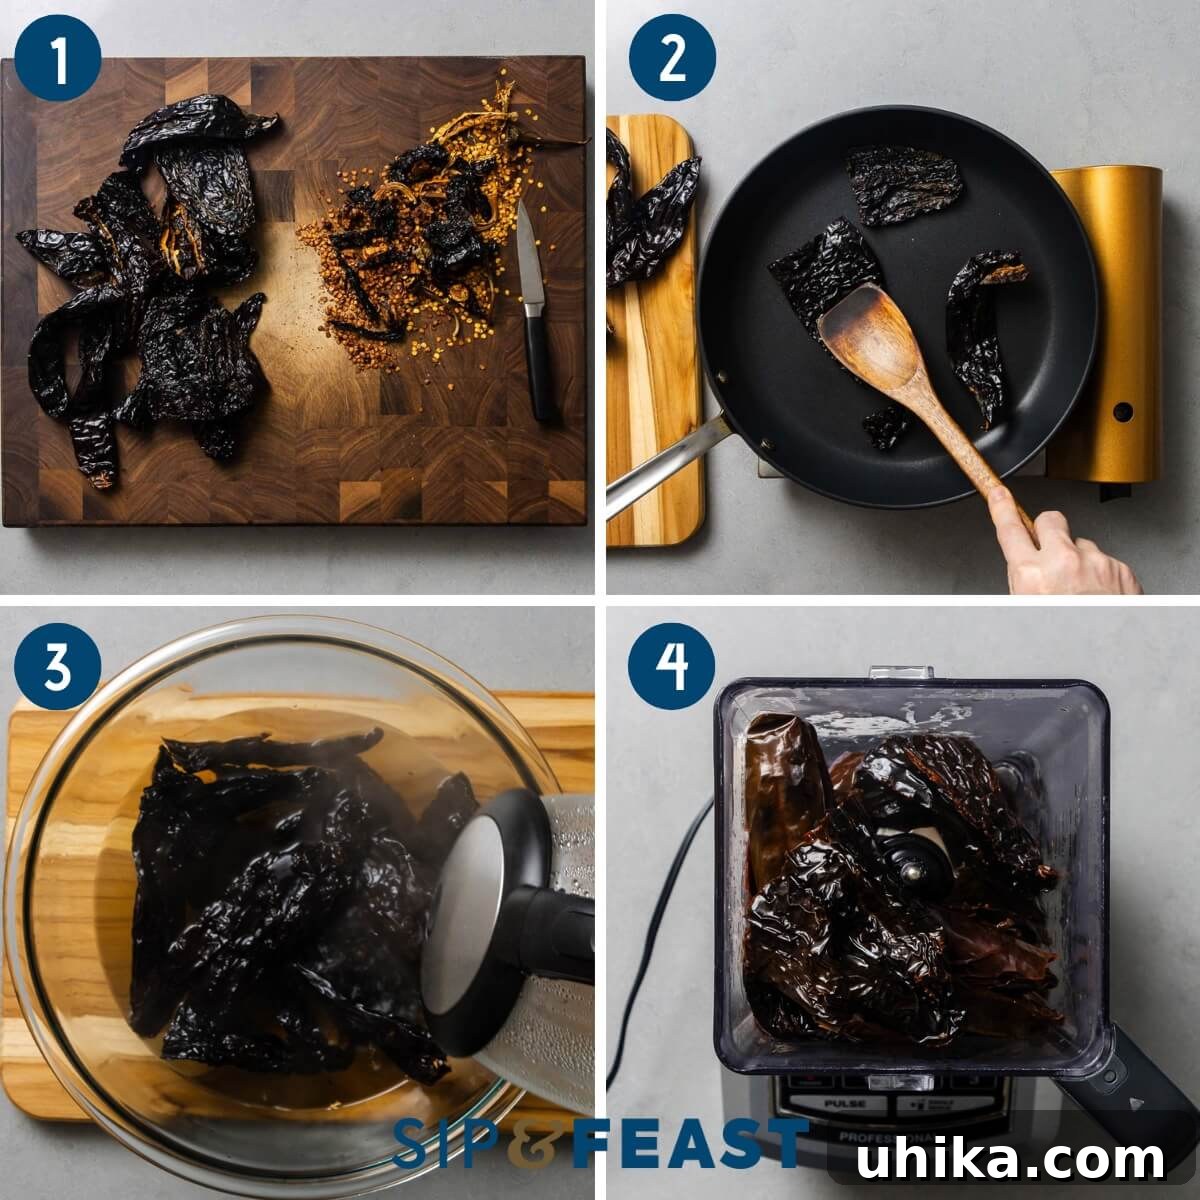
- Rehydrate the Chiles: Transfer the toasted chiles to a large heatproof bowl. Cover them completely with hot water, then cover the bowl tightly with plastic wrap. Allow the chiles to soften for at least 20 minutes, or until they are very pliable and rehydrated. This step is crucial for achieving a smooth, flavorful sauce.
- Blend the Chile Sauce: Once softened, transfer the rehydrated chiles to a blender. Add 1 cup of fresh, clean water (do NOT use the soaking water, as it can contain impurities and bitterness). Blend until the mixture is completely smooth. You may need to scrape down the sides of the blender occasionally. Set this vibrant red chile sauce aside.
Cooking the Beef and Building the Stew
- Prepare the Beef and Aromatics: Preheat your oven to 300°F (150°C) and position an oven rack in the middle. Dice 1 large yellow onion and mince 5 cloves of garlic. Cut a 3-pound chuck roast into 1-inch cubes, pat them thoroughly dry with paper towels (this aids in browning), and season generously with salt and freshly ground black pepper. Note: Trim and remove any excessively large pieces of fat from the beef; these can be rendered for other uses or discarded.
- Sear the Beef: Heat a large Dutch oven or oven-safe pot over medium-high heat. Add 4 tablespoons of lard (or neutral oil). Once hot, sear the seasoned beef cubes in batches. Avoid overcrowding the pan, as this steams the meat rather than searing it. Brown all sides of the beef until a deep, crusty sear is achieved. Remove the seared beef to a plate and set it aside.
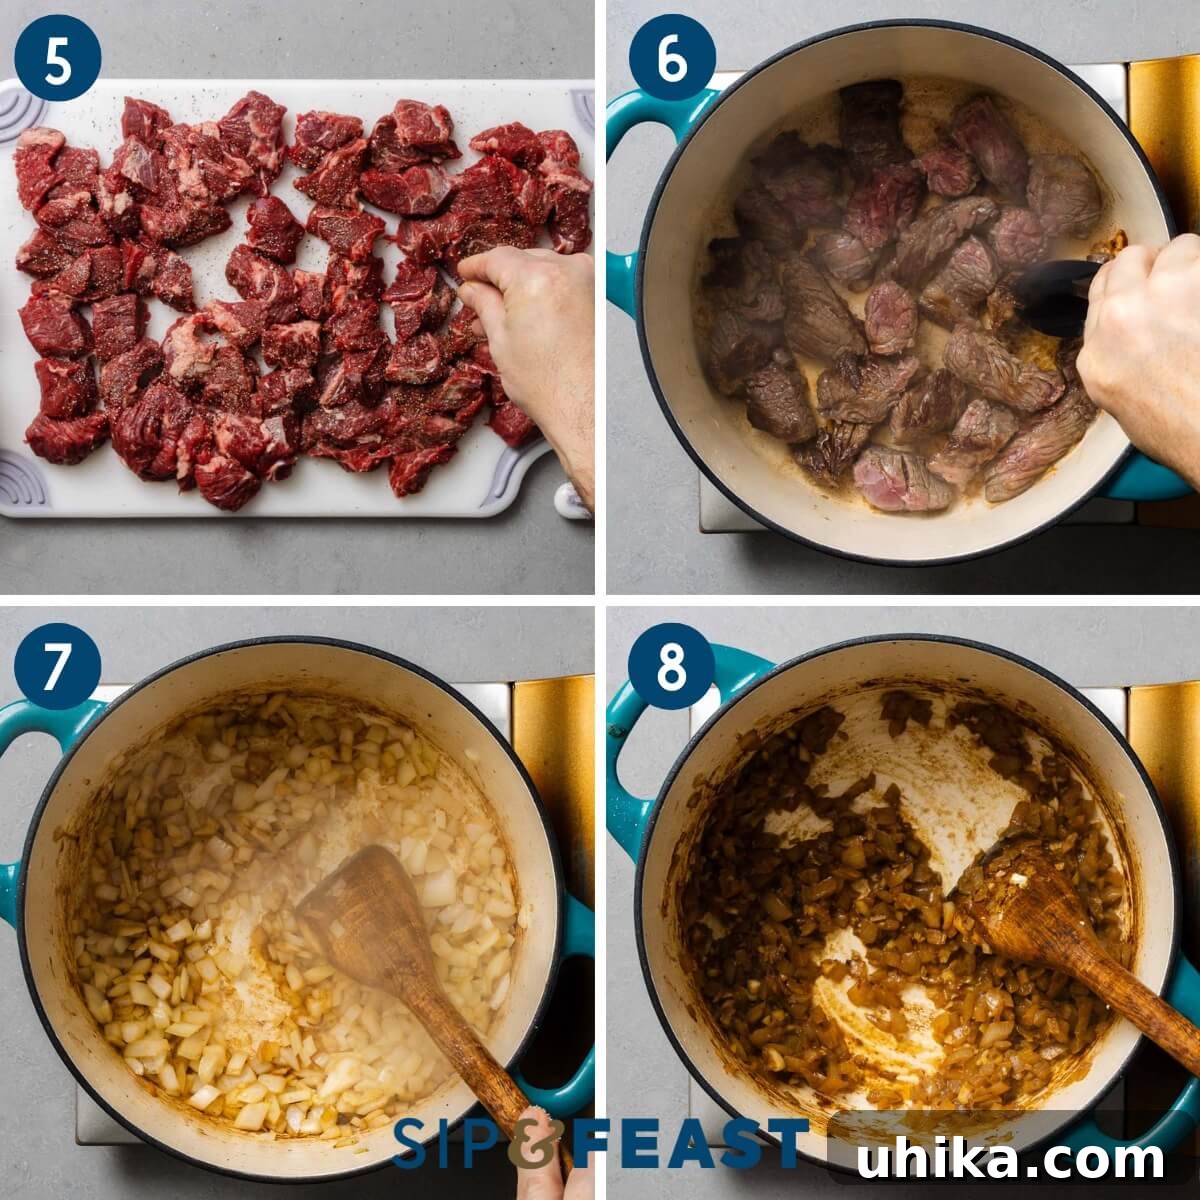
- Sauté the Onions: Add the diced onions to the same pot, adding a little more lard/oil if needed. Cook the onions for 7-8 minutes, stirring occasionally, until they are soft and translucent.
- Add Garlic and Cumin: Stir in the minced garlic along with 2 teaspoons of ground cumin. Cook for another 2 minutes, stirring constantly, until the garlic is fragrant and the cumin is toasted. Be careful not to burn the garlic.
- Incorporate the Chile Sauce: Pour the previously blended red chile sauce into the pot. Cook for 3 minutes, stirring frequently, allowing the sauce to deepen in color and flavor. This step helps to mellow any raw chile taste.
- Combine and Bring to a Boil: Return the seared beef cubes to the pot. Add 2 teaspoons of Mexican oregano, 2 large bay leaves, and 3 cups of low-sodium or homemade beef stock. Stir everything together well and bring the mixture to a rolling boil over medium-high heat.
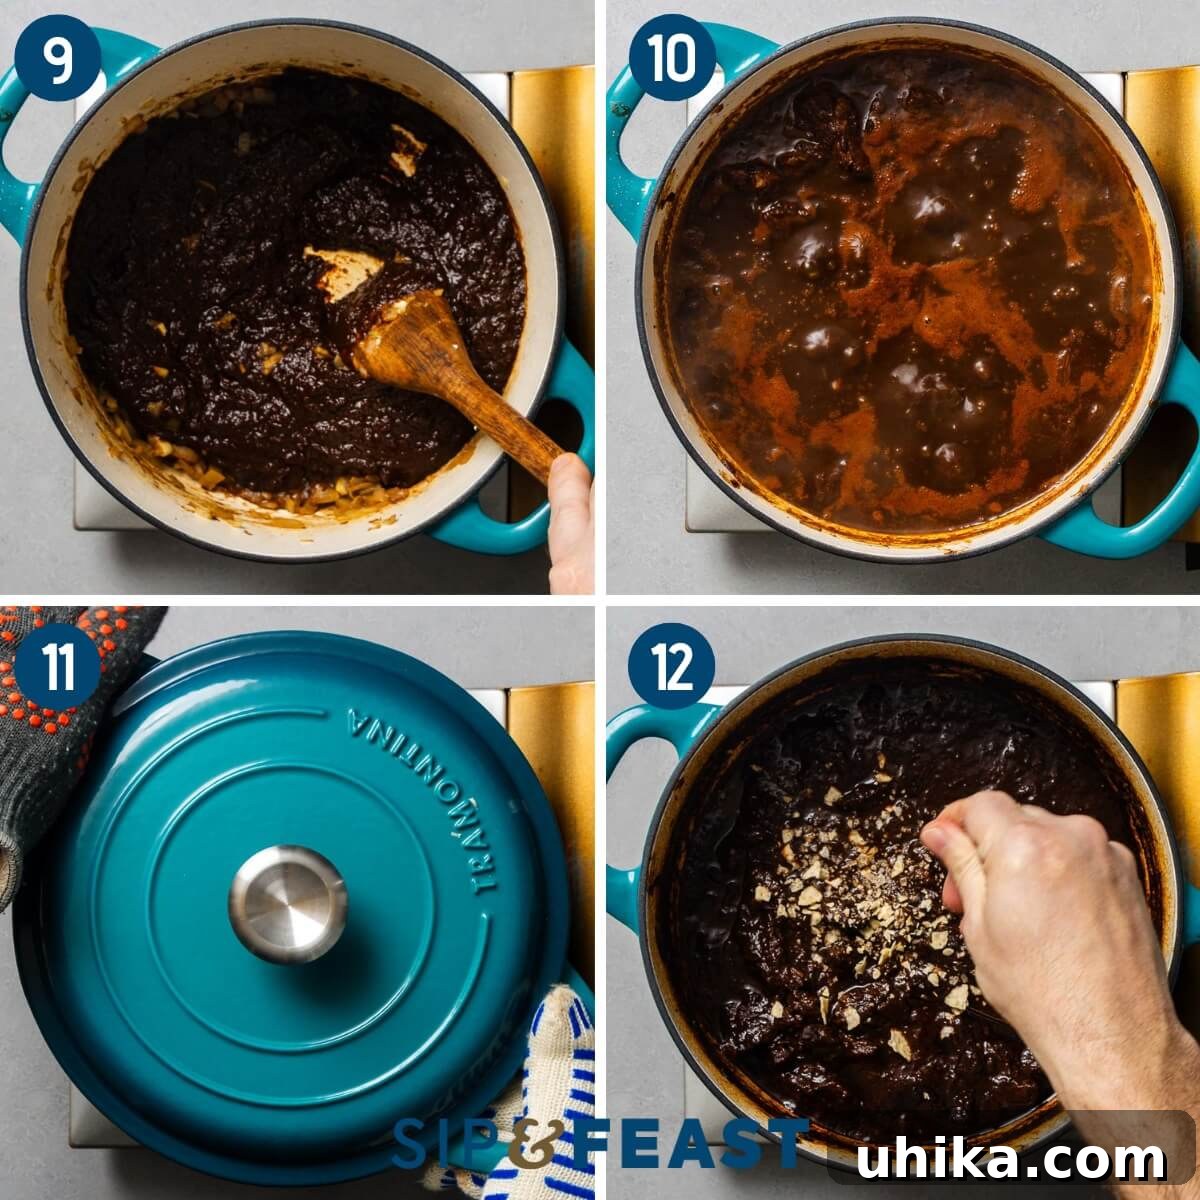
- Braise in the Oven: Once boiling, turn off the heat. Cover the Dutch oven tightly with its lid and transfer the pot to the preheated oven. Cook for 90 minutes.
- Thicken and Finish: After 90 minutes, carefully remove the lid from the pot and return it to the oven for another 30-45 minutes. This uncovered cooking period allows the chili to thicken and the beef to become incredibly tender. If the chili hasn’t reached your desired thickness, or if the beef isn’t fork-tender, continue cooking for an additional 20-30 minutes, adding more beef stock if the liquid reduces too much.
- Final Adjustments and Serving: Remove the pot from the oven. If a thicker consistency is desired, stir in 1/4 cup of crushed tortilla chips and cook on the stovetop over medium-high heat, stirring frequently, until thickened to your liking. Taste the chili and adjust the seasoning with salt and pepper as needed. If the chili has a slight bitterness from the chiles, add 1-2 teaspoons of agave nectar or honey to balance the flavors. Serve hot in bowls, traditionally with Mexican rice and warm flour tortillas, and topped with your favorite garnishes such as jalapeño slices, cotija cheese, diced raw onion, sour cream, or fresh cilantro. Enjoy this rich, authentic Mexican delicacy!
Expert Tips for the Perfect Chili Colorado
Achieving the best possible Chili Colorado involves a few key techniques and considerations. These tips will help you elevate your dish from great to extraordinary.
- Make Ahead for Enhanced Flavor: Like many soups, stews, and chilis, Chili Colorado significantly benefits from being made ahead of time. Preparing it a day in advance and refrigerating it overnight allows the flavors to meld, deepen, and truly fuse together, resulting in a much richer and more harmonious taste.
- Pre-prepare Your Chile Sauce: To further intensify the chile flavor, consider making the red chile sauce a day or two in advance. Store it in the fridge overnight before proceeding with the rest of your chili preparation. This extra time allows the chile flavors to fully develop, adding another layer of complexity to your stew.
- The Power of Homemade Stock: Whenever possible, use homemade beef or chicken stock. Store-bought stocks, even low-sodium varieties, often contain added sugars and excessive sodium, which can detract from your dish. Homemade stock provides a superior, richer flavor and a better mouthfeel, plus it gives you complete control over the sodium content of your chili. For guidance, refer to my homemade beef stock recipe.
- Balancing Bitterness with Sweetness: When working with a large quantity of dried chiles, it’s common for the resulting sauce to have a slightly bitter undertone. Don’t hesitate to balance this out with a touch of sweetness. Agave nectar, honey, or even a pinch of sugar can work wonders. The goal is to mellow the bitterness, not to make the chili sweet, so start with a small amount (1-2 teaspoons) and adjust to taste.
- Achieving Melt-in-Your-Mouth Beef: The key to incredibly tender beef is patience. If after the recommended braising time, your chuck roast isn’t fork-tender, simply continue cooking it in the oven. Check it every 20-30 minutes until it reaches the desired tenderness. If the liquid level gets too low, add a bit more beef stock to prevent drying out.
- Adjusting Heat Levels: This recipe delivers a mild chili, allowing the chile flavors to shine. If you prefer a spicier kick, you can add a pinch of cayenne pepper, a diced serrano or habanero chile to the sauce, or simply offer more jalapeño slices as a garnish.
- Storage and Reheating: Leftover Chili Colorado can be stored in an airtight container in the refrigerator for up to 3-4 days. It reheats beautifully on the stovetop over medium-low heat, stirring occasionally, or in the microwave. The flavors often improve with time!
More Hearty Beef Recipes to Explore
If you’re a fan of the rich, comforting flavors of Chili Colorado, you’ll love these other beef-centric recipes that are perfect for a satisfying meal:
- Peposo – A robust Tuscan beef stew featuring tender chuck roast braised in red wine and black pepper.
- Garlic Butter Steak Bites – Quick-cooking, succulent beef pieces bathed in a rich, garlicky butter sauce.
- Classic Pot Roast – A timeless comfort food, with chuck roast braised until tender with carrots and potatoes in a savory gravy.
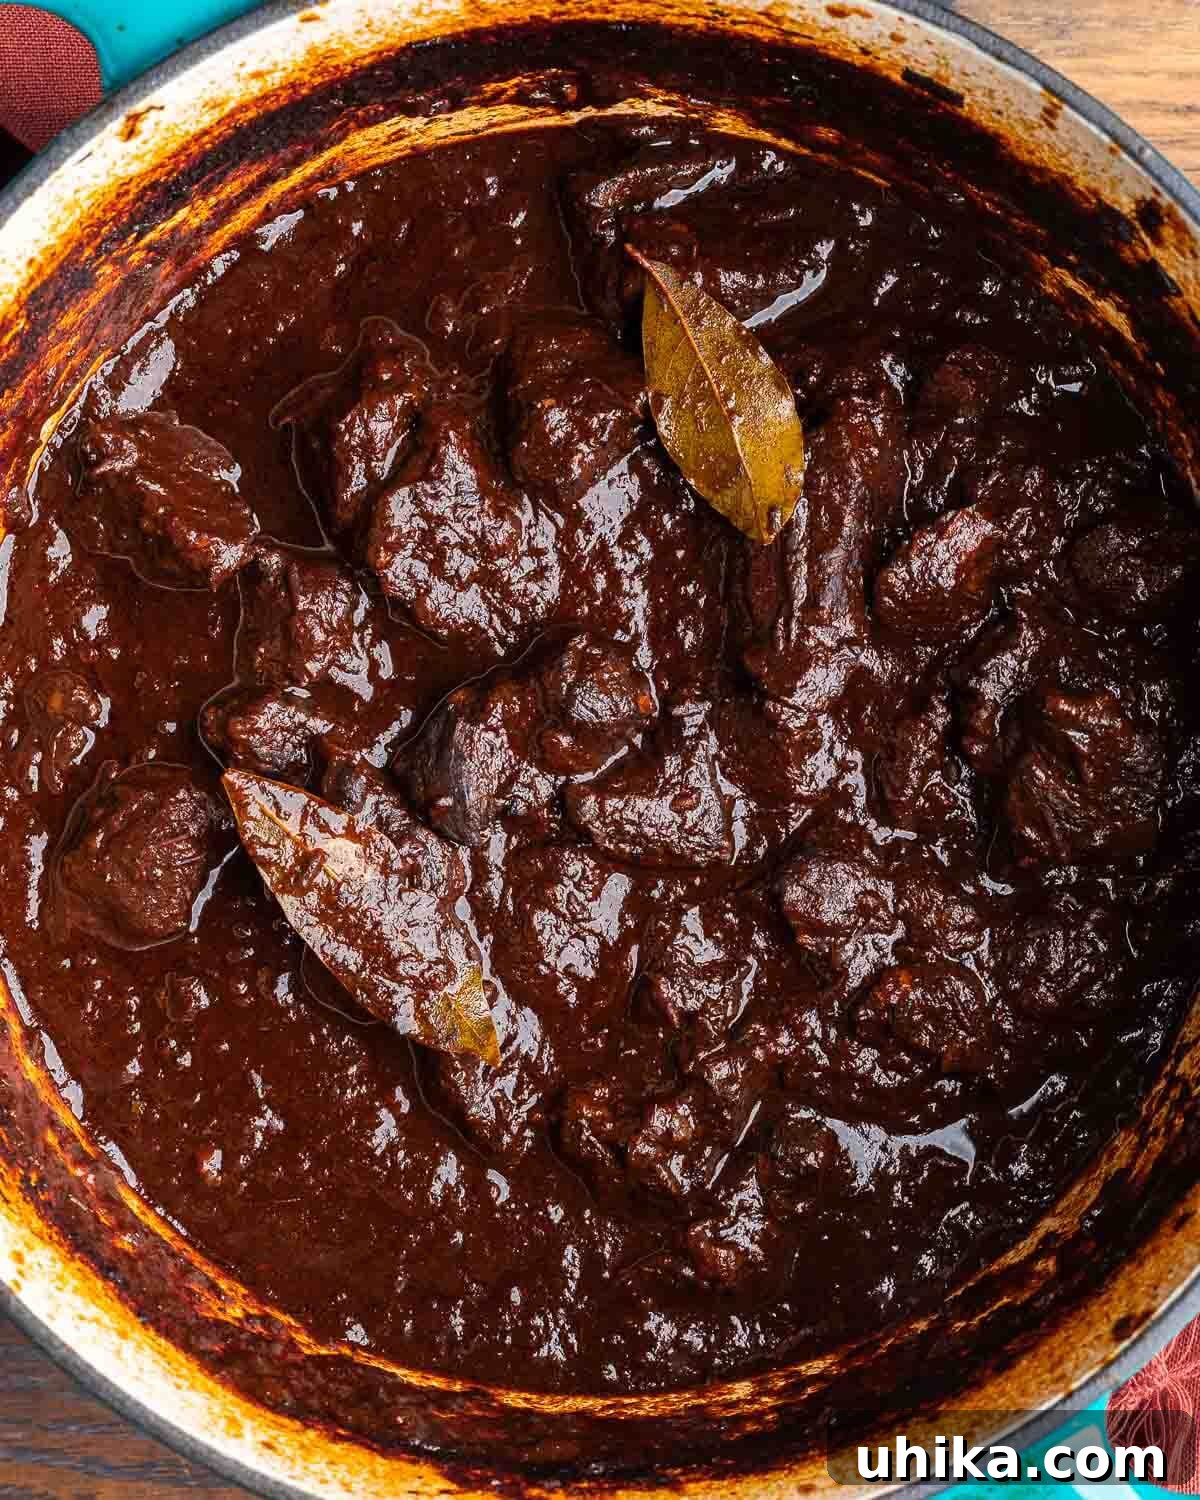
We hope you thoroughly enjoy this Authentic Chili Colorado Recipe. If you’ve tried this or any other recipe on our site, please consider leaving a 5-star rating and sharing your thoughts in the comments below. Your feedback is invaluable to us!
For those who prefer visual learning, you can find most of our recipes and cooking demonstrations on our YouTube channel and our Facebook Page.
Chili Colorado Recipe
A traditional Mexican chili with tender beef braised in a smoky red chile sauce.
Author: James Delmage
Prep time: 25 mins
Cook time: 2 hrs 45 mins
Total time: 3 hrs 10 mins
Servings: 8
Print Recipe | Pin Recipe
Ingredients
For the Dried Chiles
- 6 dried ancho chiles, stems and seeds removed
- 5 dried pasilla chiles, stems and seeds removed
- 3 dried guajillo chiles, stems and seeds removed
For the Chili Colorado
- 4 tablespoons lard or neutral oil, divided
- 3 pounds chuck roast, cut into 1-inch cubes, remove any large pieces of fat
- 1 large yellow onion, diced
- 5 cloves garlic, minced
- 2 teaspoons Mexican oregano
- 2 teaspoons ground cumin
- 3 cups low sodium beef stock, plus more as needed
- 1/4 cup crushed tortilla chips, for thickening (optional)
- 2 large bay leaves
- Salt and pepper to taste
- Agave or honey to taste (optional, for balancing bitterness)
Instructions
For the Dried Chiles
- Remove the stems and seeds from the dried chile peppers. Toast the chiles in a dry pan over medium heat for 30 seconds per side or until fragrant. Remove chiles from the heat to a large bowl and cover with hot water. Cover bowl with plastic wrap and allow the chiles to soften for at least 20 minutes.
- To a blender, add the reconstituted chiles and 1 cup of new clean water (not the chile soaking water) and blend until smooth.
For the Chili
- Preheat oven to 300°F (150°C) and set the rack to the middle level.
- Heat a large Dutch oven to medium heat with the lard. Pat the beef cubes dry and season with salt and pepper. Sear the beef until browned on all sides, working in batches if needed to not overcrowd the pan. Place the seared beef on a plate and set aside.
- Add the onions to the pot and cook until soft (about 7-8 minutes). Add the garlic along with the cumin and cook until fragrant (about 2 minutes).
- Add the chile sauce to the pot and cook for another 3 minutes while stirring frequently.
- Add the beef cubes back to the pot along with the oregano, bay leaves, and beef stock and bring to a boil. Once boiling, turn off the heat and cover with the lid. Place the pot into the oven.
- After 90 minutes, remove the lid and return to the oven for another 30-45 minutes or until the chili has thickened and the beef is tender. Note: If the beef still isn’t fork tender, cook for another 20-30 minutes and check again. Add more beef stock if it starts to dry out.
- Remove the pot from the oven. If the chili hasn’t thickened enough, add the tortilla chips and/or cook over medium-high heat, stirring frequently until thickened to your liking.
- Taste test the chili and adjust salt and pepper as required. If the chili is too bitter, add 1-2 teaspoons of agave or honey to balance it out. Serve in bowls topped with sour cream, jalapeño peppers, diced raw onion, queso blanco, cotija, or whatever you like. Enjoy!
Notes
- The single most important thing you can do to improve your chili is to make it one day in advance and refrigerate overnight! The flavors will be so much better.
- If the beef isn’t tender, simply continue to cook it in the oven and check again after 20-30 minutes.
- A mixture of chile peppers was used but you can substitute other mild chiles if you like.
- Leftovers can be saved for up to 3-4 days and can be reheated on the stovetop or in the microwave.
Nutrition (per serving, approximation)
Calories: 764kcal | Carbohydrates: 4.6g | Protein: 53.2g | Fat: 60g | Saturated Fat: 11.5g | Cholesterol: 161mg | Sodium: 398mg | Potassium: 553mg | Fiber: 0.9g | Sugar: 2.6g | Calcium: 23mg | Iron: 6mg
Nutrition information is automatically calculated, so should only be used as an approximation.
We invite you to connect with us on Instagram at @sipandfeast or tag your delicious creations with #sipandfeast!