
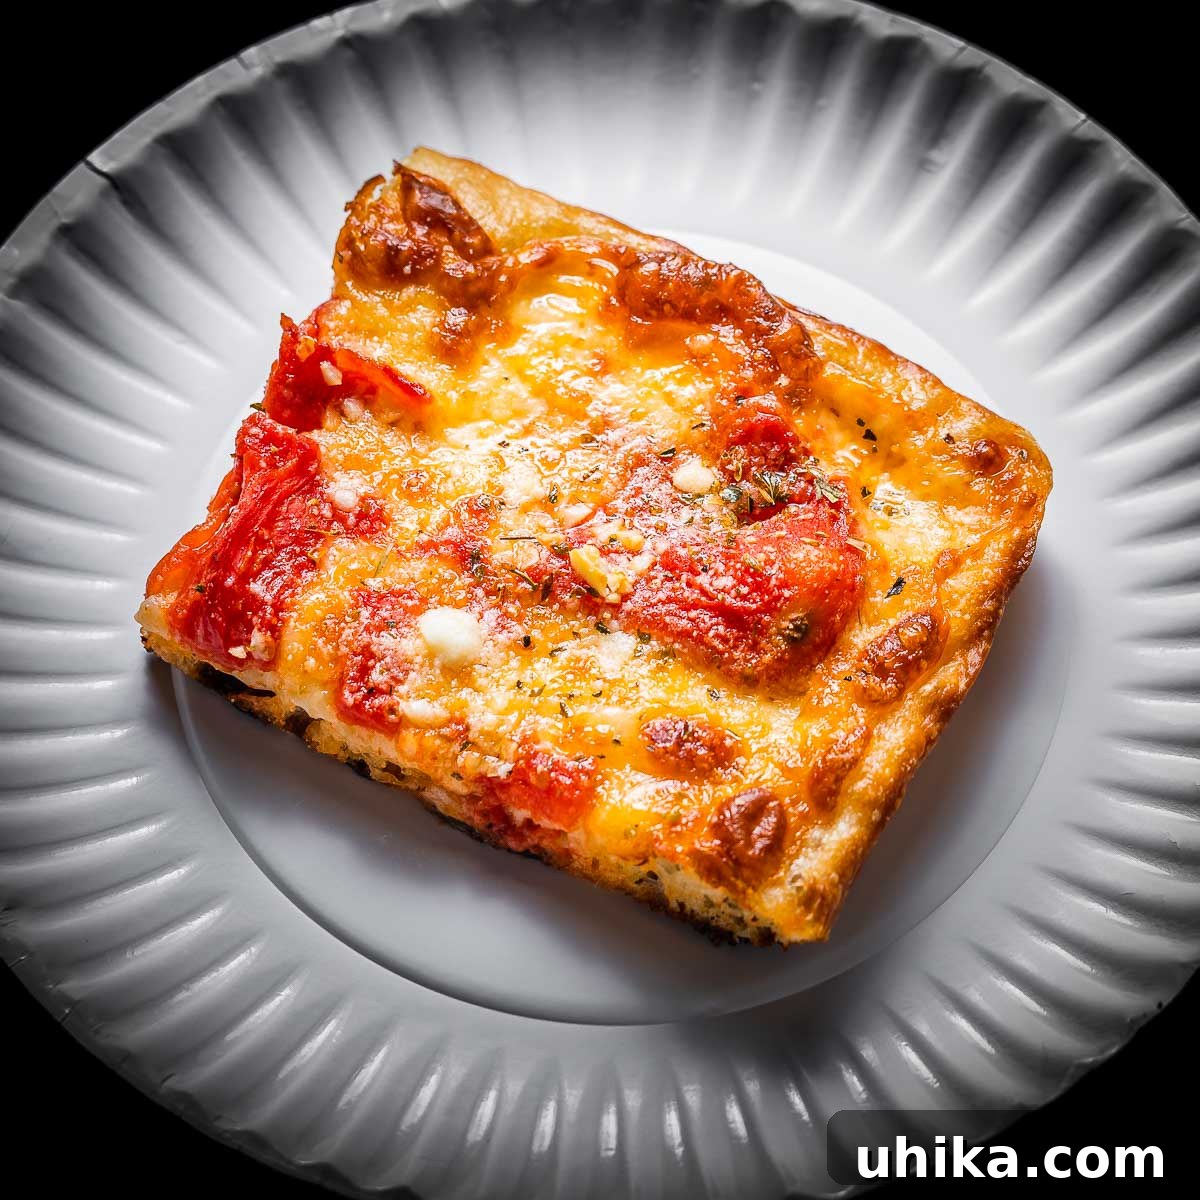
The Grandma Pizza holds a special place in the hearts of New Yorkers and pizza enthusiasts alike. Once you experience how remarkably straightforward it is to create this culinary masterpiece at home, it’s sure to become your new go-to. Originating from Umberto’s of New Hyde Park in Nassau County, Long Island, this distinct and incredibly flavorful pizza has since spread its popularity throughout the entire New York metropolitan area. Dive into this comprehensive guide to uncover every detail about the techniques, essential ingredients, and expert tips needed to craft your own perfect Grandma pizza.
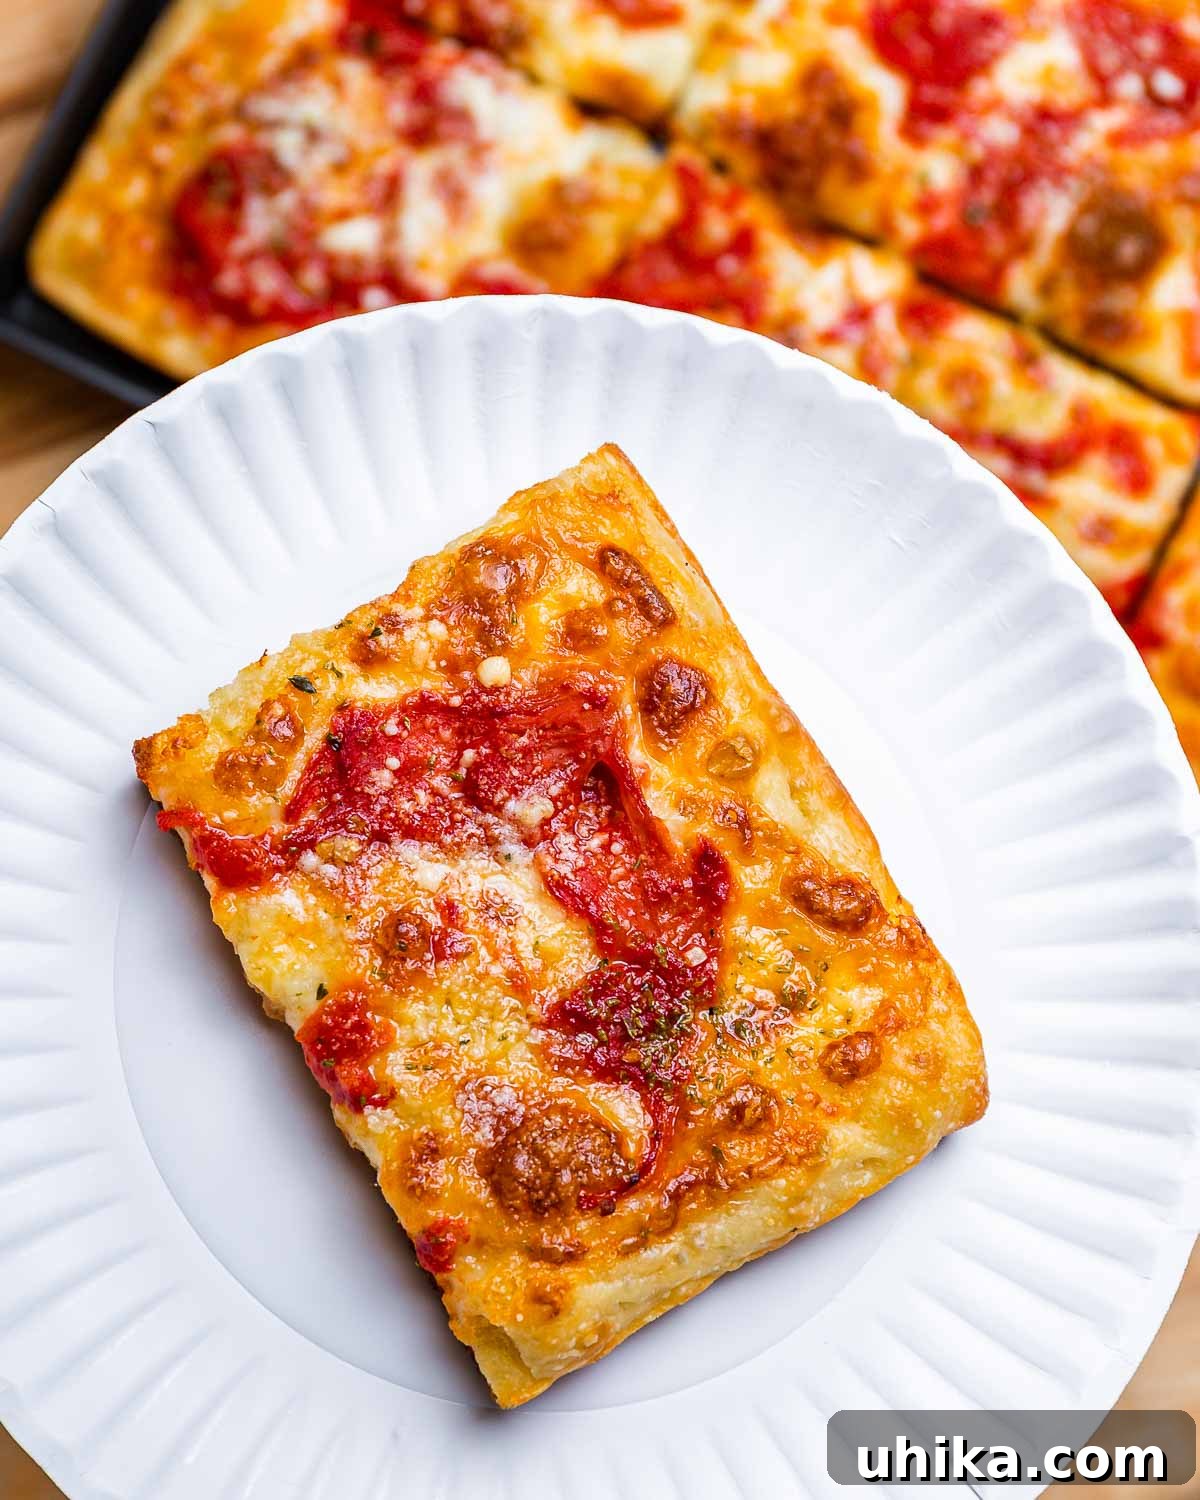
What is Grandma Pizza? A Culinary Gem
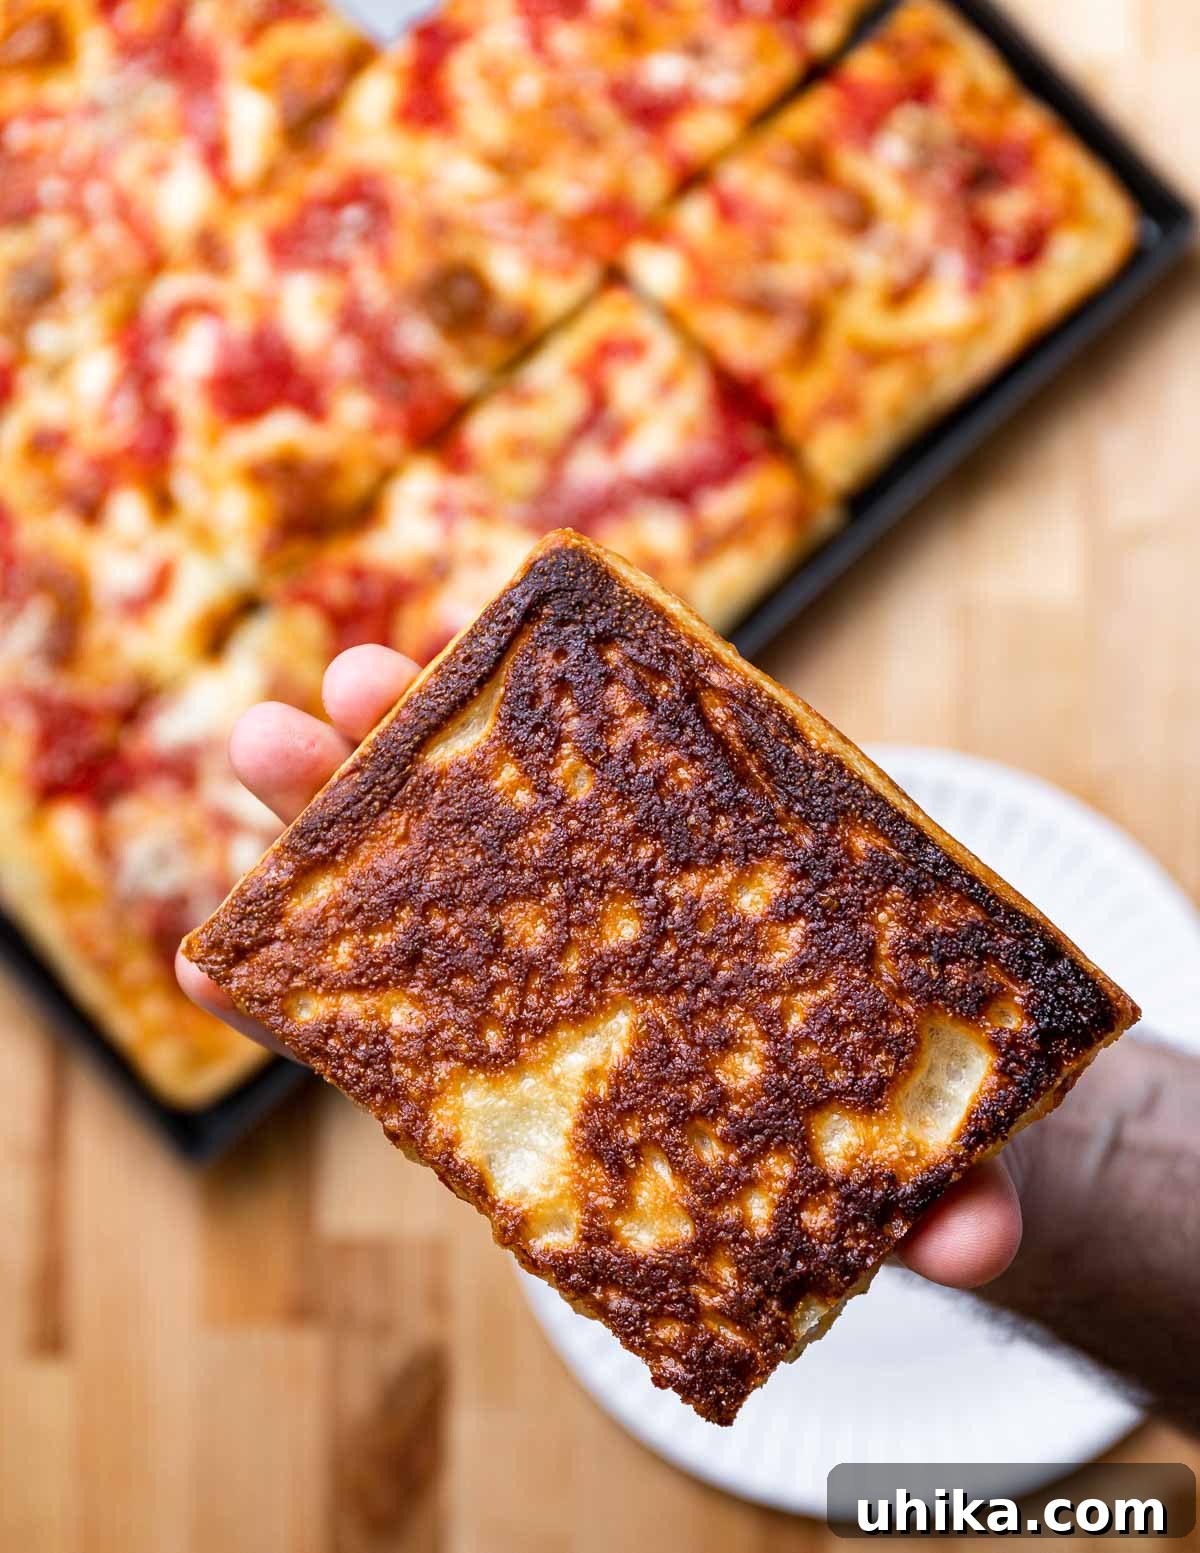
Grandma pizza stands out with its unique characteristics, distinguishing it from the more commonly known traditional New York pizza or even its thicker cousin, the Sicilian slice. It is a thin, rectangular sheet-pan pizza, famed for its incredibly crispy bottom crust. This signature crispiness is achieved by baking the dough in a pan generously coated with olive oil, creating a shallow-fry effect during the baking process. This distinctive method imparts a delightful crunch that is utterly unmistakable and highly addictive.
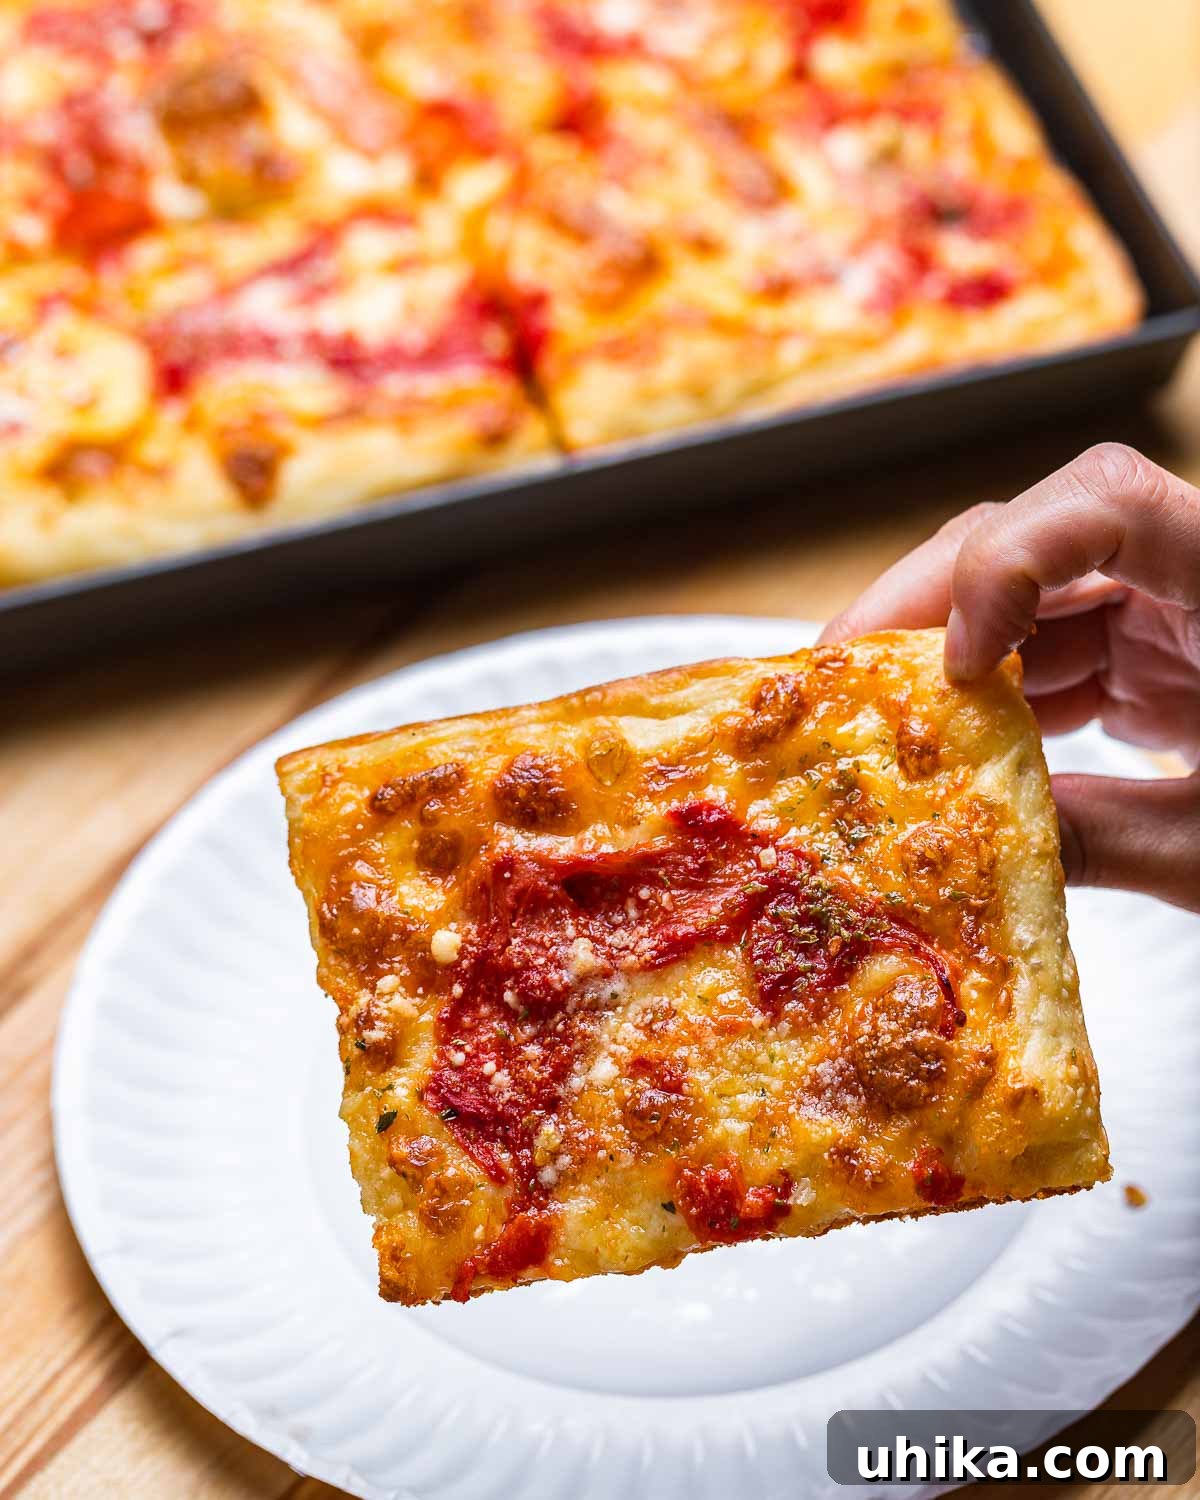
Beyond its textural allure, Grandma pizza boasts a signature topping arrangement. Instead of a smooth, uniform sauce, it features randomly scattered, thick plum tomatoes atop a layer of sliced mozzarella cheese. This distribution often gives it the appearance of an “upside-down” pie, where the cheese forms the initial layer directly on the dough, followed by the robust tomato dollops. The final touches are what truly elevate this pizza: a generous drizzle of fragrant garlic-infused olive oil, a sprinkle of authentic Sicilian oregano, and a shower of salty Pecorino Romano cheese. Its sturdy, pan-baked base also makes it exceptionally versatile, serving as an ideal foundation for various toppings, as seen in popular variations like pepperoni pizza and zucchini pizza.
The Storied Origin of Grandma Pizza
The beloved Grandma pizza isn’t as ancient as some Italian-American dishes, but its story is rich with tradition and local lore. Its creation is attributed to Umberto’s Pizzeria in New Hyde Park, Long Island, where it gained significant traction and soared in popularity throughout the 2000s and continues to thrive in the New York metropolitan area. The concept behind the Grandma pie harks back to simpler times, mimicking the home-style pizzas that Italian grandmothers – or “Nonnas” – would prepare in their kitchens. These were often made on sheet pans with readily available ingredients, baked quickly, and served with love.
While not as universally famous as the classic New York slice or the indulgent New York Sicilian, the Grandma pie holds a special, cherished status among New Yorkers. Its comforting, rustic charm resonates deeply with those who appreciate authentic, no-frills Italian-American cooking. It’s a testament to simple, quality ingredients and a straightforward method yielding extraordinary results. Even today, trendy pizzerias might rename this style, but at its heart, it remains the thin, crispy sheet-pan pizza reminiscent of those lovingly prepared by Italian grandmothers, embodying a true taste of home.
Mastering the Grandma Pizza Dough
Creating the perfect pizza starts with the dough, and for Grandma pizza, a well-made, cold-fermented dough is paramount. While this recipe provides both mass and volume measurements, using a kitchen scale for mass is highly recommended for unparalleled accuracy and consistency in baking. Our baker’s percentages for this dough are: 64% hydration, 0.4% instant yeast, 2% fine sea salt, 3.4% olive oil, and 1.2% sugar. These percentages allow you to easily scale the recipe up or down depending on your needs. To use them, simply divide your total flour weight by 100, then multiply that number by the desired percentage for each ingredient.
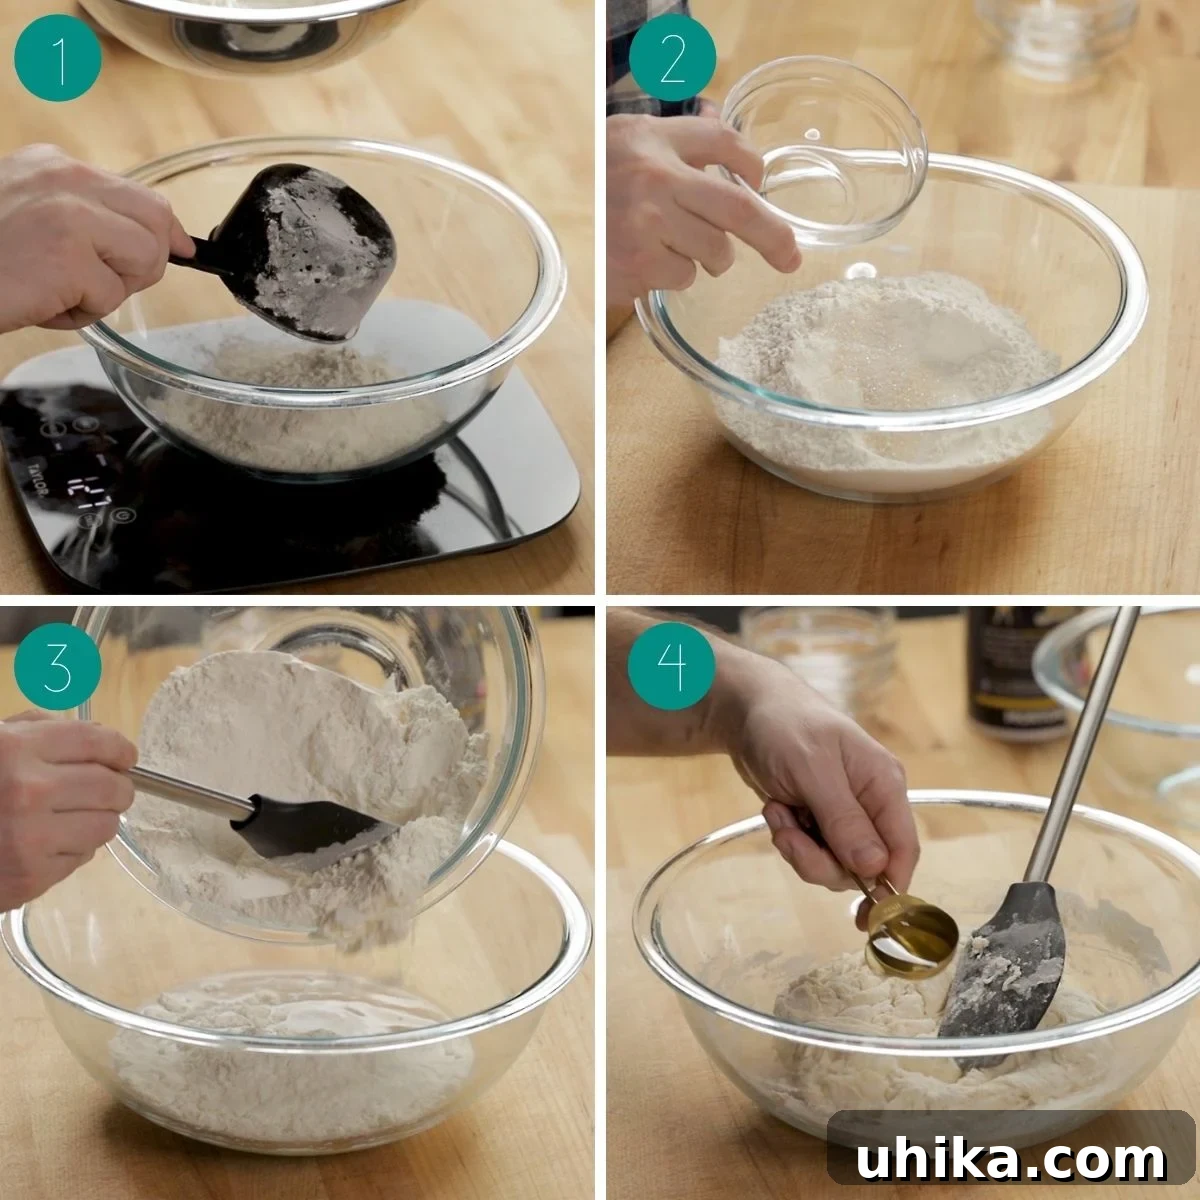
- Begin by accurately weighing or measuring 406 grams (3 1/4 cups) of bread flour, 2 grams (1/2 teaspoon) of instant yeast, 8 grams (1 1/2 teaspoons) of fine sea salt, and 4 grams (1 teaspoon) of sugar. Combine these dry ingredients thoroughly in a large mixing bowl.
- In a separate, even larger bowl, pour 260 grams (9 ounces) of cold water. Gradually add the mixed dry ingredients into the cold water, mixing continuously until a shaggy, rough mass of dough forms. Ensure all the dry bits are incorporated.
- Next, pour 14 grams (1 tablespoon) of olive oil over the dough. Continue to mix the dough in the bowl, scraping down the sides to integrate all the oil and any remaining flour residue.
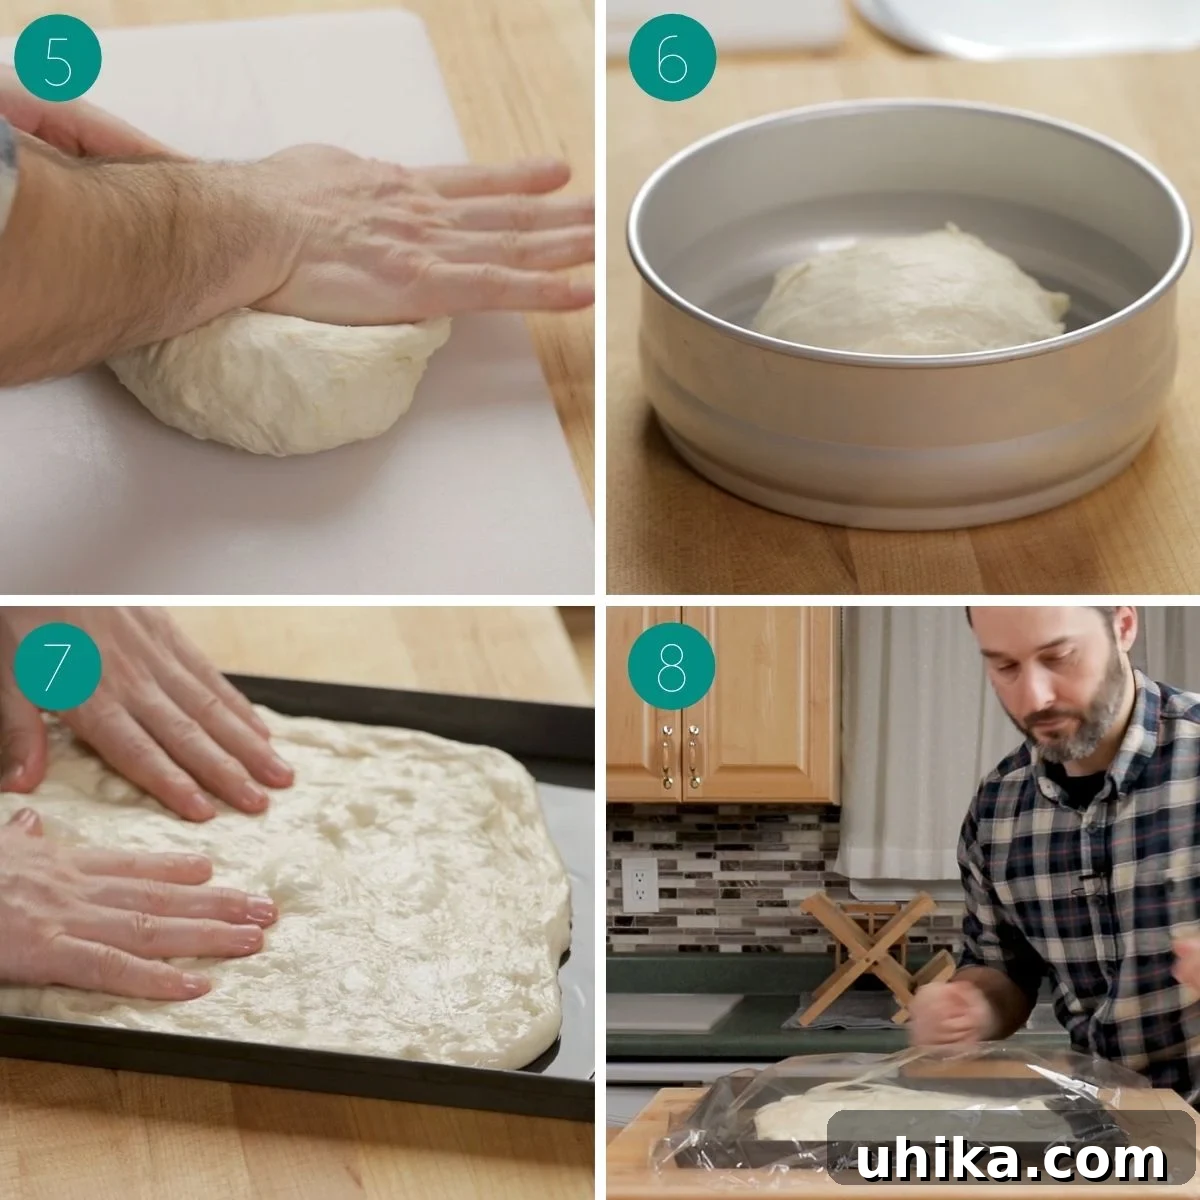
- Transfer the rough dough mass onto a clean, spacious work surface. A plastic cutting board, granite, or marble countertop works exceptionally well. Begin the kneading process. To knead effectively, fold the dough over itself, then press down and away with moderate force. Rotate the dough 90 degrees and repeat this folding and pressing motion. Continue kneading for a minimum of 5 minutes. If the dough becomes excessively sticky, simply cover it with plastic wrap or an inverted clean bowl and let it rest for 30 minutes. This rest allows the dough to relax and become easier to handle. Resume kneading, ensuring you achieve at least 5 minutes of total active kneading time, then gently form it into a ball.
- For Grandma pizza, a perfectly smooth dough ball isn’t strictly necessary, so don’t stress over minor imperfections. To form the ball, gently fold the dough tightly onto itself, creating a seam at the bottom. Rotate the dough and fold again, repeating this about 20 times. Finally, pinch the seam closed. Place the formed dough ball, seam-side down, into an oiled container. Cover the container tightly with plastic wrap and refrigerate the dough for at least 12 hours for a crucial cold fermentation. For optimal flavor development and easier handling, aim for 24-48 hours of cold fermentation if your schedule permits.
Dough Preparation for Baking
- Approximately 2 hours before you plan to bake, remove the dough from the refrigerator to allow it to warm up to room temperature. This makes it more pliable and easier to stretch. Prepare your sheet pan by generously coating the bottom with 3/8 cup of olive oil – you’ll need plenty to create that desired crispy bottom. Carefully transfer the dough from its container into the oiled pan. Using your fingertips, gently begin to press and stretch the dough towards the edges and corners of the pan. It’s unlikely you’ll achieve a full stretch on the first attempt.
- Cover the sheet pan loosely with plastic wrap and let the dough rest for another 45 minutes. This rest period allows the gluten to relax, making the dough much easier to stretch further. After 45 minutes, remove the plastic and continue stretching the dough to fill the pan completely. Depending on the dough’s warmth and elasticity, you might need to repeat this stretch-and-rest process one more time to achieve full pan coverage.
Assembling and Baking Your Perfect Grandma Pizza
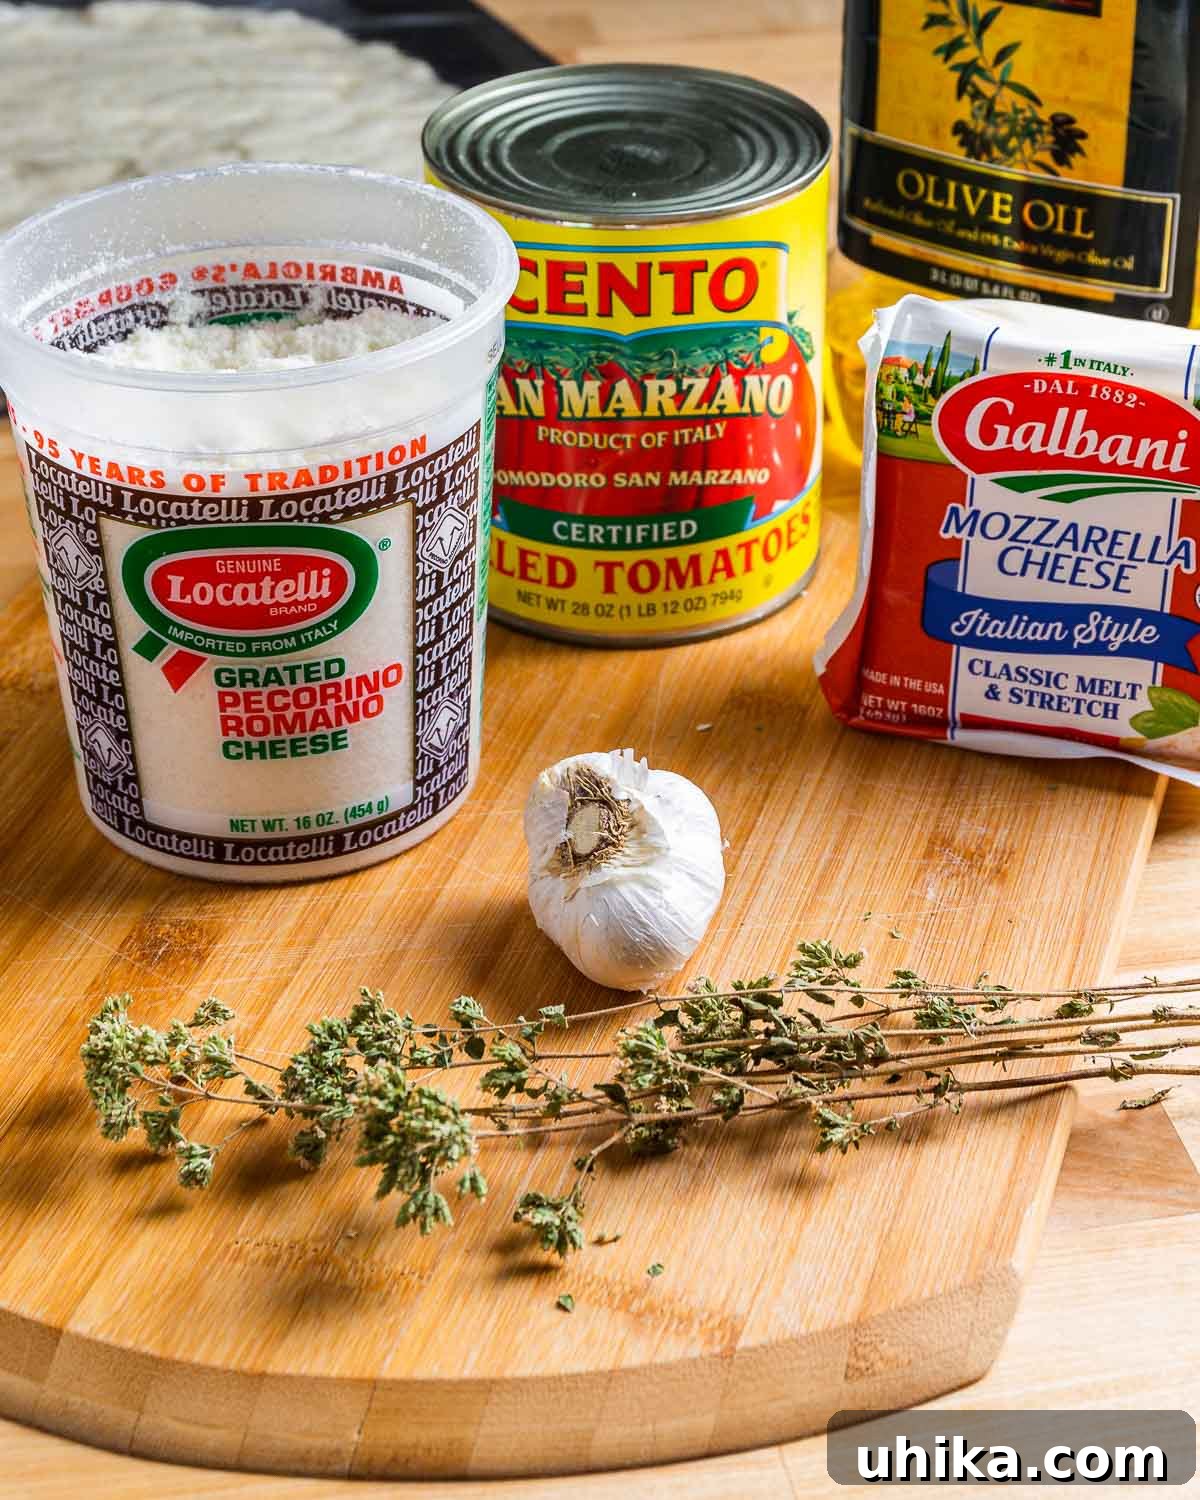
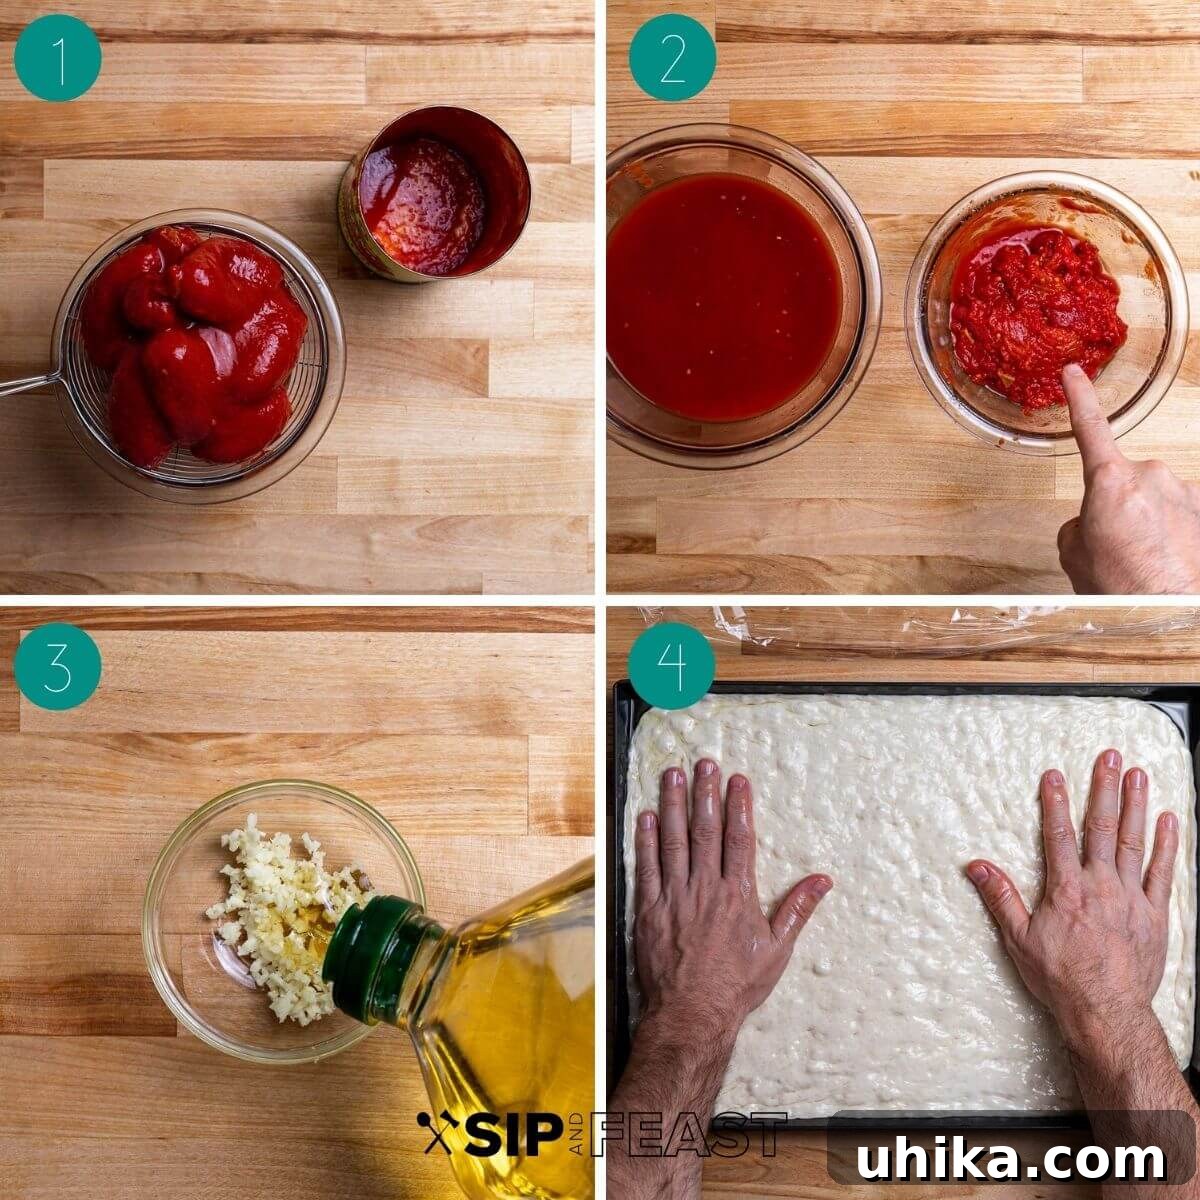
- Open one 28-ounce can of whole San Marzano or other high-quality plum tomatoes. In a large bowl, use your hands to crush the tomatoes thoroughly.
- After hand-crushing, carefully strain the tomatoes to remove excess juice. You want to be left with a thick, pulpy tomato concentrate with minimal liquid, as too much moisture can make the crust soggy. Save the drained juice for another culinary purpose if desired. Season the crushed tomatoes with 1/2 teaspoon of Kosher salt and mix well. Set aside.
- In a small bowl, combine 3 tablespoons of olive oil with 3 finely minced cloves of garlic to create your aromatic garlic oil. This oil will be drizzled over the pizza just before baking, adding a burst of flavor.
- Preheat your oven to 450°F (232°C), ensuring one oven rack is set to the lowest level and another to the highest. As your oven heats, take a moment to perform any final stretches of the dough in the pan, ensuring it completely fills the space. Remember to keep it covered with plastic wrap between stretches to prevent drying.
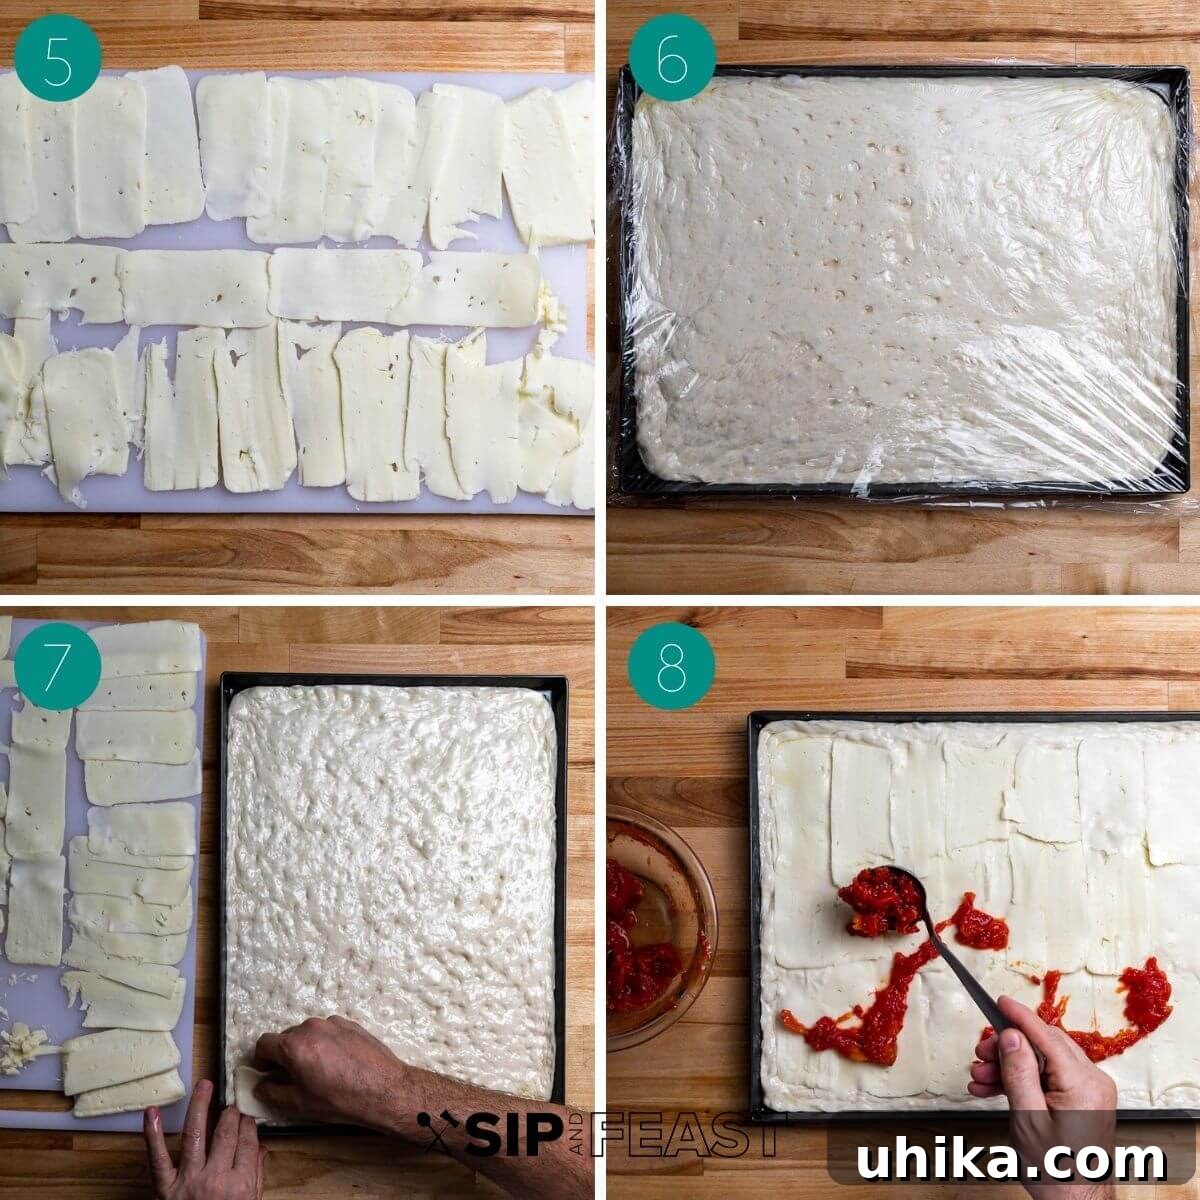
- For the cheese, it’s highly recommended to use pre-sliced mozzarella from your local deli or supermarket for convenience and even melting. If you’re slicing a block yourself, partially freezing it beforehand can make slicing much easier. You’ll need approximately 12-16 ounces of sliced mozzarella. The exact weight is less crucial than ensuring the entire dough surface is adequately covered.
- Now that your dough is perfectly stretched and your ingredients are prepared, it’s time for the final assembly before baking.
- Begin layering the mozzarella cheese. Start by pinning a corner of the dough with your hands, then place the first slice of cheese down, applying light pressure. This helps to secure the corner and prevent excessive movement of the dough during baking. Continue to layer the remaining cheese slices in an overlapping shingle pattern, leaving about a 1/4 to 1/2-inch border of dough uncovered around the edges.
- Next, distribute the strained, hand-crushed tomatoes randomly over the cheese layer. Resist the urge to over-sauce the pizza; the tomatoes will naturally spread out as they cook, creating the characteristic “upside-down” pattern of Grandma pizza.
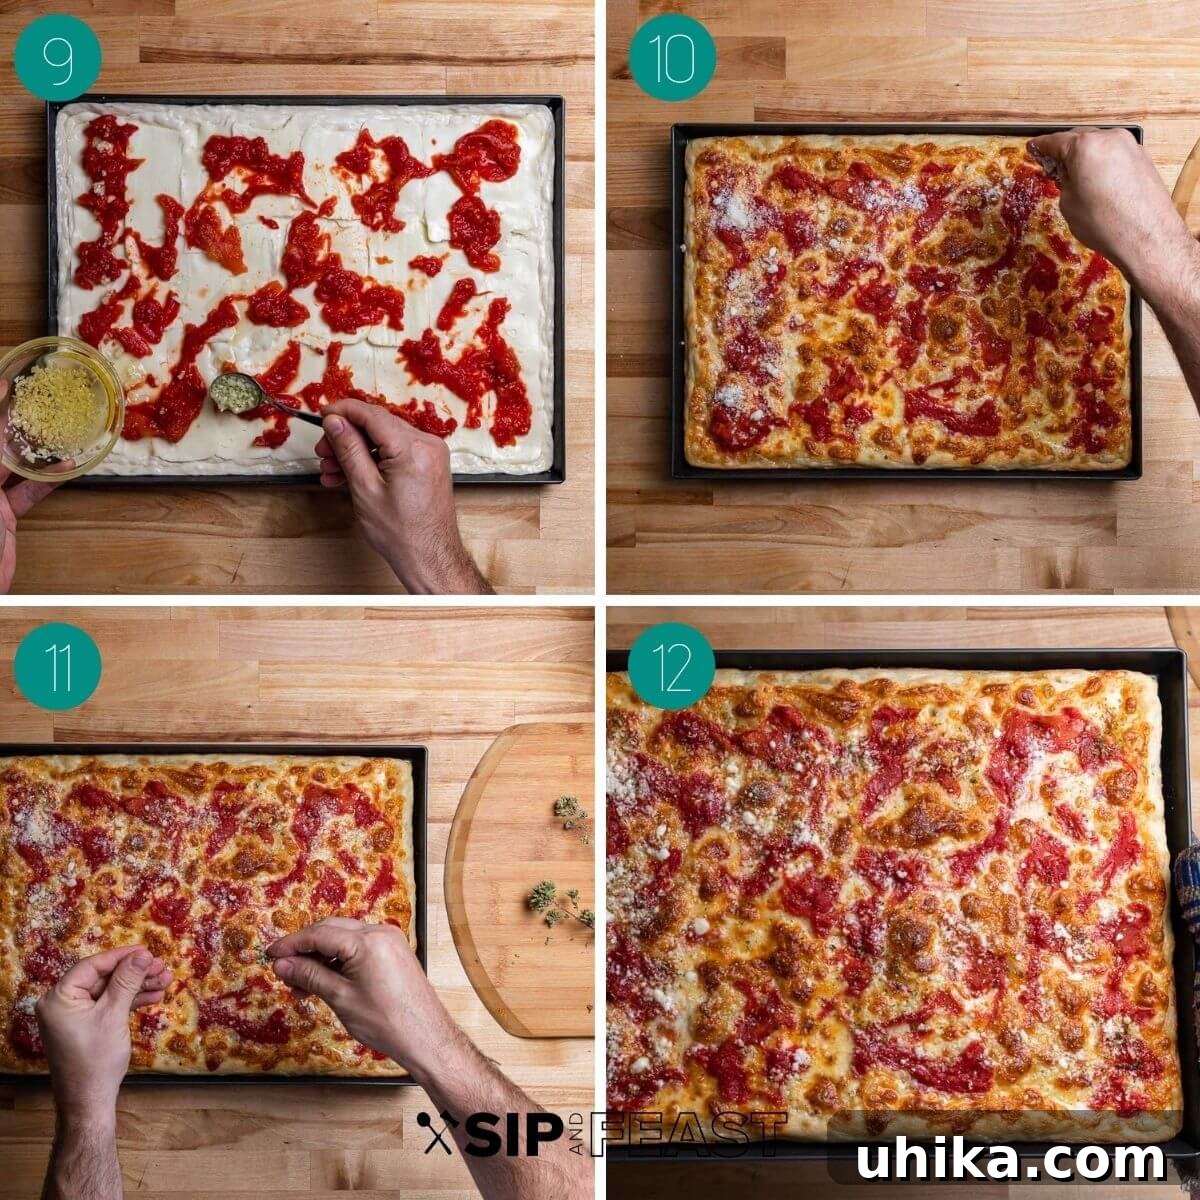
- Generously drizzle a couple of tablespoons of your prepared garlic oil all over the pizza. If you’re a garlic lover, feel free to add more! Carefully place the pizza into the preheated oven on the lowest rack. Bake for 12 minutes, rotating the pan 180 degrees halfway through (after 6 minutes) to ensure even cooking. After the initial 12 minutes, use a spatula to gently lift a corner of the pizza and check the bottom crust. If it’s beautifully browned and crisp, proceed to the next step.
- If the bottom is perfectly browned, move the pizza to the top oven rack and continue baking for an additional 6 minutes. If the bottom is still too blond, leave it on the lowest rack for the remaining 6 minutes. After a total of approximately 18 minutes of baking, remove the pizza from the oven. Immediately sprinkle a few tablespoons of Pecorino Romano cheese evenly over the hot pizza.
- Sprinkle 1/2 to 1 teaspoon of Sicilian oregano over the pizza. If using dried Sicilian oregano, crumbling it between your hands before sprinkling enhances its aroma and flavor. Return the pizza to the top rack of the oven and cook for a final 2 minutes. For an extra crispy top, if desired, you can briefly broil the pizza for 30-60 seconds, but watch it *very* carefully to prevent burning. Normally, broiling isn’t required.
- After approximately 20-22 minutes of total baking time, your perfect Grandma pizza is ready! Let the pizza rest for 5 minutes before slicing and serving to allow the cheese to set and the flavors to meld.
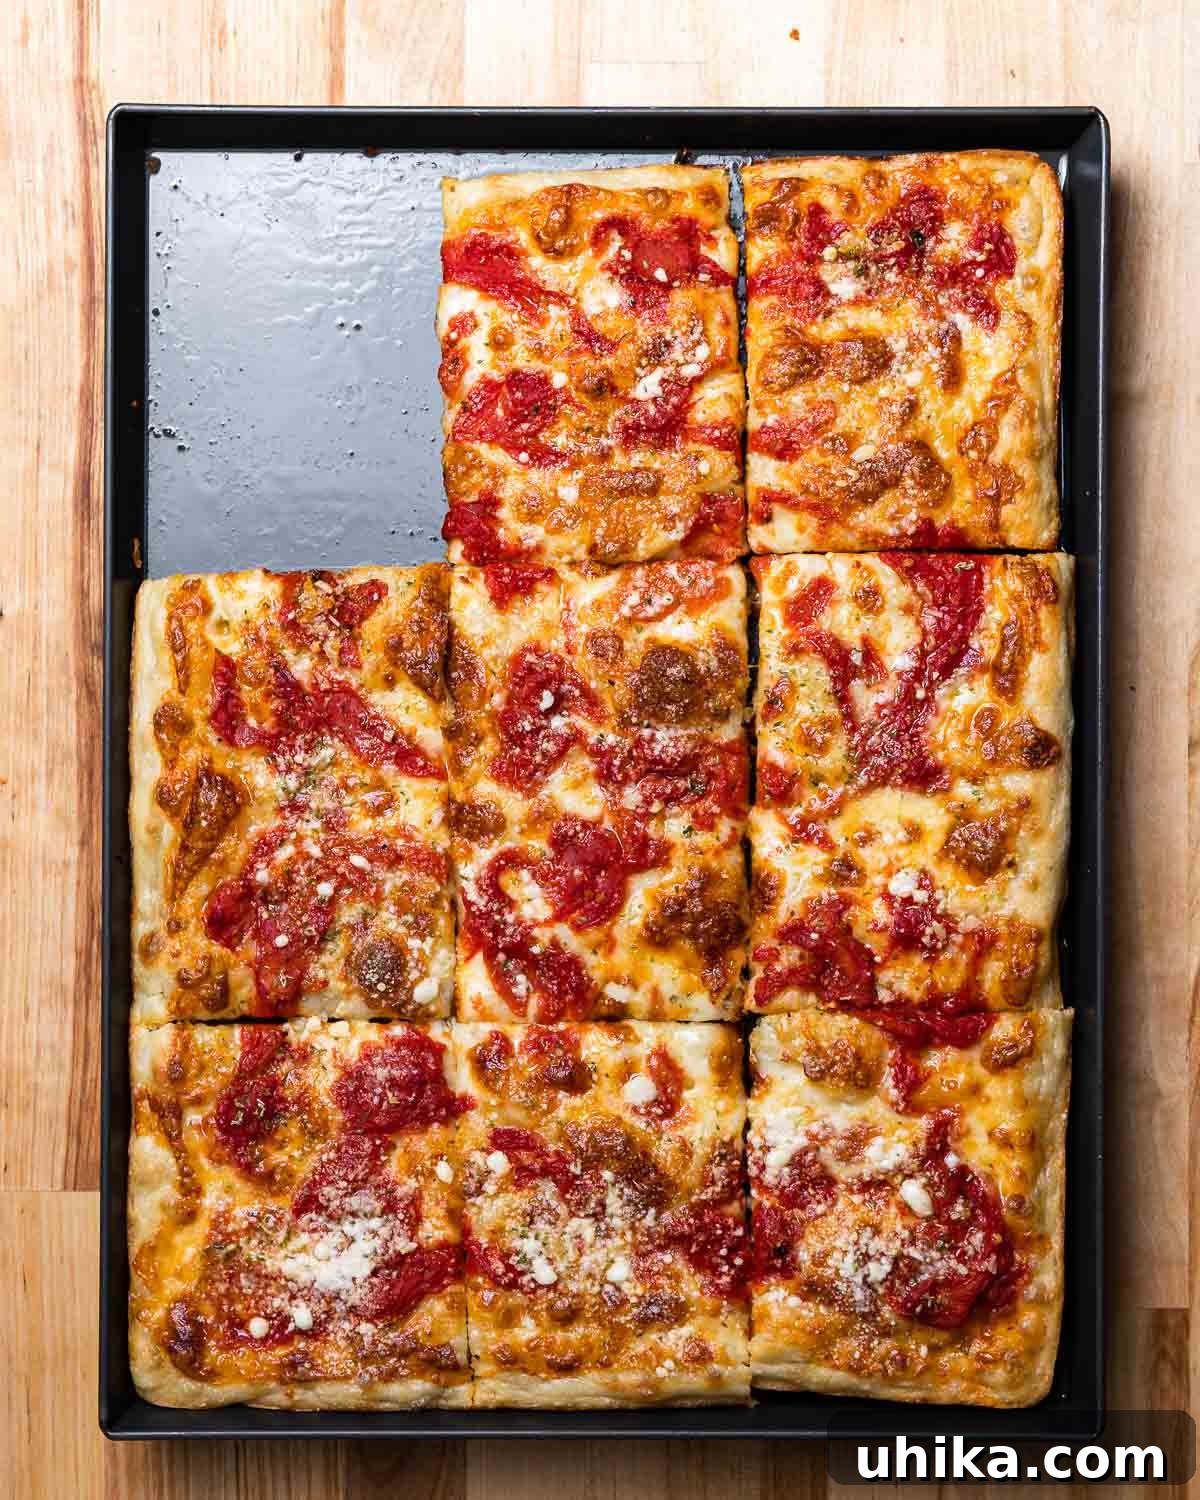
This detailed guide empowers you to create authentic New York Grandma pizza right in your own kitchen. It’s arguably the most approachable of the three main types of New York pizza – the classic thin crust, the thick Sicilian, and this crispy pan-baked delight. The most challenging aspect is often the waiting period for the dough’s cold fermentation, but the incredible depth of flavor and superior texture it imparts are undeniably worth every moment.
Choosing the Right Pan: The Secret to the Crispy Crust
The type of pan you use is a critical factor in achieving the signature crispy bottom of a Grandma pizza. While many professional pizza shops utilize heavy steel pans for their Sicilian and Grandma pies, baking them in high-temperature deck ovens that quickly brown the crust, replicating this at home can be challenging. Most home ovens cannot generate the intense, consistent heat needed to adequately brown a thick steel or cast iron pan in the time required for a Grandma pizza, potentially leading to an undercooked or pale bottom.
For home bakers, a thin aluminum pan is highly recommended. Aluminum is an excellent conductor of heat, allowing the bottom of the pizza to crisp up quickly and efficiently, especially when placed on the lowest oven rack. This method actively helps “fry” the crust in the generous olive oil you’ve added, creating that sought-after crunch. A dark aluminum pan, such as the LloydPans 16 x 12″ Grandma pan shown in the images, works exceptionally well due to its non-stick coating and optimized heat transfer. Alternatively, a standard 18 x 13 half-sheet pan will also yield fantastic results, making this authentic pizza accessible to most home kitchens.
Optimizing Oven Temperature and Rack Placement
Understanding your oven is key to successful pizza making. This recipe has been developed using a standard home conventional oven, typically around 20 years old, so results may vary slightly depending on your specific appliance. If you’re using a convection oven, you might need to adjust cooking times and temperatures, as convection can effectively add 20-25°F to the cooking environment compared to a conventional oven. Always refer to your oven’s manual or common convection cooking guidelines for specific adjustments.
As detailed in the instructions, after the initial 12 minutes of baking, it’s crucial to check the bottom of your pizza with a spatula. If it’s still very light or “blond,” keep the pizza on the bottom rack for the remaining 8 minutes of baking to ensure it develops that beautiful, crispy brown crust. If you encounter persistent issues with browning the bottom, don’t hesitate to add another 3 tablespoons of olive oil underneath the pizza before the final cooking phase. Remember, Grandma pizza famously uses a generous amount of olive oil, which is vital for its characteristic texture. Every oven has its quirks, and temperatures can fluctuate. Your oven will likely behave differently from mine. Don’t be afraid to experiment slightly with pan placement and temperature settings to find what works best for your equipment. With these guidelines and a little observation, you’ll undoubtedly be able to produce a Grandma pizza that looks and tastes just like the authentic New York original.
Alternative Dough Preparation: Using a Kitchen Aid Mixer
While this guide emphasizes the traditional hand-mixing method to demonstrate that you don’t need special equipment, a stand mixer can certainly simplify the dough preparation process. If you prefer to use your Kitchen Aid mixer, follow these straightforward steps:
- In a large bowl, mix all your dry ingredients (bread flour, instant yeast, fine sea salt, and sugar). Transfer about half of this dry mixture along with all the cold water into your Kitchen Aid mixer bowl.
- Attach the dough hook to your mixer. Mix on low speed (level 1) for 1 minute to combine. Then, gradually begin adding the remaining dry ingredients to the bowl.
- Once all dry ingredients are added, slowly drizzle the 1 tablespoon of olive oil into the mixing bowl. Continue mixing on speed level 1 for another 4 minutes, or until the dough gathers around the dough hook and starts to pull cleanly away from the sides of the bowl.
- Remove the dough from the mixer. Give it a brief hand knead for about 1 minute to ensure uniformity, then cover it and let it rest for 40 minutes. After resting, form the dough into a smooth ball, place it in an oiled proofing container, and refrigerate for at least 12 hours for cold fermentation. It’s as simple as that!
More New York Pizzeria Delights
If you’ve enjoyed mastering the Grandma pizza, you might be interested in exploring other classic New York-style pizzeria favorites:
- Homemade New York Pizza – A comprehensive guide to making the classic thin-crust New York slice.
- New York Sicilian Pizza – Indulge in a thick, airy crust topped with mozzarella, Pecorino, and fragrant Sicilian oregano.
- Vodka Sauce Pizza – A delicious Grandma-style pizza featuring rich vodka sauce.
- New York White Pizza – A savory combination of mozzarella, creamy ricotta, a hint of Pecorino Romano, and roasted garlic.
- Garlic Knots – Classic twisted knots bathed in garlic oil and butter, finished with Pecorino Romano, hot pepper flakes, and parsley.
- Cast Iron Pan Pizza – A crispy pizza dough topped with tomato, mozzarella, Pecorino, garlic oil, and oregano, baked to perfection in a cast iron pan.
- Pepperoni Pinwheels – Savory rolls filled with pepperoni, ham, and mozzarella – a fantastic accompaniment to any pizza night.
Authentic Grandma Pizza Recipe
Here’s a full breakdown of the recipe for your convenience:
Prep Time: 3 hours | Cook Time: 20 minutes | Cold Fermenting Time: 1 day | Total Time: 1 day, 3 hours, 20 minutes
Servings: 9 pieces
The Grandma pizza consists of a sheet pan style pizza baked with mozzarella, plum tomatoes, fresh garlic, Pecorino Romano, and oregano, resulting in a delightfully crispy crust and rich flavor.
Ingredients
For the Dough:
- 406 grams bread flour (or 3 1/4 cups)
- 2 grams instant yeast (or 1/2 teaspoon)
- 8 grams fine sea salt (or 1 1/2 teaspoons)
- 4 grams sugar (or 1 teaspoon)
- 260 grams cold water (9 ounces)
- 14 grams olive oil (or 1 tablespoon)
For the Grandma Pizza:
- 1 (~24 ounce) dough ball (prepared from above)
- 1 (28-ounce) can plum tomatoes (hand crushed and completely drained of liquid)
- 12-16 ounces sliced mozzarella cheese (weight will vary, use enough to cover the pizza completely)
- 3 tablespoons Pecorino Romano (grated)
- 3/4 cup olive oil (divided)
- 3 cloves garlic (minced)
- 1/2 teaspoon kosher salt
- 1 teaspoon Sicilian oregano (or Italian oregano), crumbled
Instructions
For the Dough:
- Place cold water in a large bowl. In a separate bowl, mix together the dry ingredients (bread flour, yeast, salt, sugar).
- Slowly add the dry ingredients to the water, mixing thoroughly to form a shaggy, rough mass.
- Pour the 1 tablespoon of olive oil over the dough, mix again to incorporate, then transfer the dough to a clean work surface.
- Knead the dough for 5-7 minutes. If it becomes too sticky, cover it with an inverted bowl for 30 minutes, then resume kneading for a total of at least 5 minutes.
- After kneading, cover the dough again for 30-40 minutes to allow it to warm up and relax.
- After 40 minutes, form the dough into a smooth ball by repeatedly pulling the edges towards the center and pinching the seam. Place the dough ball seam-side down into an oiled bowl and cover tightly with plastic wrap. Refrigerate for at least 12 hours for cold fermentation (24-48 hours is ideal).
For the Grandma Pizza:
- Two hours before baking, remove the dough from the fridge (keep covered). Oil the bottom of a Grandma pizza pan (or standard half-sheet pan) with 3/8 cup of olive oil – be generous!
- Place the dough into the oiled pan. Using your fingertips, gently press and stretch the dough towards the corners. You won’t fill the pan immediately. Cover the pan with plastic wrap and let the dough rest for 45 minutes.
- After 45 minutes, remove the plastic and stretch the dough further to fill the pan. If needed, repeat the cover-and-stretch process one more time until the pan is completely filled. Cover the dough and set aside. Preheat your oven to 450°F (232°C), with one rack on the lowest level and one on the highest.
- Hand crush the plum tomatoes and drain all excess juice. Save the juice for another use. Add 1/2 teaspoon of kosher salt to the crushed tomatoes and set aside.
- Mince the garlic and combine it with the remaining 1/4 cup of olive oil in a small bowl to create the garlic oil.
- Remove the plastic from the pan. If necessary, press the dough into the edges once more. Immediately layer the sliced mozzarella cheese in an overlapping shingle pattern, leaving a 1/4 to 1/2-inch border uncovered around the edges. Start from a corner and gently press down to “lock” the dough into place.
- Evenly distribute the drained plum tomatoes over the cheese in a random pattern, avoiding over-saucing. Drizzle 3 tablespoons of the prepared garlic oil (including the minced garlic pieces) all over the pizza.
- Place the pizza onto the lowest oven rack and bake for 12 minutes, rotating the pan 180 degrees after 6 minutes for even cooking.
- After 12 minutes, remove the pizza and check the bottom crust for browning using a spatula. If it’s well-browned and crisp, transfer the pizza to the top rack and bake for another 6 minutes. If the bottom is still pale, leave it on the bottom rack for the remaining 6 minutes.
- After a total of approximately 18 minutes of baking, remove the pizza from the oven. Sprinkle with the crumbled oregano and grated Pecorino Romano cheese. Return to the top oven rack and bake for 2 more minutes.
- If the top of the Grandma pizza is not crisp enough after the final bake, you can broil it for 30-60 seconds. Watch it very carefully to prevent burning, as broilers can be intense.
- Total cooking time will be approximately 20-22 minutes. Let the pizza rest for 5 minutes before cutting and serving. Enjoy your authentic homemade Grandma Pizza!
Notes
- The dough benefits greatly from cold fermentation. It can be refrigerated for as little as 12 hours or as long as 72 hours for enhanced flavor and texture.
- If you are refrigerating your dough in a metal bowl, use a bit more olive oil to coat the bowl, as metal tends to be stickier than plastic.
- Cooking times are approximate and may vary depending on your specific oven. After the initial 12 minutes on the lowest rack, the bottom of the pizza should be deeply browned and crisp. If it appears completely blond, continue baking it on the lowest rack for the entire remaining 8-10 minutes.
- Do not be shy with the olive oil! Grandma pizza requires a generous amount, particularly in the pan, to develop its signature amazingly crispy bottom crust.
- Leftover Grandma pizza can be stored in an airtight container for up to 3 days. To reheat, place slices on a parchment paper-lined baking sheet and warm in a 350°F (175°C) oven for about 10 minutes, or until hot and crispy again.
- Baker’s Percentages: 64% hydration, 0.4% yeast, 2% salt, 3.4% oil, 1.2% sugar
- Thickness Factor (TF): 0.127
Nutrition (Approximate per serving)
Calories: 424 kcal | Carbohydrates: 37.5g | Protein: 14.4g | Fat: 24.3g | Saturated Fat: 8.3g | Cholesterol: 36mg | Sodium: 734mg | Potassium: 77mg | Fiber: 1.6g | Sugar: 2.2g | Calcium: 263mg | Iron: 2mg
Nutrition information is automatically calculated and should be used as an approximation only.
Like this? Leave a comment below!Check us out on Instagram at @sipandfeast or tag #sipandfeast!