
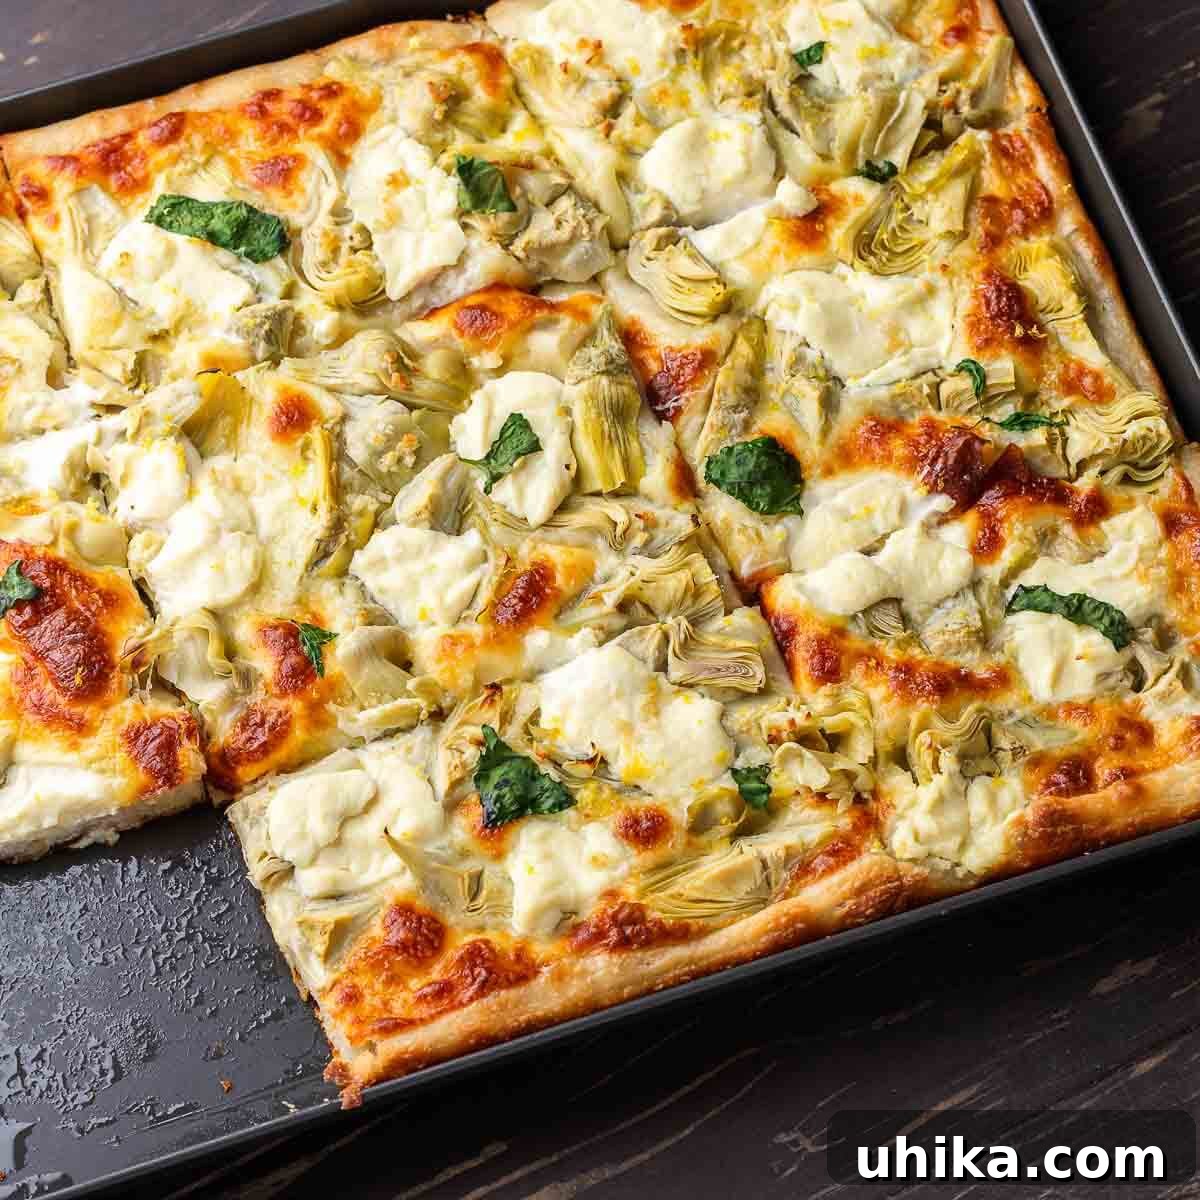
The Ultimate Artichoke Sheet Pan Pizza: A Culinary Masterpiece
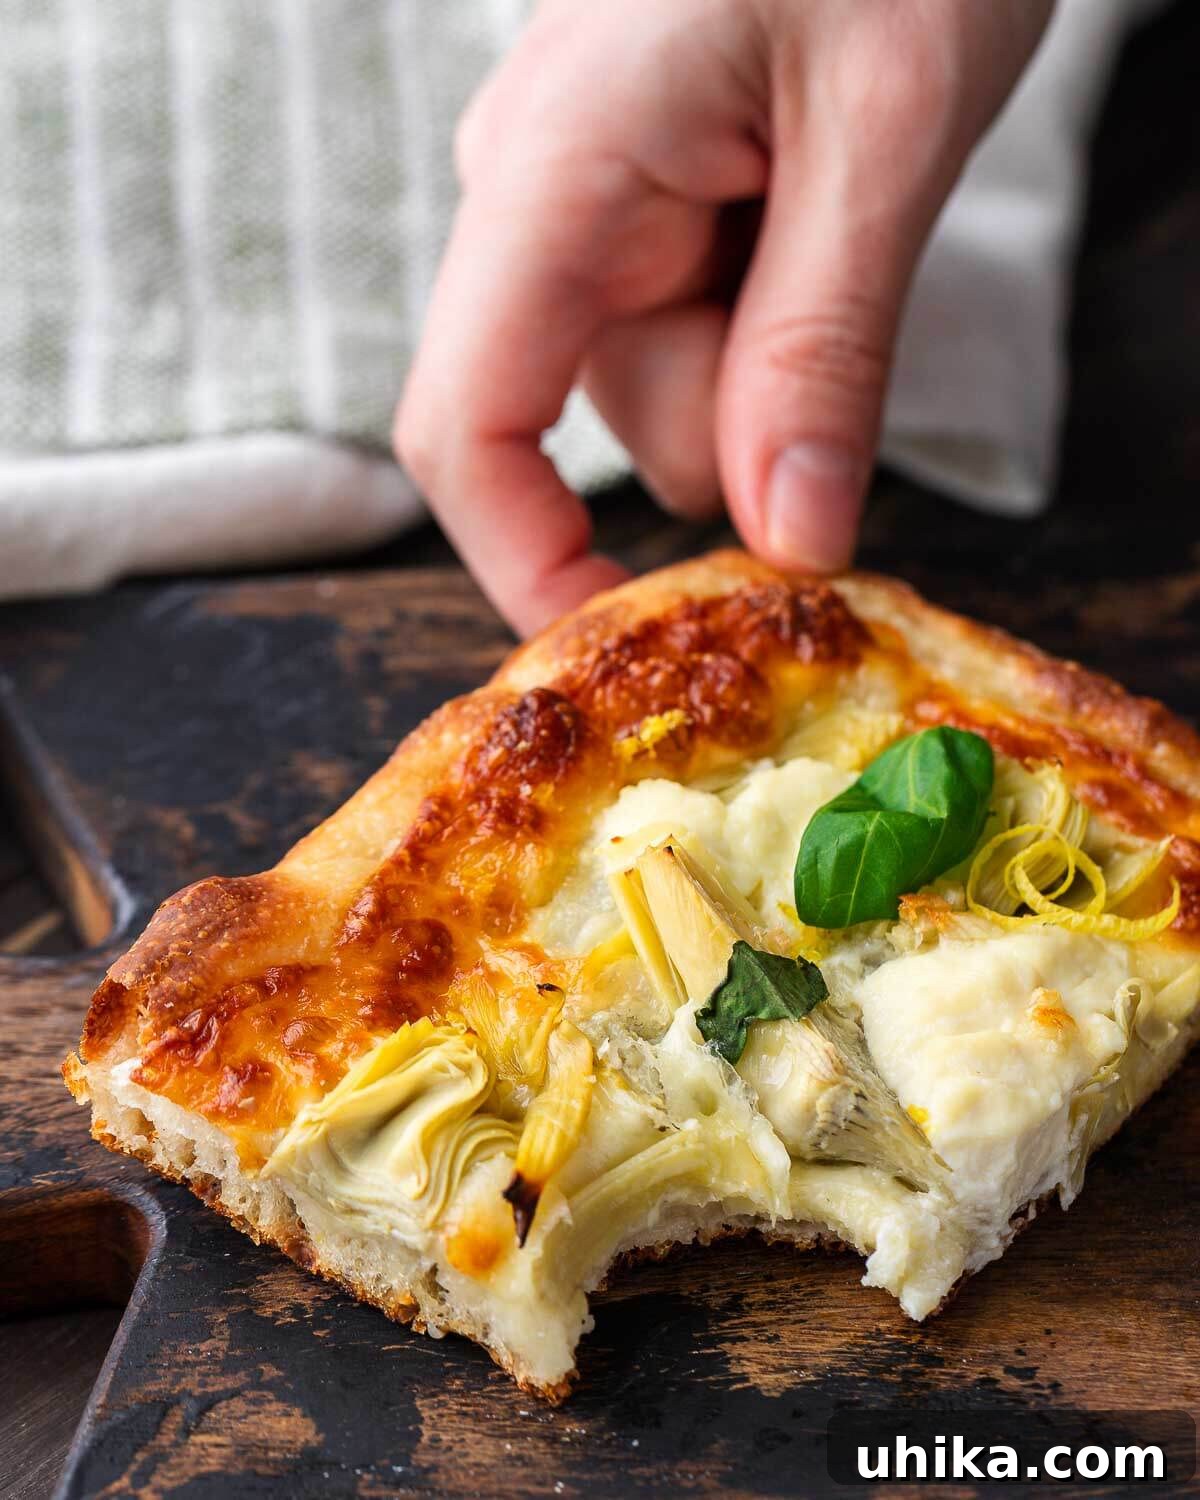
Embark on a delightful culinary journey with our exceptional Artichoke Sheet Pan Pizza. This recipe transforms a classic favorite into a gourmet experience, featuring a robust homemade crust generously topped with rich, sliced mozzarella, creamy dollops of ricotta, an aromatic garlic oil, tender artichoke hearts, vibrant fresh basil, savory Pecorino Romano, and a bright finish of fresh lemon zest. While we guide you through crafting a perfectly cold-fermented dough from scratch, feel free to use high-quality store-bought dough for a quicker preparation without compromising on flavor. This isn’t just a pizza; it’s a testament to simple ingredients coming together in harmonious perfection.
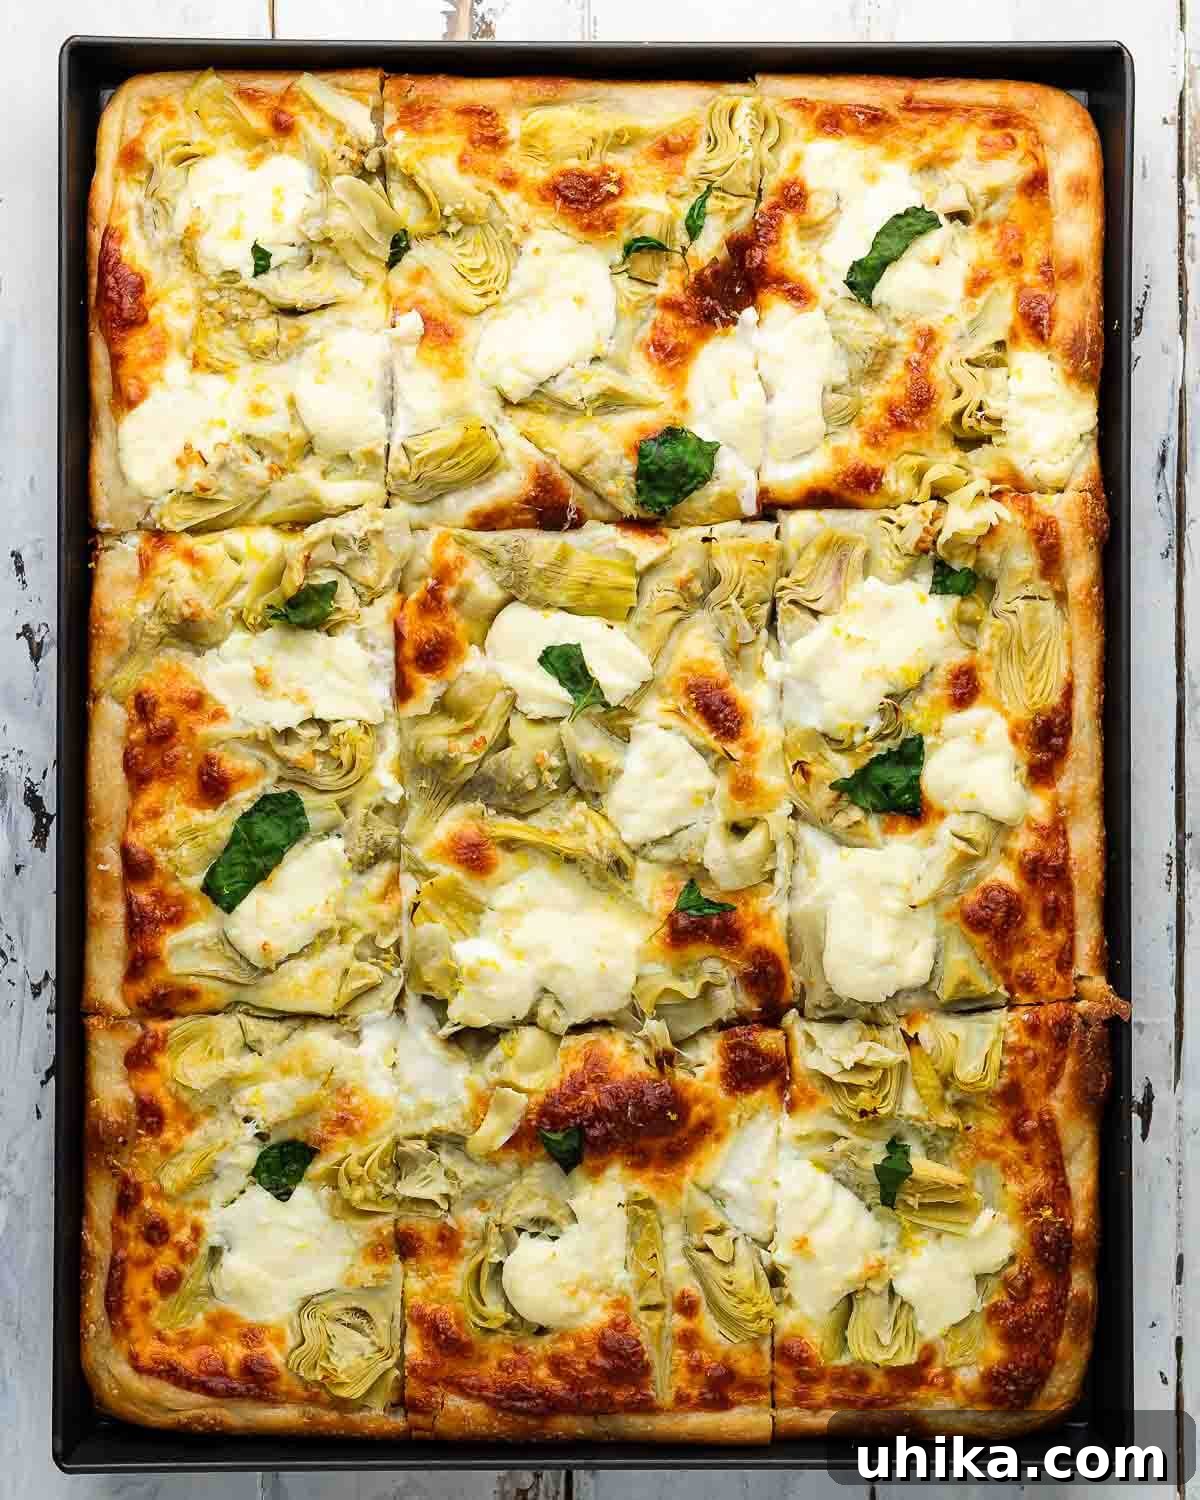
Originally published in March 2019, this recipe has been thoroughly updated with comprehensive process shots and expanded details to ensure your success in the kitchen. We believe in providing you with all the insights needed to create a truly memorable meal.
Why This Artichoke Sheet Pan Pizza Will Become Your New Favorite
This artichoke pizza recipe was born from a deep affection for the earthy, slightly tangy flavor of artichoke hearts, combined with the comforting familiarity of a classic New York-style white pizza. We opted for a thicker, more substantial pan pizza because it provides the ideal foundation to support a generous layering of succulent artichoke hearts and the luxurious, creamy dollops of ricotta cheese. The sheet pan format ensures a perfectly crisp bottom and edges, a hallmark of truly great pizza.
Beyond its incredible taste, this recipe offers flexibility. While the homemade cold-fermented dough, with its deep flavor and superior texture, is highly recommended and worth the planning, we understand that time isn’t always on your side. For those busy evenings, readily available store-bought or local pizzeria dough can be an excellent substitute, allowing you to enjoy this magnificent pizza with minimal fuss. Pair this savory white pizza with a simple fresh salad and some homemade garlic knots for a complete and satisfying meal that will impress family and friends alike.
Essential Ingredients for Artichoke Pizza Perfection
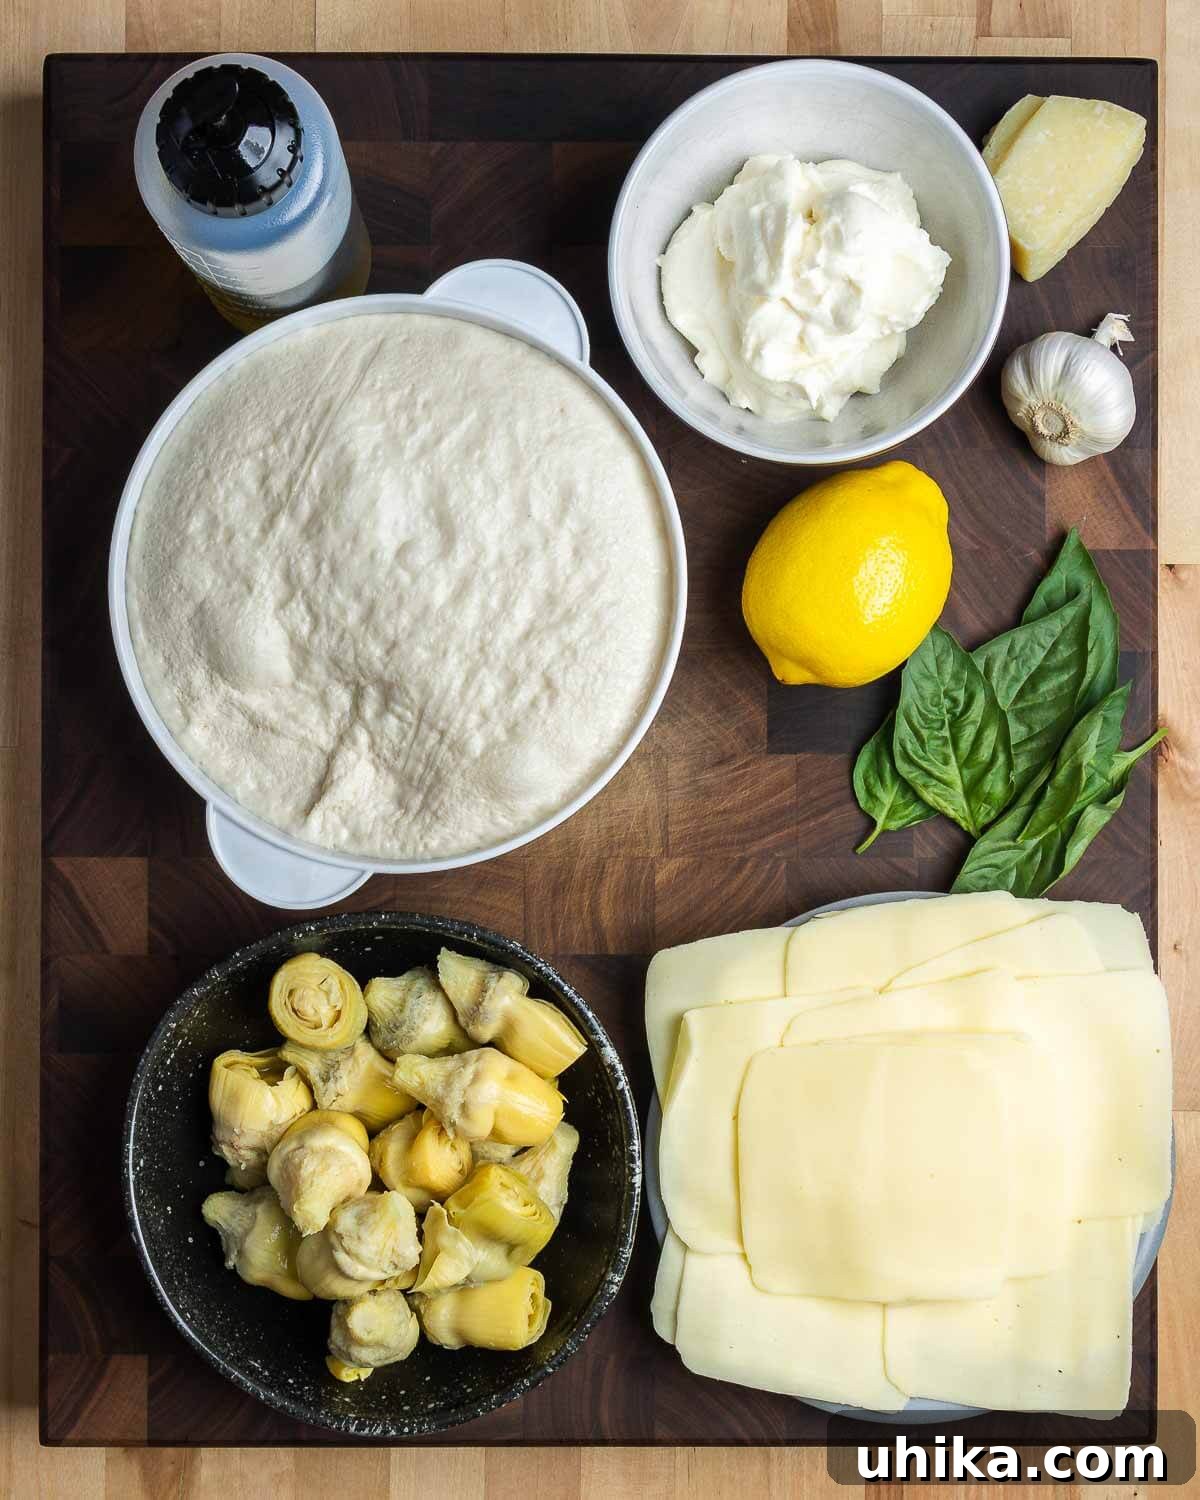
Crafting an unforgettable artichoke pizza begins with selecting the finest ingredients. Each component plays a vital role in achieving the harmonious flavors and textures that define this dish. Below, we detail the key ingredients and provide crucial tips for their preparation to ensure your pizza is nothing short of spectacular.
Pizza Dough: The Foundation of Flavor
The base of any great pizza is its dough. This recipe offers a detailed guide for making homemade pizza dough, which, when cold-fermented, develops an incredible depth of flavor and a wonderfully chewy texture. For this recipe, you’ll need approximately 24 ounces of dough. If you choose convenience, a good quality store-bought or pizzeria-bought dough works perfectly well. Ensure your dough is at room temperature before stretching for optimal results.
Artichoke Hearts: The Star of the Show
We recommend using water-packed artichoke hearts for their clean flavor, but oil-packed versions are also suitable. Regardless of your choice, it’s crucial to drain them thoroughly and pat them dry with paper towels. This step prevents excess moisture from making your pizza soggy. If using oil-packed artichokes, simply sprinkle minced garlic directly onto the pizza instead of making garlic oil, as the artichokes will impart plenty of flavor from their packing oil.
Olive Oil: The Secret to a Crispy Crust
Just like our traditional Grandma pizza, sheet pan pizzas require a generous amount of olive oil. Don’t be shy with the oil specified in the recipe. It’s not just for flavor; it’s essential for achieving that coveted perfectly crisp, golden-brown bottom crust that makes pan pizzas so irresistible. The oil creates a delicious, fried-like texture on the bottom of the dough as it bakes.
Ricotta Cheese: Creamy Indulgence
For a creamy topping without the risk of a watery pizza, draining your ricotta is paramount. Place the ricotta in a fine-mesh sieve or cheesecloth set over a bowl and allow it to drain, ideally overnight in the refrigerator. Opt for a drier ricotta brand if possible, such as Galbani. Brands like Polly-O tend to be wetter and will definitely benefit from extended draining to achieve the perfect consistency for dolloping.
Mozzarella Cheese: The Perfect Melt
This artichoke pizza, like most grandma-style pizzas, benefits from low-moisture, whole milk slicing mozzarella. You can often find this at your deli counter, or pre-packaged in blocks. While you can attempt to slice a block yourself by freezing it briefly (about 30 minutes), it can be tricky to get uniformly thin slices. Pre-sliced deli mozzarella is ideal for even coverage and melt, ensuring every bite is cheesy and delicious.
Refer to the recipe card for precise information on all ingredients and quantities to ensure your Artichoke Sheet Pan Pizza is a resounding success.
Step-by-Step Guide: Crafting Your Delicious Artichoke Pizza
Creating this Artichoke Sheet Pan Pizza is a rewarding process, broken down into two main stages: preparing the flavorful cold-fermented dough and then assembling and baking the pizza to golden perfection. Follow these detailed steps for a truly exceptional homemade pizza experience.
Part 1: Preparing the Homemade Pizza Dough
- Combine Dry Ingredients: In a large bowl, whisk together 406 grams (approximately 3 1/2 cups) of bread flour, 2 grams (1/2 teaspoon) of instant yeast, 8 grams (1 1/2 teaspoons) of fine sea salt, and 4 grams (1 teaspoon) of sugar. For accuracy in baking, a digital kitchen scale is highly recommended for weighing ingredients.
- Hydrate the Dough: In a separate, even larger bowl that can comfortably accommodate all dry ingredients, water, and mixing, add 260 grams (9 ounces) of cold water. Gradually add the dry ingredient mixture to the water, mixing by hand or with a sturdy spoon until a rough, shaggy mass forms. It won’t be smooth yet, and some dry bits are fine.
- Incorporate Olive Oil: Pour 14 grams (1 tablespoon) of olive oil over the rough dough mass. Continue mixing briefly to incorporate the oil and scrape any residue from the sides of the bowl, bringing more of the dough together.
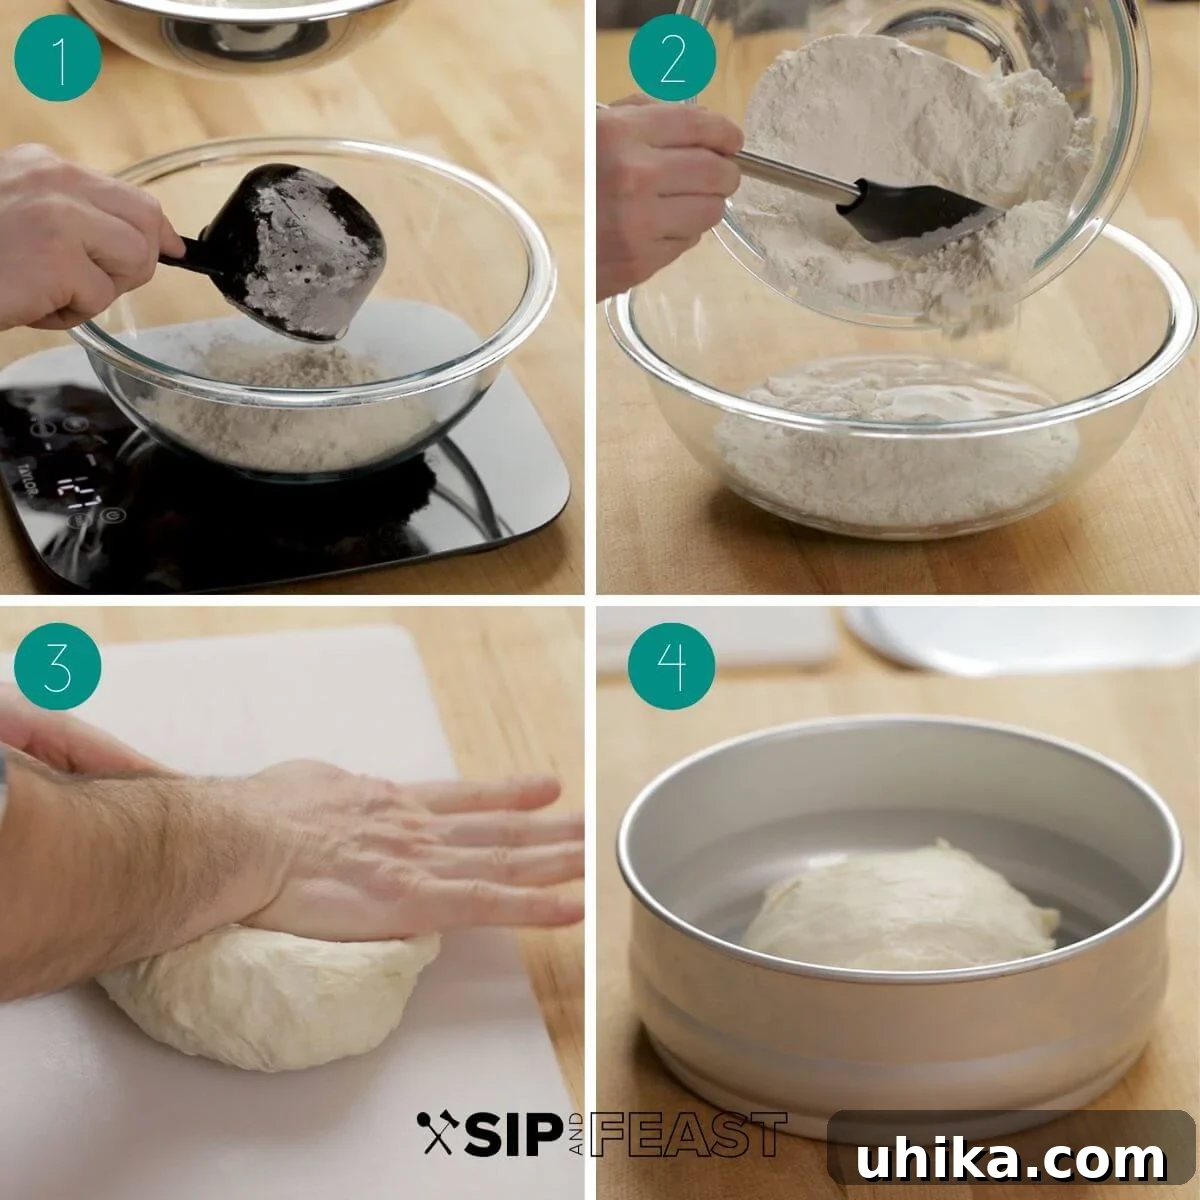
- Knead the Dough: Transfer the shaggy dough to a clean, flat workspace. Knead the dough vigorously for 5-7 minutes. If the dough becomes excessively sticky, resist the urge to add more flour. Instead, place a clean, inverted bowl over the dough and let it rest for 30 minutes. This allows the flour to fully hydrate, making the dough less sticky and easier to handle. Resume kneading, ensuring you achieve a total of at least 5-7 minutes of active kneading time.
- Rest and Form: After kneading, cover the dough again with the inverted bowl and let it rest for another 30-40 minutes at room temperature. This brief rest helps the dough relax and become more pliable for shaping.
- Shape and Cold Ferment: After the rest, gently pull the edges of the dough towards its center repeatedly to form a smooth, taut ball. Pinch the seams together on the bottom to seal. Place the dough ball seam-side down into a bowl that has been lightly oiled with olive oil. Cover the bowl tightly with plastic wrap. Refrigerate the dough for a minimum of 12 hours. For the best flavor and texture, a cold fermentation of 24-48 hours is highly recommended. While the dough ferments, take this time to begin draining 12 ounces of ricotta cheese through a fine sieve or cheesecloth as described in the ingredient section.
Part 2: Assembling and Baking Your Artichoke Pizza
- Prepare the Dough for Baking: Two hours before you plan to bake, remove the dough from the refrigerator and let it come to room temperature while still covered in the bowl. This allows the gluten to relax and makes the dough easier to stretch.
- Oil the Pan: Generously coat a grandma pizza pan (or a standard half-sheet pan) with 6 tablespoons of olive oil. Transfer the room-temperature dough from its bowl into the oiled pan.
- Stretch the Dough (in stages): Using your fingertips, gently begin pressing the dough outwards towards the corners of the pan. If the dough becomes too resistant or sticky, lightly oil your fingertips. It’s unlikely you’ll stretch the dough completely in one go. Cover the pan with plastic wrap and let the dough rest and warm up for 45 minutes. This allows the gluten to relax, making subsequent stretching much easier.
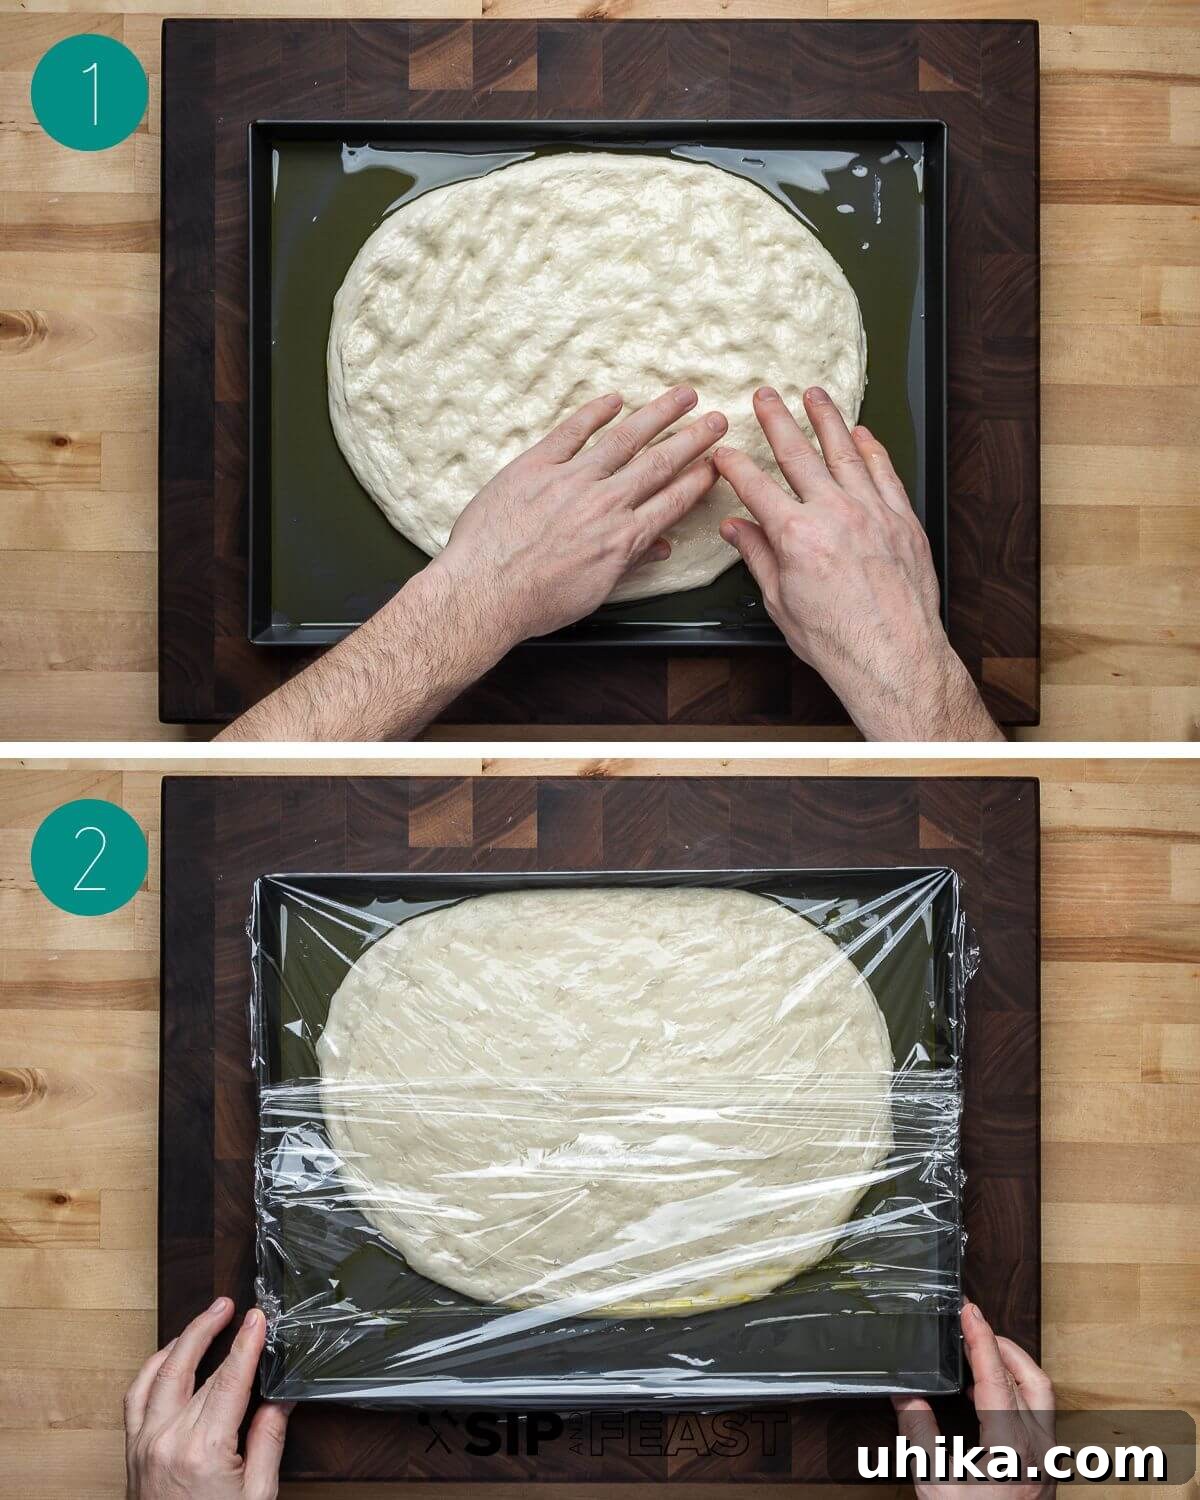
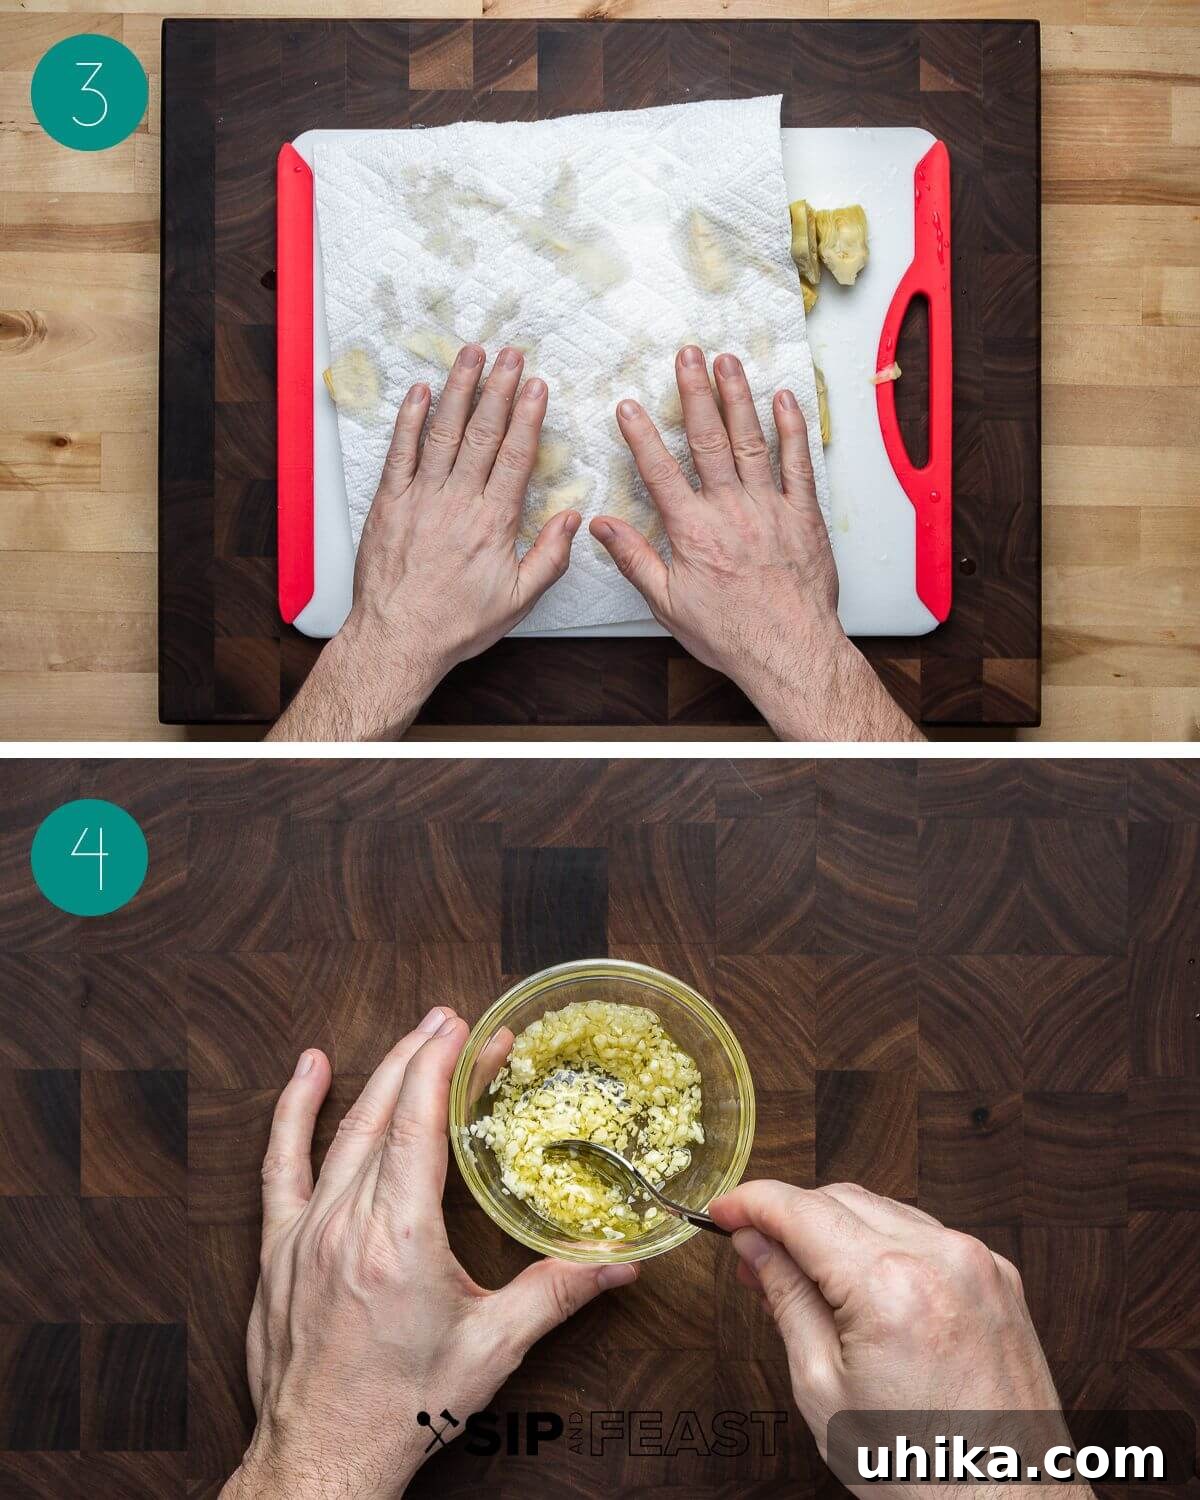
- Prepare Artichoke Hearts: While the dough rests, drain two 15-ounce cans of artichoke hearts thoroughly. Slice them into quarters and then pat them very dry with paper towels to remove any residual moisture, which can make your pizza soggy.
- Make Garlic Oil: Mince 3 cloves of garlic and place them in a small bowl. Add 1/4 cup of olive oil and mix to combine. This aromatic oil will be drizzled over the pizza before baking.
- Final Dough Stretch and Preheat Oven: After 45 minutes, remove the plastic wrap and attempt to stretch the dough to fill the pan completely. If it’s still resistant, cover it again and repeat the resting process one more time until the dough successfully fills the pan. Once stretched, cover the dough lightly and set it aside. Preheat your oven to 450°F (232°C). Position one oven rack at the lowest level and another at the highest level.
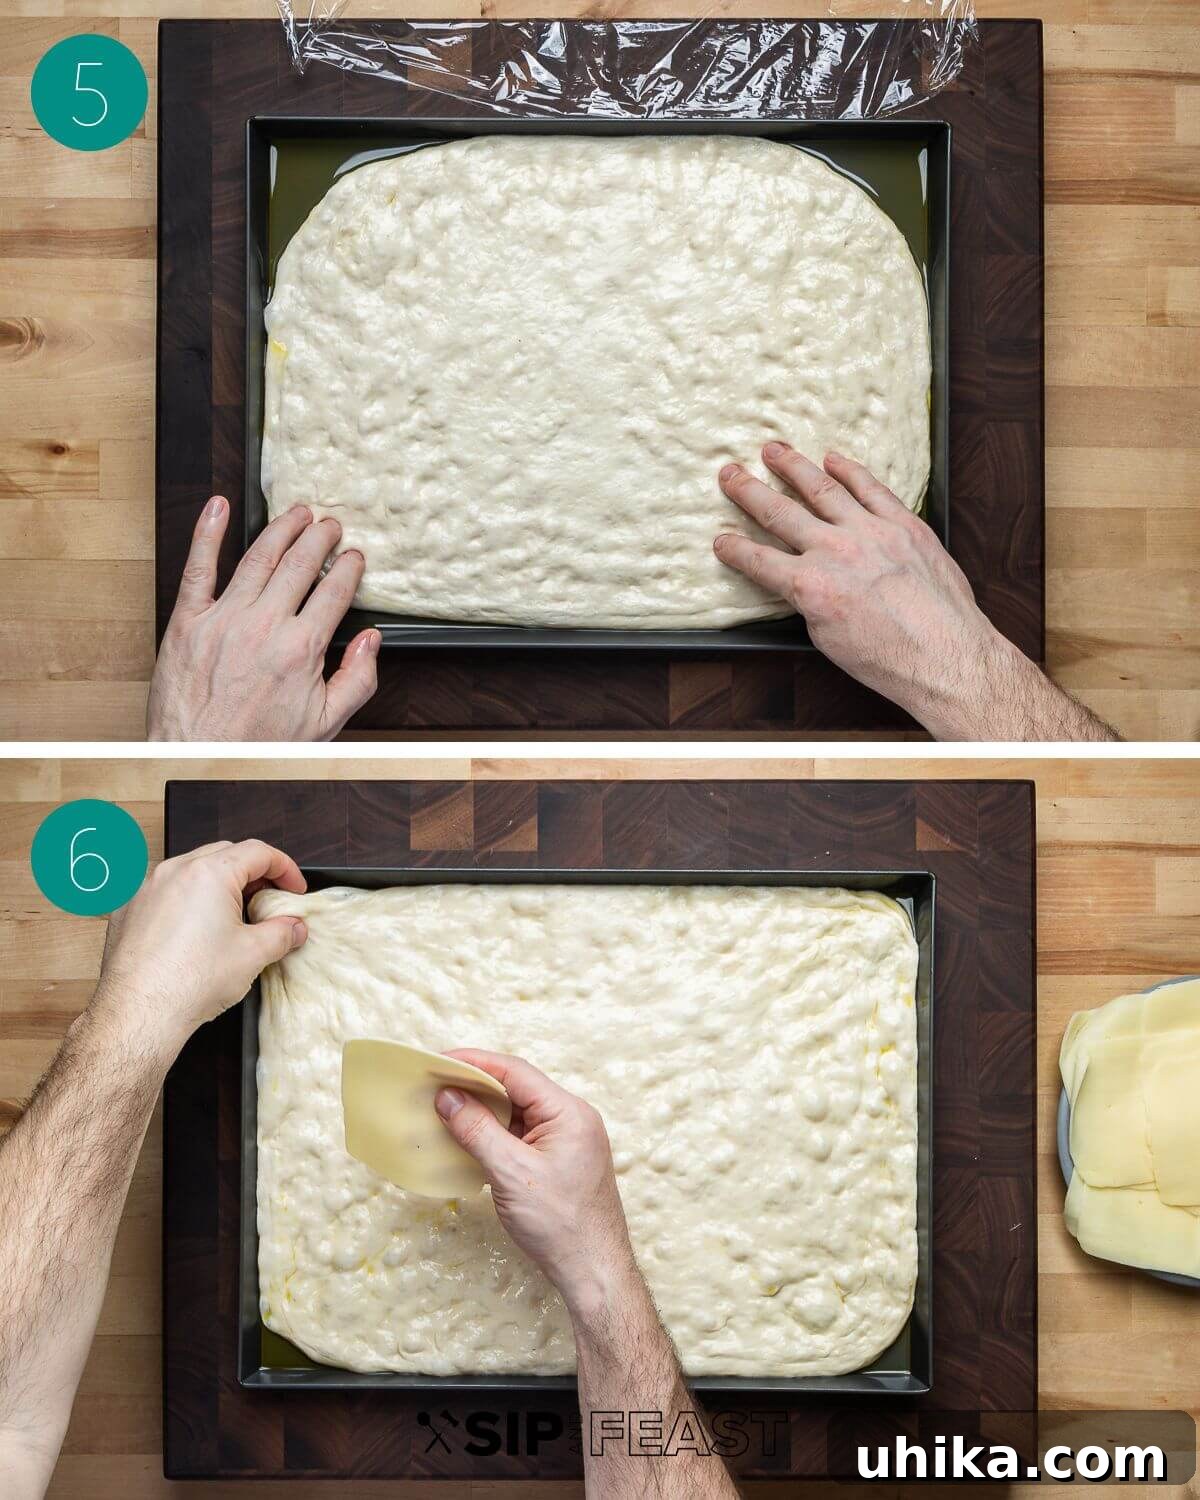
- Layer the Mozzarella: Remove the plastic wrap from the pan. If needed, gently press the dough into the very edges and corners. Begin layering the sliced mozzarella cheese in an overlapping shingle pattern, leaving about a 1/2-inch border around the outside edge of the dough uncovered. To help the dough stay put in the corners, you can initially place a piece of mozzarella there, locking it in place. Repeat this corner trick as you cover the pizza with cheese.
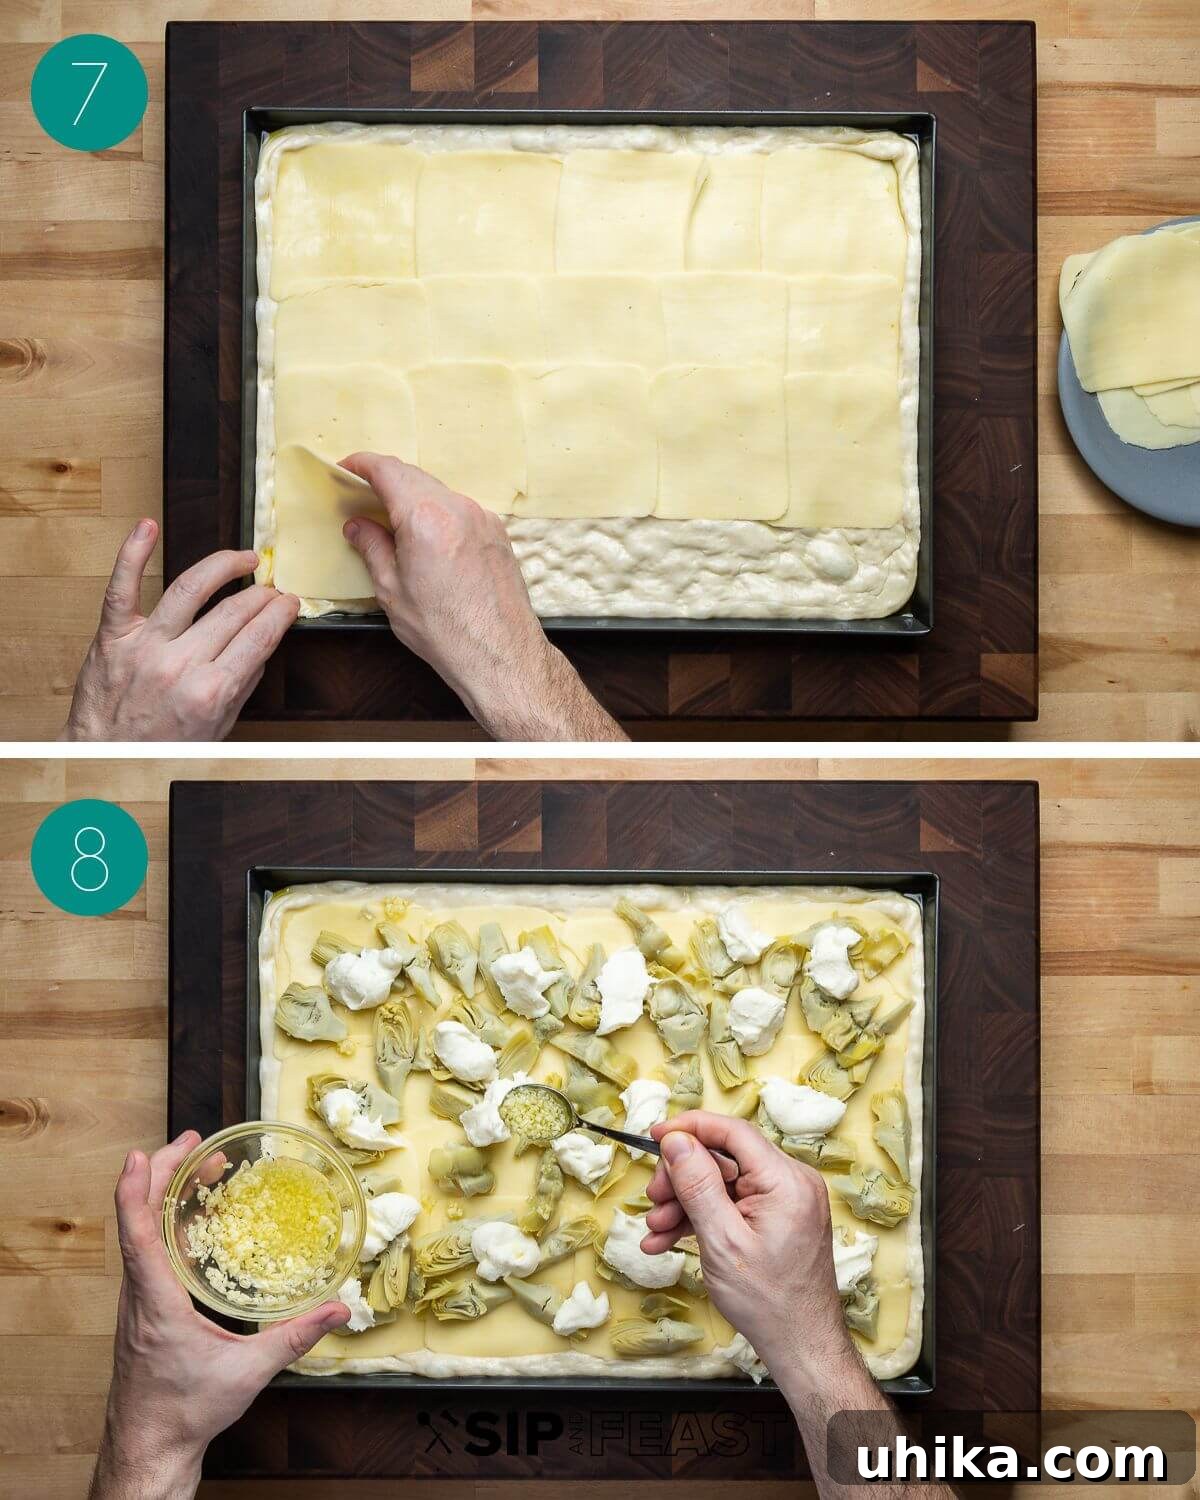
- Add Remaining Toppings: Evenly distribute the quartered artichoke hearts over the mozzarella. Then, dollop spoonfuls of the drained ricotta cheese in a random pattern across the pizza. Sprinkle a 1/4 teaspoon of hot red pepper flakes for a subtle kick, and generously spoon the prepared garlic oil over the entire pizza.
- First Bake (Bottom Rack): Carefully place the pizza pan on the lowest rack in your preheated oven. Bake for 10 minutes. At the halfway point (5 minutes), rotate the pan 180 degrees to ensure even cooking and browning.
- Second Bake (Adjust Rack Position): After 10 minutes, remove the pizza from the oven and carefully lift a corner to check the bottom crust for browning. If the bottom is well-browned and crisp, move the pizza to the highest oven rack and continue baking for another 8 minutes. If the bottom is still pale or “blonde,” leave the pizza on the lowest rack for the remaining 8 minutes to encourage further crisping.
- Final Touches: After a total of 18 minutes of baking, remove the pizza from the oven. Sprinkle 3 tablespoons of grated Pecorino Romano cheese evenly over the top, along with 6-8 hand-torn fresh basil leaves. Return the pizza to the oven for an additional 2-4 minutes, just until the Pecorino is lightly melted and the basil is fragrant.
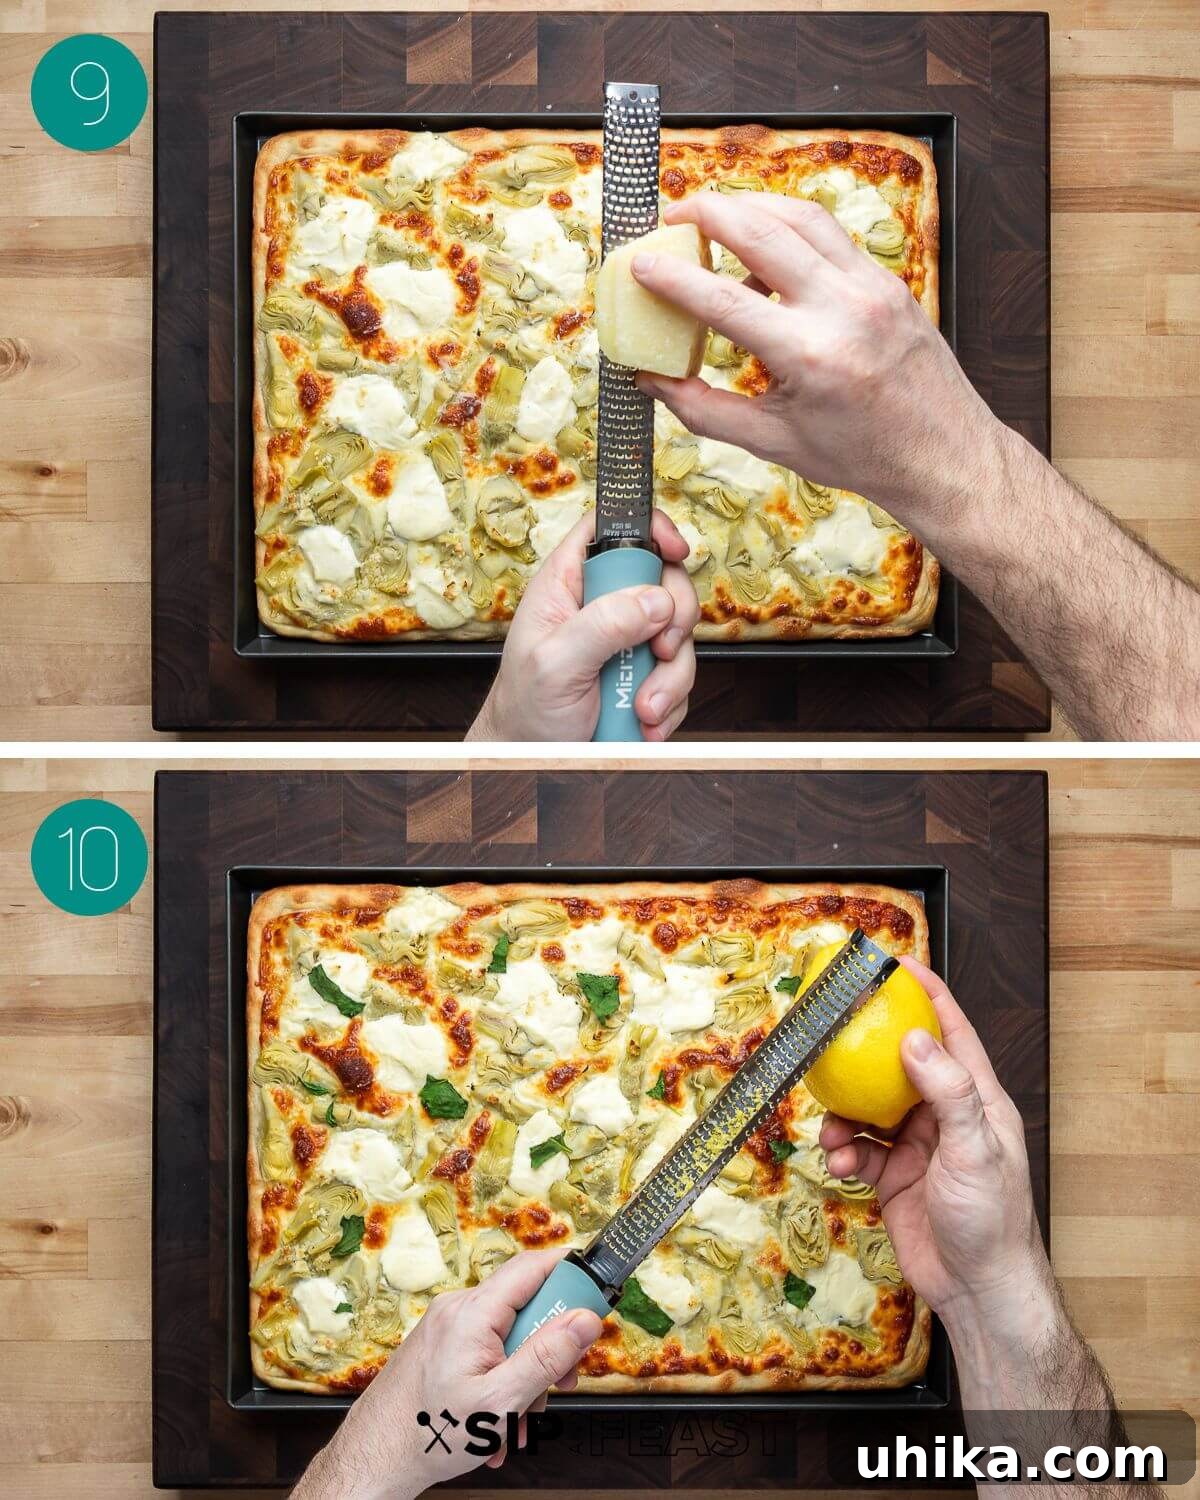
- Cool and Serve: The total cooking time will be approximately 20-22 minutes, depending on your oven. Once baked to perfection, remove the artichoke pizza from the oven. If desired, grate fresh lemon zest over the entire pizza for an extra burst of freshness. Allow the pizza to cool in the pan for a few minutes before carefully transferring it to a wire rack to cool for another few minutes. This prevents the bottom from becoming soggy. Slice and serve hot, savoring every delicious bite!
Expert Tips for the Best Artichoke Pizza
Achieving a truly exceptional artichoke pizza involves a few key techniques and considerations. These expert tips will help you master this recipe and ensure a perfectly crisp, flavorful result every time.
Mastering Your Dough: Homemade vs. Store-Bought
- Cold Fermentation is Key: If you’re making your own dough, the single most impactful tip is to allow it to cold ferment in the refrigerator for at least 24 hours. While 12 hours is sufficient, a 24-48 hour cold ferment dramatically develops the dough’s flavor, creating complex notes and a superior texture that simply cannot be rushed. It makes the dough easier to handle and contributes to a beautiful, airy crumb and a crisp crust.
- Room Temperature Dough: Regardless of whether your dough is homemade or store-bought, always bring it to room temperature (about 2 hours out of the fridge) before attempting to stretch it. Cold dough is stiff and resistant, making it prone to tearing.
- Hydration and Handling: Don’t be afraid if the dough feels a bit sticky after initial mixing. Resist adding excessive flour during kneading. Instead, use the rest periods as instructed; the dough will become much more manageable as the flour hydrates.
Understanding Your Oven: Heat Management for a Perfect Crust
- Oven Variability: Every oven is different, and temperature calibrations can vary significantly. This is why we recommend checking the bottom of your pizza for browning at the 10-minute mark. If the bottom is already a rich golden brown, move the pizza to the top rack for the remainder of the baking time to finish the toppings and achieve a beautifully browned top.
- Blonde Bottoms: If, after 10 minutes, the bottom crust is still pale, keep the pizza on the lowest rack for the entire baking duration. Some ovens struggle to deliver enough heat from the bottom, and leaving it on the lowest rack helps maximize that crucial direct heat for a crispy base. Our pizza recipes generate hundreds of comments across our platforms, and oven variations are a common topic. Learning your oven’s nuances is the ultimate secret to pizza success.
- Preheat Thoroughly: Always ensure your oven is fully preheated for at least 20-30 minutes *after* it reaches the target temperature. This allows the oven to accumulate enough heat to properly cook the crust from the bottom up.
Slicing and Serving: Preserving Quality
- Never Slice in the Pan: Slicing pizza directly in its pan can damage the non-stick coating or scratch the surface. Always transfer the pizza to a wire rack to cool for a few minutes, then move it to a sturdy cutting board for slicing. This not only protects your bakeware but also allows air circulation, preventing the bottom crust from steaming and becoming soggy.
- Cool Before Slicing: While it’s tempting to cut into a hot pizza immediately, allowing it to cool for 5-10 minutes on a wire rack allows the cheese to set and the crust to firm up slightly. This results in cleaner slices and prevents all the delicious toppings from sliding off.
Storing and Reheating Leftovers
Leftover artichoke pizza can be stored in an airtight container in the refrigerator for up to 3 days. To reheat, place slices on a parchment paper-lined baking sheet and warm in a 350°F (175°C) oven until hot and the cheese is bubbly, typically 8-12 minutes. This method helps restore the crispiness of the crust much better than a microwave.
Frequently Asked Questions About Artichoke Pizza
Here are answers to some common questions you might have about making this delicious artichoke pizza.
Can I use fresh artichokes instead of canned?
Yes, absolutely! If you have access to fresh artichokes, they will offer an even more vibrant flavor. You’ll need to trim, clean, and cook them (steaming or boiling until tender) before quartering and drying them, similar to how you would prepare canned artichoke hearts. This will add extra prep time, but the fresh taste is worth it.
What if my dough isn’t stretching easily?
This is a common issue! The key is allowing the dough to relax. If it’s springing back, cover it with plastic wrap and let it rest for another 15-30 minutes at room temperature. This allows the gluten strands to relax, making it much easier to stretch without tearing. Ensure your dough is also at room temperature before you start stretching.
Can I add other vegetables to this pizza?
Certainly! This pizza is quite versatile. Complementary additions could include thinly sliced red onions, sun-dried tomatoes (pat dry any oil-packed ones), or even some sautéed mushrooms. Add them along with the artichoke hearts.
How can I make the crust extra crispy?
Generous olive oil in the pan is critical, as detailed in the recipe. Also, ensure your oven is fully preheated and use the lowest rack for initial baking to get maximum direct heat to the bottom. If your oven has a pizza stone or steel, preheating it in the oven can also help achieve an even crispier bottom.
Is this pizza suitable for freezing?
While freshly baked is always best, you can freeze individual slices of the cooked pizza. Wrap each slice tightly in plastic wrap, then aluminum foil, and store in a freezer-safe bag for up to 1-2 months. Reheat from frozen on a baking sheet in a 375°F (190°C) oven until heated through and crisp.
More Delicious Pizza Creations
If you’ve fallen in love with the art of homemade pizza, especially the satisfaction of a perfectly crafted crust and gourmet toppings, we invite you to explore more of our favorite pizza recipes. Many of these can even be made using the same versatile homemade dough from this recipe, allowing you to expand your pizza-making repertoire!
- Vodka Sauce Pizza: Experience a truly unique Grandma-style pizza featuring a luscious pink vodka sauce, fresh basil, and perfectly melted cheese.
- Cast Iron Pizza: For those who crave an even thicker, deeply caramelized crust, our cast iron pan pizza delivers an unparalleled texture and rich flavor.
- Sausage and Broccoli Rabe Rolls: A delightful twist on pizza, these rolls feature tender pizza dough wrapped around savory sausage, slightly bitter broccoli rabe, and generous amounts of fresh mozzarella cheese.
Recipe: Artichoke Sheet Pan Pizza
Artichoke Pizza
By James Delmage
Prep Time: 3 hours (includes dough resting)
Cook Time: 20-22 minutes
Cold Fermenting Time: 1-2 days
Total Time: 1 day 3 hours 20 minutes (with cold ferment)
Servings: 9 slices
This Artichoke Sheet Pan Pizza features a delectable homemade pizza dough, generously topped with creamy sliced mozzarella, rich dollops of ricotta, aromatic garlic oil, tender artichoke hearts, fragrant fresh basil, and a hint of zesty lemon for a truly gourmet experience.
Ingredients
For the Dough
- 406 grams bread flour (or 3 1/2 cups)
- 2 grams instant yeast (or 1/2 teaspoon)
- 8 grams fine sea salt (or 1 1/2 teaspoons)
- 4 grams sugar (or 1 teaspoon)
- 260 grams cold water (9 ounces)
- 14 grams olive oil (or 1 tablespoon)
For the Artichoke Pizza
- 1 (24 ounce) dough ball (from recipe above or store-bought)
- 10 tablespoons olive oil, divided
- 2 (15-ounce) cans artichoke hearts, quartered and drained
- 12 ounces sliced mozzarella cheese
- 12 ounces ricotta, drained overnight (crucial for texture)
- 3 cloves garlic, minced
- 1/4 teaspoon crushed hot red pepper flakes
- 3 tablespoons grated Pecorino Romano
- 6-8 large basil leaves, hand torn
- 1 lemon, zested (for finishing)
Instructions
For the Dough
- Place cold water in a large bowl. In a separate bowl, mix together the bread flour, instant yeast, fine sea salt, and sugar.
- Gradually add the dry ingredients to the water, mixing thoroughly until a rough, dry mass forms.
- Pour the 14 grams of olive oil over the dough and mix again, scraping any residue from the sides of the bowl.
- Transfer the shaggy dough to a work surface and knead for 5-7 minutes. If too sticky, cover with an inverted bowl and rest for 30 minutes before continuing.
- Cover the dough again with the inverted bowl and let it rest for 30-40 minutes to warm up before shaping.
- After 40 minutes, form the dough into a smooth ball by repeatedly pulling the dough towards its end. Pinch the seam side closed and place seam-side down into an oiled bowl. Cover tightly with plastic wrap and refrigerate for at least 12 hours, ideally 24-48 hours for maximum flavor. While dough ferments, drain ricotta.
For the Artichoke Pizza
- Two hours before baking, remove the dough from the fridge but keep it covered to bring to room temperature.
- Coat a Grandma pizza pan or standard half sheet pan with 6 tablespoons of olive oil. Place the dough in the pan and begin pressing it with your fingertips into the corners. If needed, oil your fingertips.
- You won’t be able to stretch the dough entirely in one attempt. Cover the pan with plastic wrap and let the dough warm up and relax for 45 minutes.
- Drain the artichoke hearts and cut them into quarters. Pat them very dry with paper towels to remove excess water.
- Mince 3 cloves of garlic and combine with the remaining 1/4 cup of olive oil in a small bowl to make garlic oil.
- After 45 minutes, remove the plastic and stretch the dough further to fill the pan. If still resistant, cover and repeat the resting process once more until the pan is completely filled. Cover the dough and set aside. Preheat your oven to 450°F (232°C), with one rack on the lowest level and one on the highest.
- Remove the plastic wrap. Gently press the dough into the edges if necessary. Layer the sliced mozzarella in an overlapping shingle pattern, leaving a 1/2-inch border uncovered around the outside. Use a piece of mozzarella to help hold the dough in the corners.
- Distribute the artichoke hearts evenly over the mozzarella, then place spoonfuls of the drained ricotta in a random pattern on top. Sprinkle with hot red pepper flakes and drizzle the garlic oil over the pizza.
- Place the pizza on the lowest oven rack and bake for 10 minutes, rotating the pan 180 degrees halfway through.
- After 10 minutes, remove the pizza and check the bottom for browning. If well-browned, move to the top rack for 8 more minutes. If still pale, leave on the bottom rack for 8 more minutes.
- After a total of 18 minutes, remove the pizza. Sprinkle with Pecorino Romano and hand-torn basil leaves. Return to the oven for an additional 2-4 minutes.
- Total cooking time will be approximately 20-22 minutes. Allow the pizza to cool for a few minutes in the pan, then transfer to a wire rack to cool slightly before slicing and serving. Garnish with fresh lemon zest if desired. Enjoy!
Notes
- You can substitute 24 ounces of good quality store-bought pizza dough.
- If using oil-packed artichoke hearts, drain the oil thoroughly and pat dry. In this case, simply sprinkle the minced garlic directly onto the pizza instead of making garlic oil.
- Cooking times can vary significantly between ovens. Always check the bottom of the pizza at the 10-minute mark. If it’s already deep brown and crisp, move it to the top rack. If it’s still light, keep it on the lowest rack for the remaining baking time to ensure a crispy base.
- Sheet pan pizzas need a generous amount of olive oil in the pan to develop that crucial crispy, golden-brown bottom crust. Do not skimp on the oil.
- Leftover pizza can be stored in an airtight container for up to 3 days in the refrigerator. Reheat on a parchment paper-lined baking sheet at 350°F (175°C) until hot and the crust is crisp.
Bakers Percentages: 64% hydration, .4% yeast, 2% salt, 3.4% oil, 1.2% sugar
Thickness Factor (TF): .127
Nutrition (Approximate per serving)
Calories: 542kcal | Carbohydrates: 42.8g | Protein: 21.5g | Fat: 31.7g | Saturated Fat: 11.3g | Cholesterol: 53mg | Sodium: 660mg | Potassium: 137mg | Fiber: 4.8g | Sugar: 1.6g | Calcium: 379mg | Iron: 2mg
Nutrition information is automatically calculated and should be used as an approximation only.
If you’ve enjoyed this Artichoke Pizza Recipe or any recipe on this site, please consider sharing your feedback! We love to hear from our readers and value your experience. You can give it a 5-star rating and tell us about it in the comments below.
We strive to satisfy a number of learning styles. If you are someone who prefers to learn by watching, you can find most of our recipes and cooking demonstrations on our YouTube channel and our Facebook Page.
Like this? Leave a comment below! Check us out on Instagram at @sipandfeast or tag #sipandfeast!
This recipe was originally published on March 26, 2019. It was completely updated and expanded on April 22, 2023, to provide the most comprehensive and user-friendly experience possible.