
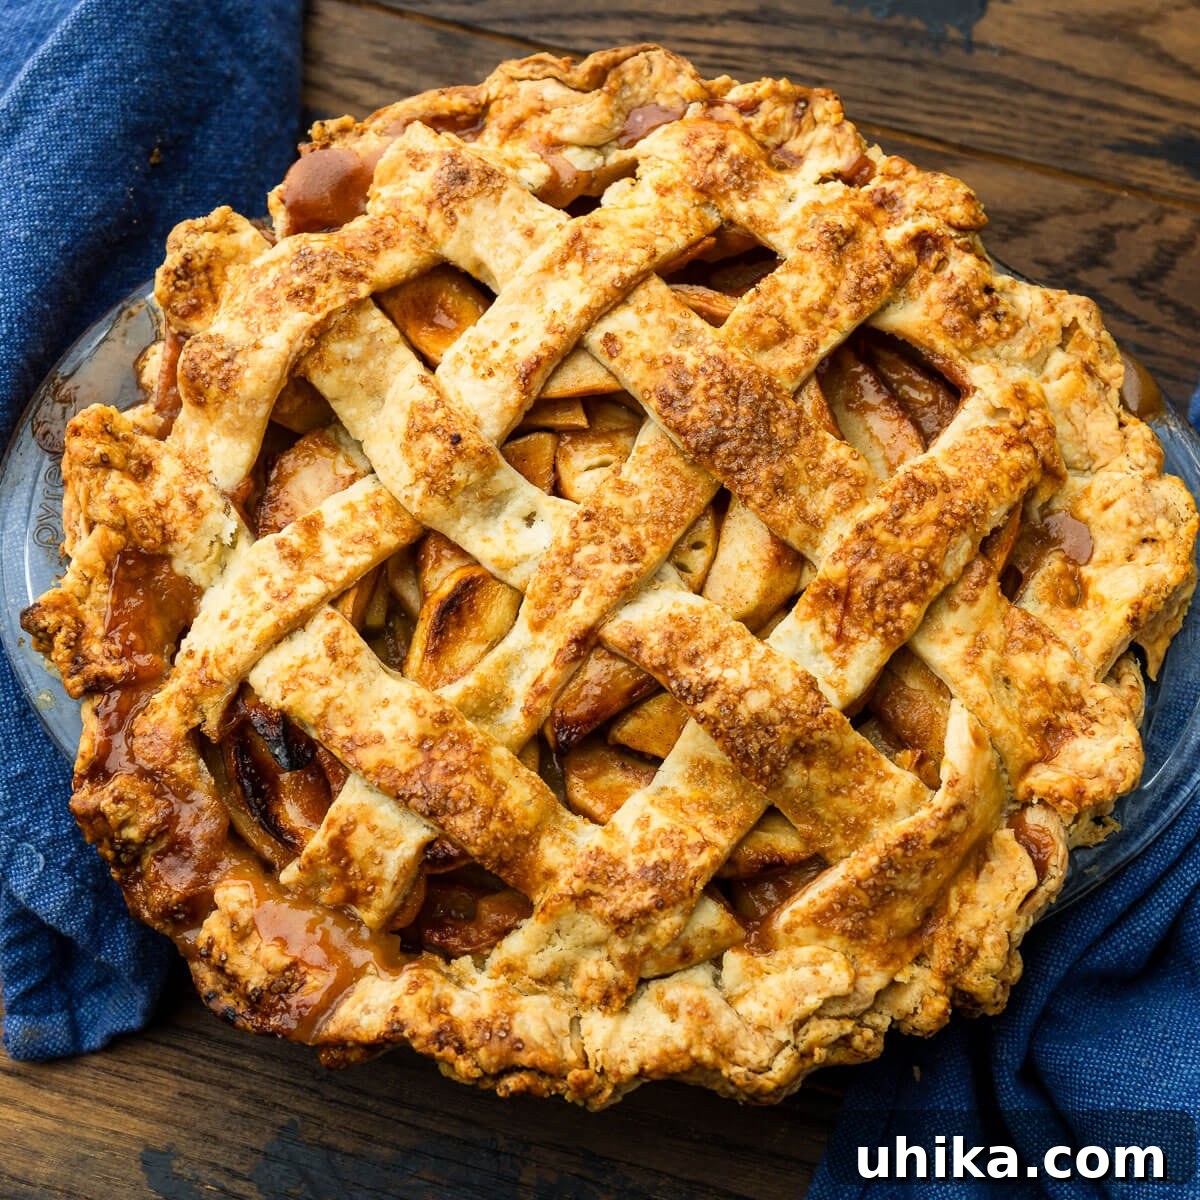
Classic Apple Pie: The Ultimate Recipe for a Flaky, Old-Fashioned Delight
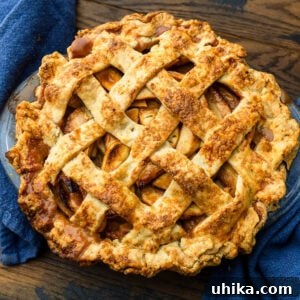
Indulge in the timeless charm of a homemade Classic Apple Pie, a dessert that effortlessly transports you back to simpler times with every delicious bite. This recipe delivers a wonderfully flaky, rustic crust generously filled with the most exquisite apple filling, striking the perfect balance between sweet and tart. It’s the quintessential centerpiece for Thanksgiving and holiday celebrations, yet so irresistibly good, you’ll find yourself craving it all year long.
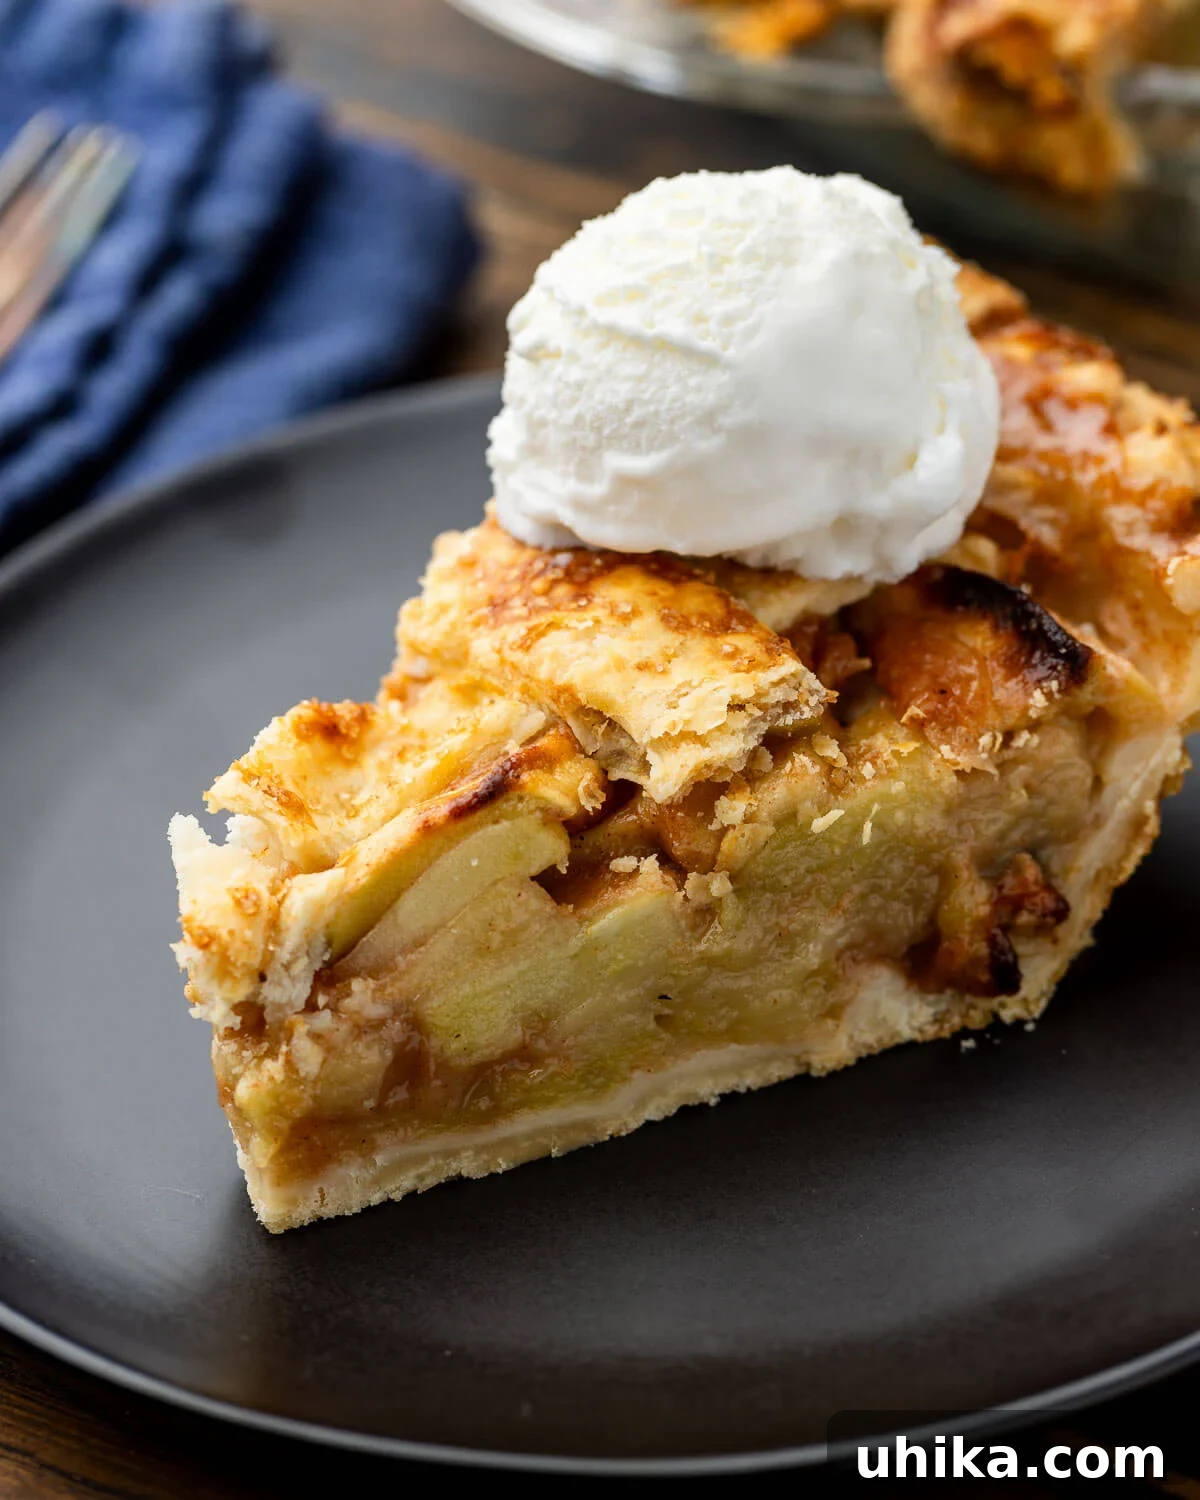

Rediscovering Old-Fashioned Apple Pie Flavor
For me, the perfect apple pie embodies three essential qualities: an incredibly flaky crust, a bountiful, heaped filling, and an unforgettable flavor that whispers of tradition. When I embarked on my quest to create this classic apple pie recipe, these three pillars guided every decision. The result is a pie that doesn’t just taste good; it tastes like cherished memories.
To achieve that quintessential old-time flavor and unparalleled flakiness in the crust, I’ve chosen a harmonious blend of butter and lard. Lard, once a staple in traditional baking, is experiencing a well-deserved resurgence. Its unique properties contribute to a remarkably tender and flaky texture that butter alone often can’t match. While an all-butter crust is certainly a delicious and vegetarian-friendly option, the addition of lard truly elevates this pie to a nostalgic level of perfection. The butter, of course, adds that rich, dairy flavor we all love, making the combination truly superior.
The apple filling is a generous concoction of crisp, tart Granny Smith apples, expertly spiced with cinnamon and nutmeg. It’s a filling so robust and flavorful, it verges on being over-the-top, ensuring every slice is packed with fruity goodness. This versatile filling is so incredible, you could even use it with a high-quality store-bought pie crust if you’re short on time, though I highly recommend making your own for the full experience.
While some prefer their apple pie warm, I personally enjoy serving mine chilled, allowing the flavors to fully meld and the crust to maintain its integrity. Regardless of your preference, don’t forget that essential final touch: a generous scoop of creamy vanilla ice cream. The cold, sweet ice cream melting into the spiced apple filling and flaky crust is pure dessert heaven.
Essential Ingredients for Your Homemade Apple Pie
Crafting the perfect apple pie begins with selecting the right ingredients. Below, you’ll find a detailed list of what you’ll need, along with special notes to help you achieve the best results.
Double Pie Crust Ingredients: The Secret to Flakiness
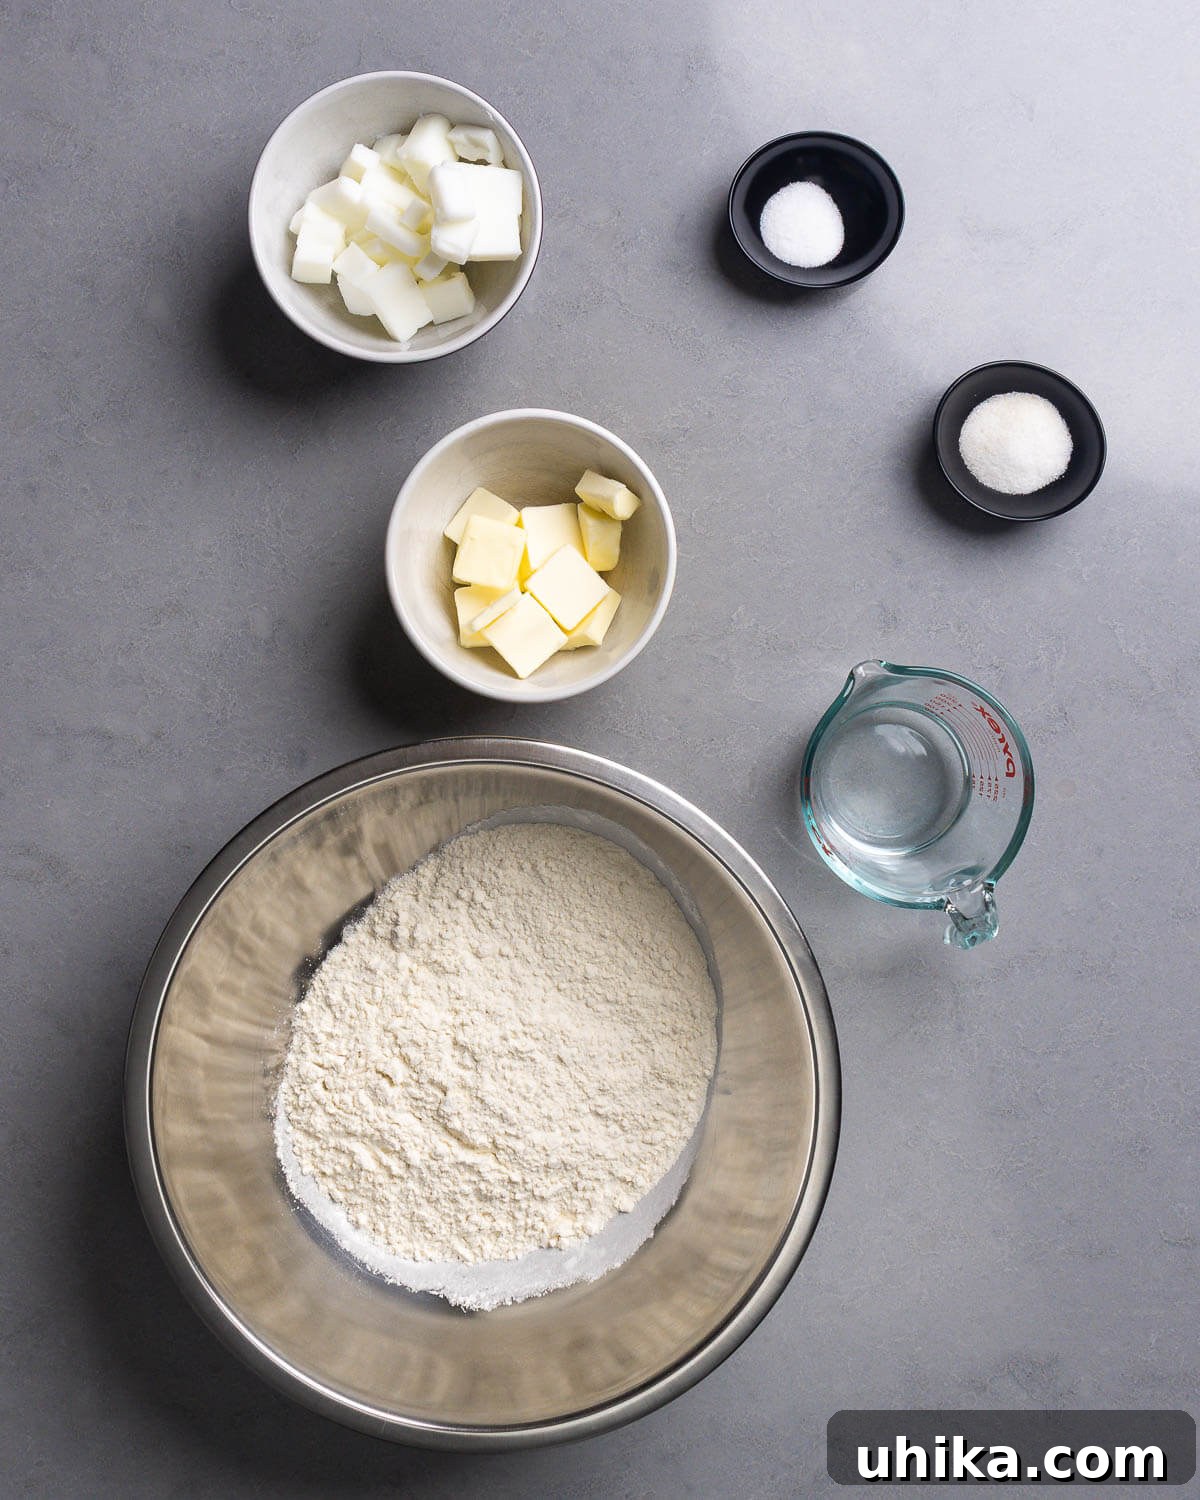
- All-purpose flour: This is the foundation of our flaky crust. All-purpose flour provides the right balance of protein to create a tender, yet structured, dough that holds up beautifully during baking.
- Butter and lard: This dynamic duo is the cornerstone of our exceptionally flaky and flavorful crust. Lard, with its higher melting point and pure fat content, creates large, distinct pockets of steam during baking, resulting in a more pronounced flakiness compared to an all-butter crust. Butter, on the other hand, contributes an unmatched rich flavor. We recommend a combination to get the best of both worlds. If you prefer an all-butter crust for dietary reasons, you certainly can, but be aware it might be slightly less flaky. Using all lard is not advised, as it would sacrifice the wonderful taste that butter imparts.
- Ice water: Using ice-cold water is critical. It ensures that the butter and lard remain solid and cold, preventing them from melting into the flour prematurely. This cold fat is what creates those desirable layers in the crust, yielding an incredibly flaky texture.
- Granulated sugar and fine sea salt: A touch of sugar adds a subtle sweetness to the crust, complementing the apple filling. Salt is essential for enhancing flavor and balancing the richness of the fats.
Apple Pie Filling Ingredients: A Symphony of Sweet and Tart
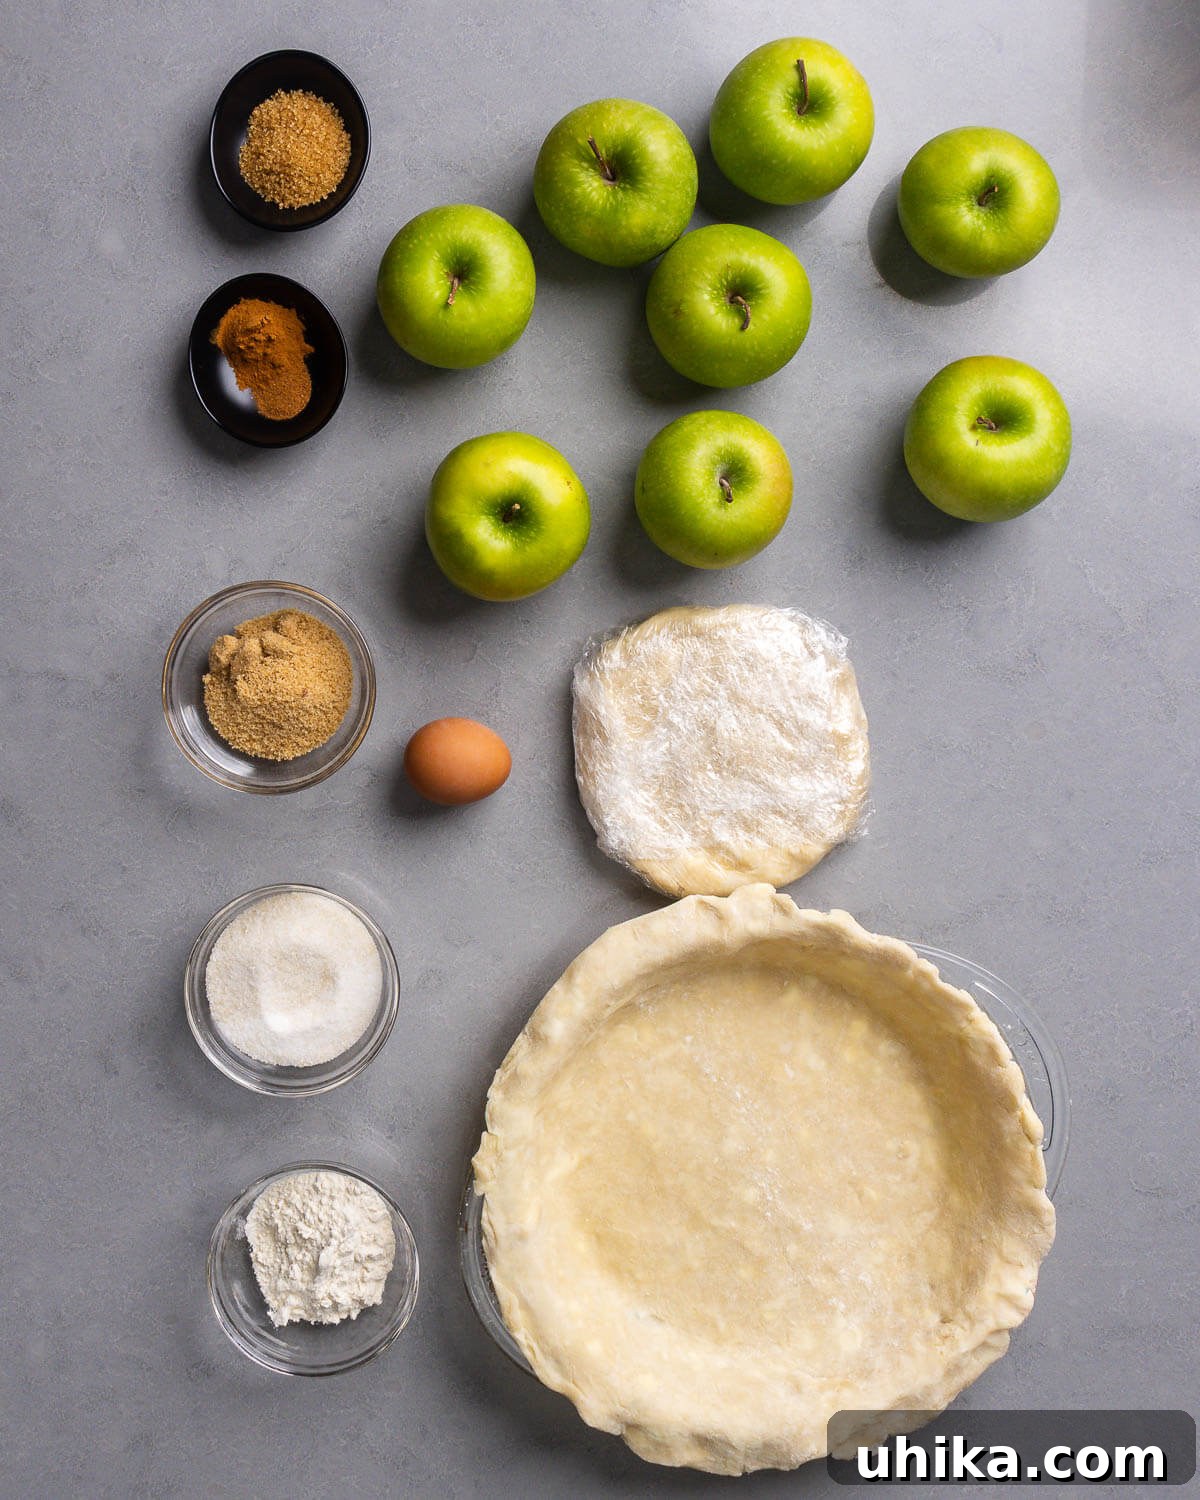
- Granny Smith apples: The undisputed champion for apple pie. Their firm texture ensures they hold their shape beautifully when baked, preventing a mushy filling. Their characteristic tartness perfectly balances the sweetness of the sugars and spices, creating a well-rounded flavor profile. For a sweeter pie, you could incorporate Honeycrisp apples, which also maintain their structure well during cooking. Other excellent baking apple choices include Cortland, Braeburn, and Jonagold.
- Sugar (granulated, brown, and turbinado): We use a combination of sugars for depth and complexity. Granulated sugar provides clean sweetness, while brown sugar adds a rich, molasses-like flavor and moisture to the filling. Turbinado sugar, with its larger crystals, is optional but highly recommended for sprinkling on top of the crust before baking. It creates a beautiful sparkle and a delightful crunchy texture.
- Spices (cinnamon and nutmeg): These classic warm spices are non-negotiable for a traditional apple pie. Ground cinnamon brings a comforting aroma and flavor, while a hint of nutmeg adds subtle warmth and complexity that harmonizes perfectly with apples.
- Lemon juice: A squeeze of fresh lemon juice is vital. It brightens the apple flavor, prevents the apples from browning, and cuts through the sweetness, ensuring the pie isn’t cloyingly sweet.
- All-purpose flour (for filling): A small amount of flour acts as a thickener for the apple filling, ensuring it sets nicely and prevents a watery, runny pie.
- Large egg (for egg wash): A simple egg wash, beaten and brushed over the top crust, gives the pie a beautiful golden-brown sheen and helps the turbinado sugar adhere, contributing to that rustic, homemade appeal.
For precise measurements and detailed quantities of each ingredient, please refer to the comprehensive recipe card below.
Want To Save This Recipe?
Enter your email and we’ll send it to you. Plus, get great new recipes from us every week!
How to Make the Perfect Flaky Pie Crust from Scratch
Creating a truly flaky pie crust is a rewarding process, and these steps will guide you to perfection. Each number corresponds to the detailed instructions below, ensuring you build the ideal foundation for your classic apple pie.
- Begin by combining the dry ingredients in a large mixing bowl. Whisk together the all-purpose flour, granulated sugar, and fine sea salt until they are well integrated. This ensures even distribution of flavor throughout the crust.
- Next, add the cold, cubed unsalted butter and cold, cubed lard to the flour mixture. Using a pastry cutter, or your fingertips if working quickly, cut the fats into the flour. The goal is to break the fats down into varying sizes, from pea-sized to small lentil-sized pieces. Alternatively, you can achieve this quickly using a food processor by pulsing until a coarse meal-like texture forms with visible fat particles.
- Continue cutting the fat into the flour until the mixture resembles a coarse meal, with some larger pea-sized pieces of fat still visible. This variation in fat size is key to achieving maximum flakiness.
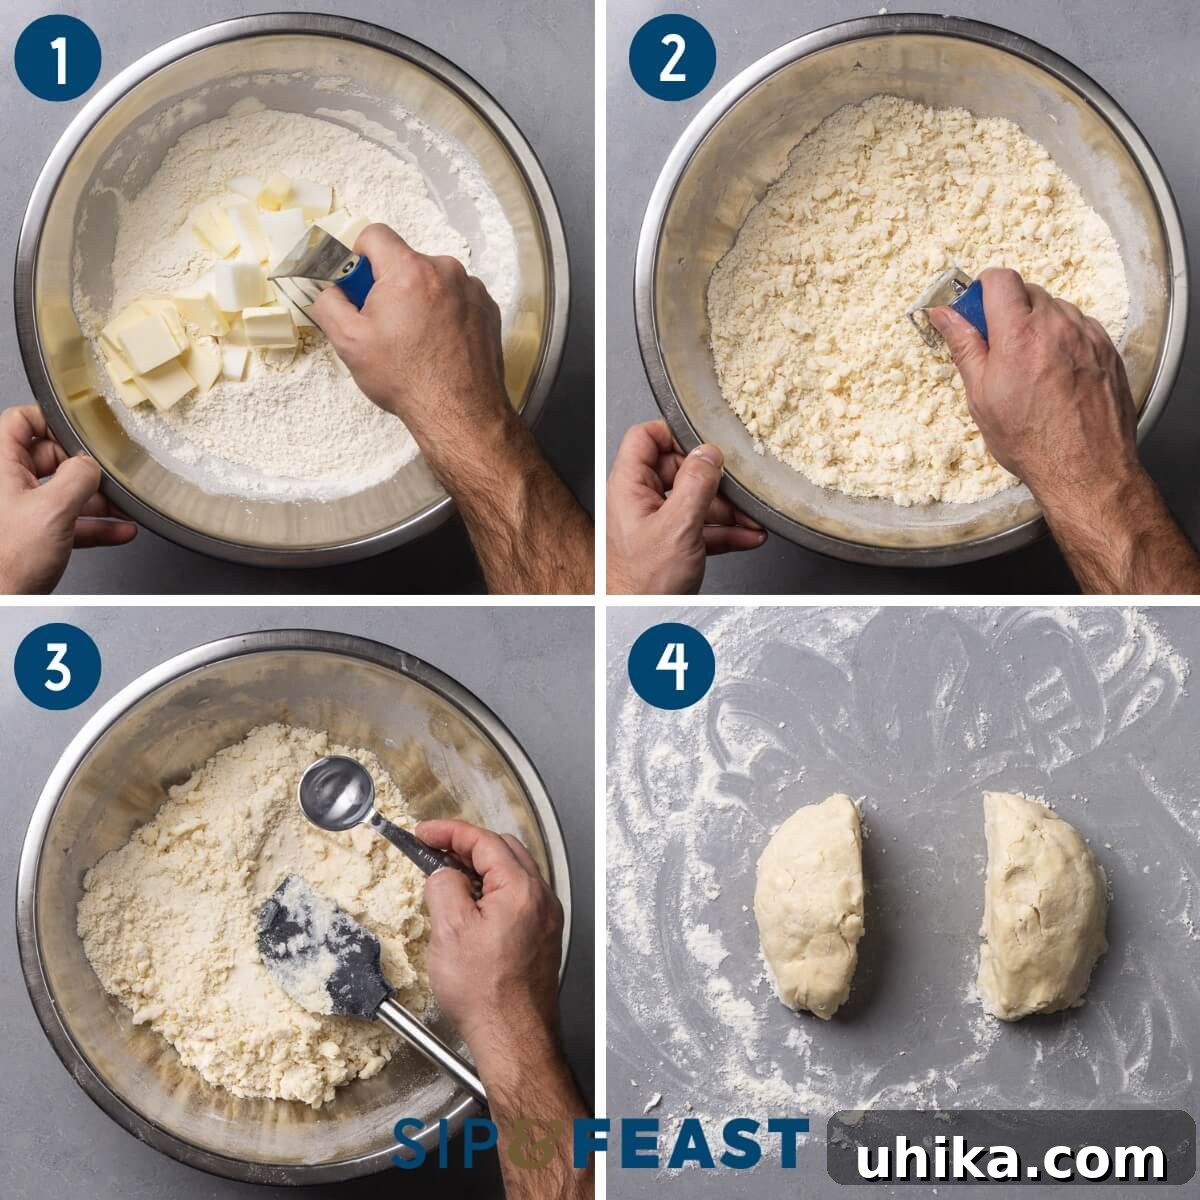
- Now, it’s time to add the ice water, a crucial step for controlling the dough’s consistency. Drizzle the ice water into the flour mixture, one tablespoon at a time. Use a spatula to gently press and fold the dough after each addition, just until the water is combined. Continue adding water tablespoon by tablespoon until large, shaggy bits of dough start to form and the dough just barely comes together when squeezed. Be careful not to over-hydrate the dough; you may not need the last 2-3 tablespoons of water. The dough should be moist enough to hold together but not sticky.
- Carefully transfer the dough onto a lightly floured work surface. Gently divide the dough into two equal halves. Avoid overworking the dough, as this can develop the gluten too much, resulting in a tough crust.
- Shape each half of the dough into a flattened disk. Wrap each disk tightly with plastic wrap to prevent it from drying out. Refrigerate for at least 2 hours. This chilling period is essential; it allows the gluten to relax, the fats to firm up, and the flavors to meld, all contributing to a tender and flaky crust. You can even prepare the dough a day or two in advance.
- When you’re ready to assemble the pie, remove one disk of dough from the fridge and let it sit at room temperature for about 20 minutes to soften slightly, making it easier to roll. If the dough has been refrigerated overnight, it might need a little longer. On a lightly floured surface, use a rolling pin to carefully roll out the dough, working from the center outwards, to form a uniform 12-13-inch circle, approximately 1/8 inch thick.
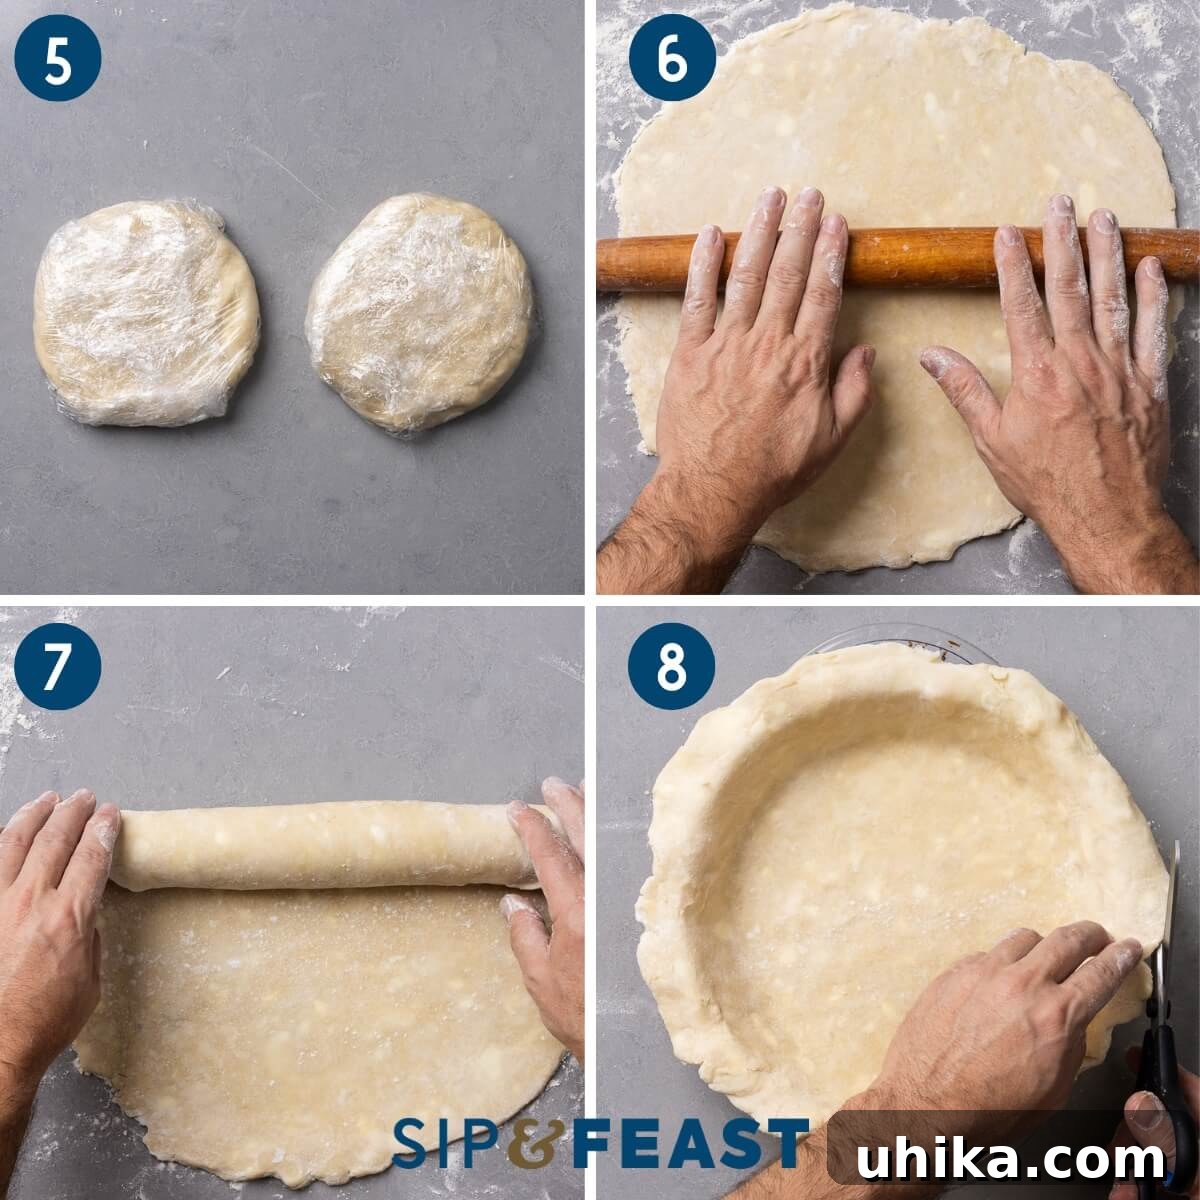
- To transfer the delicate dough into your 9-inch pie dish, gently roll it around your rolling pin. Then, unroll it carefully over the pie dish, allowing it to settle without stretching. Stretching the dough can cause it to shrink during baking.
- Use your fingers to gently tuck the dough into the sides and bottom of the dish, ensuring there are no air pockets. Allow any excess dough to overhang the edges. If there’s a significant amount of overhang (more than an inch or so), you can use kitchen shears to trim it slightly, leaving about 1 inch for crimping. Place the prepared pie dish back into the refrigerator while you prepare the filling.
How to Assemble and Bake Your Rustic Homemade Apple Pie
Now that your flaky crust is ready, it’s time to bring your classic apple pie to life with a rich, aromatic filling and perfect baking. Follow these numbered steps for a beautiful and delicious result.
- In a large bowl, combine the peeled, cored, and sliced Granny Smith apples with the all-purpose flour, granulated sugar, brown sugar, lemon juice, ground cinnamon, and ground nutmeg. Toss gently until the apples are evenly coated with the sugar and spice mixture.
- Transfer the apple mixture to a large pan and cook over medium heat for about 5 minutes, stirring frequently. This crucial step, known as pre-cooking the apples, helps them release some of their moisture and prevents the pie from having a soggy bottom. It also kickstarts the softening process and concentrates their flavor. Be careful not to overcook them; they should still be firm, not mushy. Once softened slightly, remove the pan from the heat and allow the apples to cool slightly before filling the pie.
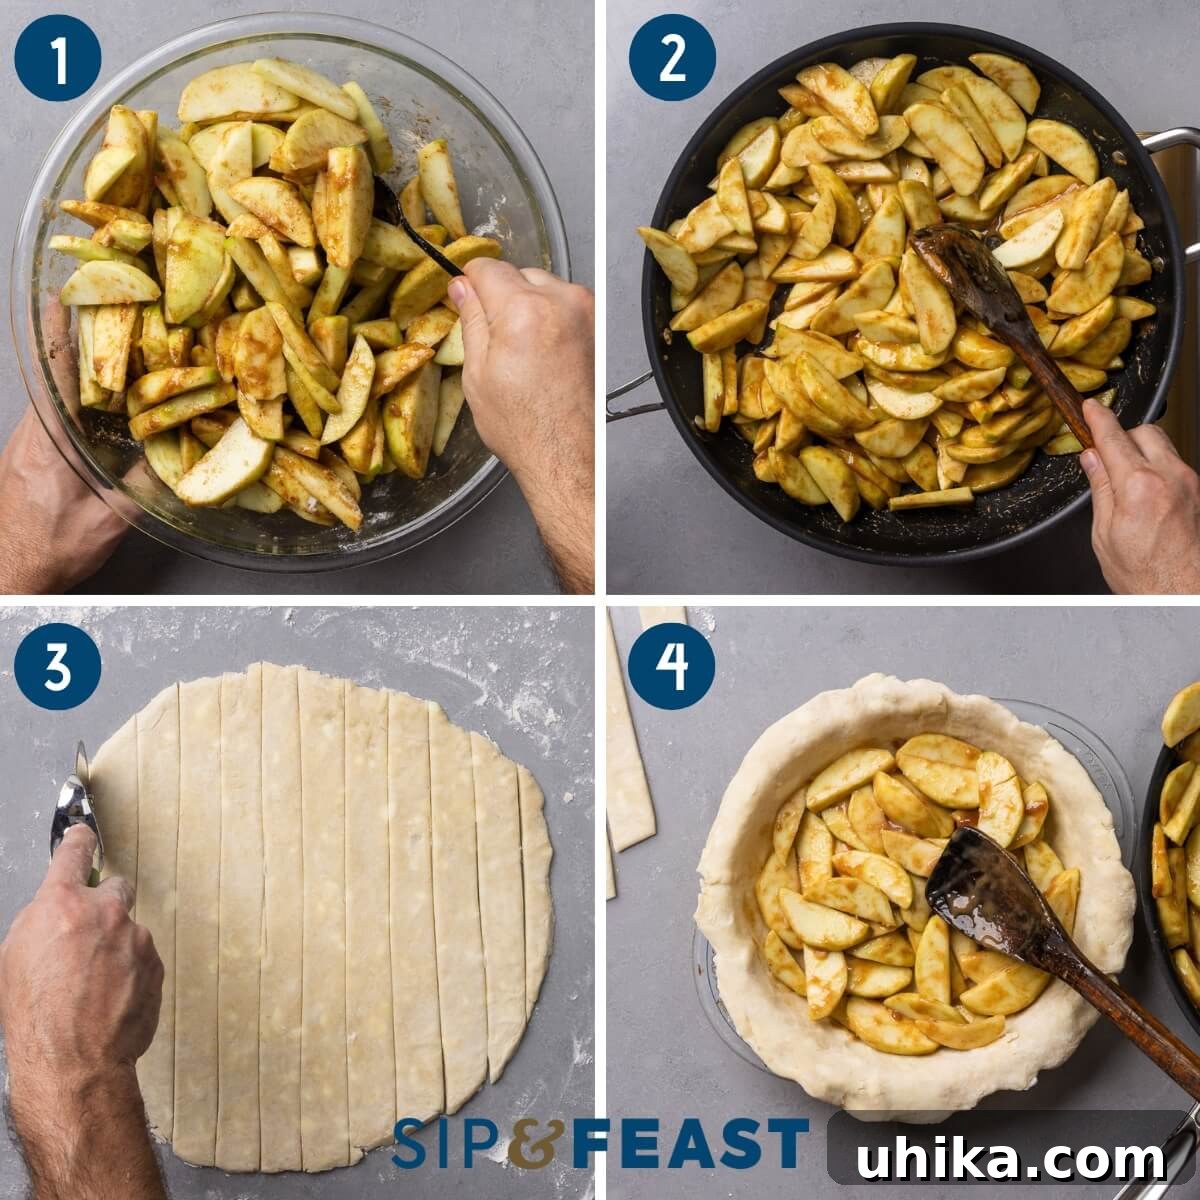
- While the apples cool, retrieve the prepared pie crust in its dish and the second disk of dough from the refrigerator. Roll out the second dough disk to form another 12-13-inch diameter circle. If you’re planning a beautiful lattice top, use a pastry wheel or knife to cut the dough into uniform 1-inch wide strips.
- Carefully spoon the slightly cooled apple filling into the chilled pie crust. Be sure to pack the apple slices down firmly, especially around the edges, to eliminate any gaps. Don’t be shy about piling the apples high in the center; they will naturally deflate and settle during baking, ensuring a full, generous pie.
- If you’re creating a lattice top, artfully arrange the dough strips over the apple filling, weaving them over and under each other to form an intricate pattern. This not only looks impressive but also allows steam to escape, preventing the crust from becoming soggy.
- Once the lattice is complete (or if you’re using a full top crust), fold the overhanging bottom pie shell edge and the lattice strips (or top crust edges) back toward the edge of the pie dish. Using your fingers, gently flute the edges for a classic, wavy pattern, or press down with the tines of a fork for a simpler, rustic crimp. This seals the pie and creates a beautiful border.
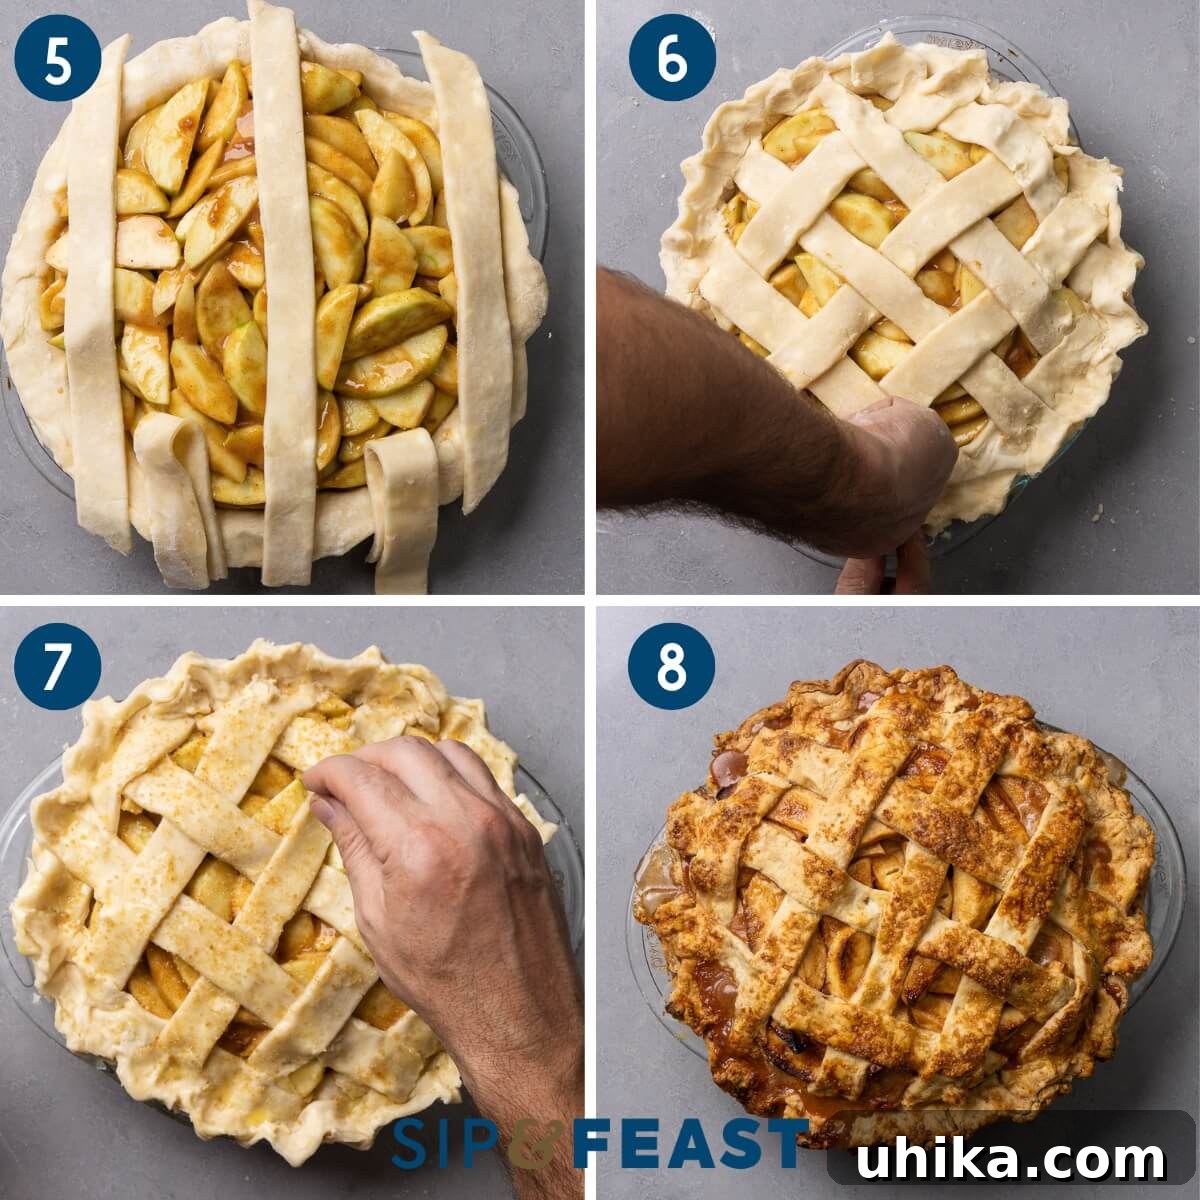
- In a small bowl, lightly beat one large egg to create an egg wash. Gently brush the egg wash over the entire top crust and lattice, if using. Then, generously sprinkle turbinado sugar over the egg-washed crust. The egg wash provides a beautiful golden sheen, and the turbinado sugar adds a delightful crunch and sparkle to the finished pie.
- Preheat your oven to 400°F (200°C) and position an oven rack in the middle. Place a baking sheet on the lower rack of the oven; this will catch any juices that might bubble over during baking, keeping your oven clean. Bake the pie for 15 minutes at 400°F. This initial high heat helps the crust set quickly and achieve its flakiness. After 15 minutes, reduce the oven temperature to 375°F (190°C) and continue to bake for approximately 40-60 minutes more, or until the internal temperature of the pie reaches 195°F (90°C) when checked with an instant-read thermometer inserted into the center. If the edges of the pie begin to brown too quickly, loosely tent them with aluminum foil or use a pie shield to prevent over-browning.
- Once the pie reaches the ideal internal temperature and the crust is golden brown, carefully remove it from the oven. This next step is crucial for success: allow the pie to cool completely on a wire rack for at least 3 hours before slicing and serving. This cooling time allows the apple filling to set properly, preventing it from oozing out when cut and ensuring beautiful, clean slices. Patience is truly a virtue here!
Top Tips for Apple Pie Perfection
- Precook the apples: Do not skip this step! Cooking the apples for a few minutes before baking helps release and evaporate excess water, which is key to preventing a soggy pie bottom. It also kickstarts the cooking process, ensuring the apples are tender when the crust is perfectly golden. Just be careful not to cook them until they are soft or mushy.
- Choosing the right apples: While Granny Smiths are highly recommended for their tartness and ability to hold their shape, don’t be afraid to experiment with other firm, tart baking apples like Honeycrisp (for sweetness), Cortland, Braeburn, or Jonagold. A blend of two or three varieties can add complexity to your filling.
- The magic of butter and lard: This combination truly yields the flakiest, most flavorful crust. Lard contributes exceptional flakiness due to its higher melting point, while butter provides that irresistible rich taste. For a purely vegetarian option, use all butter, or substitute vegetable shortening for the lard.
- Mastering the top crust: A lattice top is beautiful and allows steam to escape, which is great for preventing sogginess. If you prefer a full top crust, remember to cut several slits into it before baking. These vents are essential for steam release and prevent the crust from puffing up or cracking unevenly.
- Don’t fear store-bought crust: If you’re short on time, a good quality store-bought crust can be a lifesaver. For the best results, opt for refrigerated pie dough that you can roll out yourself, especially for the top crust, as it offers more flexibility for styling (like a lattice).
- Cook for internal temperature, not just time: The most accurate way to determine if your apple pie is perfectly cooked is by checking its internal temperature. Aim for 195°F (90°C) in the center of the filling. Ovens vary, and the density of your apple filling can affect baking time, so rely on a good instant-read thermometer.
- Prevent over-browning with a pie shield: If the edges of your crust start to brown too quickly before the center is cooked, simply create a pie shield. Cut a circle out of aluminum foil with a hole in the middle, or use a reusable store-bought pie shield, and gently place it over the pie to protect the edges for the remaining baking time.
- The importance of cooling: This is arguably the most critical tip! Allow your pie to cool for at least 3 hours, or ideally longer, before slicing. This extended cooling time allows the filling to fully set, preventing it from being runny and ensuring each slice holds its beautiful shape. Patience will be rewarded with perfect slices.
- Storing leftovers: A freshly baked apple pie can be stored at room temperature for the first 24 hours. For longer storage, cover the pie loosely with plastic wrap or foil and refrigerate for up to 5 days. Reheat gently in the oven for a warm slice.
More Delicious Desserts You’ll Love
If you’re a fan of the comforting flavors of apple pie, be sure to explore these other delightful dessert recipes!
- Easy Old-Fashioned Baked Apples
- Peach Blueberry Crisp
- Apple Crostata
- Sweet Potato Pie
If you’ve enjoyed this Classic Apple Pie recipe, please consider giving it a 5-star rating below. Your feedback helps us share more amazing recipes!
Don’t forget to watch us on YouTube, follow along on our Facebook Page, and become a Patreon member to receive access to exclusive full-meal videos and content.
Classic Apple Pie (Rustic and Flaky)
5 from 4 votes
Pin Recipe
Ingredients
For the Double Pie Crust
- 3 cups all-purpose flour
- 1 tablespoon granulated sugar
- 1 teaspoon fine sea salt
- 1/2 cup cold unsalted butter, cubed
- 3/4 cup cold lard, cubed (can also use vegetable shortening)
- 3/4 cup ice cold water
For the Apple Pie Filling
- 2 (9-inch) pie crusts (from above, or use store-bought)
- 9 large Granny Smith apples, peeled, cored, cut into 1/4-inch slices
- 1/4 cup all-purpose flour
- 1/2 cup granulated sugar
- 1/4 packed cup brown sugar
- 1 tablespoon lemon juice
- 1 1/2 teaspoons ground cinnamon
- 1/4 teaspoon ground nutmeg
- 1 large egg, beaten (for egg wash)
- Turbinado sugar for sprinkling (optional)
Want To Save This Recipe?
Enter your email and we’ll send it to you. Plus, get great new recipes from us every week!
Instructions
For the Double Pie Crust
- In a large bowl, thoroughly mix the flour, sugar, and salt.
- Add the cold, cubed butter and lard to the dry ingredients. Using a pastry cutter, cut the fats into the flour until the mixture resembles a coarse meal with some pea-sized pieces of fat remaining. This can also be done in a food processor by pulsing briefly.
- Gradually drizzle in the ice water, 1 tablespoon at a time. With a spatula, gently press and fold the dough until the water is just combined and large shaggy bits of dough begin to form. Avoid overmixing; you might not need all the water.
- Transfer the dough to a lightly floured surface, divide it in half, and gently form each half into a flattened disk. Wrap each disk tightly in plastic wrap and refrigerate for at least 2 hours, or preferably overnight, before use.
For the Apple Pie
- Approximately 20 minutes before assembly, remove one disk of pie crust dough from the refrigerator to soften slightly. On a lightly floured surface, roll it out to a 12-13-inch circle and carefully transfer it to a 9-inch pie dish. Gently tuck the dough into the sides of the dish, allowing excess to overhang. Place the prepared pie dish back in the fridge.
- In a large pan, combine the sliced apples, flour, granulated sugar, brown sugar, lemon juice, cinnamon, and nutmeg. Cook over medium heat for 5 minutes, stirring frequently to ensure uniform cooking. This step helps prevent a soggy bottom crust. Remove from heat and allow the apples to cool slightly.
- Preheat your oven to 400°F (200°C) and place an oven rack in the middle position.
- Remove the prepared pie crust in its dish and the second disk of dough from the fridge. Roll out the second dough disk to a 12-13-inch diameter circle. If making a lattice top, cut the dough into 1-inch wide strips.
- Fill the chilled pie crust with the apple mixture, packing the apples firmly into the sides to eliminate gaps. Pile the apples high in the center, as they will settle during baking.
- If making a lattice, weave the dough strips over and under the filling. Fold the overhanging pie shell and lattice pieces back towards the edge of the pie dish. Crimp the edges with your fingers or a fork to seal. Brush the beaten egg wash over the top crust and sprinkle generously with turbinado sugar, if using.
- Place a baking sheet on the lower oven rack to catch any drips. Bake the pie at 400°F for 15 minutes. Then, reduce the oven temperature to 375°F (190°C) and continue baking for 40-60 minutes, or until the internal temperature of the pie reaches 195°F (90°C) when checked with an instant-read thermometer. If the crust edges brown too quickly, loosely tent with aluminum foil.
- Remove the pie from the oven and let it cool completely on a wire rack for at least 3 hours before slicing and serving. This allows the filling to set properly.
Notes
- Food processor method for crust: For a quick crust, pulse dry ingredients in a food processor, then add cold butter and lard. Pulse until coarse crumbs form. Transfer to a floured surface, divide, wrap, and chill.
- Crust fat variations: This recipe uses a 2/3 lard to 1/3 butter ratio for ultimate flakiness. For an all-butter crust, use 1 1/4 cups (280g) cold unsalted butter, cubed, instead of the butter and lard. Vegetable shortening can be substituted for lard.
- Apple varieties: While Granny Smiths are ideal for their tartness and texture, other excellent baking apples include Honeycrisp, Cortland, Braeburn, and Jonagold.
- Why precook apples: This quick step is crucial for preventing a soggy bottom crust by evaporating excess moisture from the apples. It also ensures the apples are tender by the time the crust is perfectly baked.
- Achieving perfect doneness: For fruit pies, baking until an internal temperature of 195°F (90°C) is reached ensures the filling is perfectly set and cooked through. Baking times can vary greatly, so use an instant-read thermometer after 50-55 minutes of total baking.
- Foil shield for crust edges: If your pie crust edges begin to brown too quickly, simply create a pie shield by cutting a circle of foil with a center cutout. Place it over the pie to protect the edges during the remaining baking time.
- Leftover storage: Freshly baked apple pie can be stored at room temperature for up to 24 hours. For longer freshness, refrigerate in an airtight container for up to 5 days.
Nutrition
Nutrition information is automatically calculated, so should only be used as an approximation.