
The Ultimate Guide to Perfectly Crispy Oven-Baked Bacon: A Foolproof Method
There’s nothing quite like the irresistible aroma and satisfying crunch of perfectly cooked bacon. It’s a breakfast staple, a sandwich hero, and a flavor booster in countless dishes. However, achieving that ideal crispiness without a greasy mess can often feel like a culinary challenge. Enter oven-baked bacon – a simple, hands-off method that consistently delivers beautifully browned, evenly cooked, and delightfully crispy strips every single time. Forget the splattering grease, the constant flipping, and the unevenly cooked pieces; this guide will transform your bacon-making experience into an effortless joy. Whether you’re preparing breakfast for one or a feast for many, mastering oven-baked bacon is a game-changer you won’t regret.
This comprehensive guide will walk you through everything you need to know, from essential equipment and choosing the right bacon to a detailed step-by-step cooking process, expert tips, troubleshooting common issues, and creative ways to utilize your perfectly cooked strips. Get ready to impress your taste buds and simplify your kitchen routine with the ultimate method for crispy, delicious bacon.
Why Oven Baking is the Superior Method for Bacon
For years, cooking bacon on the stovetop was the standard. While effective, it often comes with a host of frustrations: hot grease splattering everywhere, requiring constant attention and flipping, and resulting in unevenly cooked strips that can range from perfectly crisp to sadly soggy within the same batch. Oven baking eliminates these common pitfalls, offering several compelling advantages that make it the preferred choice for many home cooks and professional chefs alike.
- Minimal Mess, Maximum Clean-up Ease: The most immediate benefit is the reduction in mess. By containing the bacon on a sheet pan in the oven, you eliminate the notorious grease splatter that can cover your stovetop and countertops. Any drippings are neatly collected, making cleanup a breeze, especially when using parchment paper or aluminum foil. This means less time scrubbing and more time enjoying your meal.
- Unparalleled Even Cooking: Unlike a hot pan where direct contact with the heat source can lead to uneven results, the circulating hot air in an oven cooks bacon from all sides simultaneously. This ensures every strip browns uniformly and reaches the same level of crispiness, from end to end. No more burnt ends and raw centers; just consistently perfect bacon.
- Hands-Free Convenience: Once the bacon is in the oven, your work is largely done. This frees you up to prepare other components of your meal, like eggs, pancakes, or toast, without having to babysit the bacon. It’s a truly hands-off approach that saves time and reduces stress, allowing you to multitask in the kitchen.
- Ideal for Batch Cooking: Need to cook a large quantity of bacon for a brunch crowd or for meal prepping? The oven is your best friend. A standard half-sheet pan can comfortably accommodate an entire pound of bacon, allowing you to cook more at once than a typical frying pan. This makes it perfect for feeding a family or preparing ingredients for the week ahead.
- Consistent, Foolproof Results: With a reliable oven temperature and a timer, you can expect perfectly crisp bacon every time. The gentle, consistent heat of the oven is far more forgiving than the intense, direct heat of a stovetop, drastically reducing the risk of burning and ensuring a high success rate even for novice cooks.
Embracing the oven for your bacon cooking needs means saying goodbye to greasy splatters, uneven doneness, and frantic flipping, and saying hello to a stress-free experience and consistently delicious results. It’s a method that promises perfection with minimal effort.
Essential Equipment for Perfect Oven-Baked Bacon
Achieving perfectly crisp bacon with minimal fuss relies on having the right tools. Thankfully, you likely already have most of these kitchen essentials on hand, making this a very accessible cooking method.
- Half Sheet Pan (approximately 13×18 inches): This is your primary cooking vessel. A sturdy, heavy-gauge sheet pan will conduct heat evenly and prevent warping at high temperatures, which is crucial for consistent cooking. It’s essential for accommodating a good quantity of bacon and catching all the rendered fat.
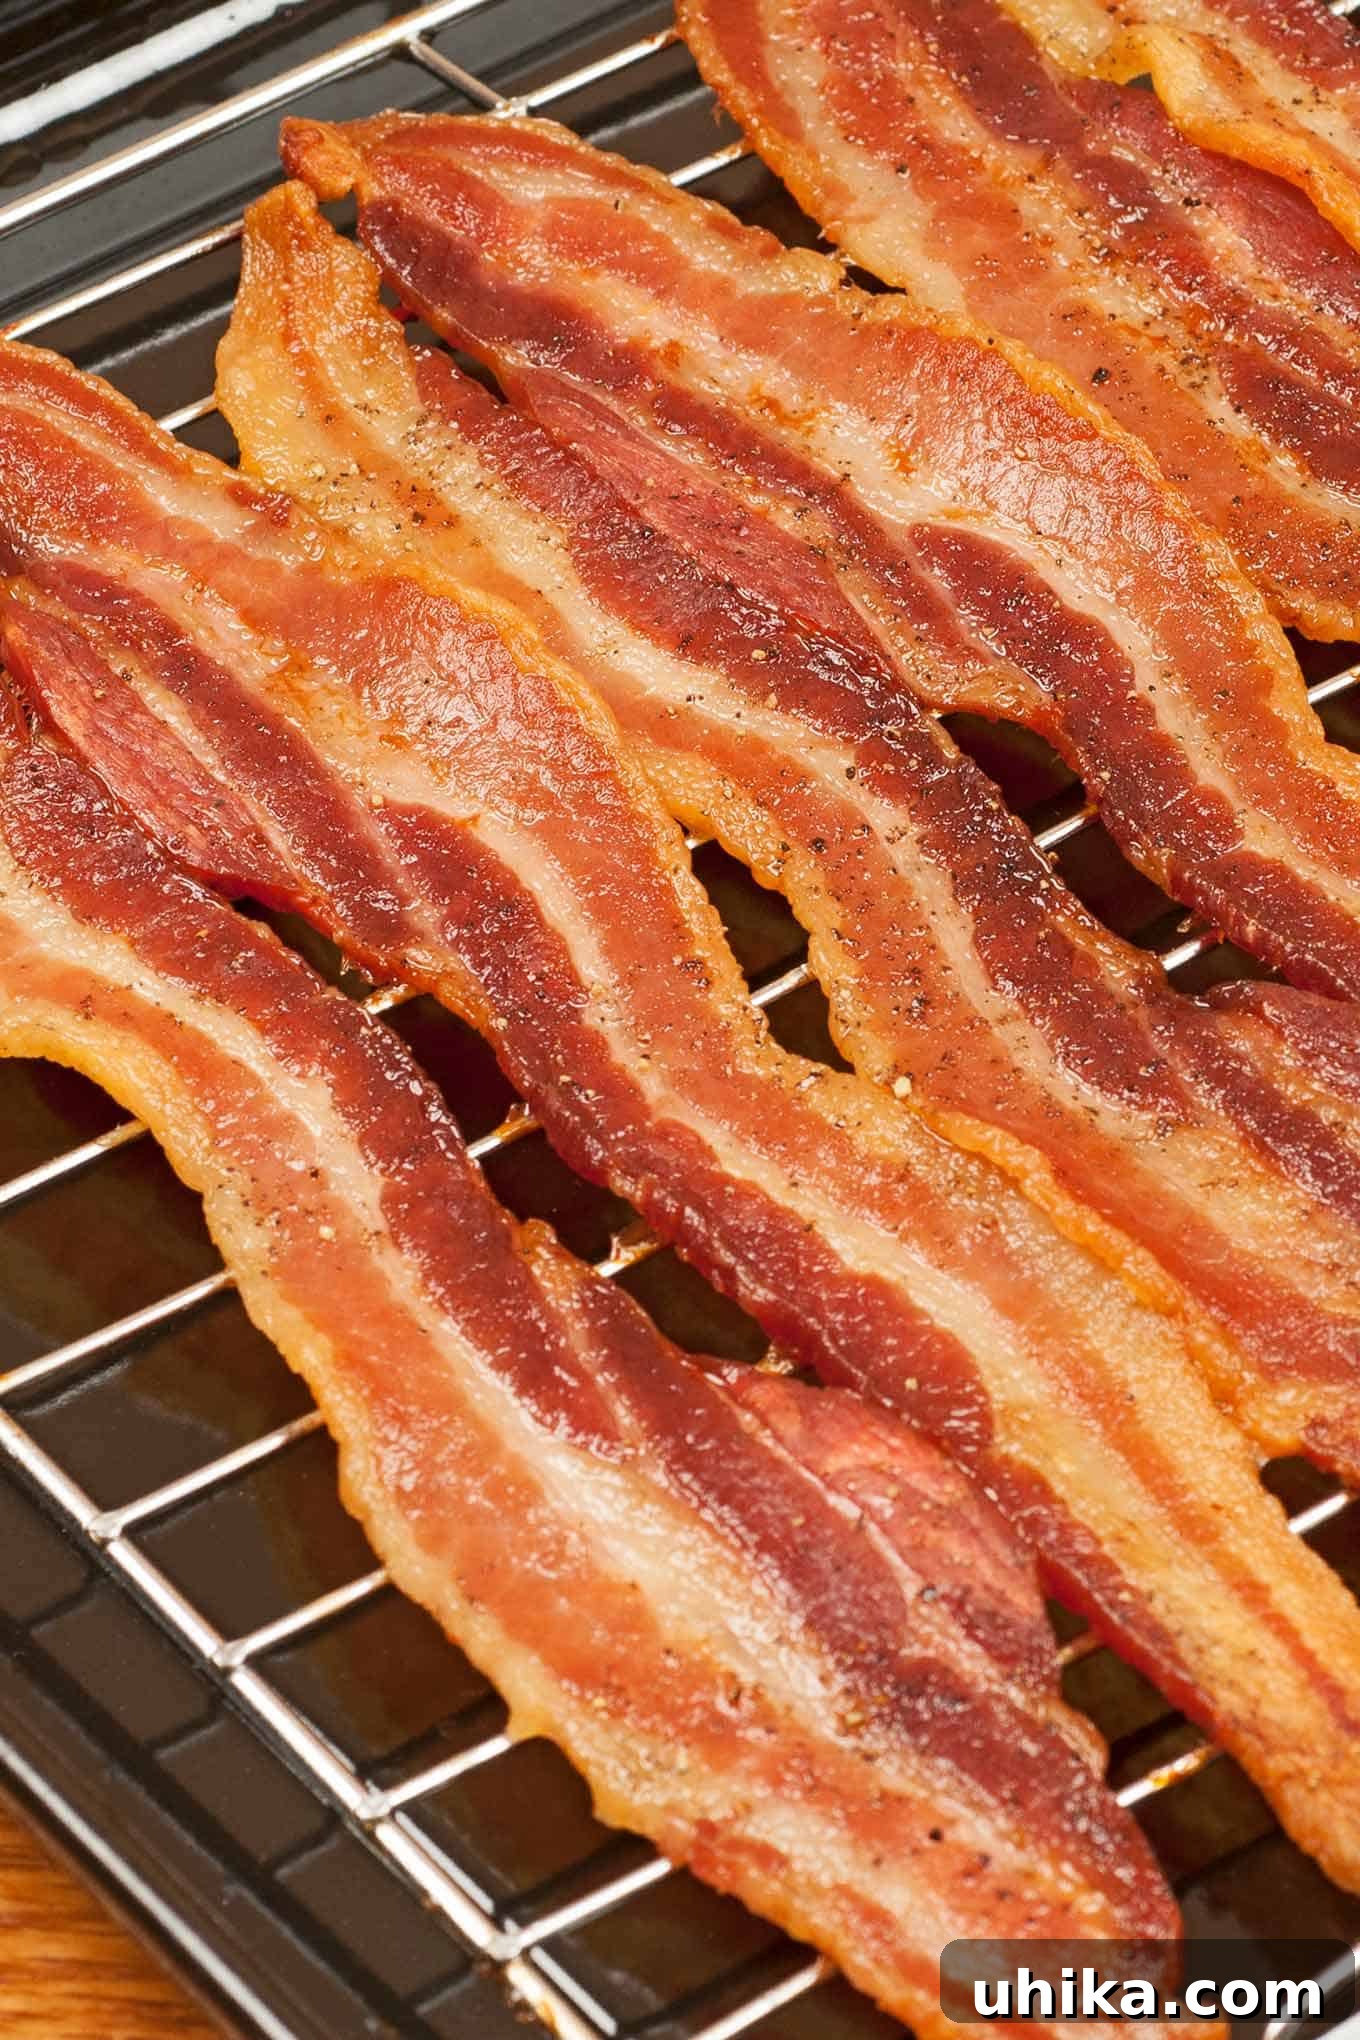
- Wire Cooling Rack (approximately 12×17 inches): This is the secret weapon for ultimate crispiness. Positioning the bacon on a wire rack allows air to circulate all around the strips, promoting even cooking and letting the rendered fat drip away below. This prevents the bacon from frying in its own grease, which can lead to soggy spots. Ensure the rack fits comfortably inside your sheet pan without touching the edges too much, leaving space for fat collection. If you don’t have one, don’t worry – you can still achieve great results directly on parchment paper, but with slightly different management.
- Heavy-Duty Aluminum Foil or Parchment Paper: A non-negotiable for easy cleanup. Line your sheet pan with either before placing the rack or the bacon directly on it. Aluminum foil is excellent for capturing fat and can be easily molded to the pan, while parchment paper prevents sticking even without a rack and makes lifting the cooked bacon effortless.
- Nonstick Cooking Spray (optional but recommended): A light coating on your wire rack will ensure the bacon doesn’t stick as it crisps, making removal effortless and preventing frustrating tears.
- Tongs: Essential for safely handling hot bacon, rotating the pan mid-cooking, and transferring the cooked strips to paper towels without breaking them. Long tongs are particularly useful.
- Paper Towels: A generous stack of paper towels is needed for draining excess fat from the cooked bacon after it comes out of the oven, ensuring maximum crispiness and a less greasy final product.
Choosing the Right Bacon for Baking
While almost any bacon will benefit from oven baking, understanding the different types can help you achieve your desired outcome and tailor your choice to the specific meal or your personal preference. The variety of bacon available today means you can fine-tune your crispy creation.
- Standard Cut Bacon: This is your everyday bacon, typically sliced to about 1/16 to 1/8 inch thick. It cooks relatively quickly in the oven, usually within 15-20 minutes at 375°F (190°C), and yields consistently crisp results. Its familiar texture and cooking time make it perfect for a classic breakfast side or crumbling into salads.
- Thick-Cut Bacon: As the name suggests, this bacon is sliced thicker, often around 1/8 to 1/4 inch. Thick-cut bacon takes longer to cook, usually 20-30 minutes, but it offers a more substantial, meatier bite and a chewier texture alongside its crisp edges. It’s excellent for sandwiches where you want the bacon to stand out, or when you want it to be a star component of the dish rather than just an accent.
- Uncured Bacon: If you’re looking for bacon without added synthetic nitrites or nitrates, uncured bacon is a great option. It’s often cured with natural ingredients like celery powder or sea salt. The cooking process remains the same as conventional bacon, but always check the package for specific recommendations as some brands may vary slightly.
- Flavor Profiles: Don’t shy away from experimenting with different flavors! Applewood smoked, hickory smoked, maple-cured, or peppered bacon can add wonderful depth and complexity to your dishes. These varieties bake up just as beautifully in the oven, allowing their unique seasonings to infuse into every crispy bite.
Regardless of your choice, ensure the bacon is fresh and of good quality. The thickness will be the primary factor influencing your baking time, so always keep that in mind when planning your meal. For the crispiest results, avoid excessively fatty cuts.
How to Cook Bacon in the Oven: A Step-by-Step Recipe
By: Lynne Webb
Oven baking is an easy, foolproof way to make perfectly crisp, evenly browned bacon. Learn how to do it in seven easy steps to transform your breakfast routine.
Prep Time: 5 mins
Cook Time: 25 mins
Servings: Approximately 9 servings (based on 2 strips per serving from 1lb of standard bacon)
Equipment
- 1 Half sheet pan (approximately 13 x 18-inch)
- 1 wire cooling rack (approximately 12 x 17-inch, optional but recommended)
- Heavy-duty aluminum foil or parchment paper
- Tongs
- Paper towels
Ingredients
- 1 lb bacon (standard or thick-cut, your preference)
- Nonstick cooking spray (optional, for the wire rack)
Instructions
- Preheat the Oven to 375°F (190°C): Begin by preheating your oven to the specified temperature. It’s crucial to allow the oven to fully preheat before placing the bacon inside, as a consistently hot oven ensures even cooking from the start and helps the bacon crisp up beautifully and quickly.
- Prepare Your Sheet Pan: Line your half sheet pan completely with heavy-duty aluminum foil or parchment paper. This vital step is critical for incredibly easy cleanup, as the lining will efficiently catch all the rendered bacon fat, preventing it from baking onto your pan.
- Set Up the Rack (or Go Direct): If you have a wire cooling rack that fits inside your sheet pan, position it on top of the lined pan. For an extra non-stick measure, lightly coat the rack thoroughly with nonstick cooking spray. The rack is key for allowing fat to drip away, promoting maximum crispiness and preventing the bacon from simmering in its own grease. Note: If you don’t have a suitable wire rack, you can still achieve great results by placing the bacon directly on the parchment-lined pan. In this case, you’ll need to drain off rendered fat during cooking for the best crispy outcome.
- Arrange the Bacon: Carefully lay the bacon slices side-by-side in a single layer on the prepared rack or parchment paper. It’s perfectly fine for the strips to be close together on the pan, but it is absolutely essential to ensure they do not overlap. Overlapping strips will fuse together during cooking, leading to unevenly cooked results with chewy, undercooked spots and preventing them from crisping properly.
- Initial Bake and Rotate: Place the sheet pan with the arranged bacon into the preheated oven. Bake for an initial period of 10 minutes. After this time, carefully remove the pan from the oven using oven mitts and rotate it 180 degrees. This rotation helps to ensure all the bacon cooks evenly, compensating for any hot spots in your oven. If you’re baking directly on parchment without a rack, this is also the ideal time to carefully drain off any accumulated fat from the pan, as too much fat can make the bacon soggy.
- Continue Baking to Crispness: Return the bacon to the oven and continue baking for an additional 10 to 15 minutes, or until the bacon reaches your desired level of crispness. The exact cooking time will vary depending on the thickness of your bacon slices (thick-cut will take longer) and your oven’s specific calibration. Keep a very close eye on it during the last few minutes, as bacon can go from perfectly crisp to burnt very quickly.
- Drain and Serve: Once the bacon is perfectly crisp and golden brown, carefully remove the pan from the oven. Use tongs to transfer the hot bacon strips to a plate lined with several thicknesses of paper towels. This crucial step allows any remaining excess grease to drain off, significantly enhancing the bacon’s crisp texture. Let it rest for just a minute or two before serving, as the bacon will continue to crisp slightly as it cools on the paper towels.
Troubleshooting Common Oven-Baked Bacon Issues
While oven-baked bacon is incredibly foolproof and consistent, sometimes minor issues can arise. Here’s how to quickly address them and ensure consistently perfect, crispy results every single time:
- Bacon Isn’t Crispy Enough:
- Issue: Your bacon comes out chewy, slightly soft, or lacks that desirable crunch.
- Solution: This usually means it hasn’t cooked long enough, or your oven temperature might be running a bit cooler than indicated. Increase the baking time by a few minutes, carefully monitoring the bacon’s progress to prevent burning. Ensure your oven is fully preheated before you even put the bacon in. If you are not using a wire rack, it is absolutely essential that you drain the rendered fat at least once, halfway through cooking, to prevent the bacon from simmering in its own grease, which leads to sogginess.
- Bacon is Burning or Too Dark:
- Issue: The edges of your bacon are burnt, or the whole strip is excessively dark, brittle, or charred.
- Solution: The oven might be too hot, or you’ve simply cooked it for too long. Check your oven’s calibration with an oven thermometer if you suspect it runs hot, or consider reducing the temperature by 25°F (about 15°C) next time. Always keep a very close eye on the bacon, especially during the last 5-7 minutes of cooking, as it can go from perfect to burnt quickly.
- Bacon is Sticking to the Rack/Pan:
- Issue: Bacon tears apart or is difficult to remove from the cooking surface after baking.
- Solution: If you are using a wire rack, ensure you’ve coated it thoroughly with nonstick cooking spray before arranging the bacon. If baking directly on parchment paper, sticking is less common, but ensure your parchment is of good quality and isn’t too old. A very old or worn sheet pan can also contribute to sticking; make sure it’s clean and undamaged.
- Unevenly Cooked Strips:
- Issue: Some bacon strips are perfectly crisp, while others remain soft, or one side of the pan cooks noticeably faster than the other.
- Solution: First, ensure you are arranging the bacon in a single layer without any overlapping. Overlapping is a primary cause of uneven cooking. Second, don’t skip the step of rotating the pan 180 degrees halfway through the cooking process. Oven hot spots are common, and rotating helps ensure consistent exposure to heat for all strips, leading to uniform crispness.
By understanding and addressing these common scenarios, you can quickly adjust your technique and enjoy perfectly cooked bacon every single time, free from common kitchen frustrations.
Storing Cooked Bacon for Future Enjoyment
One of the many benefits of oven-baked bacon is how easily it can be prepared in advance and stored. Having perfectly cooked bacon on hand is a fantastic time-saver for quick meals, savory snacks, and delightful additions throughout the week, ensuring you always have that irresistible flavor readily available.
Refrigerator Storage
Once your bacon is cooked to perfection and drained on paper towels, it’s crucial to allow it to cool completely at room temperature. This step is essential because wrapping warm bacon can trap moisture, leading to sogginess and a significantly shorter shelf life. Once fully cooled:
- Wrap the bacon strips tightly in heavy-duty aluminum foil, creating a sealed package to protect them from air.
- Alternatively, place them in an airtight container. For added protection against moisture, you can line the container with a fresh paper towel to absorb any residual moisture.
- Store the wrapped or contained bacon in the refrigerator for optimal freshness for up to 7 days.
Freezer Storage
For longer-term storage, cooked bacon freezes beautifully without any significant loss of flavor or texture. This is an excellent option for meal prepping large batches, ensuring you’re always just minutes away from delicious bacon.
- After cooking and cooling completely, arrange the bacon strips in a single layer on a parchment-lined baking sheet.
- Place the baking sheet in the freezer for about 1-2 hours, or until the bacon is firm and solid. This “flash freezing” technique prevents the strips from sticking together when stored in bulk.
- Once flash-frozen, transfer the bacon to a heavy-duty freezer-safe bag or an airtight container. Remove as much air as possible from the bag to prevent freezer burn, which can affect taste and texture.
- Store in the freezer for 4 to 6 weeks for optimal quality, though it can remain safe to eat for longer periods.
Reheating Cooked Bacon
Reheating your cooked bacon is quick and easy, allowing you to enjoy its crispness any time:
- From the refrigerator: Briefly warm the strips in a microwave on a paper towel-lined plate for 30-60 seconds, or in a skillet over medium-low heat until they become warm and crisp again.
- From the freezer: You can often reheat frozen bacon directly without thawing. Place the strips on a baking sheet and warm them in a 350°F (175°C) oven for a few minutes, or microwave for 30-60 seconds per strip until warm and crisp. It defrosts and reheats in a matter of minutes, making it incredibly convenient.
With these comprehensive storage tips, you can always have delicious, perfectly crisp bacon ready to go, simplifying your meal prep and enhancing your culinary creations.
Delicious Ways to Incorporate Your Oven-Baked Bacon
Beyond being a standalone breakfast item, perfectly crispy oven-baked bacon is a truly versatile ingredient that can elevate a wide array of dishes. Its smoky, savory, and salty notes add incredible depth and a delightful textural contrast to both sweet and savory recipes, making it a culinary superstar.
Breakfast & Brunch Enhancements:
- Classic Side Dish: The most obvious and always welcome use! Serve generously alongside fluffy scrambled eggs, perfectly fried sunny-side-up eggs, elegant omelets, and buttery toast.
- Pancake and Waffle Topping: Crumble crispy bacon over sweet treats like Chocolate Chip and Bacon Pancakes, or fold small bits directly into the batter for an unexpected sweet and savory twist.
- Elevated Egg Dishes: Fold finely chopped bacon into your morning scrambled eggs, sprinkle it generously over quiches and frittatas, or create delicious, hearty Scrambled Eggs in Potato Nests with a delightful bacon garnish.
- Breakfast Burritos & Sandwiches: Bacon is an essential, flavorful component for any robust breakfast wrap, burrito, or sandwich, adding both protein and a satisfying crunch.
Lunch & Dinner Upgrades:
- BLT Sandwiches: The quintessential use for crisp bacon. Layer generously with crisp fresh lettuce and ripe, juicy tomatoes on perfectly toasted bread for a timeless classic.
- Salad Topping: Crumble bacon over vibrant garden salads, classic Caesar salads, or even warm spinach salads for an incredible burst of smoky flavor and a delightful textural crunch.
- Baked Potatoes & Soups: Sprinkle chopped crispy bacon generously over creamy baked potatoes, hearty potato soup, rich creamy tomato soup, or savory split pea soup for an added layer of flavor and texture.
- Roasted Vegetables: Add chopped bacon to roasted Brussels sprouts, green beans, asparagus, or include it in comforting dishes like Roasted Okra with Bacon and Tomatoes to enhance their savoriness.
- Pasta Dishes: Incorporate crispy bacon bits into creamy carbonara, comforting mac and cheese, or any creamy pasta sauce for a rich, salty dimension.
- Burgers & Hot Dogs: Elevate your backyard BBQ fare by adding a couple of strips of crispy bacon to your gourmet burgers or classic hot dogs for an unforgettable taste.
Snacks & Appetizers:
- Homemade Bacon Bits: Keep a jar of crumbled bacon bits in the fridge for spontaneous additions to almost anything, from dips to deviled eggs.
- Bacon-Wrapped Dates/Shrimp: A fantastic and simple appetizer for entertaining guests or for a special treat.
The possibilities are truly endless when you have a batch of perfectly cooked bacon ready to go. Let your culinary creativity shine and transform everyday meals into extraordinary experiences!
Nutrition Information
(Approximation per 2 strips, based on general values)
- Serving Size: 2 strips
- Calories: 92
- Total Fat: 9g
- Cholesterol: 15mg
- Sodium: 146mg
- Carbohydrates: 1g
- Protein: 3g
Nutrition information is automatically calculated and provided for general guidance. It should only be used as an approximation. Actual values may vary significantly based on the specific brand of bacon, its thickness, and your exact preparation methods.
Mastering oven-baked bacon is a simple yet powerful skill that will undeniably save you time, drastically reduce kitchen mess, and consistently deliver perfectly crisp, delicious results. With its superior texture and rich, savory flavor, this hands-off method is truly a game-changer for any bacon lover, from casual eaters to culinary enthusiasts. So, next time you’re craving that irresistible crunch and smoky aroma, skip the stovetop fuss and let your oven do the work to achieve bacon perfection. Happy cooking!
Enjoyed this recipe and found our guide helpful? We’d love to hear your thoughts and see your perfectly crispy bacon! Please consider leaving a rating and comment below to share your experience and tips with other home cooks.