
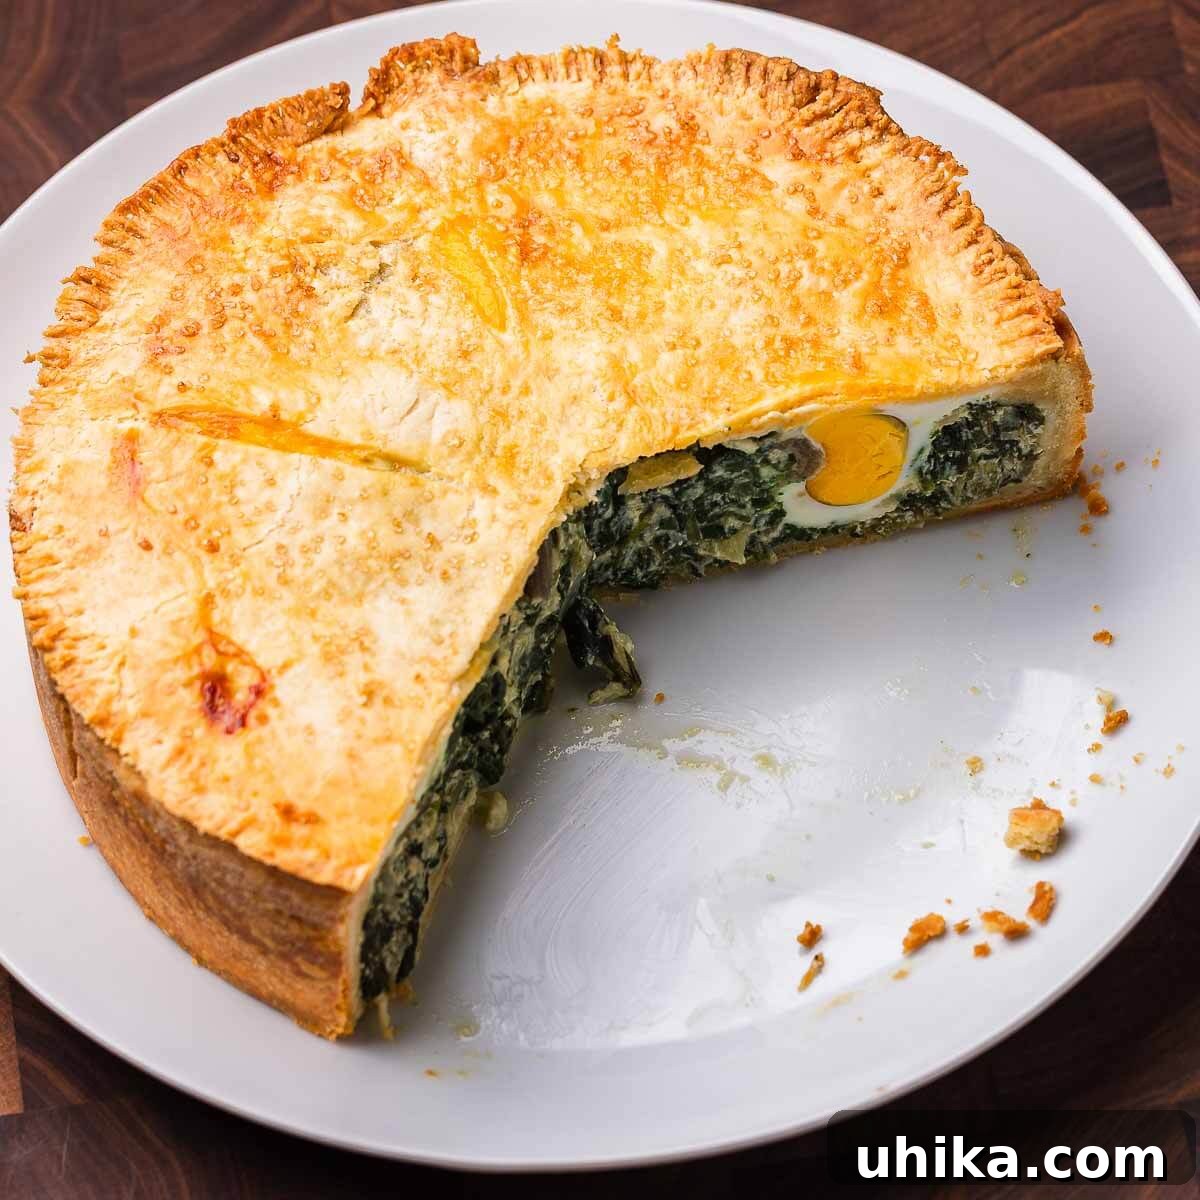
Torta Pasqualina: A Timeless Italian Savory Easter Pie
Torta Pasqualina, a magnificent savory Easter pie, is a culinary masterpiece that beautifully blends tradition with exquisite flavor. Encased in a tender, homemade pastry crust, this iconic Italian dish is generously filled with a creamy, vibrant mixture of spinach, Swiss chard, rich cheeses, and perfectly set whole eggs. More than just a meal, Torta Pasqualina is a celebration – a centerpiece perfect for Easter breakfast, a delightful brunch item, or an elegant appetizer that captivates with its rustic beauty and incredible taste.
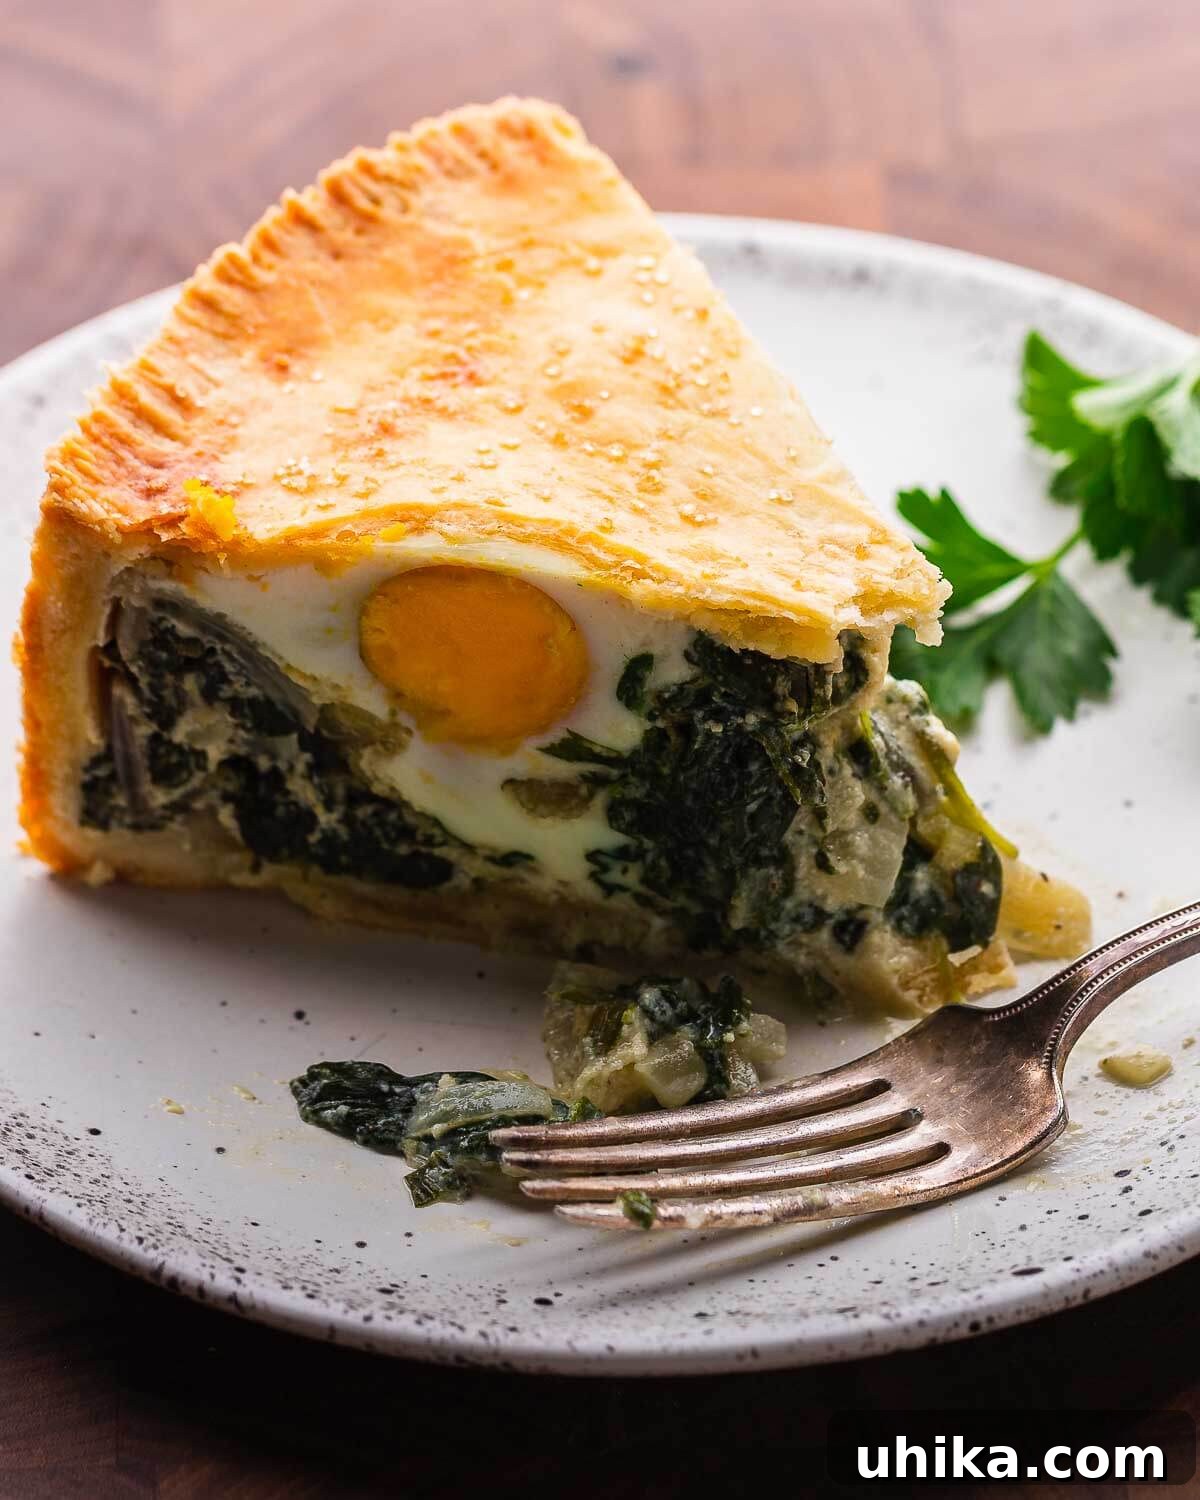
Easter in Italian and Italian-American households is synonymous with extraordinary culinary traditions. From the delicate sweetness of Italian Easter brioche bread and the aromatic complexity of Pastiera Napoletana, to the savory layers of Torta Pasqualina, the breadth of flavors, textures, and time-honored techniques is truly remarkable. Each dish tells a story, a testament to generations of culinary heritage.
While the distinct presence of whole eggs in this savory pie traditionally marks it as an Easter delicacy, the truth is, this verdant green pie is far too delicious to be confined to a single season. Its wholesome ingredients and comforting profile make it an ideal dish to enjoy year-round. Don’t limit yourself to spring; Torta Pasqualina is a delightful treat for any occasion.
For those seeking a simpler, yet equally satisfying, alternative to Torta Pasqualina, our spinach ricotta pie offers a wonderful option, delivering similar fresh flavors with a slightly less intricate preparation.
Crafting Your Authentic Torta Pasqualina: A Step-by-Step Guide
Creating Torta Pasqualina is a rewarding culinary journey that begins with a perfect homemade crust and culminates in a beautifully baked, flavorful pie. Follow these detailed steps to bring this Italian classic to life in your kitchen.
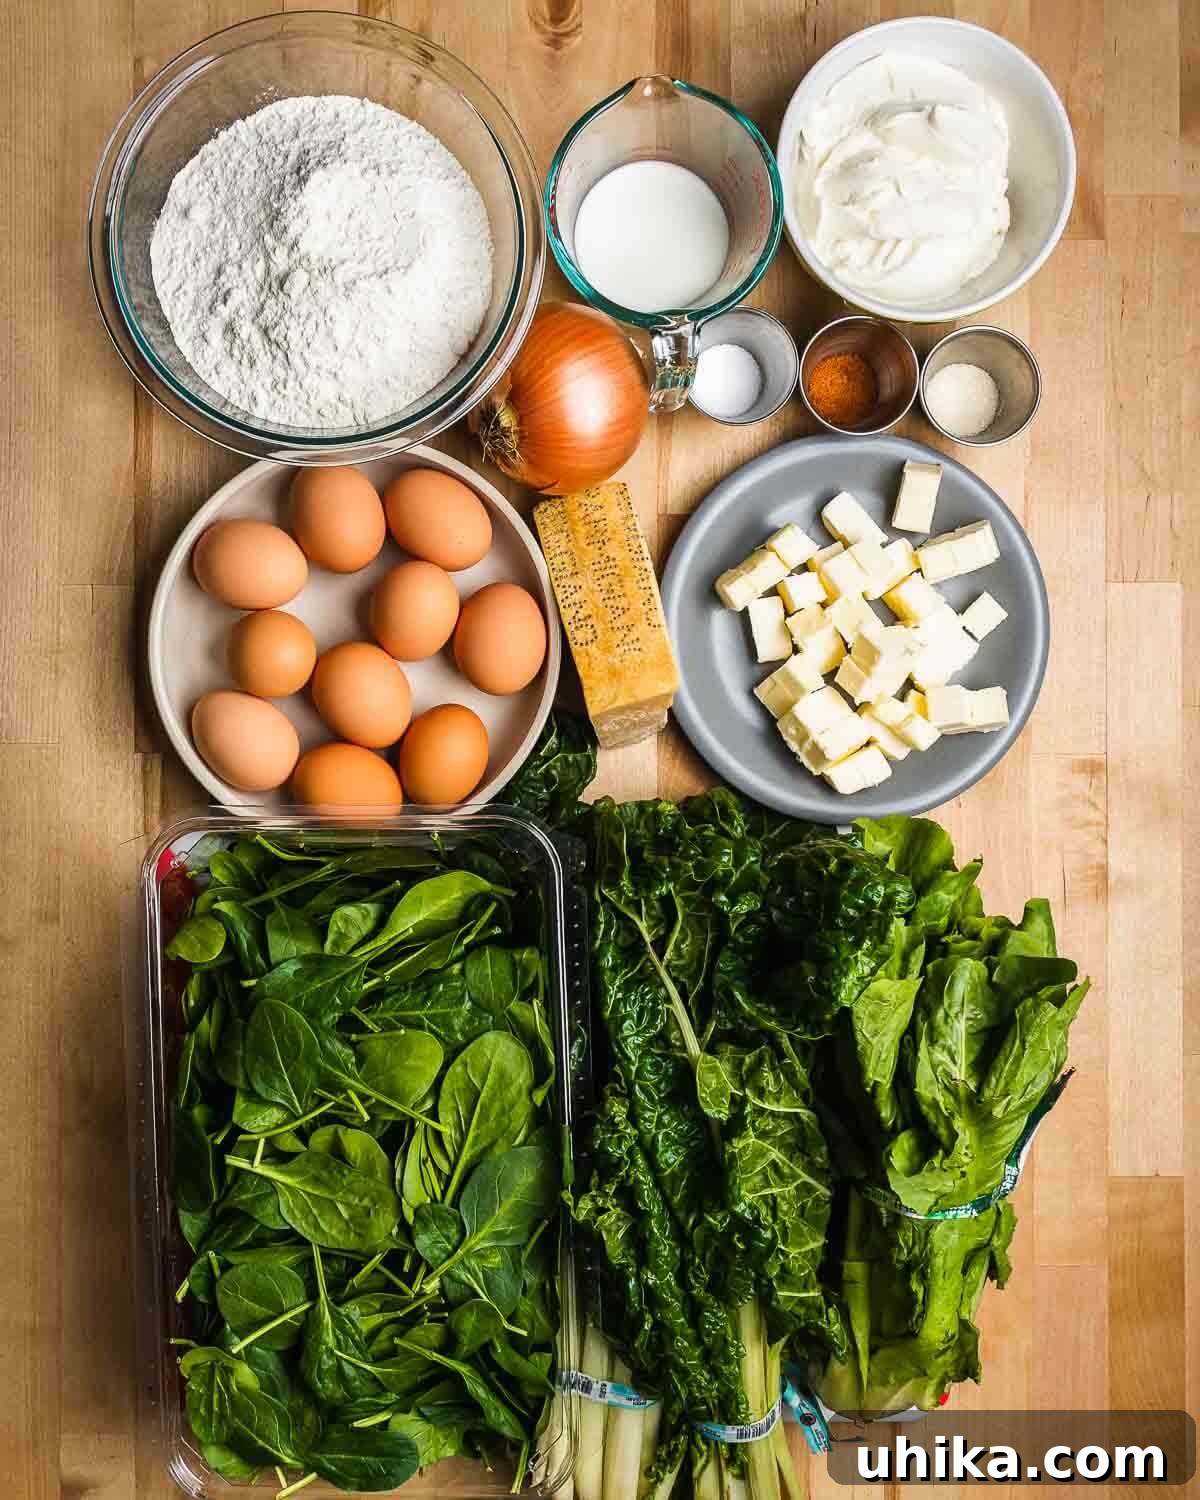
The Foundation: Preparing the Homemade Dough
A truly exceptional Torta Pasqualina starts with its crust. This recipe calls for a buttery, flaky homemade pastry, essential for holding the rich filling and providing a delightful contrast in texture. The key to a tender crust lies in using cold ingredients and handling the dough minimally.
- Begin by combining 3 1/2 cups (450g) of all-purpose flour, 1 teaspoon of fine sea salt, and 1 teaspoon of sugar in the bowl of a food processor. Pulse a few times to ensure these dry ingredients are thoroughly mixed. This initial step helps distribute the leavening agents evenly.
- Next, add 2 sticks (226g) of cold, unsalted butter, cut into small cubes. Pulse the mixture for 20-30 seconds. The goal here is to incorporate the butter into the flour until the mixture resembles coarse crumbs with some pea-sized pieces of butter still visible. This texture is crucial for achieving a flaky crust. Avoid over-processing, as this can lead to a tough dough.
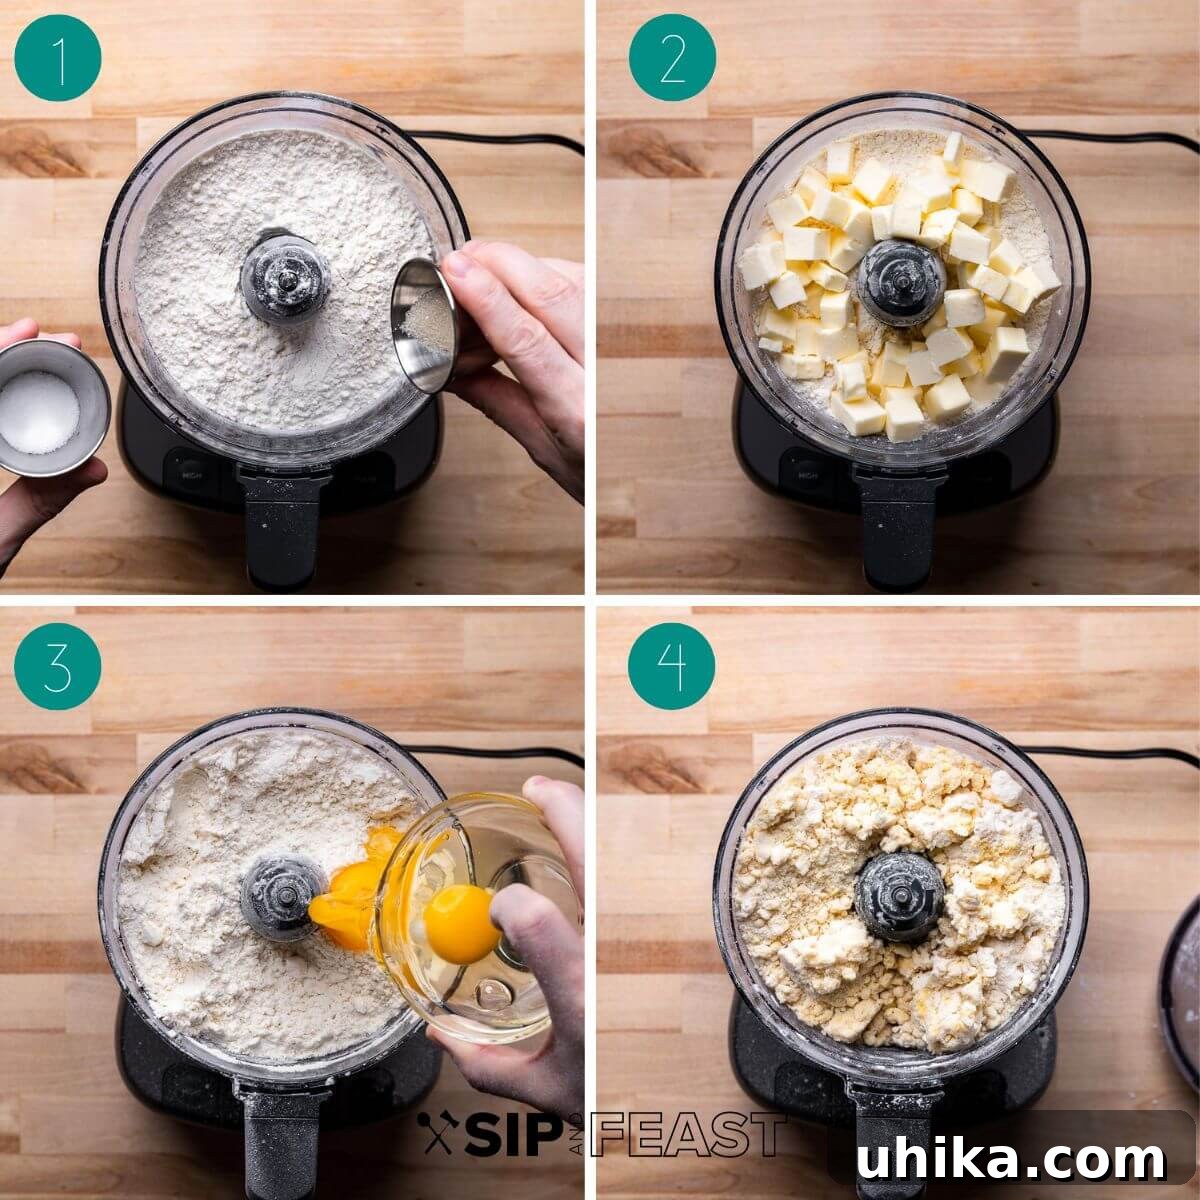
- Add 1/3 cup (80g) of cold milk and 2 large eggs to the food processor. Pulse again until a rough dough begins to form. At this stage, the dough will appear shaggy and somewhat crumbly, but this is perfectly normal and desired.
- Carefully transfer the crumbly dough mixture onto a clean work surface.
- Gently knead the dough for just a few seconds, only long enough for the mixture to come together into a cohesive, rough mass. Over-kneading will develop the gluten too much, resulting in a tough crust. The less you handle it, the more tender your pie crust will be.
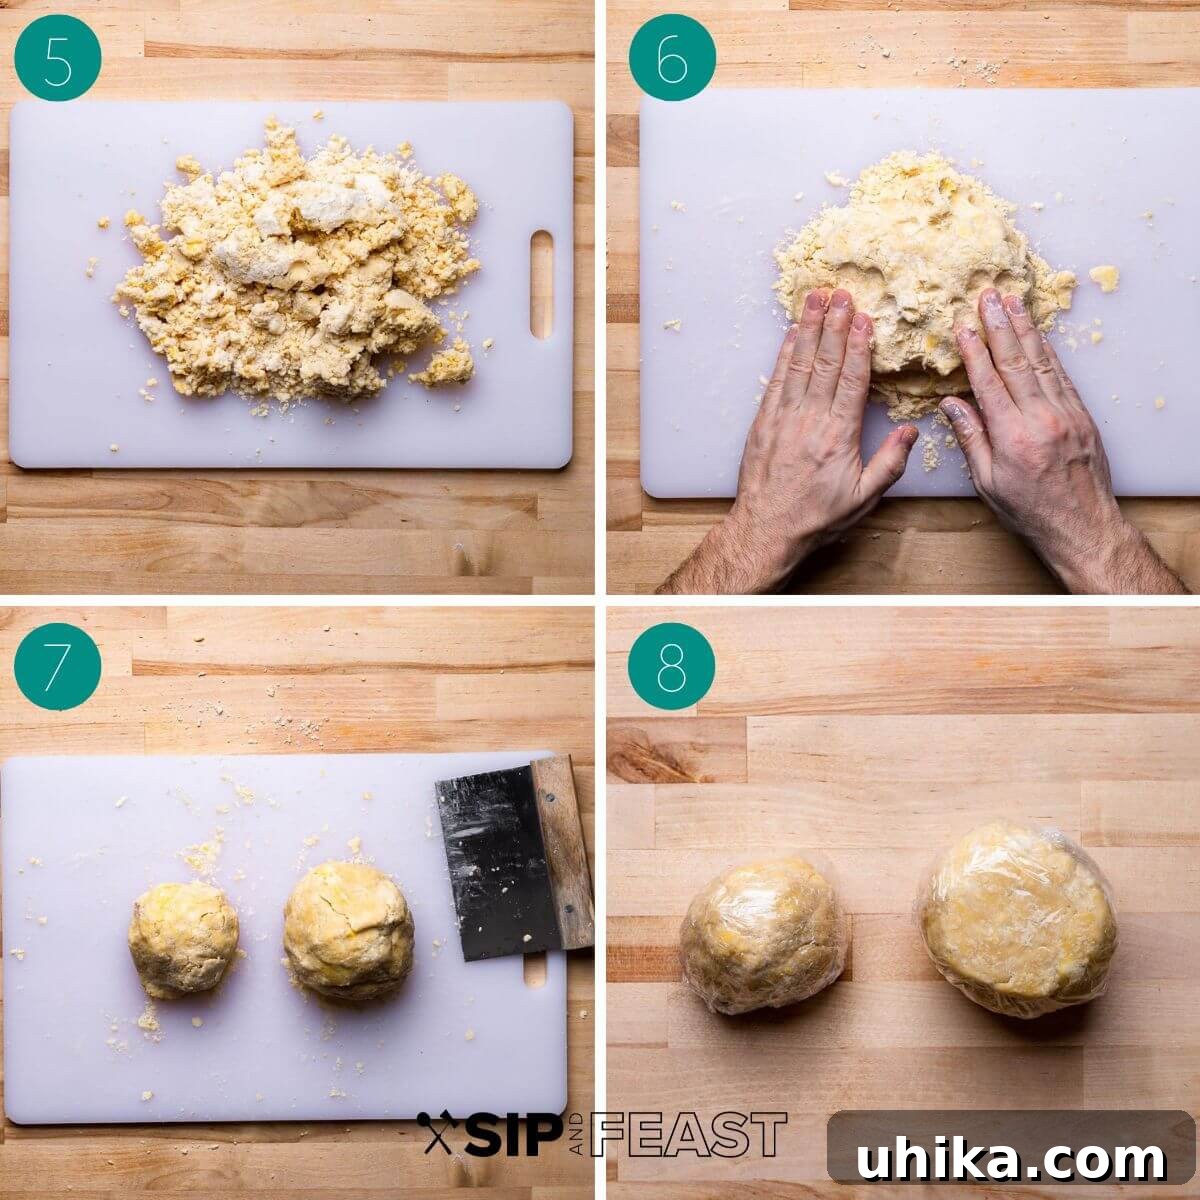
- Using a bench scraper or a sharp knife, divide the dough into two distinct balls. One ball should be noticeably larger, comprising about two-thirds of the total dough, as this will form the bottom crust. The remaining one-third will be for the top crust.
- Wrap both dough balls tightly in plastic wrap to prevent them from drying out. Refrigerate them for at least one hour. This chilling period is crucial; it allows the gluten to relax, making the dough easier to roll out, and helps the butter firm up, contributing to a flakier crust. The dough can also be prepared a day in advance, making it a convenient option for holiday meal planning.
Assembly and Baking: Bringing the Torta to Life
With your dough chilling, it’s time to prepare the flavorful green and cheese filling and then assemble your magnificent Torta Pasqualina for baking. This is where the magic truly happens, layering textures and tastes for a harmonious pie.
- While the dough is chilling, begin preparing the savory filling. Bring a large pot of lightly salted water to a rolling boil. In the meantime, thoroughly wash and finely chop 1 bunch of fresh green Swiss chard and 1 pound of baby spinach. You can also experiment with other greens like escarole or dandelion greens for added variety. If incorporating a third type of green, adjust the amount of spinach accordingly to maintain balance. Remember, if you end up with extra filling, you can always use any leftover dough scraps to create a charming small individual pie in a ramekin!
- Once the water is boiling, add the chopped chard first, allowing it to cook for 3-4 minutes. Then, add the baby spinach and continue to cook for another 2-3 minutes, or until the greens are tender but still vibrant. Immediately drain the cooked greens in a large colander. This step is critical: thoroughly squeeze out as much excess water as possible. A highly effective method is to place the greens in a clean dish towel, tie it securely, and twist firmly to wring out every last drop of moisture. This prevents a soggy pie.
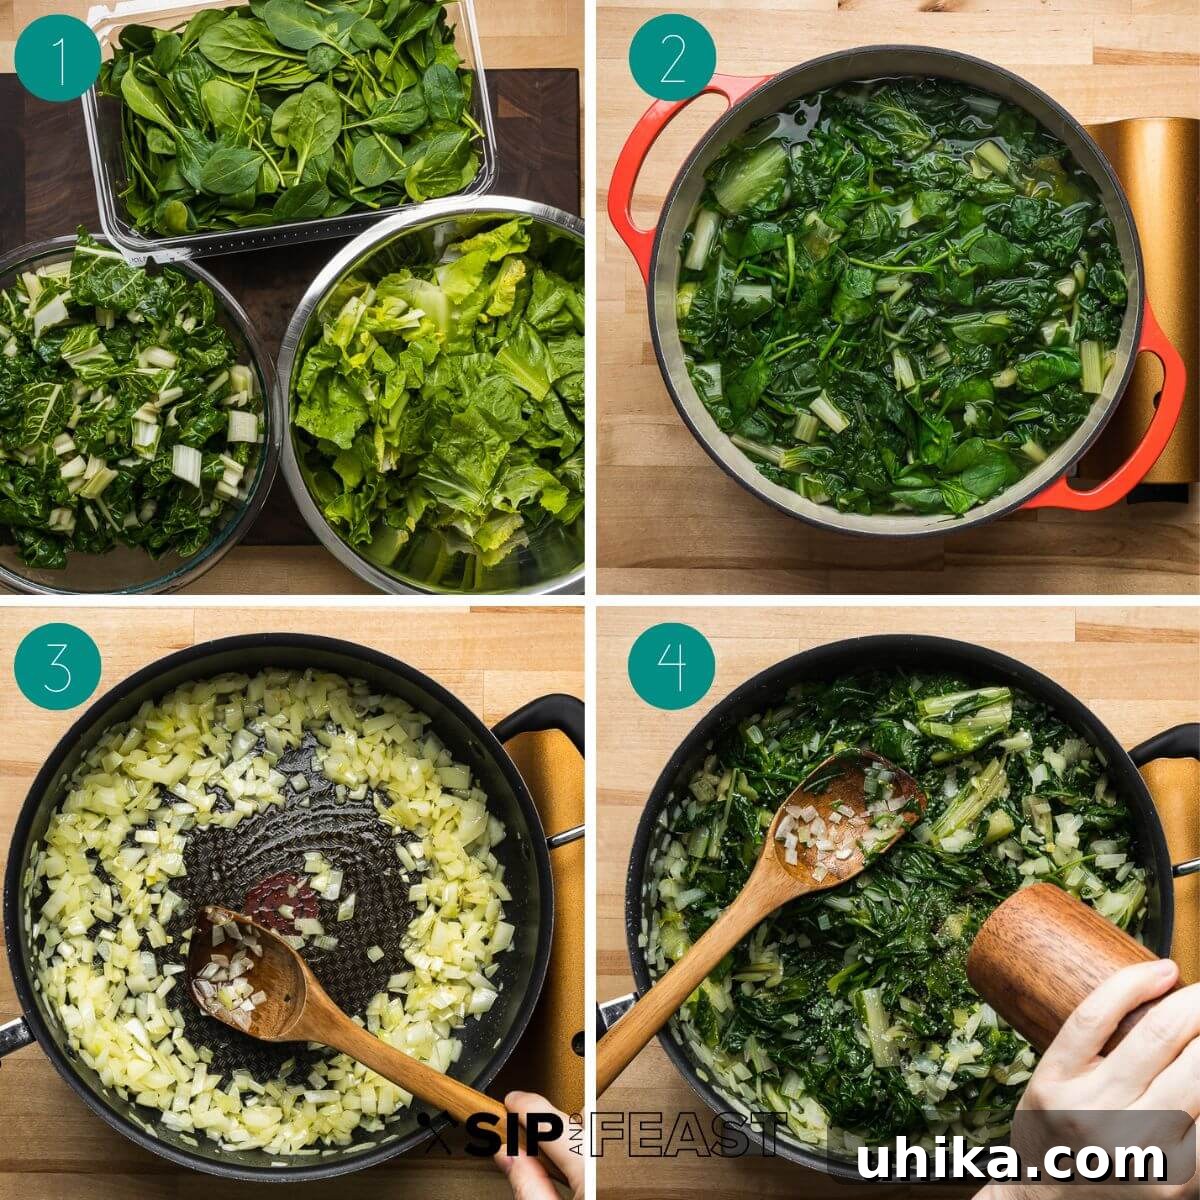
- Dice one large onion and add it to a large pan over medium heat along with 3 tablespoons of good quality olive oil.
- Sauté the diced onion until it becomes soft and translucent, usually about 5-7 minutes. Once soft, add the thoroughly drained and squeezed greens to the pan and cook for another 5 minutes, allowing the flavors to meld. Season the greens with salt and freshly ground black pepper to taste.
- Transfer the sautéed greens to a large mixing bowl and let them cool for approximately 15 minutes. After cooling, it’s essential to squeeze the greens again to remove any additional moisture that may have released. You can do this by pressing them firmly in a colander or by using the clean kitchen cloth method once more. This double-draining ensures your pie filling will have the perfect consistency.
- To the cooled, well-drained greens, add 12 ounces of ricotta cheese (which should ideally be drained overnight or squeezed through cheesecloth to remove excess whey), 1 cup of freshly grated Parmigiano Reggiano cheese, and 1/2 teaspoon of freshly grated nutmeg. Mix all these ingredients thoroughly until well combined. Taste the mixture and adjust seasonings, adding more salt and pepper as needed to your preference. Finally, incorporate 2 lightly beaten large eggs, mixing them in until just combined. Set this delectable filling aside.
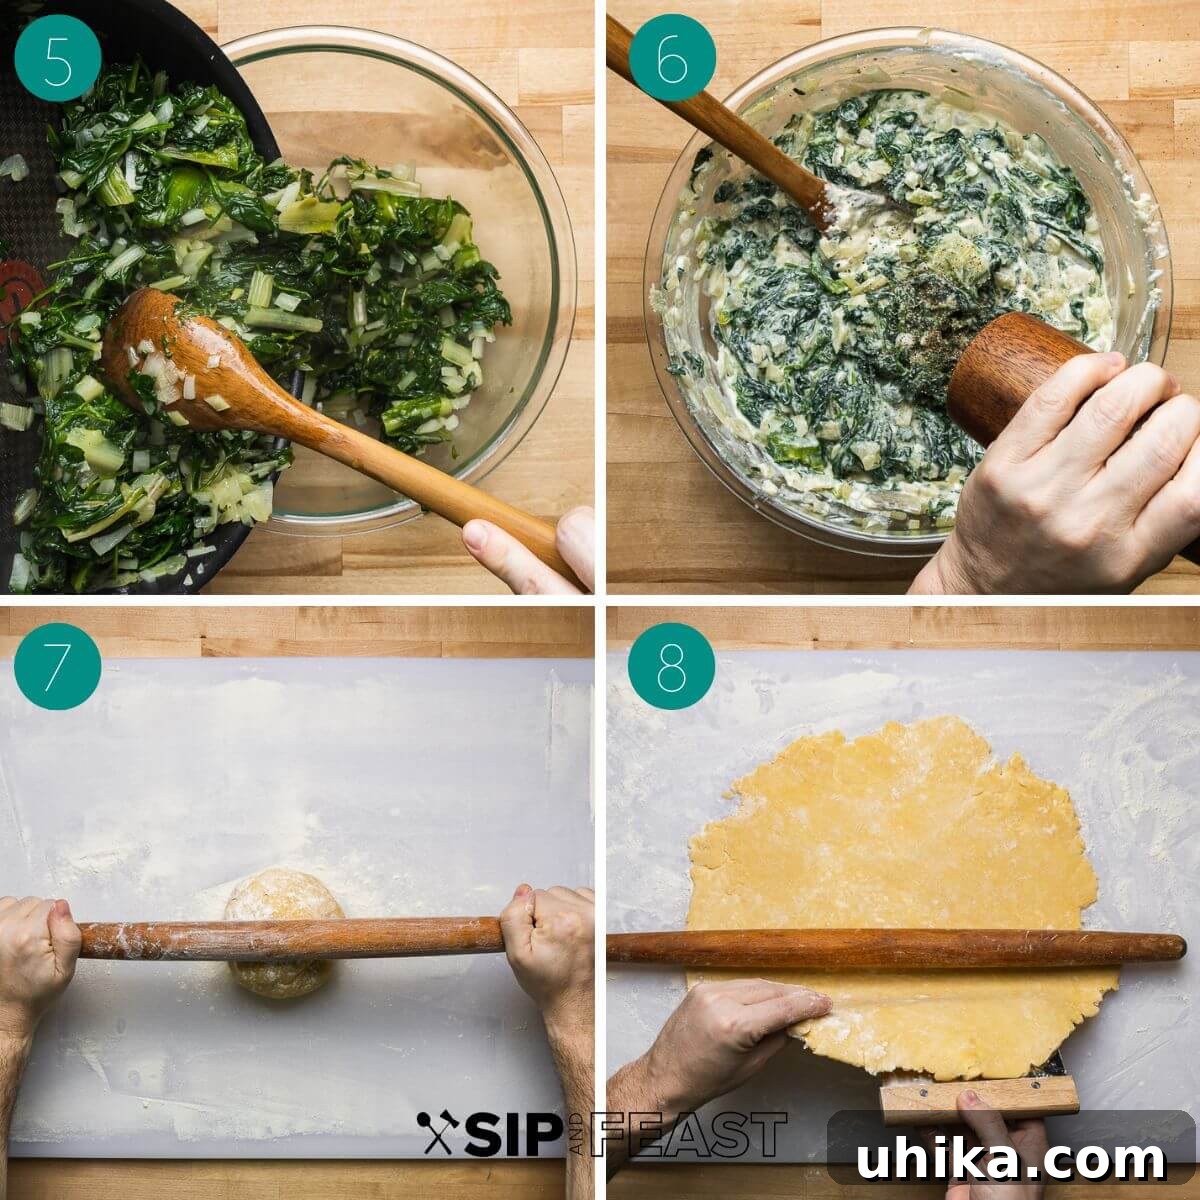
- Approximately 10-15 minutes before you plan to roll out the dough, remove it from the refrigerator. This allows it to slightly warm up, making it more pliable and preventing cracks during rolling. Preheat your oven to 375°F (190°C). Set one oven rack to the lowest level and another to the middle level. Generously grease a 9×3-inch springform pan with butter or lard to prevent sticking and aid in browning. On a lightly floured work surface, take the larger dough ball and begin to roll it out.
- Roll the larger dough ball into a circular shape, aiming for approximately 1/4 inch thick and about 15 inches in diameter. This size should be ample to cover the bottom and sides of your springform pan with some overhang. Use a bench scraper periodically to gently loosen the dough from your work surface, ensuring it doesn’t stick. Carefully drape the rolled dough over your rolling pin for easier transfer.
- Place the springform pan on a baking sheet (this makes it easier to handle and catches any potential drips). Use the rolling pin to gently unroll and transfer the larger dough circle into the prepared springform pan.
- Carefully tuck the dough into the contours of the pan, ensuring it lines the bottom and extends up the sides. Allow a generous amount of excess dough to overhang the edges. Don’t worry about minor imperfections; any small open spots or tears can be easily patched with the trimmed excess dough.
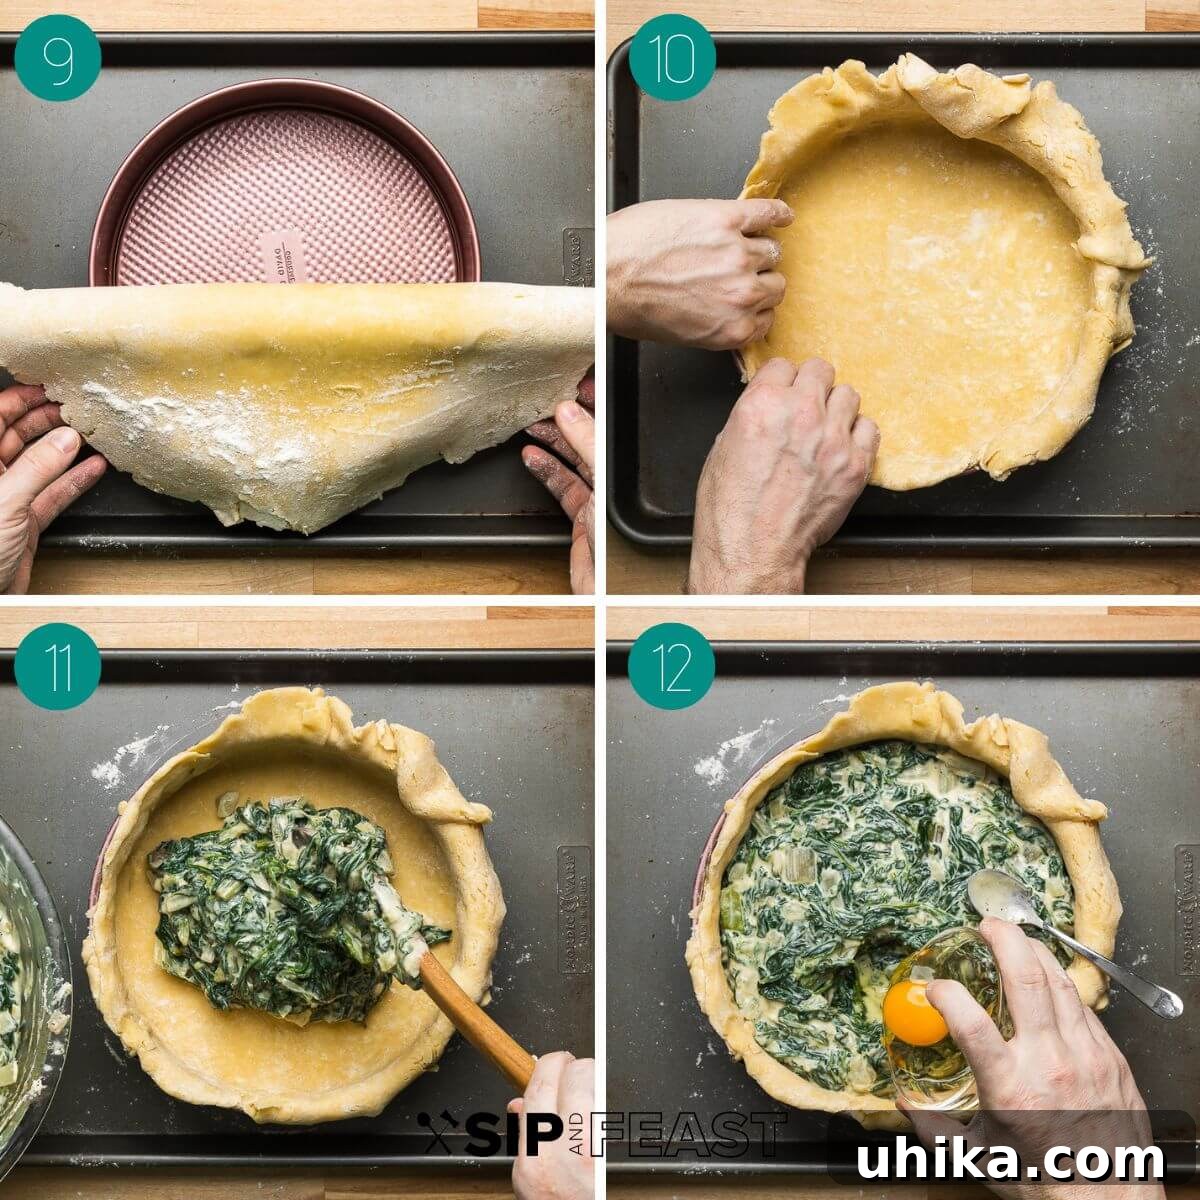
- Evenly pour the prepared filling into the dough-lined pan. Ensure you leave at least 3/4-inch of space from the top edge of the pan. This allows room for the eggs and prevents the filling from overflowing during baking.
- Using the back of a spoon, carefully create 5 distinct wells or depressions within the filling, spaced out evenly. These wells should be large enough to comfortably hold a whole large egg. Gently crack one egg into each of these prepared holes. A helpful tip: make a mental note or even a small mark where each egg is located on the top crust before covering, as this will guide you in creating vent lines later to ensure a beautiful cross-section when sliced.
- Roll out the second, smaller dough ball into a circular shape slightly larger than the diameter of your pie pan. Carefully lift it with your rolling pin and place it over the top of the pie, covering the filling completely.
- Trim the overhanging edges of the top crust, leaving about an inch of excess. Bring the excess bottom crust dough up and over the top crust edge. Seal the pie by crimping the edges together using the tines of a fork or by pressing firmly with your fingers, creating a decorative and secure seal.
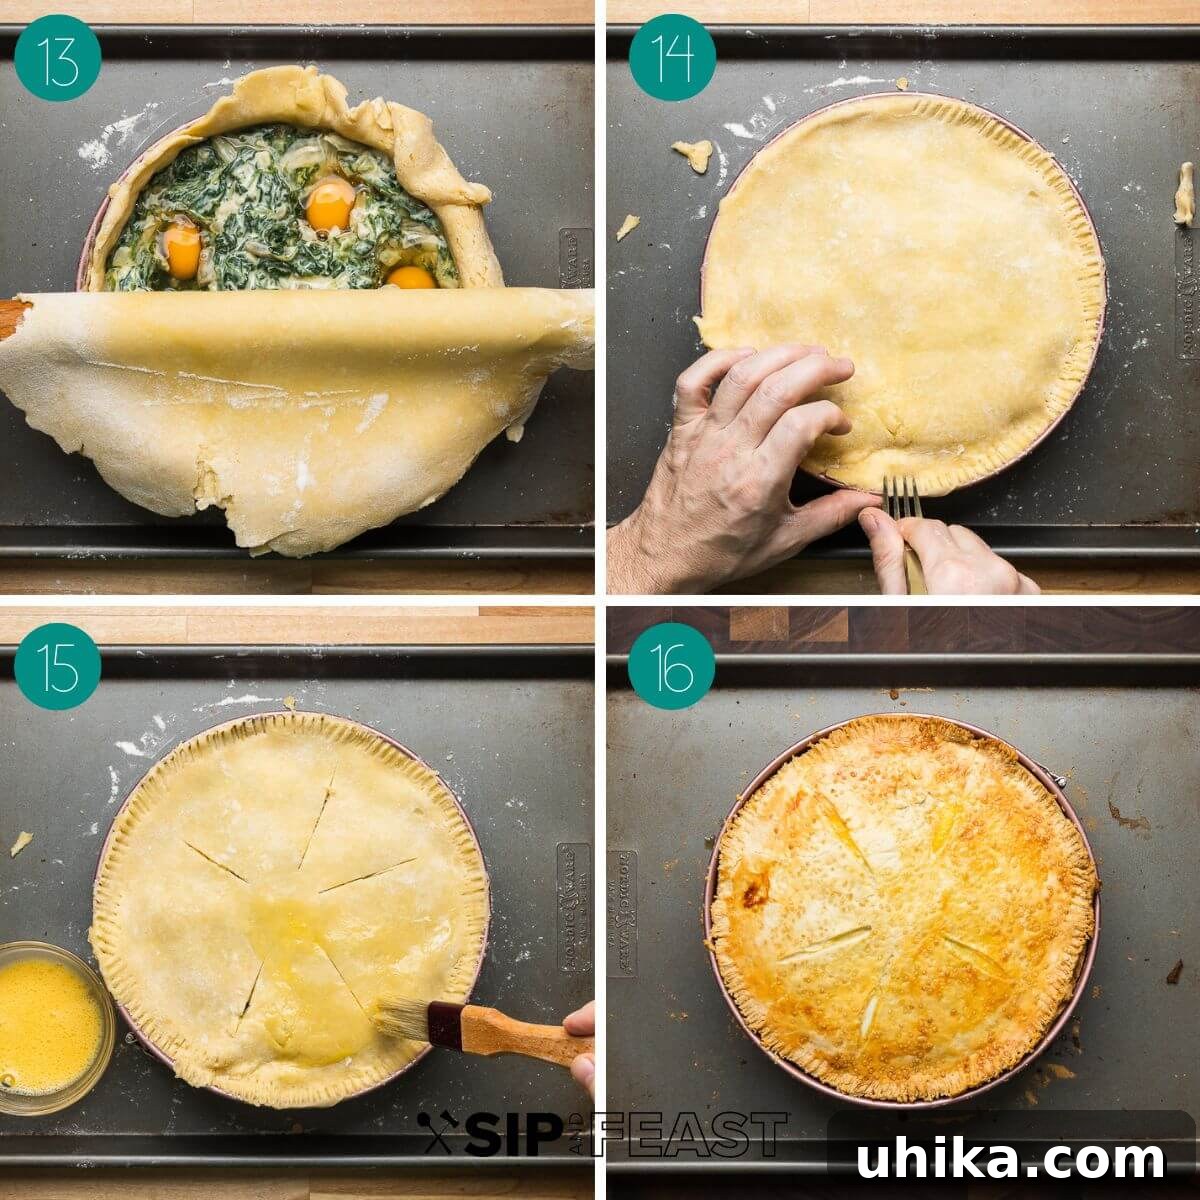
- To achieve that signature Torta Pasqualina look and ensure proper air circulation during baking, cut several vent lines (or small decorative shapes) into the top crust, particularly over the areas where the whole eggs are hidden. This thoughtful placement guarantees that each slice reveals a beautiful cross-section of the cooked egg. In a small bowl, whisk together 1 egg yolk with 2 teaspoons of water to create an egg wash. Lightly brush the entire top surface of the pie crust with this wash; this will give it a gorgeous golden sheen. For an added textural element and subtle sweetness, you may optionally sprinkle a small amount of turbinado sugar over the top.
- Place the baking sheet with the springform pan into the preheated oven on the lowest rack and bake for 20 minutes. This initial phase helps to crisp up the bottom crust. After 20 minutes, carefully move the pan to the middle oven rack and continue baking for an additional 35-40 minutes, or until the crust is deeply golden brown and the filling is set. The total baking time will be approximately 55-60 minutes. Keep an eye on the pie at the halfway mark; if the top crust appears to be browning too quickly, loosely tent it with aluminum foil. Once baked to perfection, remove the pie from the oven and transfer it to a wire rack to cool. Patience is key: allow the pie to cool for at least 45 minutes before attempting to remove the sides of the springform pan. This cooling period allows the filling to fully set, preventing it from crumbling when sliced. Once cooled, slice and serve this beautiful and delicious savory pie. Enjoy every flavorful bite!
Essential Tips for the Perfect Torta Pasqualina
Mastering Torta Pasqualina involves a few key techniques and considerations. These tips will help you achieve a show-stopping pie every time, whether you’re a seasoned baker or trying this Italian Easter tradition for the first time.
- Choosing and Preparing Greens: The recipe suggests 1 pound of baby spinach and 1 bunch of green chard, a classic combination. However, feel free to get creative with your greens! Incorporating other varieties like escarole, dandelion greens, or even kale can add unique flavor profiles. If you opt for additional greens, simply reduce the amount of spinach to maintain a balanced filling. You can also make a delicious Torta Pasqualina using only spinach. Regardless of your choice, the most crucial step is to thoroughly remove excess water from the greens after boiling and again after sautéing. This vigilance against moisture is paramount to prevent a soggy crust and a watery filling. If you find yourself with extra filling after preparing the main pie, don’t let it go to waste! Use any remaining dough scraps to make charming individual mini pies in small ramekins – they make excellent appetizers or single servings.
- Draining the Ricotta: Just as with the greens, eliminating excess moisture from the ricotta cheese is vital for the pie’s success. Ricotta can hold a surprising amount of water, which, if not removed, will make your pie soggy. We highly recommend draining the ricotta overnight. Simply place it in a fine-mesh sieve lined with cheesecloth and let it sit in the refrigerator over a bowl to catch the liquid. This simple step ensures a firmer, creamier, and more flavorful filling.
- Flavorful Additions and Variations: Torta Pasqualina, with its savory green and cheese filling, shares a delightful kinship with Greek spanakopita. If you’re a fan of the tangy, briny notes of feta cheese, consider adding some crumbled feta to your Torta Pasqualina filling. It’s a fantastic way to introduce a Mediterranean twist and enhance the overall flavor complexity. Other additions could include sun-dried tomatoes, pine nuts, or a pinch of red pepper flakes for a subtle kick.
- Exploring Pie Crust Options: While this recipe champions a rich, flaky homemade pasta frolla crust – which is also excellent for our Pizzagaina (aka Pizza Rustica or Easter Pie) – you do have alternatives. Some recipes utilize store-bought puff pastry, phyllo dough, or even pizza dough for a quicker preparation. Each option will yield a different texture: phyllo will be incredibly crisp and delicate, puff pastry will be light and airy, and pizza dough will offer a chewier, bread-like crust. Our homemade pasta frolla provides a robust, buttery foundation that perfectly complements the hearty filling.
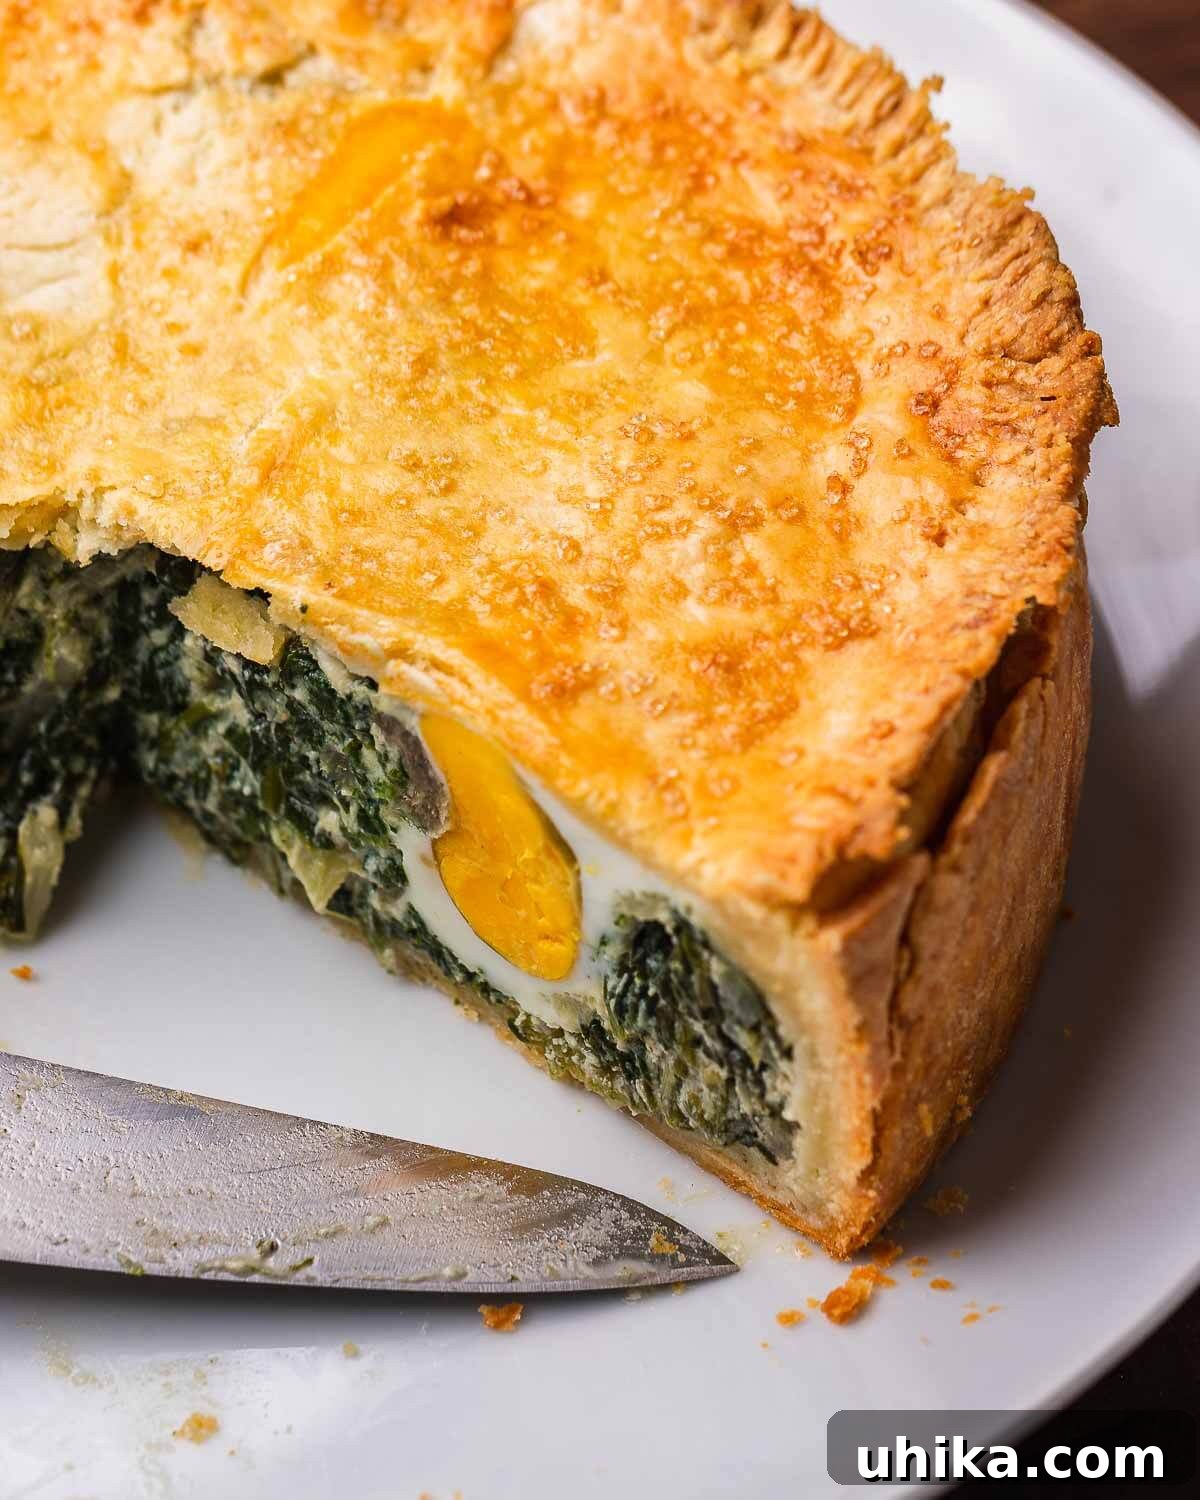
- Locating the Eggs for Perfect Slices: One of the most visually appealing aspects of Torta Pasqualina is a slice that beautifully showcases a cross-section of a perfectly cooked whole egg. To ensure this delightful presentation, it’s a clever trick to cut small vent lines or make a slight indentation in the top crust directly over where you placed each hidden egg. This not only allows steam to escape during baking but also guides your knife for precise cuts that highlight the eggs. For an extra festive touch, you could even use small Easter-themed cookie cutters to cut out dough shapes and place them directly over the egg locations before baking.
- Storage and Reheating: Torta Pasqualina is wonderful leftover. Store any remaining pie tightly covered in the refrigerator for up to 4 days. To reheat, you can warm individual slices in a microwave, or for a crispier crust, place them in a preheated oven at 300°F (150°C) for about 10-15 minutes, or until warmed through. It can also be enjoyed at room temperature, making it ideal for picnics or potlucks.
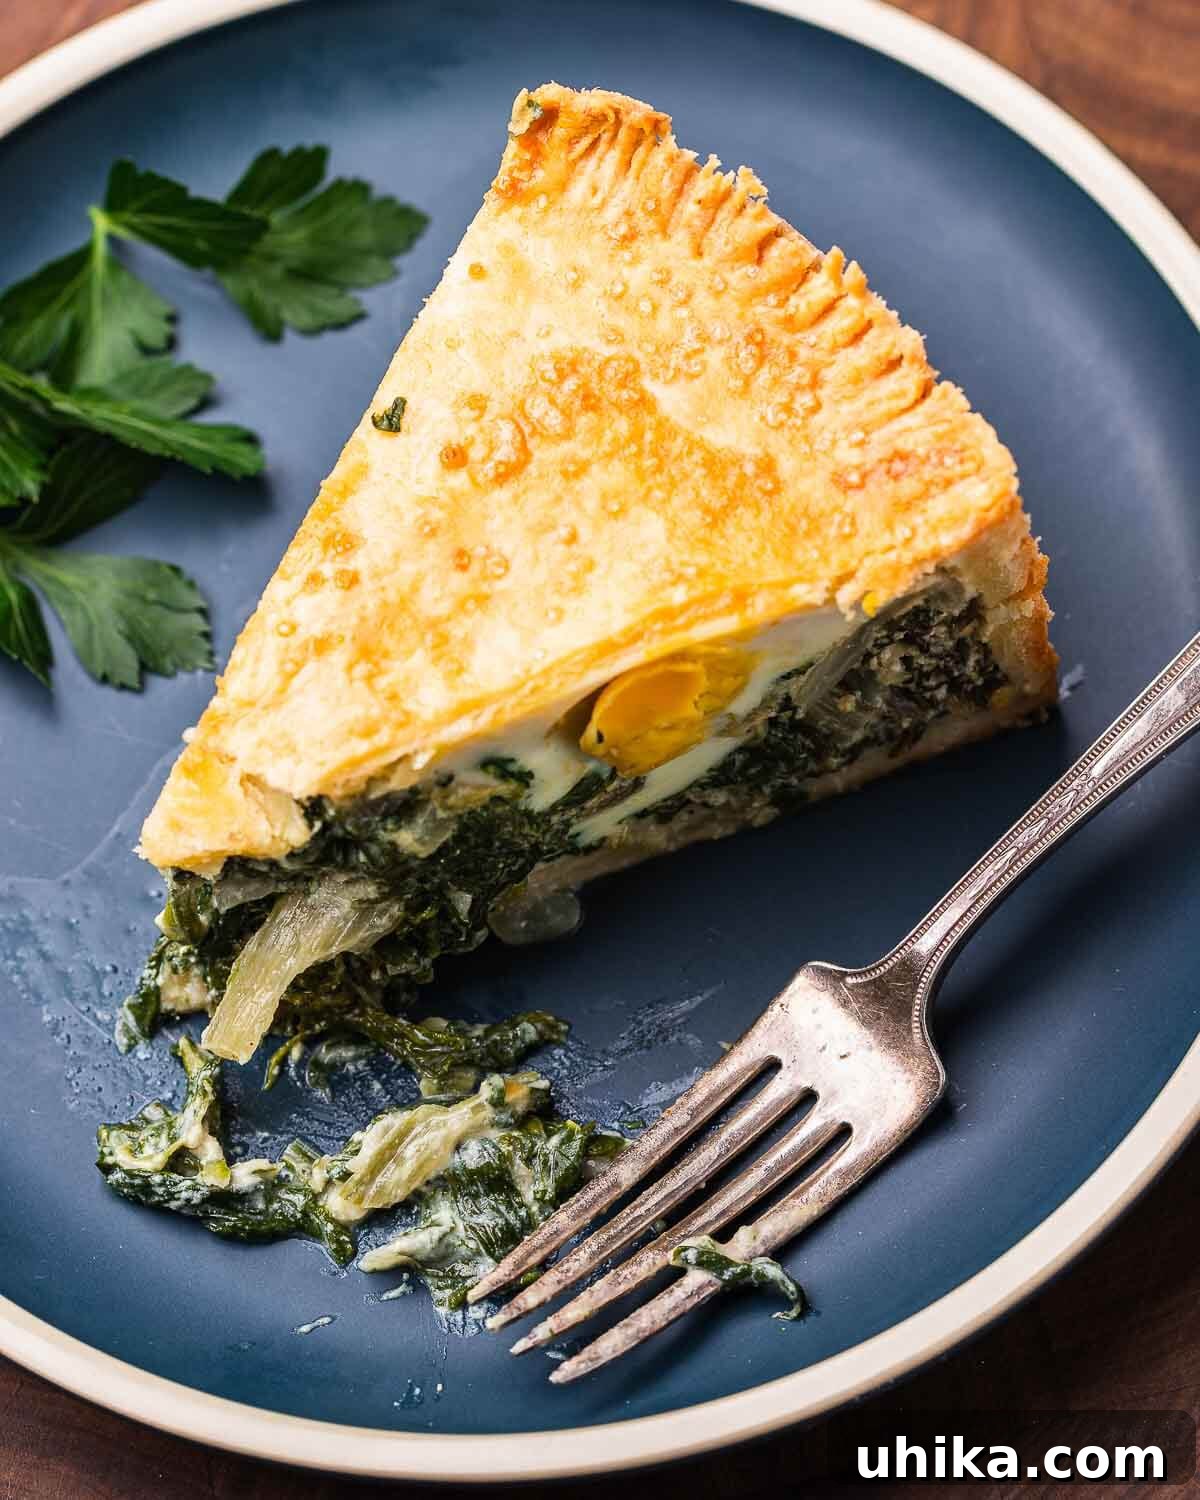
If you’ve enjoyed this Torta Pasqualina recipe, please consider leaving it a 5-star rating and sharing your thoughts in the comments below!
Watch our cooking demonstrations on YouTube, follow along on our Facebook Page, and explore exclusive full-meal videos and content by becoming a Patreon member.
Torta Pasqualina
Rated 5 out of 5 stars based on 2 votes.
Pin
Ingredients
For the dough
- 3 1/2 cups (450grams) all-purpose flour
- 2 sticks (226 grams) cold butter cubed
- 1/3 cup (80 grams) milk
- 2 large eggs
- 1 teaspoon fine sea salt
- 1 teaspoon sugar
For the filling
- 1 bunch green swiss chard washed and finely chopped
- 1 pound baby spinach
- 3 tablespoons extra virgin olive oil
- 1 large onion finely diced
- 12 ounces ricotta drained overnight
- 1 cup Parmigiano Reggiano grated
- 1/2 teaspoon nutmeg
- salt and pepper to taste
- 2 large eggs beaten
Remaining ingredients
- 6 large eggs
- 2 teaspoons water for egg wash
- 1 tablespoon butter for greasing the pie dish
- 1/2 teaspoon turbinado sugar optional
Want To Save This Recipe?
Enter your email and we’ll send it to you. Plus, get great new recipes from us every week!
Instructions
For the dough
-
Add the flour, salt, and sugar to a bowl of a food processor and pulse to mix the ingredients. Then, add the cold butter cubes and pulse for about 20-30 seconds until the mix is well incorporated but still crumbly, resembling coarse pieces and a grainy texture.
-
Next, incorporate the eggs and milk. Pulse again until the dough begins to form. At this point, the dough will appear somewhat shaggy and loose, which is perfectly acceptable.
-
Transfer the dough onto a work surface and knead it gently for only a few seconds. The aim is simply to bring the dough together into a rough, cohesive mass. Divide the dough into two balls, ensuring one is larger (about two-thirds of the total dough) and the other smaller, using the remaining dough.
-
Wrap both dough balls tightly in plastic wrap and refrigerate them for at least 1 hour before use. This chilling period is crucial for dough handling and texture. The dough can also be prepared up to 1 day in advance.
Make the filling
-
Bring a large pot of water to a boil. Add the chopped chard and cook for 4 minutes. Then, add the spinach and continue cooking for another 3 minutes. Drain the greens thoroughly in a large colander and squeeze out all excess water, perhaps using a clean kitchen towel for maximum drainage.
-
Heat a large pan over medium heat and add the olive oil and finely diced onion. Sauté the onion until it softens, approximately 5 minutes. Then, add the well-drained greens and cook for another 5 minutes, allowing the flavors to meld. Season the greens with salt and pepper to taste.
-
Transfer the cooked greens to a large mixing bowl and allow them to cool for about 15 minutes. After cooling, squeeze out any further released excess water, either by pressing in a colander or wringing them out with a clean kitchen cloth.
-
Mix in the drained ricotta, grated Parmigiano Reggiano cheese, and nutmeg. Taste the mixture and adjust the seasoning with additional salt and pepper as desired. Once the taste is satisfactory, gently fold in 2 beaten eggs to complete the filling. Set the filling aside while you prepare the pie crust.
Assemble and bake
-
Remove the dough from the refrigerator about 10-15 minutes before you plan to roll it out. This allows it to soften slightly, making it easier to work with and preventing cracks.
-
Preheat your oven to 375°F (190°C). Arrange one oven rack on the lowest level and the second on the middle level. Generously grease a 9×3-inch springform pan with butter or lard.
-
On a lightly floured surface, roll out the larger dough ball into a circle approximately 1/4-inch thick and about 15 inches in diameter. Carefully transfer the dough into the springform pan, tucking it into the edges and allowing about 1 inch of dough to overhang. Trim any excess dough. Small gaps or tears can be patched with these excess dough trimmings.
-
Pour the prepared filling into the pie pan, ensuring that you leave at least 3/4-inch of space from the top rim of the pan.
-
Using a spoon, create 5 distinct depressions within the filling, large enough to hold a whole egg. Carefully crack one large egg into each of these wells.
-
Roll out the second, smaller dough ball into a circle slightly larger than the pie pan. Carefully place this top crust over the filling. Close the pie by bringing the overhanging bottom crust up and over the top crust, then crimp the edges together with a fork or by pressing with your fingers to seal.
-
In a small bowl, whisk 1 egg yolk with 2 teaspoons of water to create an egg wash. Brush this wash over the entire top surface of the pie crust for a golden finish. Optionally, sprinkle turbinado sugar on top for extra texture and a hint of sweetness. Cut vent lines into the top crust, ideally over the concealed eggs, to allow steam to escape and ensure beautiful cross-sections when sliced.
-
Place the pie on the lowest oven rack and bake for 20 minutes. Then, move the pan to the middle rack and continue baking for an additional 35-40 minutes. The total baking time will be approximately 55-60 minutes. Monitor the pie at the halfway point; if the top is browning too quickly, loosely tent it with aluminum foil. Once the crust is golden brown and the filling is set, remove the pie from the oven and transfer it to a wire rack to cool.
-
Allow the pie to cool for at least 45 minutes after baking before attempting to remove the sides of the springform pan. This cooling time is crucial for the filling to set properly, ensuring clean slices. Once cooled, slice and serve this exquisite Torta Pasqualina. Enjoy!
Notes
- This recipe makes 8 generous servings.
- It is imperative to allow the pie to cool for at least 45 minutes after baking before attempting to remove the springform pan sides. This ensures the pie sets correctly and maintains its structure.
- Feel free to customize your greens! While spinach and chard are traditional, you can use a variety of other greens or even an all-spinach filling. The key is proper water removal.
- Removing excess water from both the ricotta (ideally drained overnight) and the blanched and sautéed greens is perhaps the most critical step for preventing a soggy pie and achieving a firm, flavorful filling.
- Leftover Torta Pasqualina can be stored tightly covered in the refrigerator for up to 4 days.
Nutrition
Nutrition information is automatically calculated, so should only be used as an approximation.