
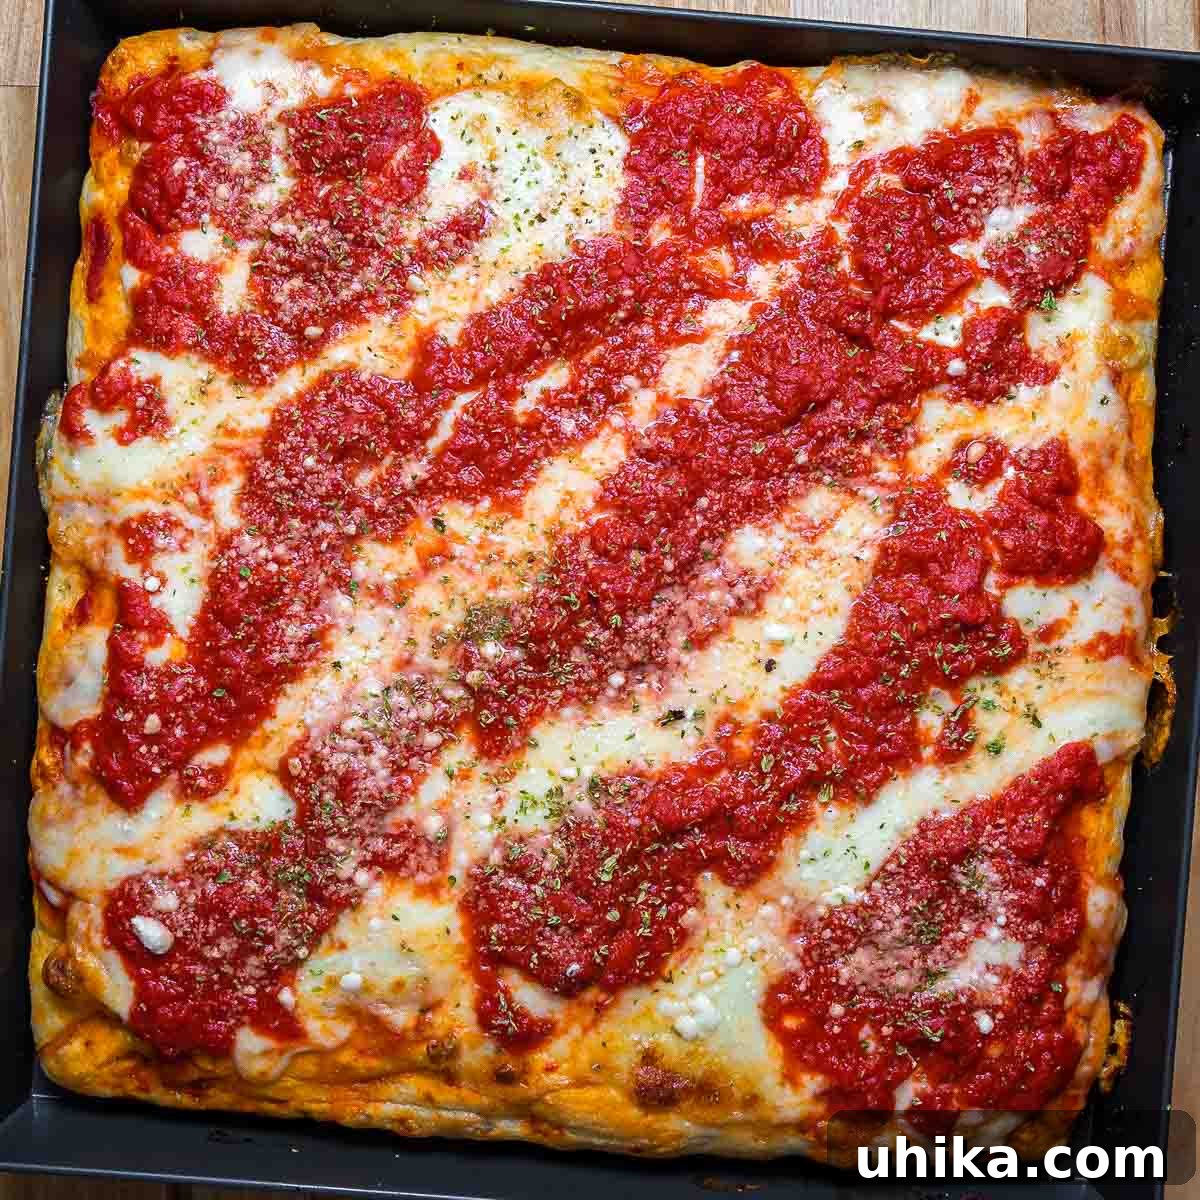
The New York Sicilian pizza stands as an iconic symbol of the city’s rich culinary landscape. Defined by its robust, thick, and wonderfully airy crust, generously adorned with a vibrant tomato sauce, melted mozzarella, and aromatic Sicilian oregano, this pizza delivers an unforgettable flavor experience that has captivated millions. Found in virtually every pizzeria across the New York metropolitan area, its popularity is a testament to its unique texture and taste. This comprehensive guide will walk you through the precise steps to recreate a pizzeria-quality New York Sicilian pie in the comfort of your own kitchen, ensuring every bite transports you straight to the bustling streets of NYC.
Understanding the Essence of a New York Sicilian Pizza
To truly appreciate what sets a New York Sicilian pizza apart, it’s essential to first distinguish it from other styles, particularly its distant cousin, the traditional Sicilian Sfincione. While the Sfincione, often considered the inspiration, features breadcrumbs, anchovies, caciocavallo cheese, and an onion-based sauce, the New York-style Sicilian takes a simpler, yet equally profound, approach. It’s a distinct creation that evolved on American soil, tailored to local palates.
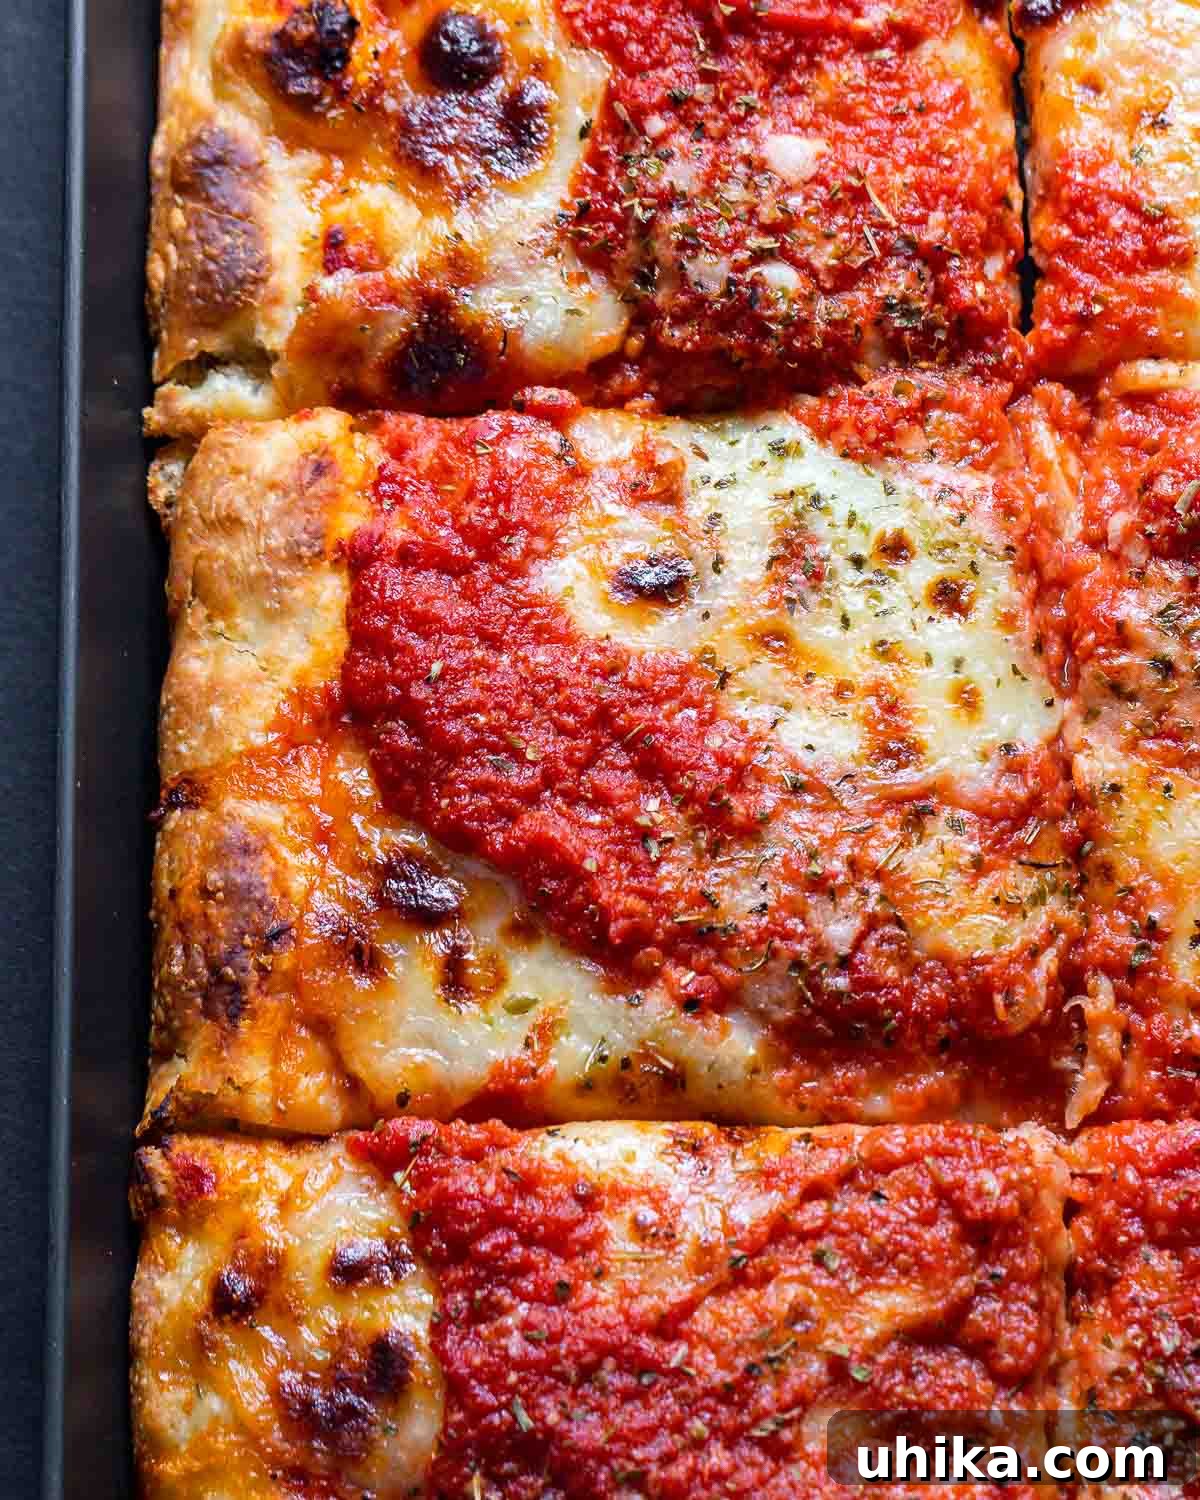
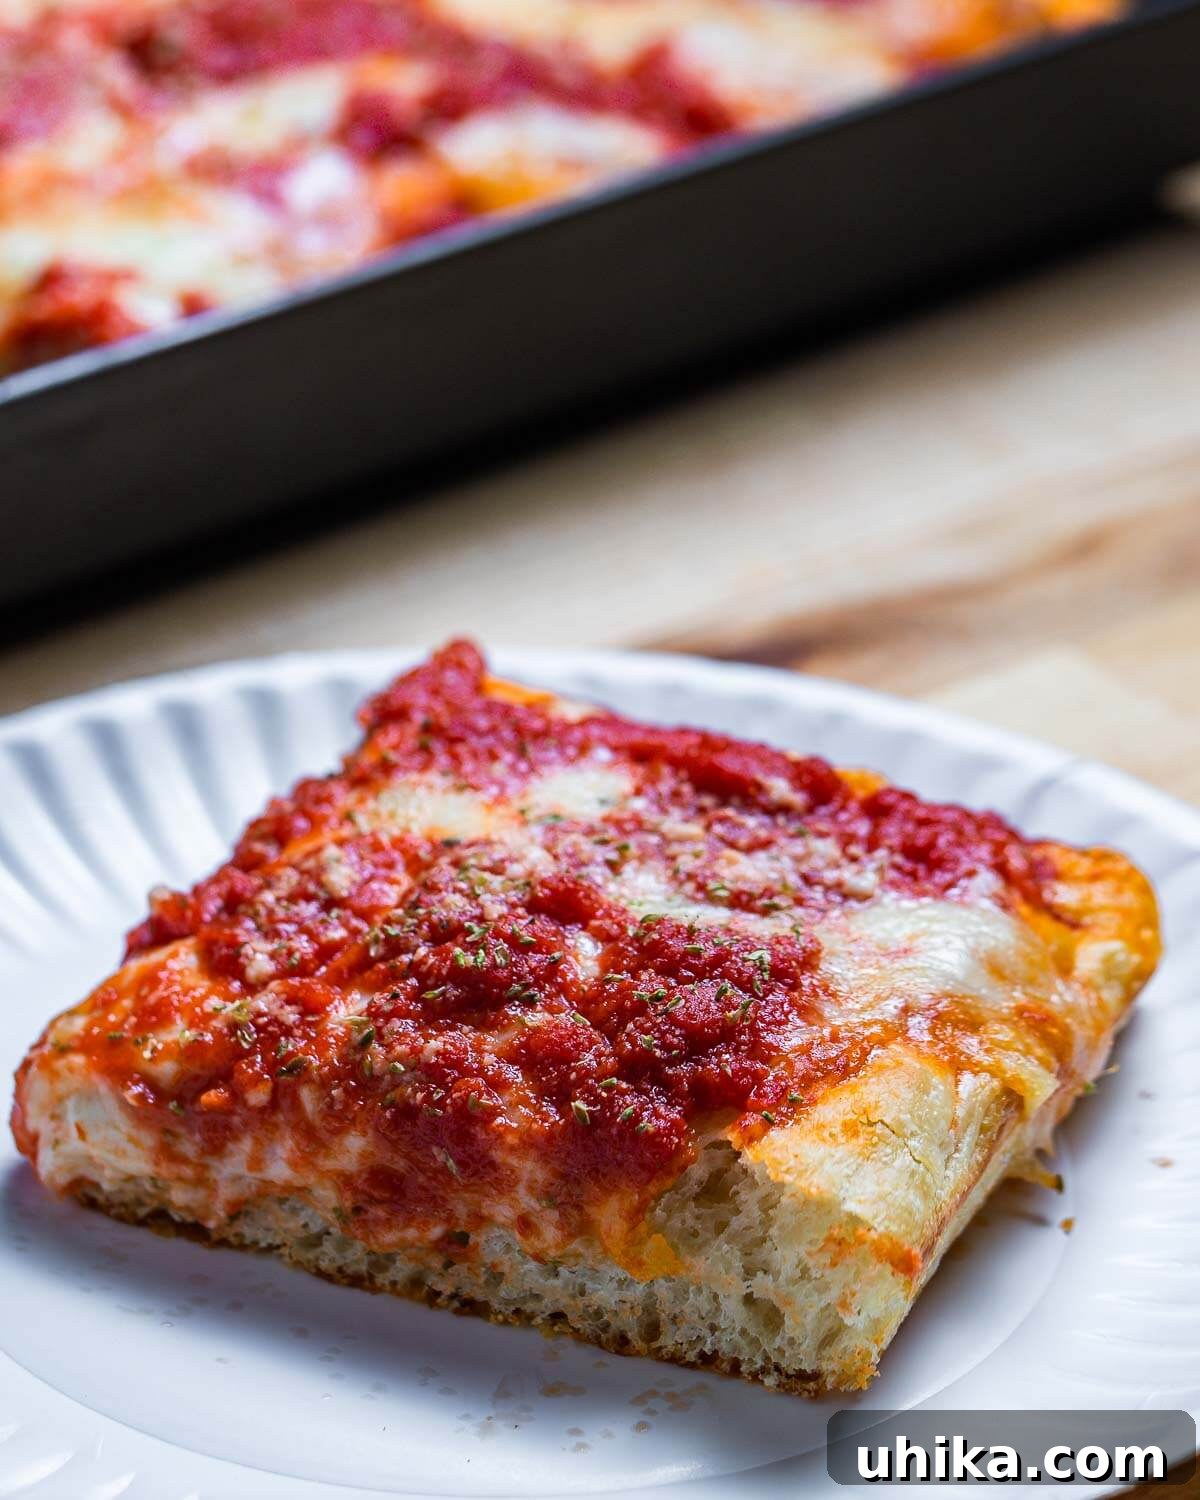
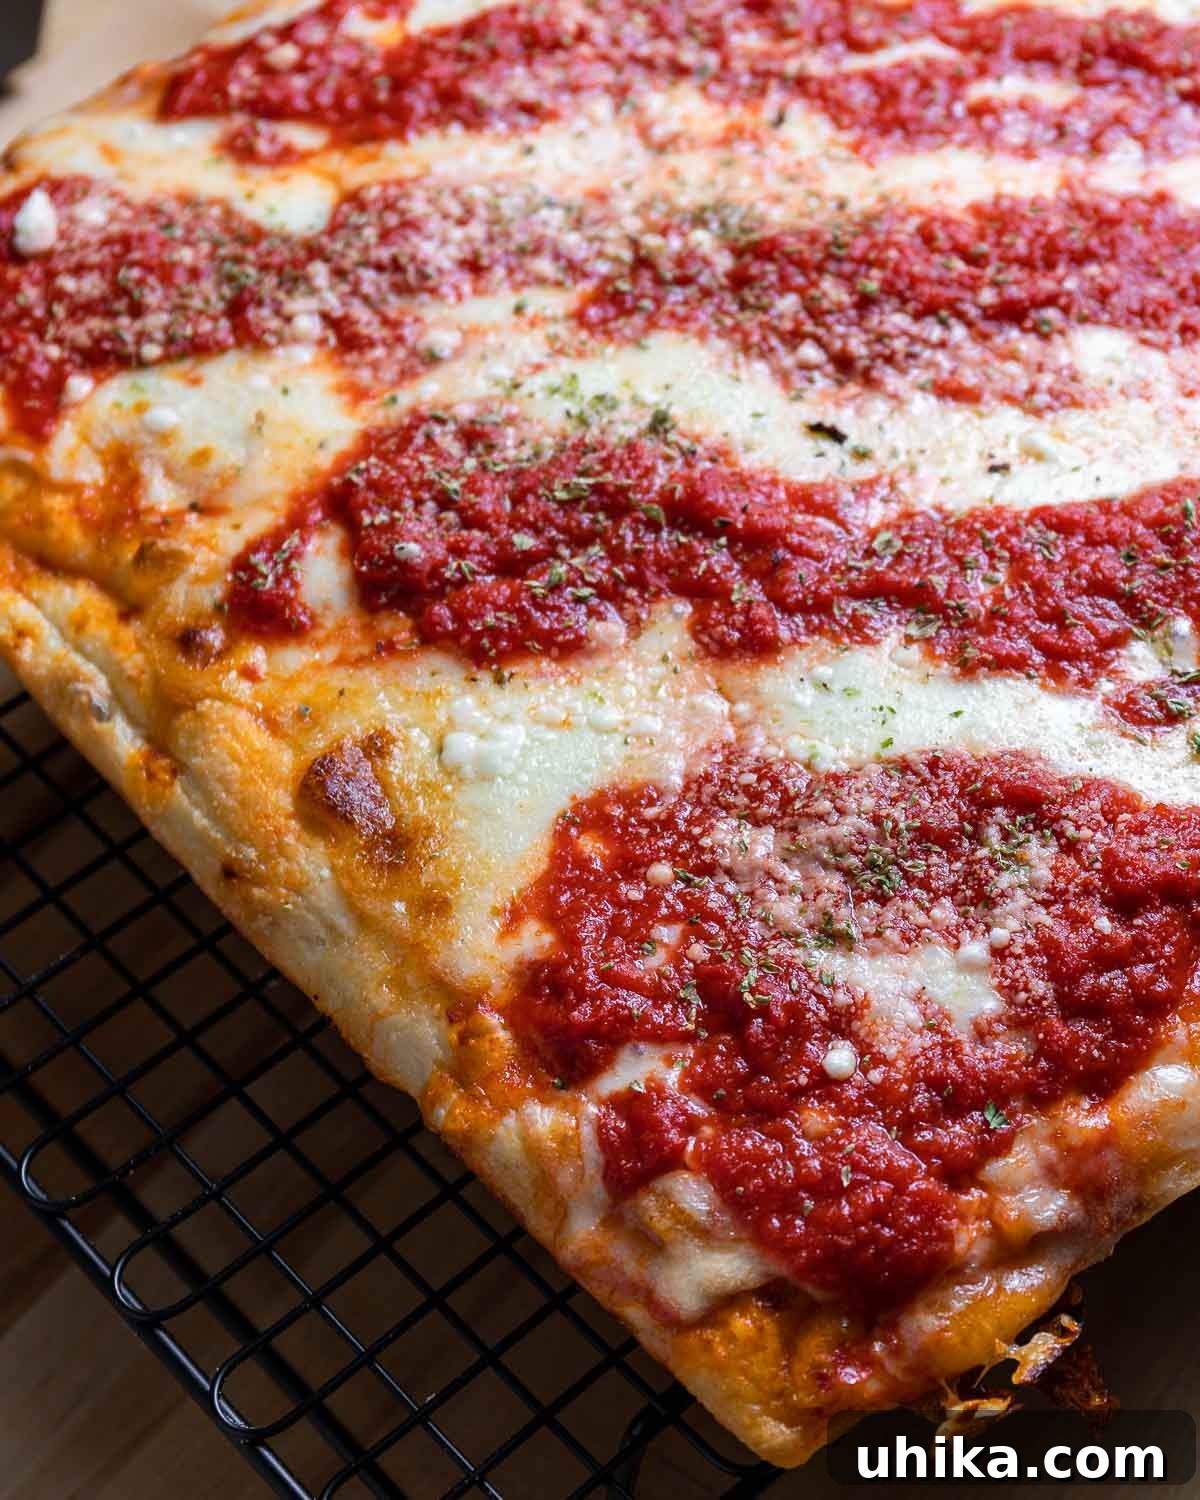
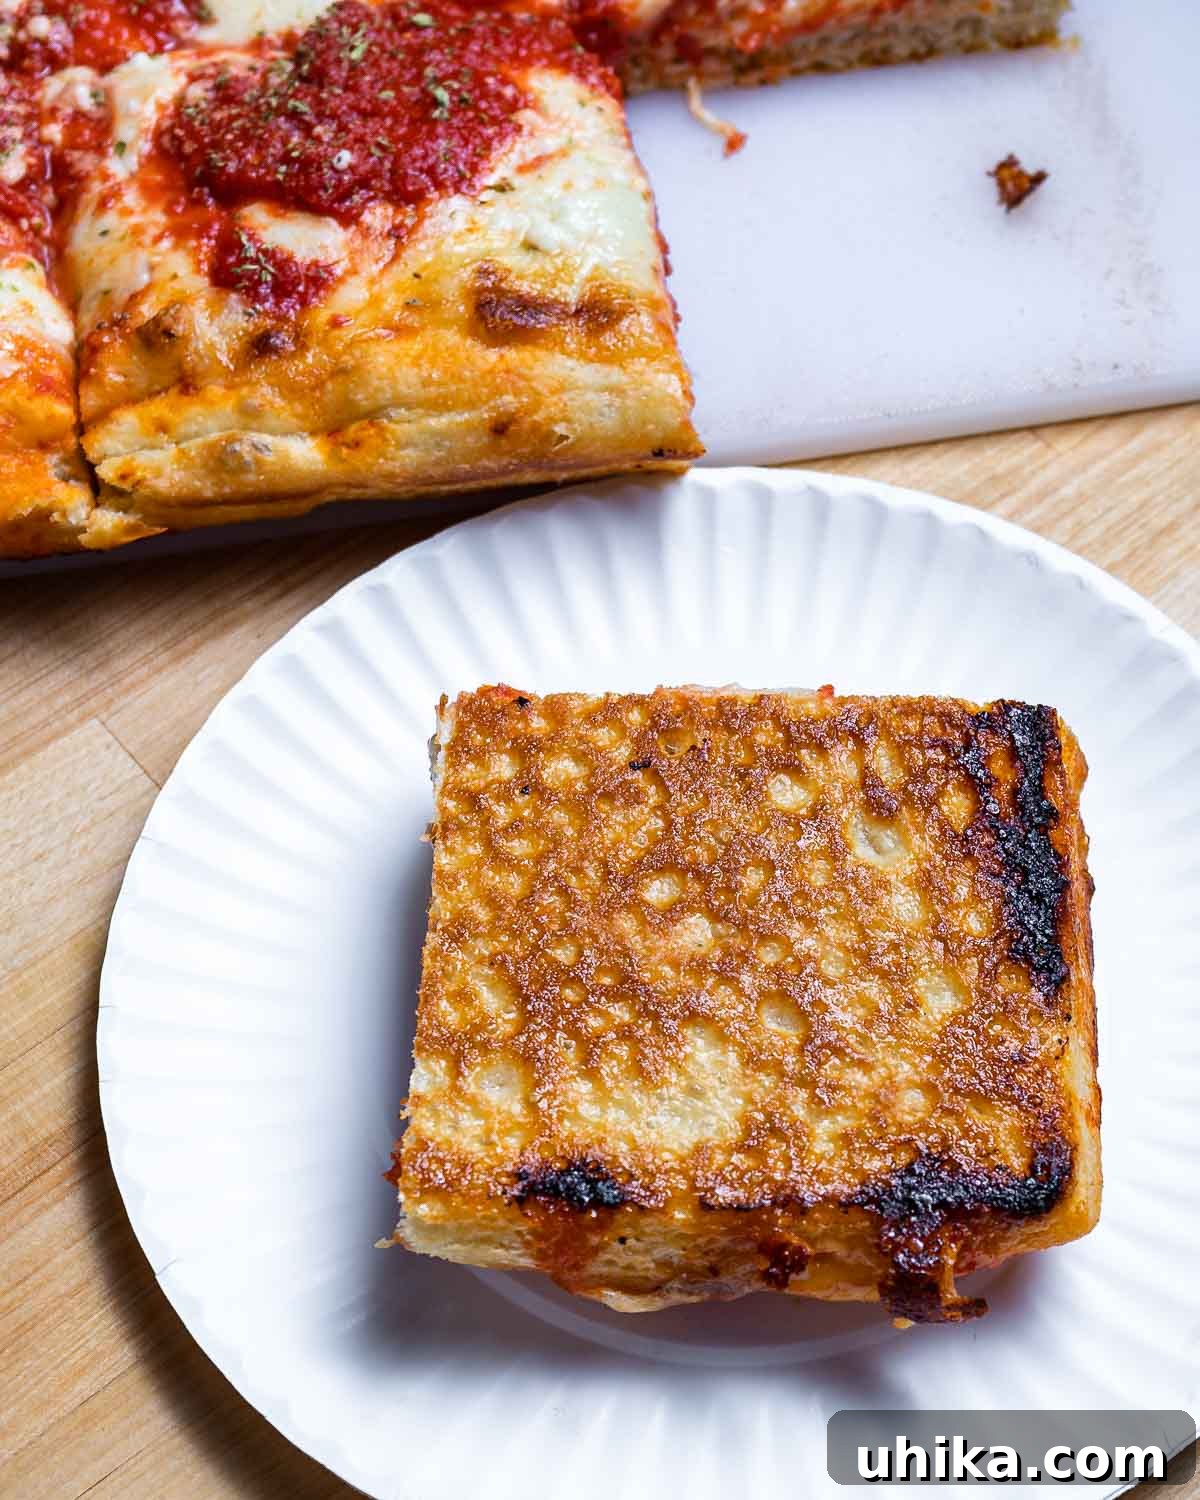
A quintessential New York Sicilian is celebrated for its distinctive thick, airy, and chewy interior, complemented by a remarkably crisp and golden-brown bottom crust. This unique texture is achieved through a specific preparation method, often involving par-baking in a rectangular pan. The toppings are kept intentionally minimal and fresh: a simple, uncooked tomato sauce seasoned with just salt, high-quality block mozzarella cheese, a generous sprinkle of authentic Sicilian oregano, and a finishing touch of Pecorino Romano cheese. This elegant simplicity allows the quality of each ingredient, especially the dough, to shine through. When you step into a New York pizzeria and ask for “a slice of Sicilian,” this is the hearty, satisfying square you’ll receive—a slice that offers a more substantial and filling experience compared to the classic New York round pizza.
Mastering Your Homemade New York Sicilian Pizza: A Step-by-Step Guide
Crafting an authentic New York Sicilian pizza at home is a rewarding journey that begins with a meticulously prepared dough. Follow these detailed instructions to achieve that perfect balance of thick, airy, and crispy that defines this beloved pizza style.
A note on measurements: For optimal consistency and accuracy in baking, especially with doughs and breads, mass measurements (grams) are always superior to volume measurements (cups, teaspoons). While we provide standard U.S. customary volume measurements for convenience, we highly recommend using a kitchen scale for the most reliable results, as flour density can vary significantly.
Understanding Baker’s Percentages: For those who love to experiment or scale recipes, baker’s percentages are an invaluable tool. They express each ingredient’s weight as a percentage of the total flour weight, making it easy to adjust the recipe quantity up or down. For this recipe, the baker’s percentages are: 64% hydration, 0.4% instant dry yeast, 2% fine sea salt, 3.4% olive oil, and 1.2% granulated sugar.
Dough Preparation: The Foundation of Flavor and Texture
- Combine Dry Ingredients: In a medium mixing bowl, thoroughly whisk together 497 grams (approximately 4 cups) of high-quality bread flour, 2 grams (1/2 teaspoon) of instant dry yeast, 6 grams (1 1/2 teaspoons) of granulated sugar, and 10 grams (1 3/4 teaspoons) of fine sea salt. Ensure all ingredients are evenly distributed.
- Initiate the Dough: Pour 318 grams (1 1/2 cups) of cold water into a very large mixing bowl. Gradually add the dry ingredient mixture into the water, stirring with a sturdy wooden spoon until a rough, shaggy dough forms. Drizzle 17 grams (1 1/2 tablespoons) of olive oil over the dough, then mix once more, scraping the sides of the bowl to incorporate any dry flour bits.
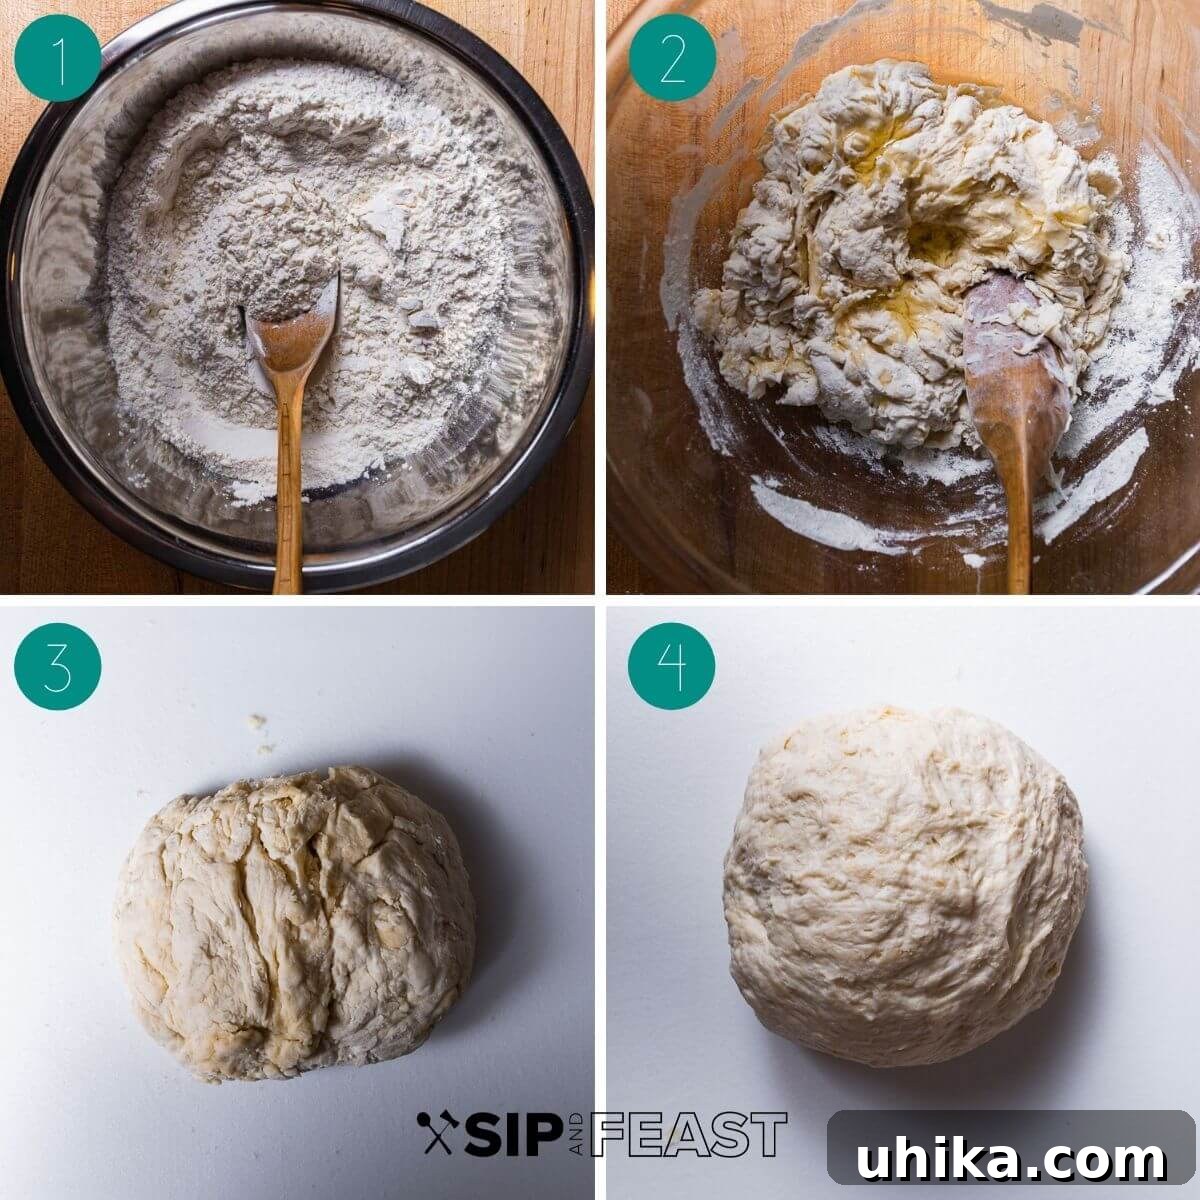
- First Kneading Phase: Transfer the rough dough onto a clean, lightly floured work surface. Begin kneading the dough for an initial 5 to 7 minutes. This develops the gluten, crucial for the pizza’s airy texture. If the dough feels excessively sticky and difficult to manage, simply place a clean bowl inverted over the dough, allow it to rest for 30-45 minutes (this resting period helps the flour absorb water, making the dough less sticky), then resume kneading.
- Second Kneading and Ball Formation: Continue kneading until the dough reaches a smooth, elastic consistency (ensuring a total kneading time of at least 5-7 minutes). Once kneaded, cover the dough and let it rest for another 40 minutes. After resting, it’s time to form a tight dough ball. Achieve this by repeatedly pulling the edges of the dough towards its center, creating tension on the surface, until a smooth, taut sphere is formed. Pinch the seams closed at the bottom. Place the dough ball, seam-side down, into an oiled bowl (a plastic bowl with 1-2 teaspoons of olive oil works best to prevent sticking), and cover it tightly with plastic wrap. Refrigerate the dough for a minimum of 12 hours, but for superior flavor development and a more manageable dough, aim for 24 to 72 hours of cold fermentation.
- Preparing for Baking: On the day you plan to bake your pizza, remove the dough from the refrigerator at least 1 hour before use, keeping it covered. This allows the dough to slowly come to room temperature. Pour a generous 1/4 to 3/8 cup of olive oil into a 14-inch square Sicilian pizza pan (or any similar-sized rectangular pan). Place the dough ball into the oiled pan. Gently begin to press the dough outwards with your fingertips, starting from the center and working towards the edges. The dough will likely resist stretching fully on the first attempt.
- Gradual Stretching: Cover the pan loosely with plastic wrap and allow the dough to relax and warm up for another 30-45 minutes. This crucial resting period softens the gluten, making the dough much more pliable.
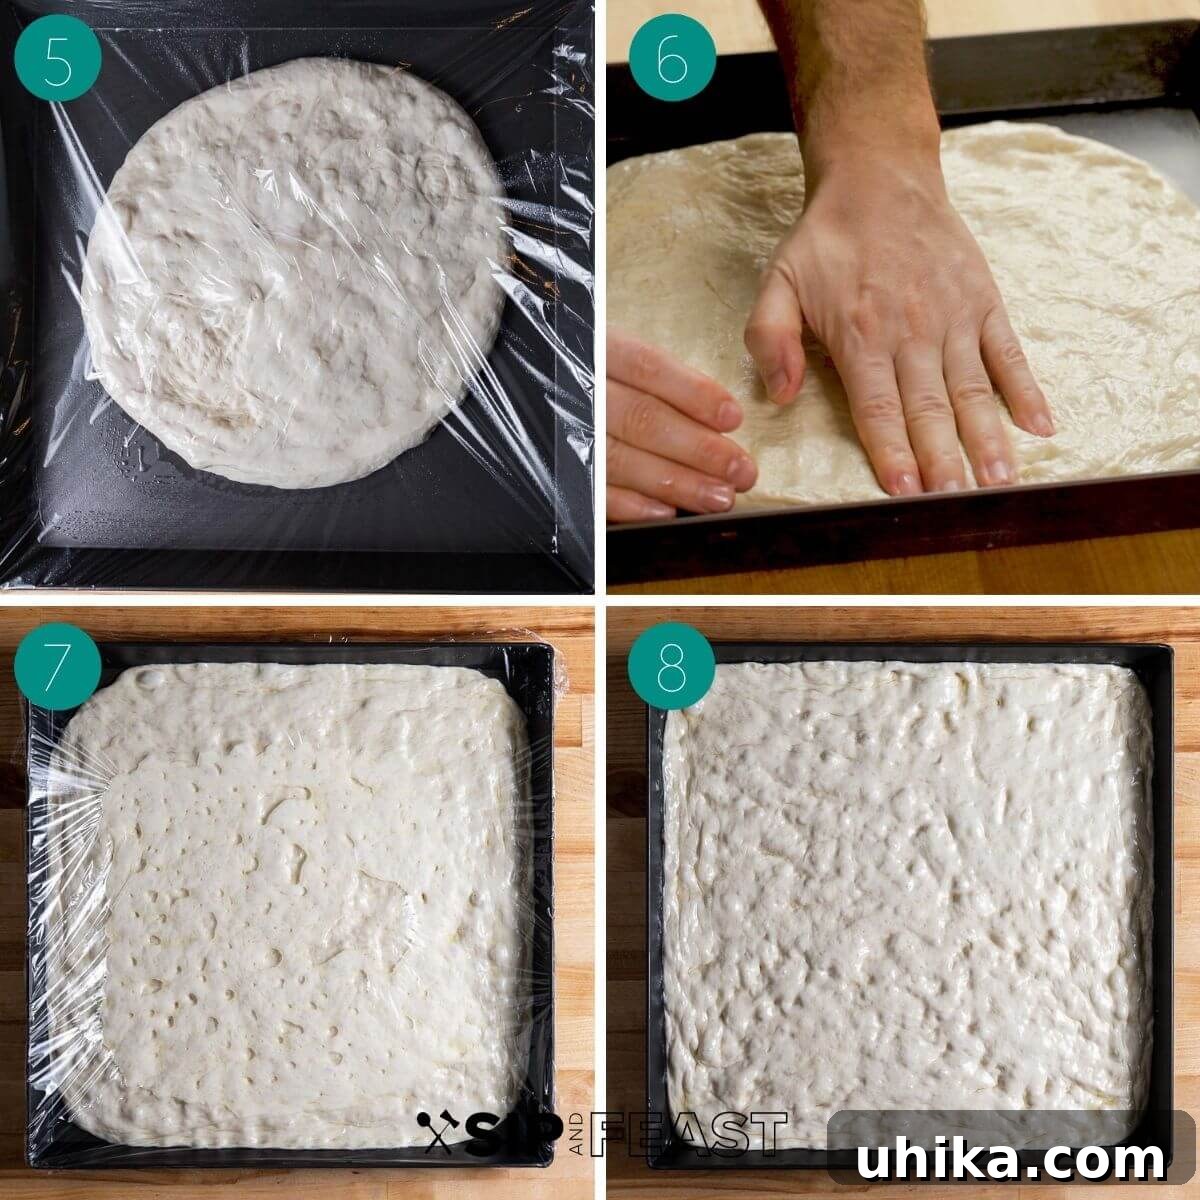
- Final Stretch and Rise: After the rest, the dough will be significantly easier to stretch. Continue pressing it with your fingers until it fills the entire pan, reaching all corners. If it still resists, cover it again and let it rest for another 45 minutes before giving it a final stretch. The goal is an evenly spread dough that covers the base of the pan.
- Dough Fully Expanded: (Referring to original image 8) At this point, after multiple intervals of pressing and covering, your dough should have beautifully filled the pan, showcasing its readiness for the next stage. Its surface should appear smooth and slightly puffed.
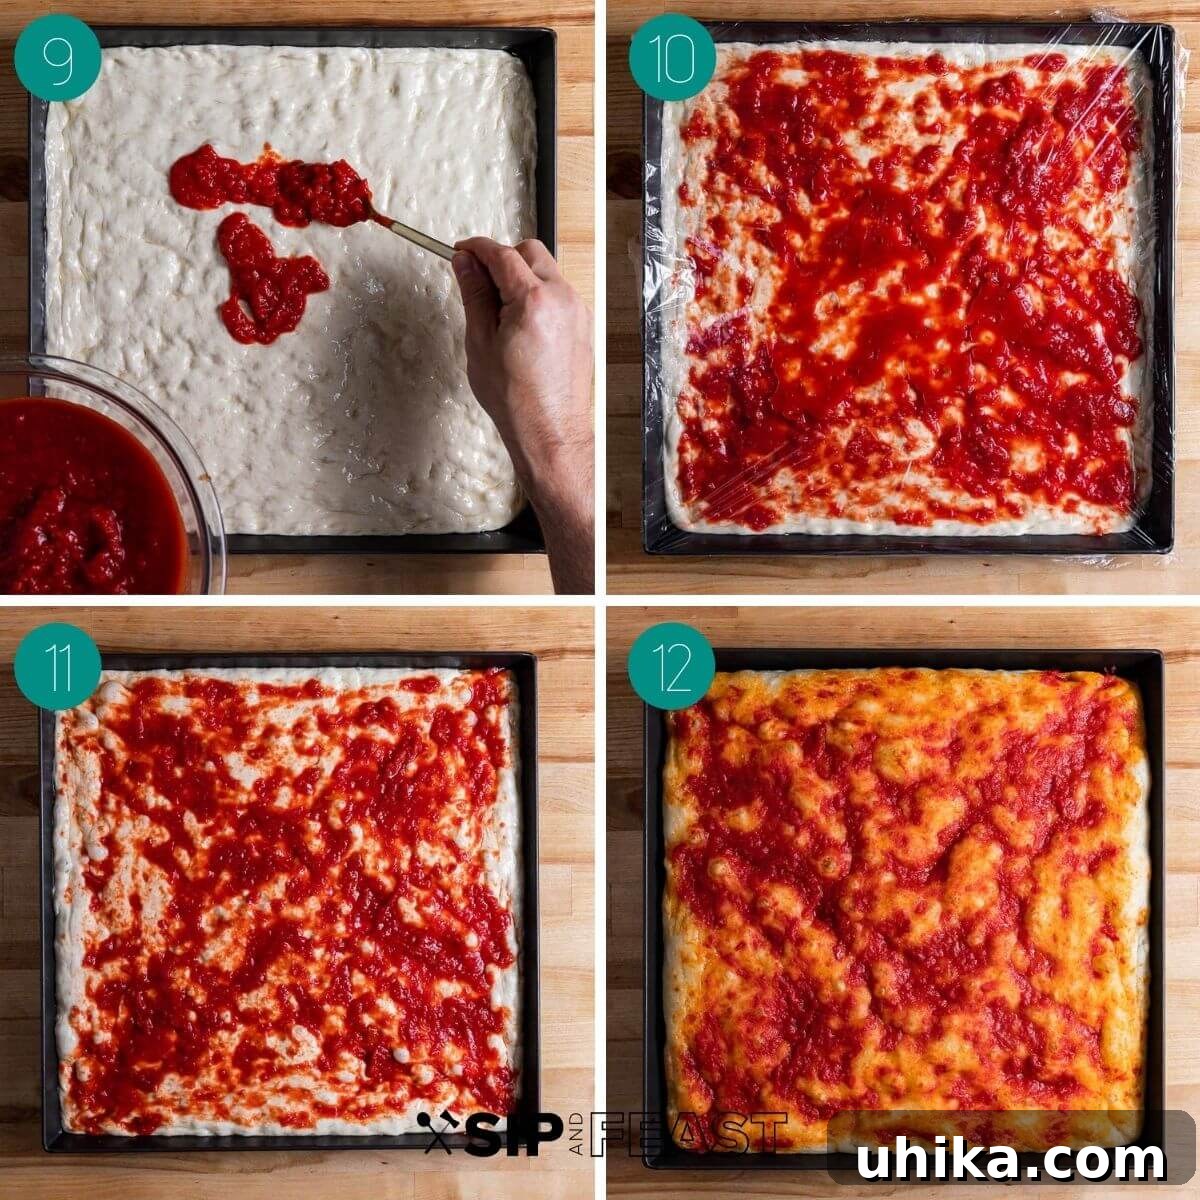
- Saucing and Proofing: In a separate bowl, mix 1/2 teaspoon of kosher salt with one 28-ounce can of crushed plum tomatoes. If the tomatoes appear watery, drain them in a fine-mesh strainer for a few minutes to prevent a soggy crust. Spread a very thin layer (approximately 4-6 ounces) of this seasoned tomato sauce evenly over the dough, making sure to leave about a 1/2-inch border around the perimeter free of sauce. Cover the pan with plastic wrap and place it on top of your oven (if it’s warm) or near a sunny window. Allow the dough to warm and rise for a full 3 hours. During this period, the dough will expand substantially, becoming very airy.
Baking Your New York Sicilian Masterpiece
- Preheat and Position Racks: Preheat your oven to 430°F (220°C). Position one oven rack to the lowest possible level and another rack in the upper third of the oven. This two-tier setup is crucial for achieving the perfect crust. By now, your dough will have visibly risen and become very puffy (as seen in original image 11).
- Initial Par-Bake (Bottom Crust Crispness): Place the sauced pizza pan on the lowest oven rack. Bake for 12 minutes. This initial bake, known as par-baking, is critical for developing a crisp, golden-brown bottom crust and preventing sogginess. After 12 minutes, carefully check the underside of the pizza. If it’s still pale or “blond,” allow it to bake for a few more minutes on the bottom rack until it achieves a light golden hue and feels firm.
- Add Cheese and Final Sauce: Remove the pizza from the oven. Evenly spread 12 ounces of shredded low-moisture whole milk mozzarella over the par-baked crust, again leaving a 1/2-inch border free of cheese. Then, take the remaining tomato sauce and spoon it onto the cheese in diagonal lines. This method allows for pockets of rich tomato flavor and ensures the cheese melts beautifully without becoming overly saucy.
- Final Bake (Topping Perfection): Transfer the pizza to the higher oven rack. Bake for an additional 12 minutes. During this stage, the mozzarella will melt into a golden, bubbly perfection, and the crust will continue to develop its internal structure.
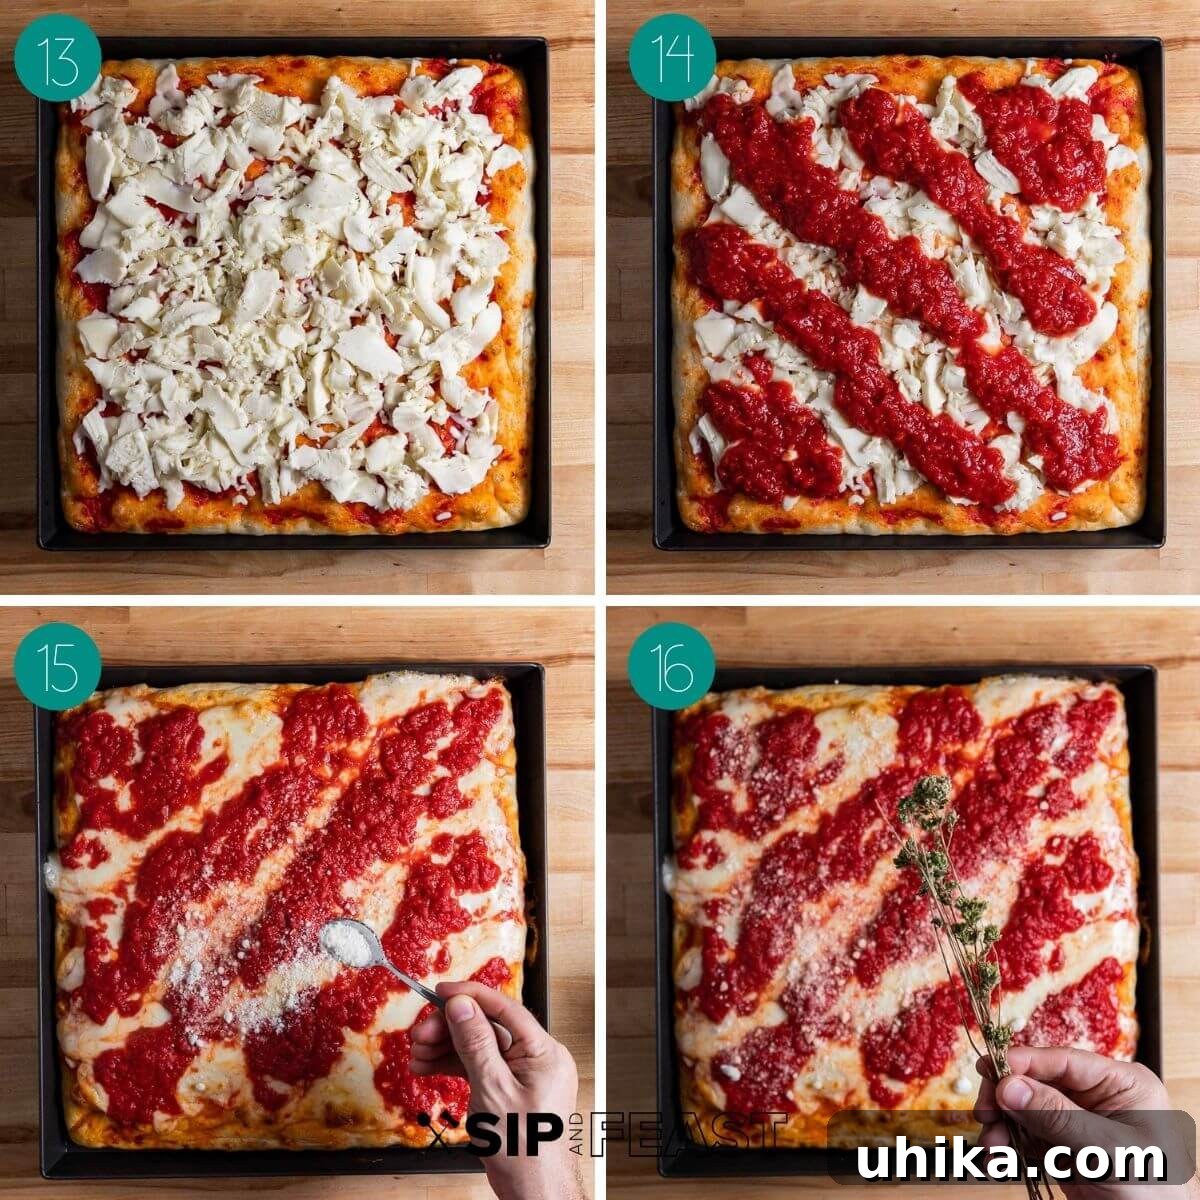
- Finishing Touches: Carefully remove the pizza from the oven. Immediately sprinkle 3 tablespoons of freshly grated Pecorino Romano cheese evenly over the top. Follow this with 1 teaspoon of authentic Sicilian oregano, distributing its fragrant leaves across the entire pie.
- Optional Broil for Color: For a touch more color and a slight char on the cheese, you can return the pizza to the oven for 1 more minute, or even use the broiler for 30-60 seconds. However, watch it *very carefully* to prevent burning, as broilers can work quickly.
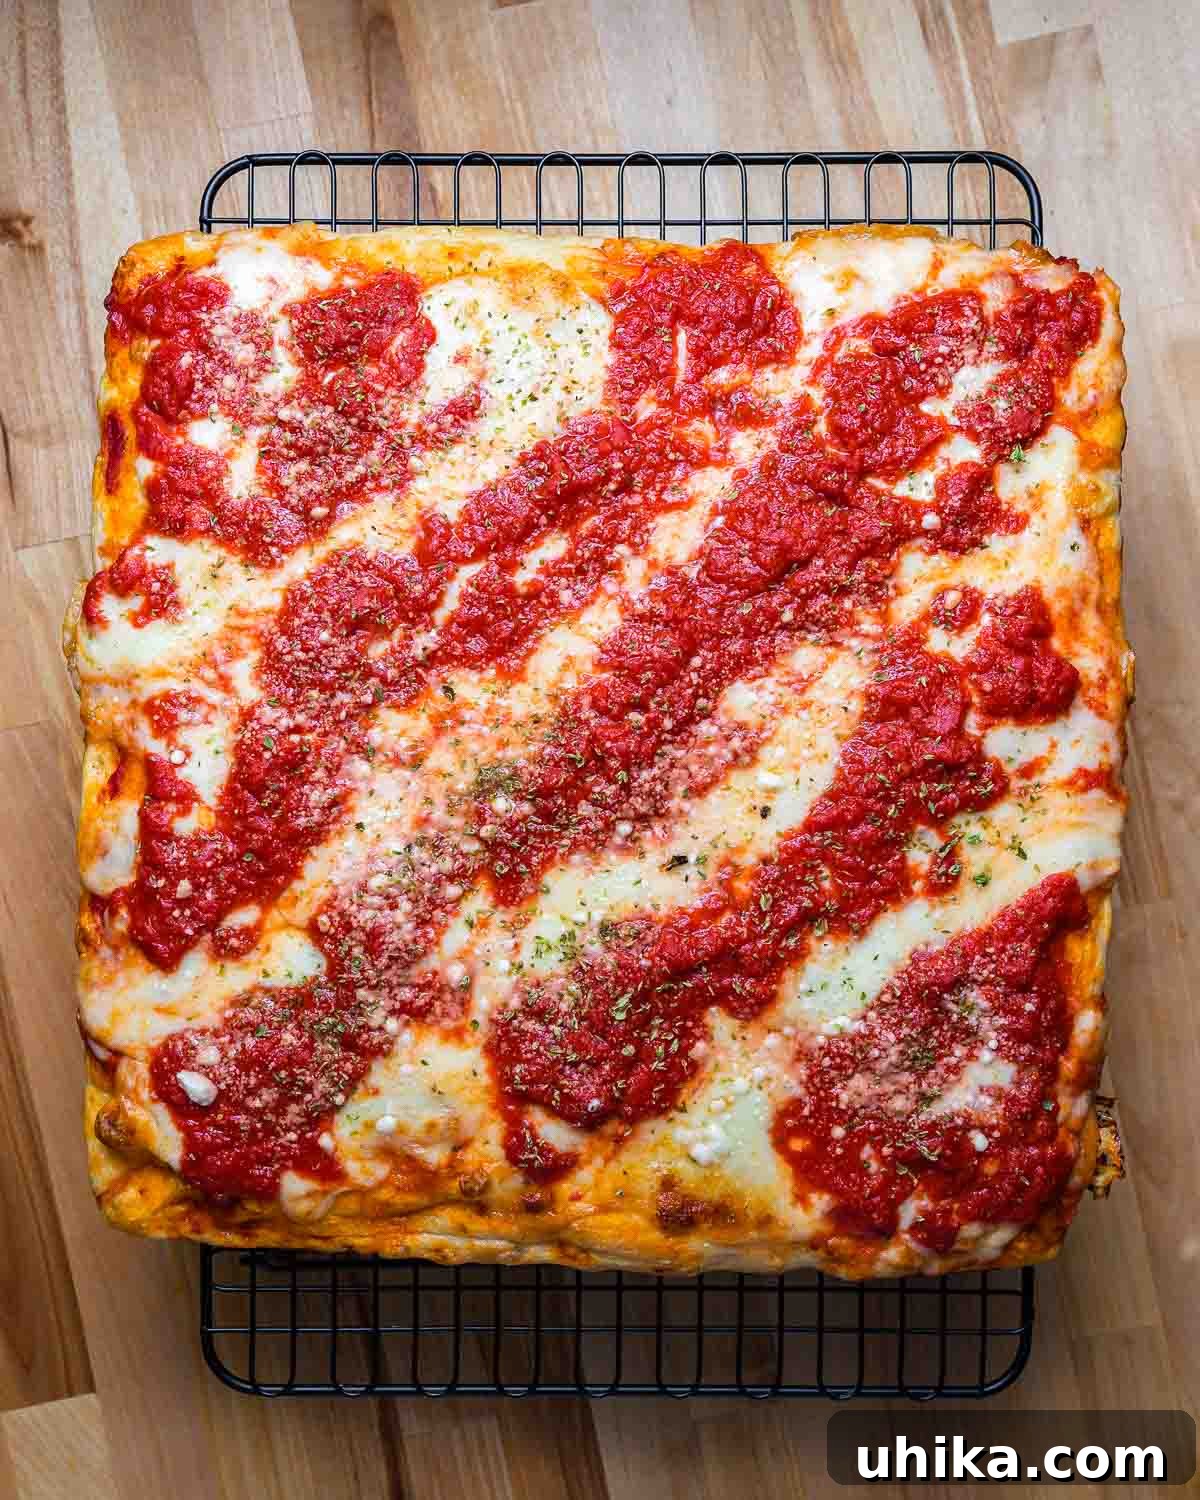
- Resting, Slicing, and Serving: Once baking is complete, using two spatulas, carefully transfer the hot pizza from the pan onto a wire rack. Let it rest on the rack for a couple of minutes. This vital step allows air to circulate, maintaining the crispness of the bottom crust. After resting, move the pizza to a cutting board. Using a sturdy pizza cutter, slice the Sicilian pie into traditional squares. The individual pieces can then be returned to your pizza pan for serving. Enjoy the authentic taste of homemade New York Sicilian pizza!
Choosing the Right Pan for Your New York Sicilian
The pan you choose plays a significant role in the success of your New York Sicilian pizza, particularly in achieving that signature crisp bottom. While many professional pizzerias use heavy black steel pans in high-temperature deck ovens that quickly brown the crust, replicating this at home requires careful consideration.
Most home ovens lack the intense, direct bottom heat of a commercial deck oven. Therefore, using a heavy black steel or cast iron pan in a standard home oven might result in an under-browned and less crispy bottom crust, as these materials retain heat differently and require more sustained exposure to high temperatures to transfer it effectively.
For home bakers, we highly recommend using an aluminum pan. Its thinner material allows for more efficient heat transfer from the oven rack to the pizza’s bottom, promoting superior crisping. When placed on the lowest rack, a good quality aluminum pan will ensure that the bottom crust achieves that desired golden crunch. Keep a close eye on it to prevent over-browning or burning.
A dark aluminum pan, similar to the one often pictured, performs exceptionally well. Specifically, a LloydPans 14 x 14″ Sicilian pizza pan is an excellent choice. Its depth is ideal for the thick crust of a Sicilian pizza, and its dark coating enhances heat absorption for a better bake. This versatile pan also doubles perfectly for baking focaccia. Alternatively, a standard aluminum sheet pan can yield great results. However, if using a standard sheet pan, consider increasing your dough ball size to approximately 40 ounces instead of the 30 ounces used in this recipe. A 30-ounce dough ball will produce a thinner pie that will cook in less time—approximately 5 minutes faster.
Important Pan Care Tip: Never slice your pizza directly in an aluminum pan. The pan’s surface can be easily scratched and damaged by a pizza cutter. Instead, always transfer the cooked pizza to a wire rack first, then to a sturdy cutting board for slicing. Once cut into squares, you can return the slices to the pan for serving.
Optimizing Oven Placement and Temperature
Achieving the perfect bake for your New York Sicilian pizza is highly dependent on understanding your oven’s unique characteristics. My own experience, and that of many home bakers, often involves working with standard conventional ovens. This recipe has been developed and tested in a typical 20-year-old GE oven.
If you possess a convection oven, you will likely need to adjust both the cooking time and oven temperature. Convection ovens circulate hot air, which can lead to faster cooking and more aggressive browning. Many culinary experts suggest reducing the oven temperature by 20-25°F (10-15°C) and/or shortening the cooking time when converting conventional oven recipes for convection use.
As highlighted in the step-by-step instructions, it’s crucial to check the bottom of your pizza after the initial 12 minutes of baking on the lowest rack. If the crust is still very pale, continue baking it on the bottom rack for the remainder of the total 24-25 minute cooking time. This ensures proper browning and crispness at the base. Should you consistently encounter issues with inadequate bottom browning across multiple attempts, consider increasing your oven temperature to around 450°F (232°C) for your next bake.
It’s an undeniable truth that all ovens fluctuate in temperature and perform differently. Your oven’s performance, much like your grandmother’s or a professional kitchen’s, will have its own quirks. Therefore, expect to experiment a bit with both rack placement and precise temperature settings to dial in the perfect bake for your specific appliance. Remember, crafting a New York Sicilian pie is an interactive and attentive process. It demands a touch of love, careful observation, and a bit of finesse. But with these detailed instructions and a willingness to adapt, I am confident you will produce a pizza that rivals mine, if not surpasses it!
Using a Stand Mixer for Dough Preparation
While the primary instructions emphasize hand-mixing to ensure accessibility for everyone, regardless of special equipment, a stand mixer can certainly streamline the dough preparation process. If you prefer to use your stand mixer, simply follow these modified steps:
- Initial Mixer Setup: In a large separate bowl, combine all the dry ingredients. Place half of this dry mixture along with all of the cold water into the bowl of your KitchenAid or similar stand mixer.
- First Mix: Attach the dough hook. Mix on low speed (level 1) for 1 minute, then gradually add the remaining dry ingredients into the mixing bowl.
- Add Oil and Continue Mixing: Drizzle the olive oil into the mixer bowl. Continue mixing at speed level 1 for another 3-4 minutes, or until the dough gathers around the dough hook and pulls away cleanly from the sides of the bowl.
- Final Kneading and Cold Fermentation: Remove the dough from the mixer and perform a brief hand-knead for about 1 minute to ensure uniformity and develop a smooth surface. Form it into a ball and place it in an oiled container, covering it tightly. Cold ferment the dough in the refrigerator for a minimum of 12 hours. For the best flavor development and an even more enhanced texture, aim for a cold fermentation period of 24 to 72 hours.
The Strategic Advantage of Par-Baking New York Sicilian Pizza
One of the defining characteristics that sets the New York Sicilian apart from many other New York-style pizzas is its requirement for par-baking. This technique involves baking the dough with only a minimal amount of sauce *before* adding the majority of the cheese and remaining sauce. This critical step offers several significant benefits:
- Enhanced Oven Spring: Par-baking allows the dough to undergo a burst of expansion, known as oven spring, without the weight of heavy toppings inhibiting its rise. This effectively “locks in” the size and structure of the crust, contributing to the signature airy, open crumb and preventing the dough from becoming dense or overly compressed. It also acts as a protective barrier, preventing the full amount of sauce and cheese from soaking into the raw dough and creating a soggy bottom.
- Optimal Moisture Control and Bubble Prevention: Applying a thin layer of sauce during the par-bake helps maintain the dough’s internal moisture balance. This prevents the formation of excessively large, unsightly bubbles on the surface of the crust, ensuring a more even and appealing texture. Additionally, this initial layer provides a slightly tacky surface for the subsequent cheese and sauce layers to adhere to, reducing the chances of toppings sliding off after baking.
- Convenient Make-Ahead Option: Par-baking is a game-changer for efficiency. Once the crust is par-baked, it can be cooled, tightly wrapped in plastic, and refrigerated for up to 3 days. This significantly simplifies the pizza-making process on busy days, transforming it into a quick assembly and final bake. Many pizzerias employ this exact method to streamline their workflow and serve fresh slices rapidly.
Explore More Irresistible Pizza Creations
If you’ve enjoyed the journey of making this New York Sicilian pizza, you’ll love exploring these other fantastic pizza recipes that cater to various tastes and styles:
- Classic New York Round Pizza – The quintessential triangular-slice pizza, a staple in every authentic New York pizzeria.
- Grandma Pizza – A beloved Long Island classic, known for its thinner crust and abundant garlic.
- Vodka Sauce Pizza – A delectable sheet pan pizza featuring a rich vodka sauce and fresh basil.
- Pizza Fritta – Fried pizza dough, a delightful treat that can be topped with either savory or sweet ingredients.
- New York White Pizza – A round pie luxuriously topped with mozzarella, creamy ricotta, fragrant garlic, and a hint of Pecorino Romano.
- Pizzeria-Style Garlic Knots – Soft, savory knots drenched in garlic butter, Pecorino Romano, a touch of hot pepper, and fresh parsley.
We hope you cherish this New York Sicilian pizza recipe as much as we do. If you found it helpful and delicious, please consider leaving a 5-star rating and a review. Your feedback truly helps us and other home cooks!
For those who prefer visual learning, most of our recipes, including this one, are available on our YouTube channel and Facebook Page.
New York Sicilian Pizza
by James Delmage
Pin
Thick and airy dough topped with tomatoes, mozzarella, oregano, and Pecorino Romano. Just like you’d find in any New York area pizzeria, but better because it’s made in your own home!
Ingredients
For the dough
- 497 grams bread flour (or 4 cups)
- 2 grams instant dry yeast (or 1/2 teaspoon, SAF brand recommended)
- 10 grams fine sea salt (or 1 3/4 teaspoons)
- 6 grams granulated sugar (or 1 1/2 teaspoons)
- 318 grams cold water (or 1 1/2 cups)
- 17 grams olive oil (or 1 1/2 tablespoons, plus more for proofing container)
For the NY Sicilian pizza
- 1 (30 ounce) dough ball (from above recipe)
- 1/4 cup olive oil
- 1 (28-ounce) can crushed plum tomatoes, drained
- 1/2 teaspoon kosher salt
- 1 teaspoon Sicilian dried oregano (or Italian oregano)
- 3 tablespoons Pecorino Romano, grated
- 12 ounces low-moisture whole milk mozzarella, shredded
Instructions
For the dough
- Place water into a bowl large enough to hold both the water and all the dry ingredients and still have room to spare. Mix together dry ingredients in another bowl.
- Add dry ingredients to water a bit at a time and mix thoroughly to form a dry rough mass. Pour the oil over the dough, mix again, and place the rough shaggy dough onto a work surface.
- Knead the dough for 5-7 minutes. If the dough is too sticky, place a clean bowl inverted over the dough and wait for 30-45 minutes before resuming. Return to kneading (just make sure to knead for at least a total of 5-7 minutes).
- Place the bowl over the dough once more and let sit for 30-40 minutes to warm up before forming the dough ball.
- After 40 minutes pull the dough toward its end repeatedly to form a smooth ball. Pinch the seam side and place the dough ball seam side down into an oiled bowl (about 2 teaspoons olive oil) and cover tightly with plastic wrap. Refrigerate for at least 12 hours but preferably 24 -72 hours before using.
For the NY Sicilian Pizza
- Take the dough out of the fridge for 60 minutes prior to use. Do not uncover the bowl.
- Pour and spread the olive oil into a 14-inch square pan and drop the dough ball into it. Try to stretch with your fingers to fill the pan for a couple of minutes. The dough will not be able to be stretched on the first try. Cover the pan with plastic wrap and let the dough warm up for 30-45 minutes and try to stretch again. If unsuccessful, cover one more time and wait another 30-45 minutes. Press the dough into the corners to form a crust.
- Mix the salt into the tomatoes. Spread 4-6 ounces of the tomato sauce onto the dough (just a very thin layer) then cover with plastic wrap. Place the pan on top of the oven or a sunny windowsill to warm and rise for 3 hours.
- Preheat the oven to 430f and set one rack to the lowest level and the other to the top 1/3 of the oven. Once the oven is to temp and the dough has risen enough par-bake the pizza on the lowest rack for 12 minutes or until the bottom of the pizza is lightly golden and the dough has firmed up.
- Remove the pizza and top with the mozzarella cheese, leaving 1/2-inch of the perimeter without any cheese. Spoon the sauce on top of the pizza in diagonal lines (you might not need all of the sauce) and cook on the higher set rack for 12 minutes more.
- Remove from the oven and sprinkle with grated Pecorino Romano and Sicilian oregano. Cook for 1 minute more. You can broil the top for 30 seconds or so for more color but watch very carefully! Enjoy!
Notes
- The dough can be cold fermented for as little as 12 hours in the fridge but is much better after a longer period. 24 to 72 hours is recommended.
- If refrigerating the dough ball in a metal bowl use a bit more oil to coat. The metal bowls tend to stick more than plastic.
- Cooking time will vary depending on the exact oven temp. After 12 minutes of cooking on the lowest rack, the pizza should be quite golden. If it’s completely blond, the pizza might need further cooking on the lowest rack after adding the sauce and cheese. All ovens are different so you will need to check the bottom to make sure!
- The Sicilian pizza needs a lot of oil. More than you think! The oil helps develop the amazing crispy bottom, so please use enough of it.
- Leftovers can be saved for up to 3 days and the pizza can be reheated at 350f on a baking sheet until hot. About 10 minutes.
Bakers Percentages: 64% hydration, .4% yeast, 2% salt, 3.4% oil, 1.2% sugar
Thickness Factor (TF): .153
Nutrition
Carbohydrates: 45.4g |
Protein: 15.6g |
Fat: 2.1g |
Saturated Fat: 8g |
Cholesterol: 36mg |
Sodium: 678mg |
Potassium: 88mg |
Fiber: 1.8g |
Sugar: 2.2g |
Calcium: 269mg |
Iron: 3mg
Nutrition information is automatically calculated, so should only be used as an approximation.
Enjoyed this recipe? Leave a comment below!
Find us on Instagram at @sipandfeast or share your creations with #sipandfeast!