
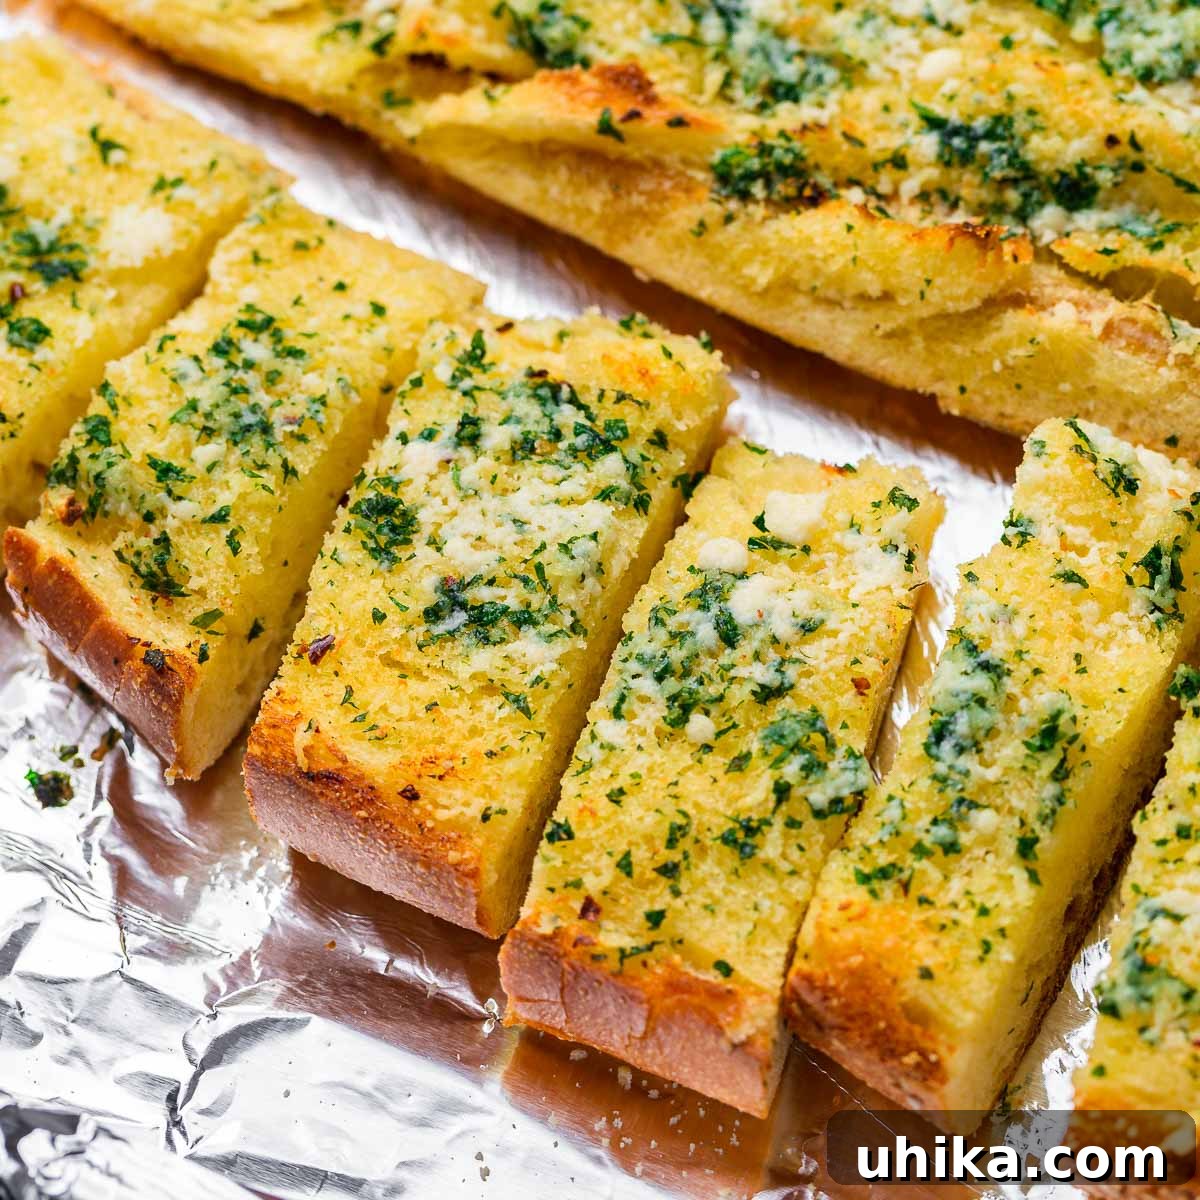
Garlic bread is a beloved classic, instantly elevating any meal from ordinary to extraordinary. This ultimate guide will walk you through creating the perfect homemade garlic bread – a harmonious blend of crispy golden edges, a soft, tender interior, and an irresistible aroma of roasted garlic, rich butter, savory cheese, and fresh herbs. Whether you’re serving it alongside a hearty Sunday sauce, a fresh salad, or a comforting bowl of soup, this easy garlic bread recipe is guaranteed to become a family favorite.
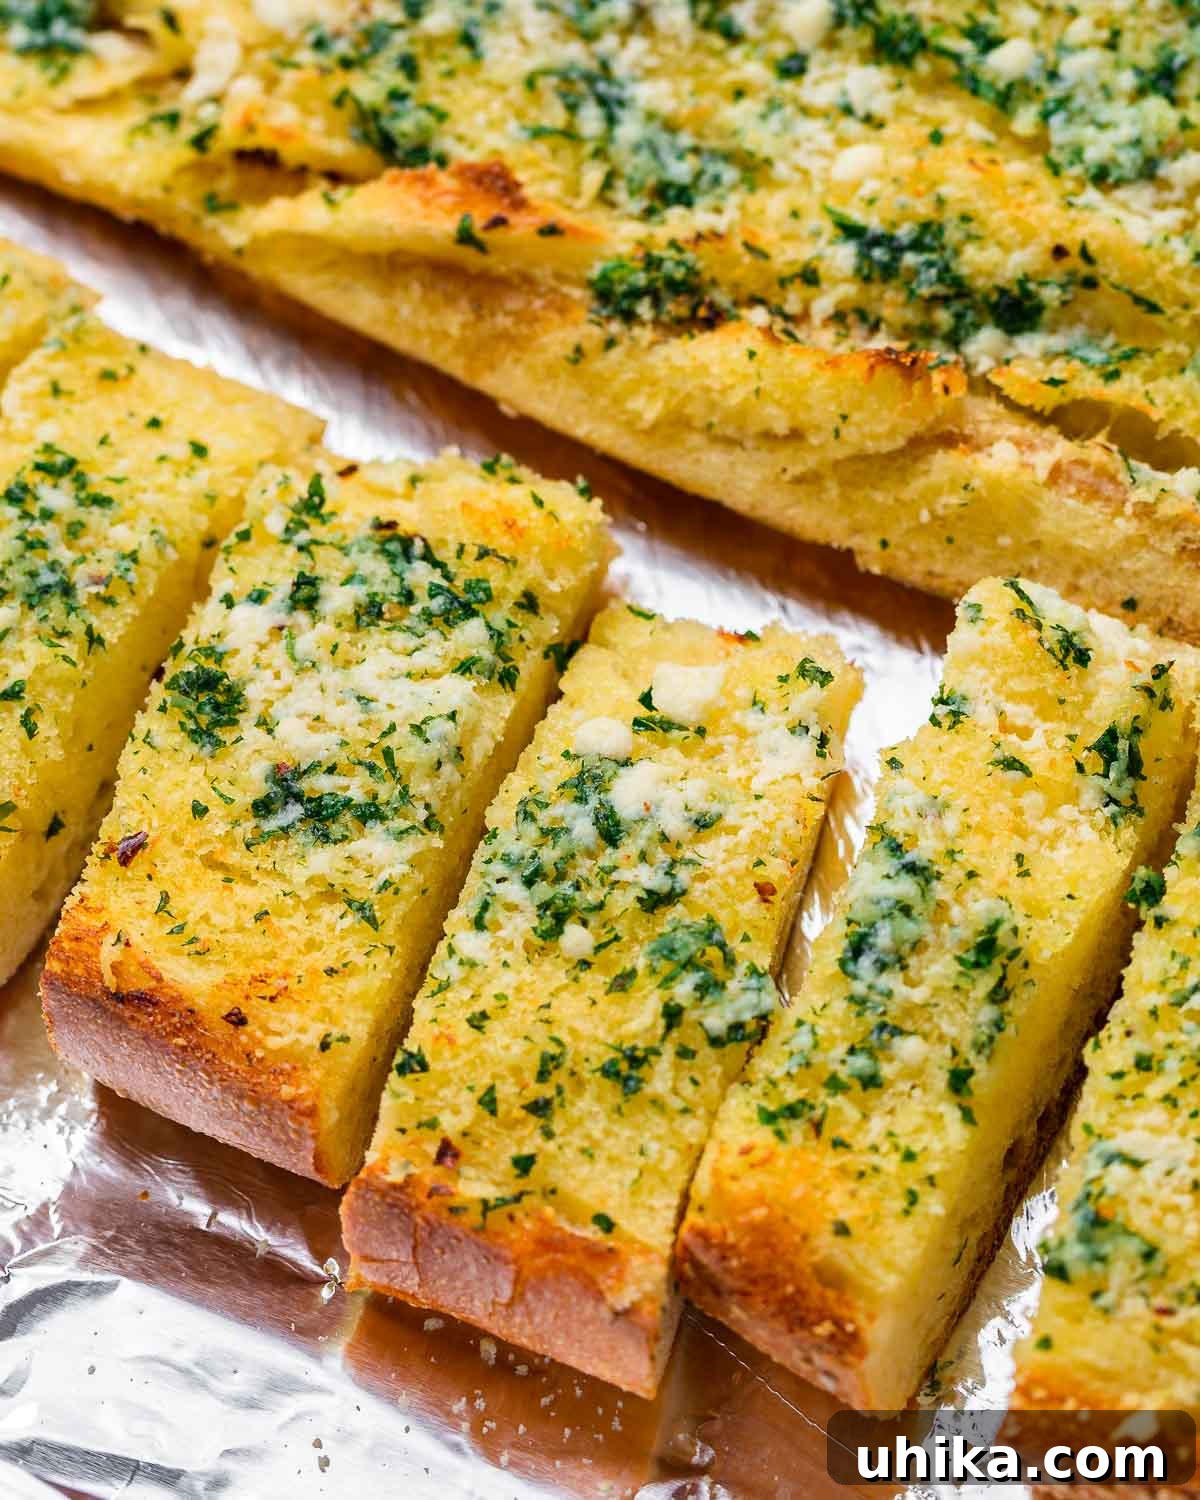
For many, garlic bread evokes warm memories of childhood meals and bustling Italian restaurants where it’s often served as a complimentary delight. Its simplicity and universal appeal make it a go-to side dish, perfectly complementing any pasta dish or a robust main course. Beyond its nostalgic charm, homemade garlic bread is a fantastic introduction to cooking for kids due to its straightforward process and use of basic, accessible ingredients. Utilizing a pre-made Italian loaf, you can have this delectable side ready on your table in just 20-25 minutes, making it an ideal choice for busy weeknights when you crave something special without a lengthy preparation time.
Why Homemade Garlic Bread Shines
While store-bought options exist, nothing quite compares to the flavor and texture of freshly made garlic bread. The magic lies in controlling the quality of ingredients and the baking process. When you make it yourself, you get to choose your preferred bread, load it with as much garlic as your heart desires, and achieve that coveted balance of a gloriously crispy crust and a wonderfully chewy crumb. The aroma alone, as the garlic-infused butter melts into the bread and toasts in the oven, is enough to get anyone excited for dinner. Plus, it’s incredibly cost-effective and allows for endless customization to suit your taste preferences.
Essential Ingredients for Superior Garlic Bread
The secret to exceptional garlic bread lies in a few key, high-quality ingredients. Each component plays a crucial role in building the layers of flavor and achieving the perfect texture. Let’s delve into what you’ll need to create your culinary masterpiece.
Choosing Your Bread Base: The Foundation of Flavor
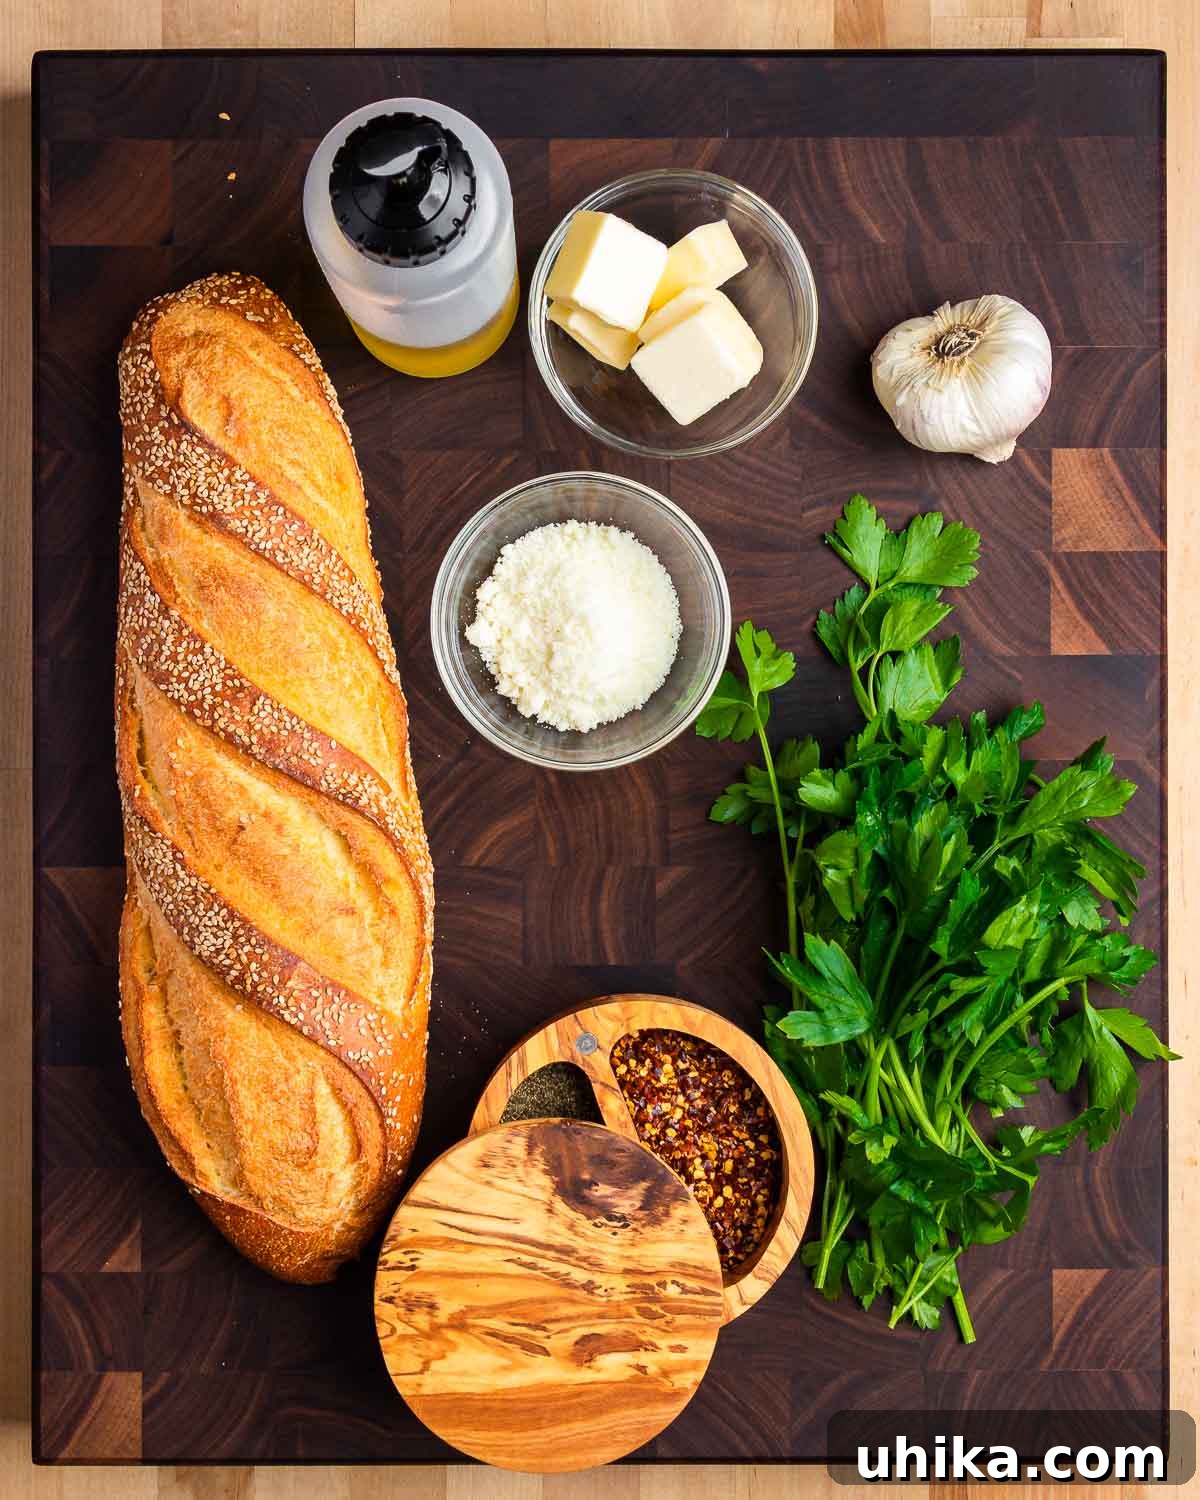
The type of bread you choose forms the backbone of your garlic bread. A long, crusty loaf is generally preferred, as it provides a sturdy base to hold the rich garlic butter while offering a delightful contrast in texture. Italian semolina bread is a classic choice, known for its hearty texture and slightly sweet flavor. Other excellent options include:
- French Baguette: Offers a very crispy crust and a light, airy interior, perfect for delicate slices.
- Ciabatta: Known for its open, airy texture, which soaks up the garlic butter beautifully, resulting in a moist and flavorful interior.
- Sourdough: For a tangier flavor profile and a denser, chewier texture.
- Seeded Italian Bread: As used in this recipe, provides a wonderful texture and subtle nutty notes.
No matter your choice, ensure the bread is fresh for the best results. A stale loaf will dry out too much during baking.
The Heart of the Flavor: Fresh Garlic
Garlic is, naturally, the star of the show. Using fresh garlic is paramount for a vibrant, pungent flavor that truly shines. Pre-minced garlic in a jar can be convenient, but it often lacks the robust flavor of fresh cloves. For this recipe, we recommend grating or finely mincing about 5 cloves of garlic. Grating creates a fine paste that blends seamlessly into the butter, ensuring even distribution and maximum flavor release. Avoid burning the garlic when sautéing, as this can lead to a bitter taste.
The Richness: Butter and Olive Oil
A combination of butter and olive oil provides the perfect fat base for our garlic spread. Unsalted butter allows you to control the overall saltiness of the dish, while good quality extra virgin olive oil adds a fruity depth and helps to keep the bread moist and tender. The olive oil also contributes to a superior crispness during the broiling stage. The ratio of 6 tablespoons of unsalted butter to 3 tablespoons of olive oil creates a perfectly balanced and richly flavored spread.
The Cheesy Touch: Pecorino Romano (and other options)
A sprinkle of grated cheese adds a layer of savory complexity and a touch of saltiness. Pecorino Romano, a hard, salty Italian cheese made from sheep’s milk, is a fantastic choice, offering a sharp, piquant flavor that beautifully complements the garlic. If you prefer a milder taste, Parmigiano Reggiano (Parmesan) is an excellent substitute. For those who love a gooey, cheesy pull, shredded mozzarella can be added during the final broiling stage, creating an irresistible topping.
Fresh Herbs & Seasonings
- Flat-leaf Italian Parsley: Freshly minced parsley brightens the flavor profile and adds a lovely pop of color.
- Crushed Red Pepper Flakes (Optional): A pinch of red pepper flakes introduces a subtle warmth and a hint of spice, elevating the overall taste. Adjust to your heat preference.
- Salt and Pepper: Seasoning is key! A pinch of salt enhances all the flavors, and freshly ground black pepper can add a subtle kick. Remember to taste and adjust, especially if using salted butter.
Crafting Your Masterpiece: Step-by-Step Homemade Garlic Bread Recipe
Creating delicious homemade garlic bread is a surprisingly simple process. Follow these detailed steps to ensure a perfectly crispy exterior and a wonderfully soft, flavorful interior every time.
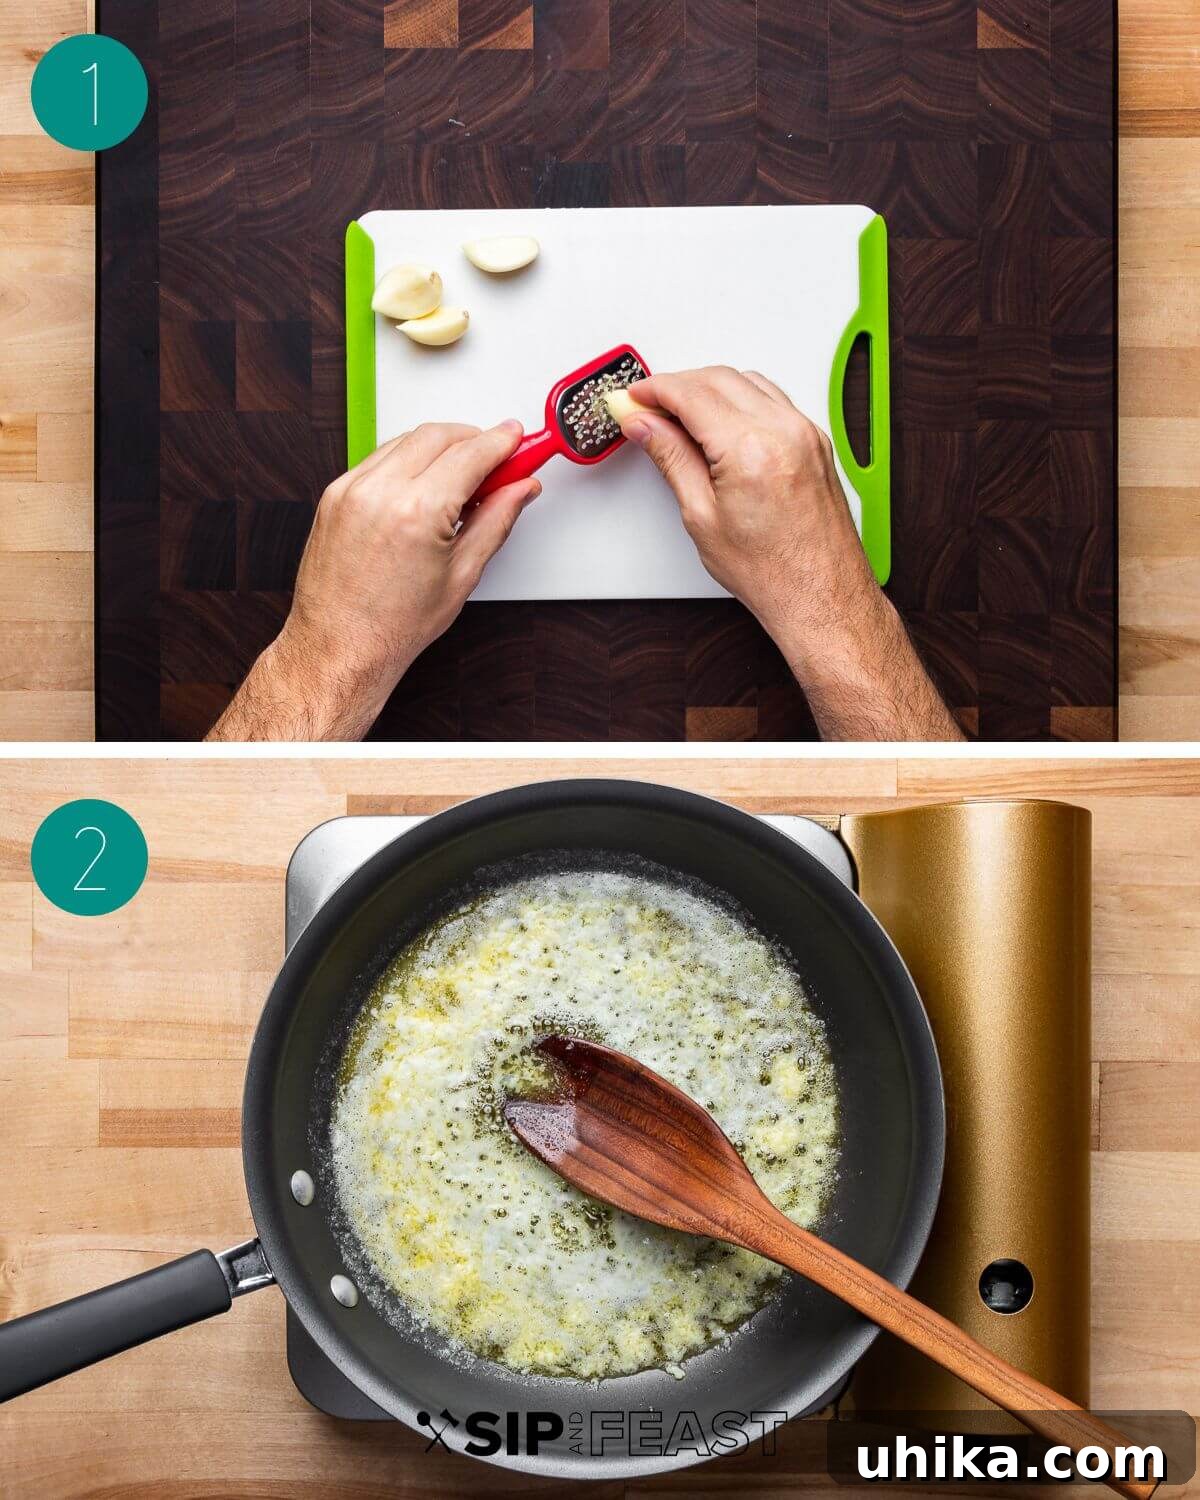
- Prepare Your Ingredients: Begin by finely grating 5 cloves of fresh garlic using a grater or zester. Exercise caution to protect your fingers! Next, mince about 1/4 cup of fresh flat-leaf Italian parsley. Finally, grate approximately 3 tablespoons of Pecorino Romano cheese. Having all your ingredients prepped and ready will make the cooking process smooth and efficient.
- Preheat and Prepare Garlic Butter: Preheat your oven to 350°F (175°C). Position one oven rack in the middle and another rack in the top third of the oven. In a small pan, combine 6 tablespoons of unsalted butter, 3 tablespoons of olive oil, and the grated garlic. Sauté this mixture over medium-low heat for about 2-3 minutes, or until the garlic becomes fragrant and lightly golden. Be careful not to brown or burn the garlic, as this can make it bitter. If using salted butter, you may want to adjust the amount of salt added later.
- Season the Garlic Butter: Remove the pan from the heat. Stir in the minced parsley, 1/4 teaspoon of crushed red pepper flakes (if desired for a hint of spice), and a pinch of salt to taste. Give it a good stir to combine all the flavors evenly.
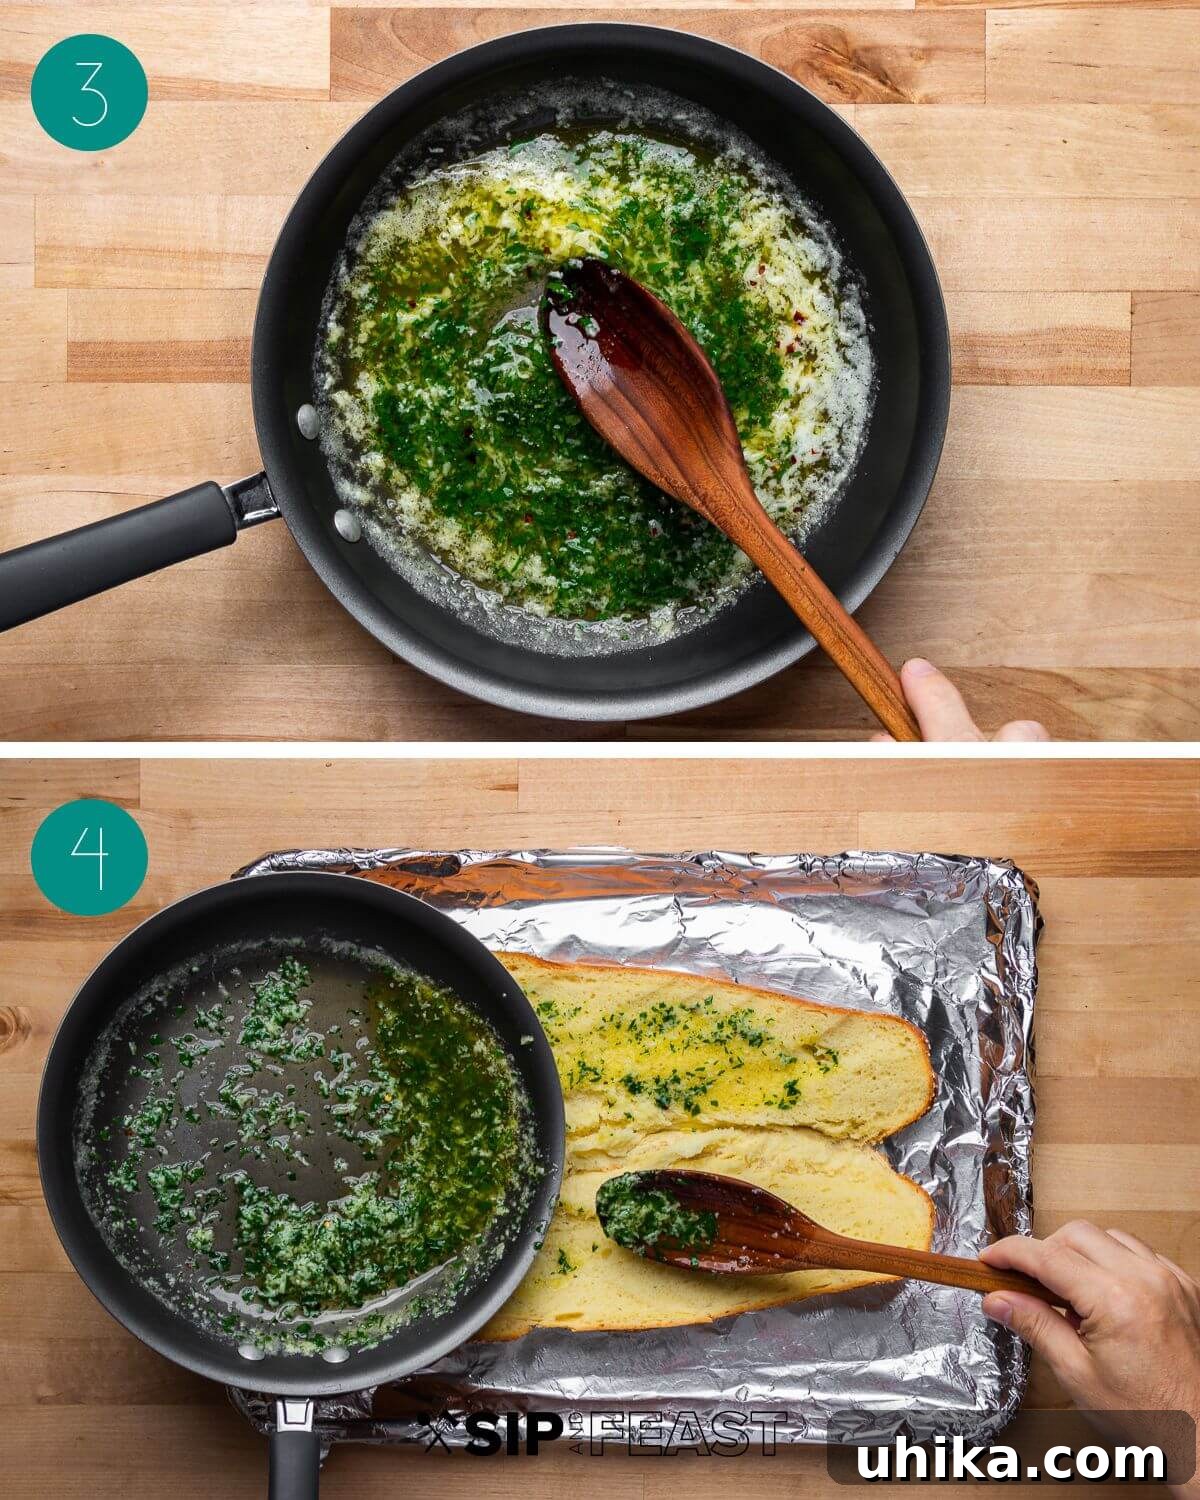
- Prepare and Apply to Bread: Line a baking sheet with aluminum foil for easy cleanup. Take your loaf of seeded Italian bread and carefully split it lengthwise. If you prefer larger, connected pieces, slice it like a book, leaving one side intact. Generously pour or brush the prepared garlic butter mixture evenly over both halves of the bread, ensuring every nook and cranny is coated for maximum flavor. Remember, you can use any crusty bread like baguette or ciabatta if Italian bread isn’t available.
- Add Cheese and Initial Bake: Sprinkle the grated Pecorino Romano cheese evenly over the buttered bread. Once covered, re-cover the bread tightly with the foil. Bake on the lower oven rack for 12 minutes. This initial covered bake allows the bread to steam slightly, soaking up all the rich butter and garlic flavors while keeping the interior moist and chewy.
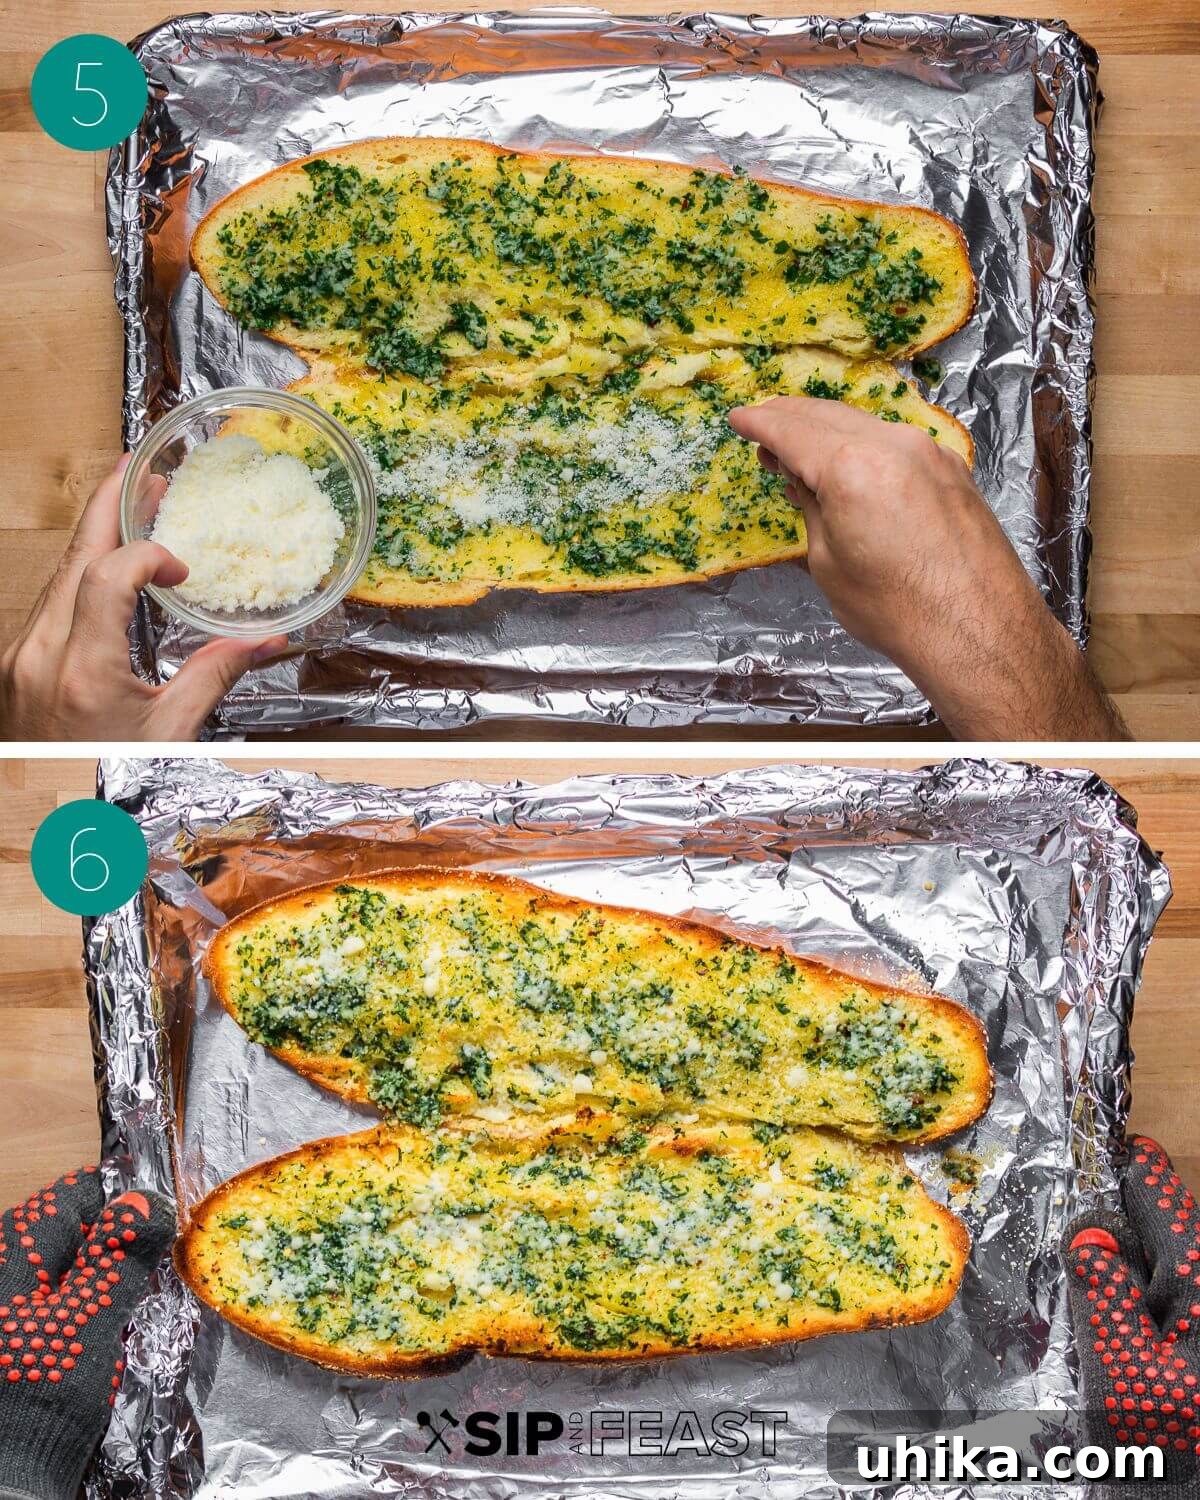
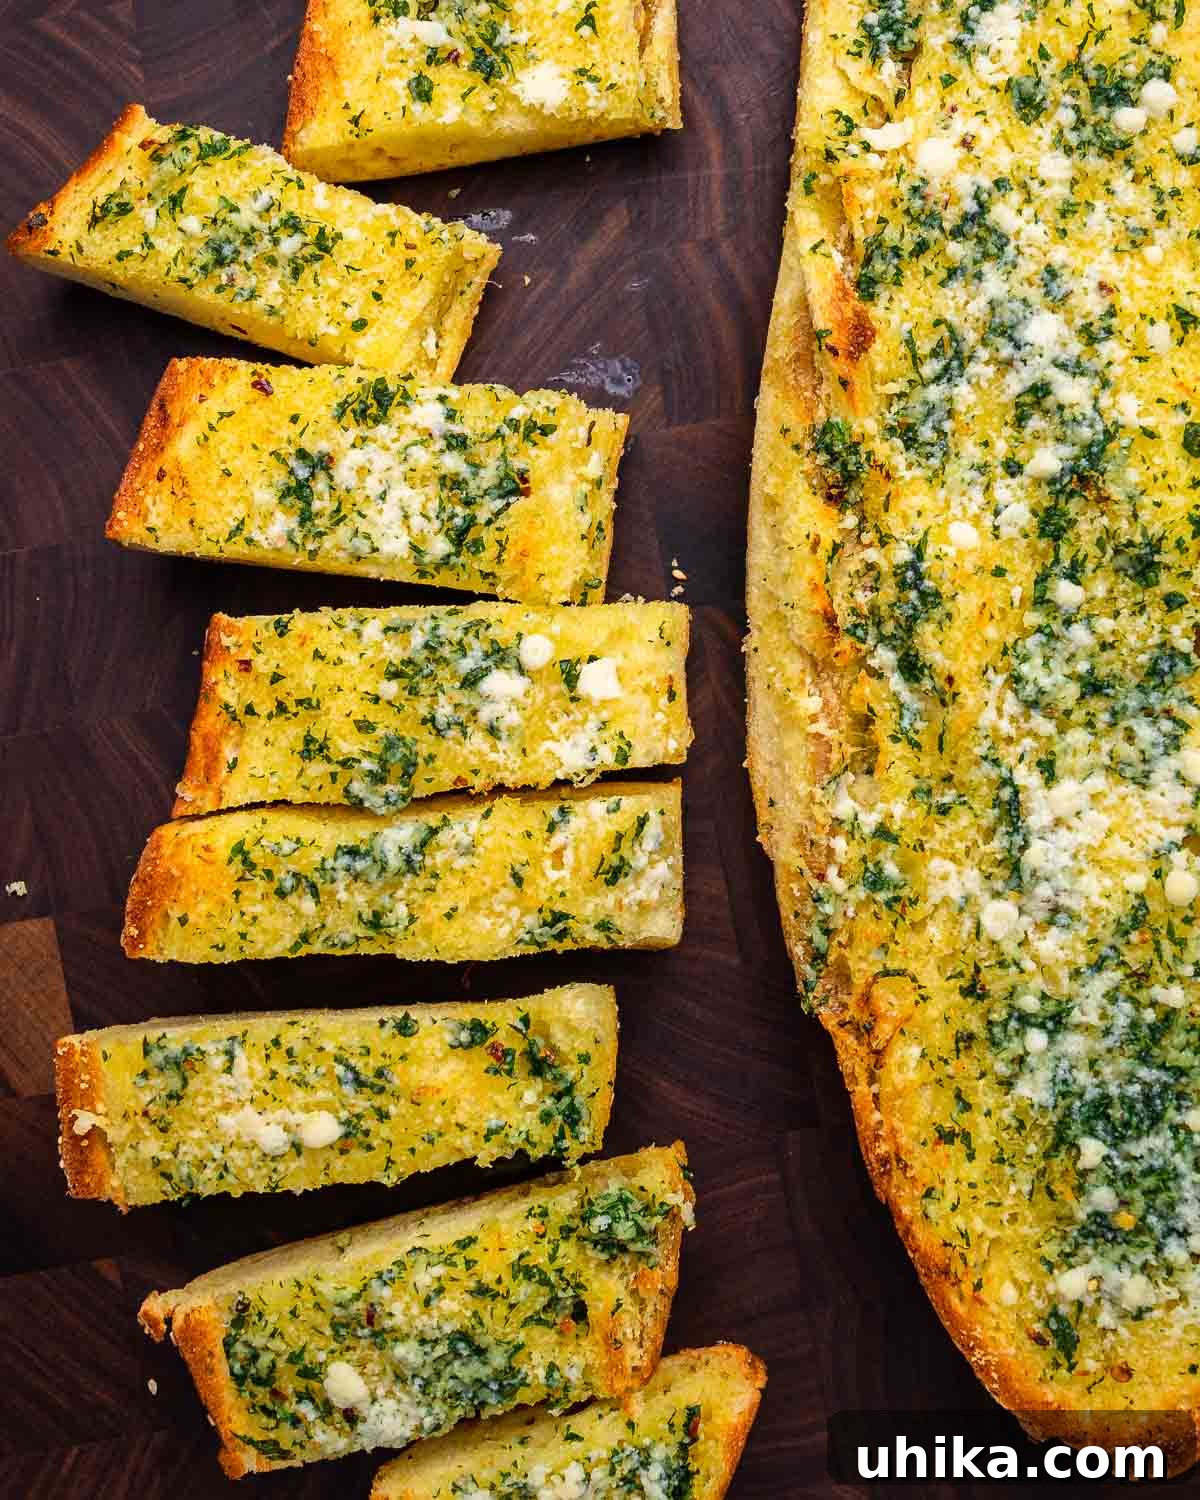
- Broil for Crispness and Serve: After 12 minutes, carefully remove the foil from the bread and move the baking sheet to the higher oven rack. Turn on the broiler and broil for 1-3 minutes. This is the crucial step for achieving that signature crispy, golden-brown top. Watch the bread very closely during this stage, as broilers can vary in intensity and bread can burn quickly. As soon as the edges are golden and sizzling, remove it immediately from the oven. Once finished, transfer the garlic bread to a cutting board, slice it into individual pieces, and serve immediately while hot and fresh. Enjoy your perfectly crafted homemade garlic bread!
Expert Tips for Unforgettable Garlic Bread
While the recipe itself is straightforward, a few key techniques can elevate your garlic bread from good to truly exceptional. Keep these tips in mind for the best results.
- The Perfect Bread Choice and Slicing: As mentioned, a good crusty loaf is ideal. When slicing, consider whether you want individual slices or connected halves. Slicing almost all the way through, like opening a book, allows for larger, more substantial pieces that can be pulled apart at the table, ensuring each person gets both a crispy top and a soft, flavorful bottom.
- Mastering the Garlic Butter: Don’t rush the sautéing of the garlic. A gentle simmer in butter and olive oil allows the garlic to mellow and release its aromatic oils without burning. Burnt garlic will impart a bitter taste, which can ruin the entire dish. A light golden hue is what you’re aiming for.
- The Magic of Foil: The importance of covering the bread with foil during the initial baking phase cannot be overstated. This creates a steamy environment that keeps the bread moist and chewy, allowing it to fully absorb the rich garlic butter. Without foil, your garlic bread might turn out dry and brittle instead of delightfully chewy and crunchy.
- Optional Additions and Substitutions:
- Cheese: Feel free to experiment with different cheeses. If you love a gooey texture, sprinkle some shredded mozzarella over the Pecorino Romano before broiling.
- Umami Boost: For an incredible depth of flavor, mince a couple of anchovy fillets and melt them into the garlic butter mixture. They dissolve completely and add a savory umami punch without tasting fishy.
- Herbs: While parsley is traditional, you can also add a pinch of dried oregano or Italian seasoning to the garlic butter for another layer of flavor.
- Broiler Vigilance: The broiler works quickly! Stay by the oven and watch your garlic bread continuously during the broiling stage. It can go from perfectly golden to burnt in a matter of seconds. A beautiful, bubbling, golden-brown crust is what you’re looking for.
Creative Ways to Enjoy Your Garlic Bread
Garlic bread is incredibly versatile and makes a fantastic accompaniment to a wide variety of meals. Here are some of our favorite ways to enjoy this Italian-style classic:
- Alongside Pasta and Sauces: This is a classic pairing for a reason! Garlic bread is the perfect partner for rich pasta dishes like our Sunday sauce with meatballs, simple marinara, or a creamy Alfredo. It’s ideal for soaking up every last drop of delicious sauce.
- With Soups and Salads: Elevate a simple meal of soup and salad with the addition of warm, crusty garlic bread. It’s fantastic dipped into hearty bowls of lentil soup or pasta fagioli. Pair it with a crisp green salad for a complete and satisfying lunch or light dinner.
- As a Sandwich Base: Transform your ordinary sandwiches into something extraordinary by using garlic bread as the base. Imagine a delicious hot roast beef sandwich with onion jam or a classic meatball sub, all built on a flavorful slice of garlic bread.
- Dipping Delight: Serve garlic bread alongside a small bowl of extra virgin olive oil with a splash of balsamic vinegar for dipping. It’s also fantastic for scooping up creamy dips or spreads.
- Elevating Dinner: Garlic bread perfectly complements a wide array of comforting Italian-American “Sunday” dinners. Think beyond pasta and pair it with dishes like baked ziti, succulent beef braciole, cheesy stuffed shells, or crispy chicken parmigiana. It adds texture and another layer of deliciousness to every bite.
Storing and Reheating Homemade Garlic Bread
While garlic bread is undeniably best enjoyed fresh from the oven, you can certainly store leftovers. To maintain its quality, allow any leftover garlic bread to cool completely before transferring it to an airtight container or wrapping it tightly in aluminum foil. It can be stored in the refrigerator for up to 3 days.
For reheating, the oven is your best friend for restoring that coveted crispness. Place the garlic bread directly on a baking sheet and reheat in a preheated oven at 350°F (175°C) for about 8-10 minutes, or until warmed through and the edges are crisp once more. You can also use an air fryer for quicker reheating and excellent results, typically at 350°F (175°C) for 3-5 minutes, watching closely to prevent burning.
Garlic Bread
James Delmage
5
20
25
10 pieces
Pin
Ingredients
- 6 tablespoons unsalted butter
- 3 tablespoons olive oil
- 5 cloves garlic grated
- 1/4 teaspoon crushed hot red pepper flakes (optional)
- 1/4 cup flat-leaf Italian parsley minced
- salt to taste
- 1 loaf seeded Italian bread
- 3 tablespoons Pecorino Romano grated
Instructions
-
Preheat oven to 350°F (175°C) and set the first rack in the middle and the other rack to the top 1/3 of the oven.
-
Sauté the garlic in the butter and oil for 2-3 minutes over medium-low heat or until fragrant. Turn off the heat and add in the crushed red pepper flakes and parsley along with a pinch of salt (to taste).
-
Split the bread lengthwise and open it up like a book. Brush or pour the garlic butter all over the bread making sure to evenly distribute it. Sprinkle with the Pecorino then cover with foil.
-
Bake for 12 minutes on the lower rack then remove the foil and move the bread to the higher rack. Broil for 1-3 minutes or until the bread is golden around the sides and sizzling but not burnt. Watch the whole time and be prepared to remove it quickly.
-
Once finished, slice the bread and serve. Enjoy!
Notes
- Any type of bread can be used. Ciabatta, baguette, and all types of crusty bread work well.
- Shredded mozzarella cheese can be added during the broiling stage.
- Leftovers can be saved for up to 3 days in the fridge and should be reheated in the oven.
Nutrition
Carbohydrates: 33.1g |
Protein: 5.7g |
Fat: 11.5g |
Saturated Fat: 5.3g |
Cholesterol: 20mg |
Sodium: 564mg |
Potassium: 2mg |
Fiber: 1g |
Sugar: 1g |
Calcium: 20mg |
Iron: 2mg
Nutrition information is automatically calculated, so should only be used as an approximation.
If you’ve enjoyed making this easy homemade garlic bread recipe or any other recipe from our collection, we’d love for you to share your experience! Consider leaving a 5-star rating and a review to help others discover these delicious dishes. For those who love to learn by watching, many of our recipes are available on our YouTube channel and Facebook Page. Happy cooking!
Like this? Leave a comment below!
Check us out on Instagram at @sipandfeast or tag #sipandfeast!