
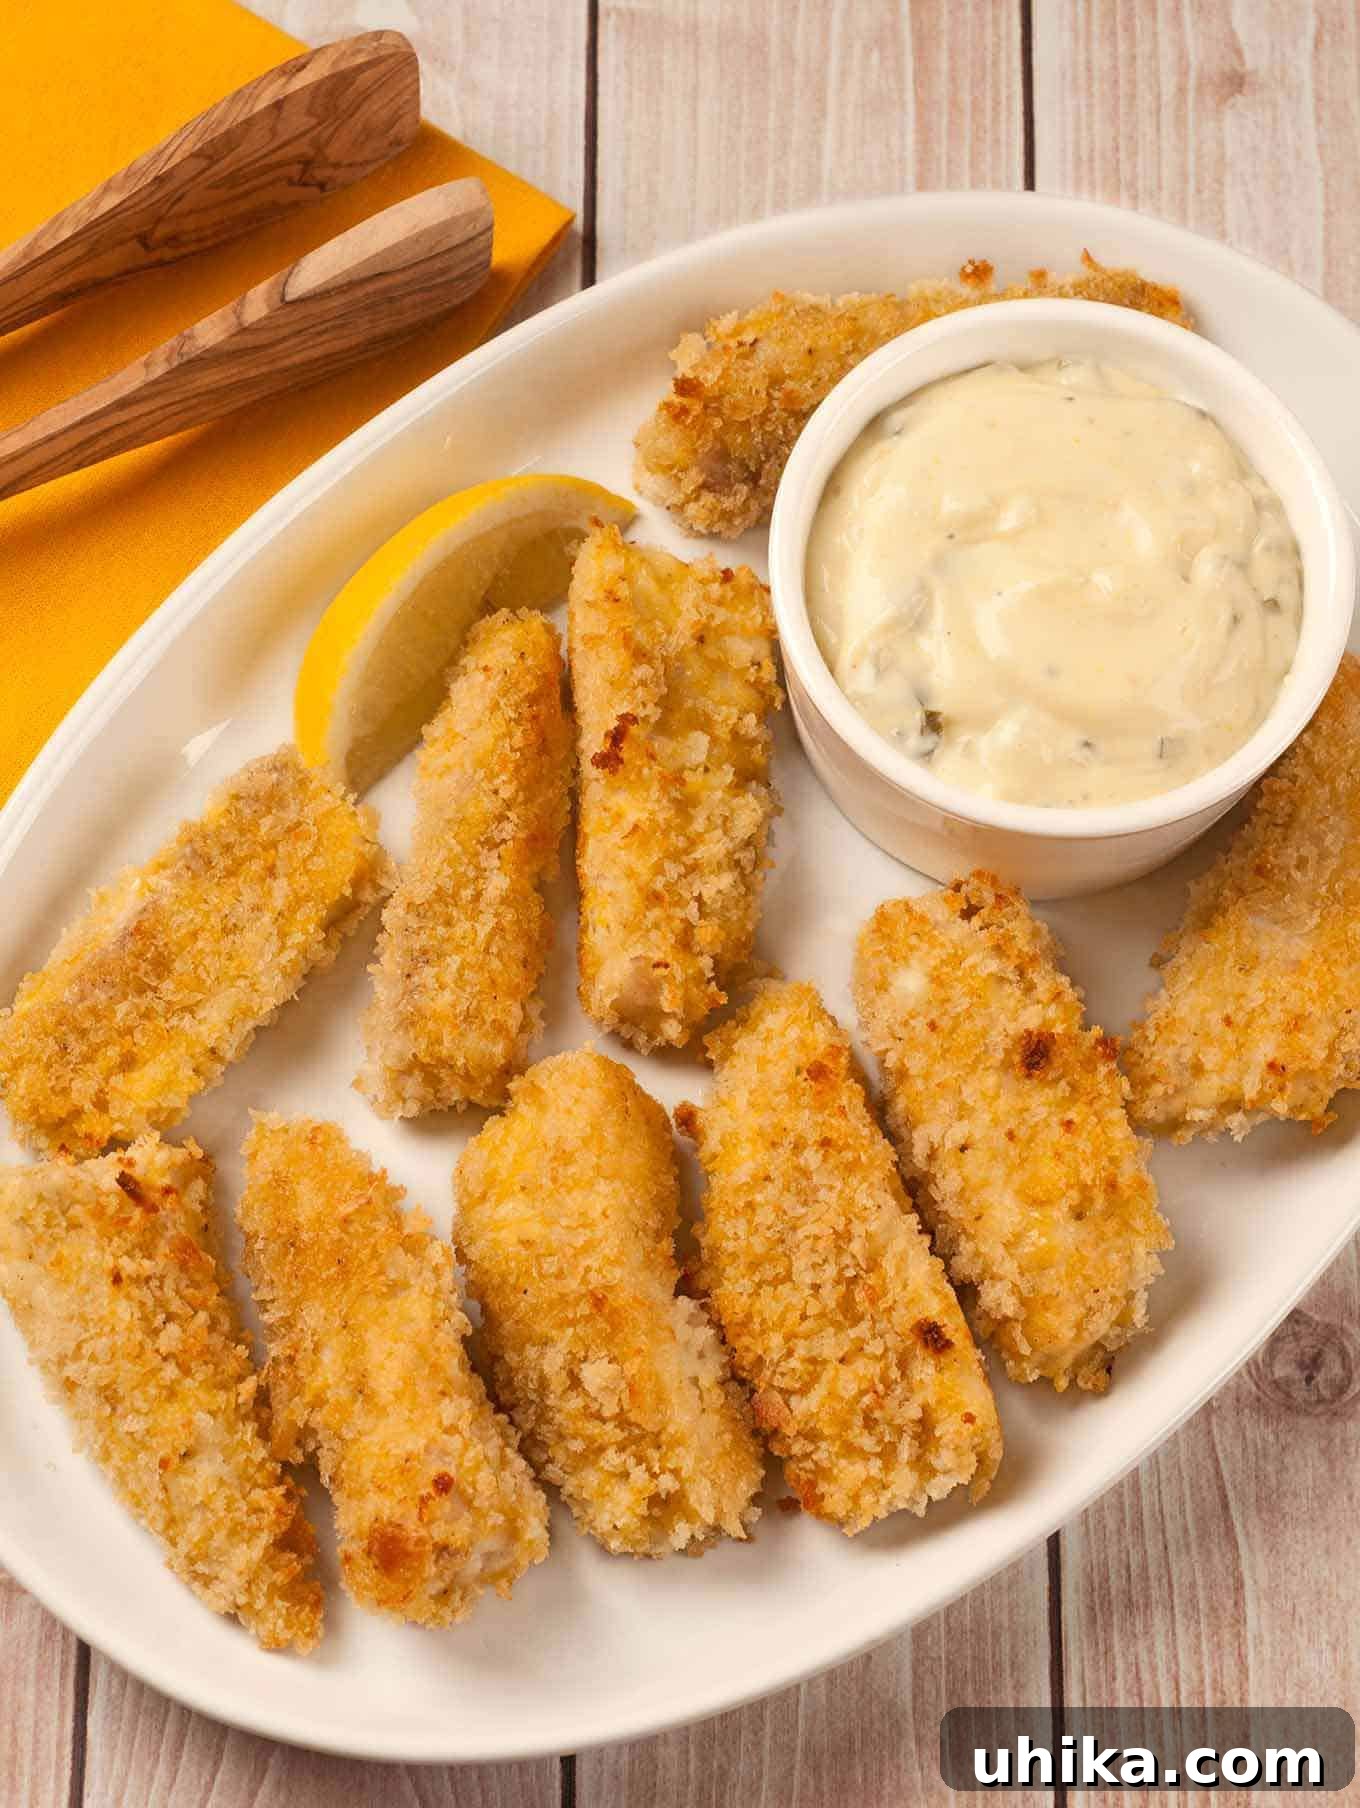
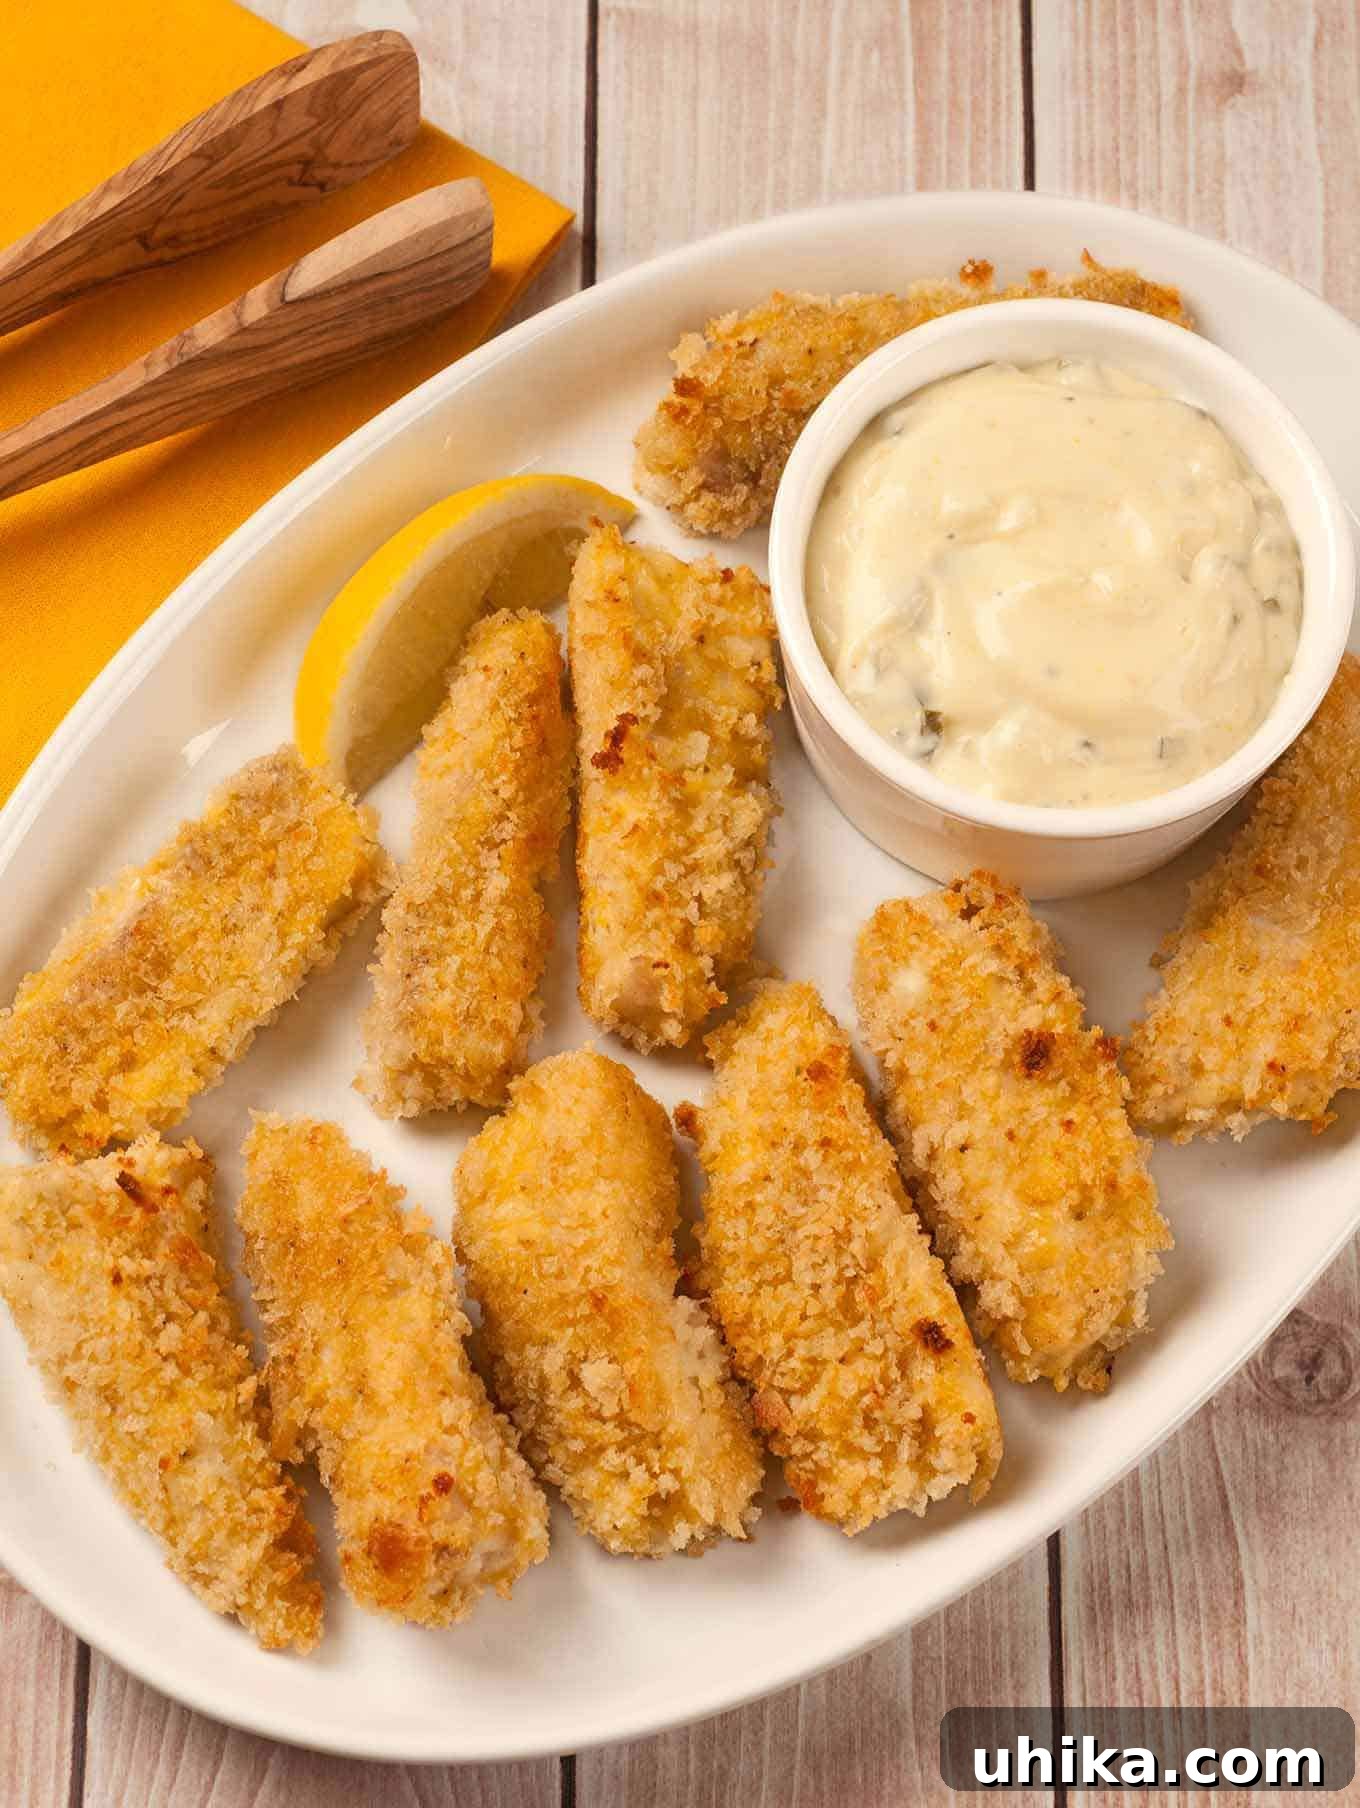
Craving that childhood classic, fish sticks, but want a healthier, more flavorful version? Look no further! These homemade oven-fried fish sticks deliver exceptional crispness and taste, far surpassing their frozen counterparts. They are simple to prepare and make a fantastic weeknight meal, especially when paired with our quick-to-fix homemade tartar sauce and a fresh green salad. Get ready to transform your dinner table with this easy and satisfying recipe that promises both nostalgia and a gourmet touch.
Making fish sticks at home not only ensures freshness but also allows you to control the ingredients, leading to a much healthier and more delicious result. Forget the mystery meat and excessive sodium often found in store-bought options; with this recipe, you get pure, flaky white fish enveloped in a golden, crunchy crust. It’s a meal that’s sure to become a family favorite, appealing to both kids and adults alike.
Crispy Oven-Fried Fish Sticks
Lynne Webb
10 minutes
20 minutes
30 minutes
4
servings
Rate Recipe
Print Recipe
Ingredients
- 1 lb firm white fish fillets, such as tilapia, cod, or catfish
- 1 cup all-purpose flour
- 1-1/2 teaspoons Old Bay seasoning
- 1 teaspoon salt
- Freshly ground black pepper, to taste
- 2 large eggs
- 2 teaspoons milk
- 1-1/2 cups panko crumbs
- 3 tablespoons vegetable oil
For the Homemade Tartar Sauce
- 1/2 cup mayonnaise
- 1 tablespoon sweet pickle relish, well-drained
- 1 teaspoon Dijon-style mustard
- 1-1/2 tablespoons freshly squeezed lemon juice
- 1 tablespoon sweet onion, very finely chopped
- Salt and freshly ground black pepper, to taste
Instructions
-
1. Prepare the Tartar Sauce: In a small mixing bowl, combine the mayonnaise, sweet pickle relish, Dijon mustard, fresh lemon juice, and finely chopped sweet onion. Stir until all ingredients are well blended.
-
2. Season and Chill: Season the tartar sauce to your liking with salt and freshly ground black pepper. Transfer it to a serving dish, cover, and refrigerate until you are ready to serve the fish sticks. This recipe yields approximately 2/3 cup of tartar sauce.
-
3. Preheat Oven & Prep Pan: Preheat your oven to 425°F (220°C). Line a shallow baking pan with aluminum foil for easier cleanup. Liberally coat the foil with nonstick cooking spray to prevent sticking, then set the pan aside.
-
4. Cut the Fish: Pat the fish fillets dry with paper towels. Cut the fillets into uniform strips, roughly 2-1/2 to 3 inches in length and about 1/2 inch thick. Consistency in size ensures even cooking.
-
5. Prepare Egg Wash: In a shallow dish (a pie plate or a wide, shallow bowl works best), whisk together the eggs and milk until thoroughly combined and slightly frothy.
-
6. Prepare Flour Mixture: On a dinner plate, combine the flour, Old Bay seasoning, salt, and a few grinds of fresh black pepper. Mix these dry ingredients well.
-
7. Prepare Panko Mixture: In a small bowl, combine the panko crumbs and vegetable oil. Toss them together until the panko is evenly coated with the oil. Then, spread this mixture onto a second clean dinner plate.
-
8. Breading the Fish: Create an assembly line: flour plate, egg wash dish, panko plate, and finally the prepared baking pan. Working with one fish strip at a time, first dredge it in the flour mixture, ensuring it’s lightly coated and shaking off any excess. Next, dip it into the egg wash, allowing any excess to drip off. Finally, thoroughly coat the fish strip in the seasoned panko crumbs, pressing gently to adhere. Transfer the breaded fish stick to the prepared baking pan, ensuring there is a little space between each piece.
-
9. Final Spray: Once all the fish sticks are arranged on the baking pan, give them a light, even spray with additional nonstick cooking spray. This helps achieve that extra golden crispness.
-
10. Bake to Perfection: Bake the fish sticks for 6 to 8 minutes. Then, carefully turn each fish stick over with tongs or a spatula. Continue baking for an additional 8 to 10 minutes, or until the panko crumbs are beautifully golden brown and the fish is opaque and cooked through.
-
11. Serve Hot: Remove from the oven and serve immediately with your fresh homemade tartar sauce and a lemon wedge for an extra burst of flavor.
Notes
Tips for the Crispiest Oven-Fried Fish Sticks:
- Pat the Fish Dry: Excess moisture on the fish can lead to a soggy coating. Always pat your fish fillets thoroughly dry with paper towels before cutting and breading.
- Don’t Overcrowd the Pan: Give your fish sticks space to breathe on the baking sheet. If they are too close, they will steam instead of crisp, leading to a less desirable texture. Use two baking sheets if necessary.
- Oil the Panko: Tossing the panko crumbs with vegetable oil before coating helps achieve a more even, golden-brown crisp. This simulates the effect of frying without the deep oil.
- Lightly Spray Before Baking: A final light spray of cooking oil or olive oil on the breaded fish sticks just before baking enhances browning and adds an extra layer of crunch.
- Flip Halfway: Turning the fish sticks halfway through the baking process ensures both sides get equally golden and crispy.
- Use a Wire Rack: For even crisper results, place a wire rack on top of your foil-lined baking sheet. This allows air to circulate around all sides of the fish sticks as they bake.
Why Choose Homemade Oven-Fried Fish Sticks?
The allure of fish sticks is undeniable, evoking memories of childhood meals. However, commercial frozen varieties often disappoint with their processed ingredients, questionable fish quality, and lack of genuine flavor. Making them from scratch provides a multitude of benefits:
- Superior Flavor and Texture: Fresh fish makes all the difference. You get tender, flaky fish inside and a truly crispy, golden exterior.
- Healthier Alternative: Baking these fish sticks in the oven significantly reduces the amount of oil compared to traditional deep-frying. This means fewer calories and less saturated fat, making it a guilt-free pleasure.
- Control Over Ingredients: You decide what goes into your meal. Choose high-quality, sustainably sourced fish, and customize the seasoning to your family’s preferences. No artificial flavors, preservatives, or excessive sodium.
- Kid-Friendly and Fun: Even picky eaters are often drawn to the familiar shape and appealing crunch of homemade fish sticks. Getting kids involved in the breading process can make mealtime even more exciting.
Choosing the Best Fish for Your Sticks
The success of your fish sticks largely depends on the fish you choose. Aim for firm, white-fleshed fish with a mild flavor. Here are some excellent options:
- Tilapia: A popular choice for its mild flavor and firm texture, readily available and affordable.
- Catfish: Another great option with a slightly sweet, mild flavor and firm flesh that holds up well to breading and baking.
- Cod: Known for its delicate, flaky white flesh and mild taste. It’s a classic choice for fish and chips, and equally good for sticks.
- Haddock: Similar to cod but with a slightly sweeter flavor and firmer texture, making it excellent for this recipe.
- Pollock: Often used in commercial fish sticks, pollock is a sustainable and economical choice with a mild flavor.
- Flounder or Sole: If you prefer a very thin, delicate fish stick, these are good options, though they may require a slightly shorter baking time.
Always ensure your fish is fresh or properly thawed. Patting the fillets very dry with paper towels before cutting is a crucial step to ensure the breading adheres properly and becomes wonderfully crispy.
The Secret to a Perfect Crispy Coating
The magic of these oven-fried fish sticks lies in their perfectly crispy coating. The three-step breading process is key:
- Flour: The initial coating of flour creates a dry surface that allows the egg wash to adhere better. Our blend includes Old Bay seasoning, salt, and pepper to infuse flavor directly into the crust.
- Egg Wash: A simple mixture of eggs and milk acts as the “glue,” binding the dry ingredients to the fish and creating a base for the final crispy layer.
- Panko Crumbs: This is where the serious crunch comes in! Panko, a type of Japanese breadcrumb, is coarser and flakier than regular breadcrumbs, resulting in an exceptionally light and crispy texture when baked. Tossing the panko with a little vegetable oil before coating ensures an even, golden-brown finish that mimics deep-frying.
Creating an efficient “assembly line” for breading will make the process smooth and mess-free. Arrange your plates and dishes in order: fish, flour mixture, egg wash, panko mixture, and then your prepared baking sheet. This flow helps minimize cross-contamination and keeps your hands cleaner.
Serving Suggestions for a Complete Meal
While homemade tartar sauce is a must-have accompaniment, these oven-fried fish sticks are versatile enough to pair with a variety of sides to create a well-rounded meal:
- Classic Sides: Serve with a simple green salad, steamed vegetables (like broccoli or green beans), or roasted asparagus for a light and healthy option.
- Comfort Food Pairings: French fries (homemade oven-baked sweet potato fries are a great alternative), mashed potatoes, or macaroni and cheese make hearty, comforting sides.
- Grain-Based Sides: A serving of brown rice, quinoa, or couscous can add substance and nutritional value to your meal.
- Alternative Dipping Sauces: While tartar sauce is traditional, don’t hesitate to explore other options like sriracha mayo, a sweet chili sauce, honey mustard, or even a simple ketchup for the kids.
- Lemon Wedges: Always include fresh lemon wedges for squeezing over the hot fish sticks. The bright acidity enhances the flavor of the fish and cuts through the richness of the coating and sauce.
Variations to Customize Your Fish Sticks
Feel free to get creative with your homemade fish sticks! Here are a few ideas to customize the flavor:
- Spicy Kick: Add a pinch of cayenne pepper or smoked paprika to the flour mixture for a subtle heat.
- Herbaceous Twist: Mix dried dill, parsley, or chives into the panko crumbs for an aromatic touch.
- Cheesy Goodness: Incorporate a tablespoon or two of grated Parmesan cheese into the panko mixture for a savory, cheesy crust.
- Lemon-Herb Panko: Zest a lemon into the panko crumbs along with some dried herbs for a bright and fresh flavor profile.
- Gluten-Free Option: Easily adapt this recipe by using a gluten-free all-purpose flour blend and gluten-free panko breadcrumbs.
Storage and Reheating
While these fish sticks are best enjoyed fresh out of the oven, leftovers can be stored and reheated:
- Storage: Allow any leftover fish sticks to cool completely. Store them in an airtight container in the refrigerator for up to 2-3 days.
- Reheating: To restore their crispiness, avoid the microwave. Reheat fish sticks in a preheated oven at 350°F (175°C) for 10-15 minutes, or until heated through and crispy. You can also use an air fryer for even quicker and crispier results, heating at 375°F (190°C) for 5-7 minutes.
Embrace the joy of cooking wholesome, delicious meals at home with these crispy oven-fried fish sticks. They’re a testament to how simple ingredients, carefully prepared, can elevate a classic dish into something truly special. Enjoy the process, savor the flavors, and delight in creating a healthier version of a family favorite!